Note: To read this in a rendered view, open your VS Code Command Palatte (using Control+Shift+P on Windows, Command+Shift+P on macOS) and choose “Markdown: Open Preview” or “Markdown: Open Preview to Side”.
In this assessment, you are asked to create an Express application. You will create an Express application that
There are screenshots in the images directory that show you what is expected from a structure standpoint. They are meant to be guides. The tests will not make any assertions about the styling of your pages, merely the structure of the pages.
Use the technologies you have used up to this point. They are all installed in the package.json for your convenience.
A package.json file already exists with “mocha”, “chai”, and “supertest” as part of the dependencies. Please run npm install to install those before running your tests.
You can run your application in “dev” mode. The nodemon package is installed and runnable from npm run dev.
This is “black-box testing”. The tests will only use your Express application. It will not make connections to the database or directly test your route handlers. They will merely make HTTP requests of your Express app and analyze the responses.
To ease your development, tests will run against your development database and not the test database.
You will be responsible for creating, migrating, and seeding the data in your development database.
Run your tests with npm test.
These are the requirements for the application. Follow them closely. The tests will attempt to read data from your rendered HTML. The tests will not make any connections to your database. However, the name of the login, the login password, and the database are provided for you so that instructors can easily run your code, if need be.
Read all of the requirements. Determine the data needed to include in your data model.
Please use port 8081 for your Express.js server.
You will need to store “people” data and “hair color” data. The people data should support:
| Attribute name | Attribute type | Constraints |
|---|---|---|
| First name | Up to 50 characters of text | Must always have a non-null value |
| Last name | Up to 50 characters of text | Must always have a non-null value |
| Age | An integer | No constraint |
| Biography | As much text as possible | No constraint |
| Hair color | reference to hair color data | Must always have a non-null value |
The hair color data should have the
| Attribute name | Attribute type | Constraints |
|---|---|---|
| Color | Up to 50 characters of text | Must always have a non-null value, must be unique |
Moreover, the hair color data must have the following pre-defined data in it
If you use Sequelize CLI seeders, don’t forget to add the entry:
"seederStorage": "sequelize"to the config.json so that it will track your seed files and not run them too many times.
NOTE: All of the data constraints for this assessment can be handled by the database with the allowNull flag in your migrations. You do not need to use form validations in this project. They are good to have, in general, but can require too much time for you to integrate them into this project. Again, you do not need to use a form validator, just use database constraints and catch exceptions that occur when you try to save data.
You must use the app.js file to create and configure your Express application. You must store the instance of your Express.js application in a variable named “app”. That is what is exported at the bottom of the app.js file.
Set up your CSRF middleware to use cookies.
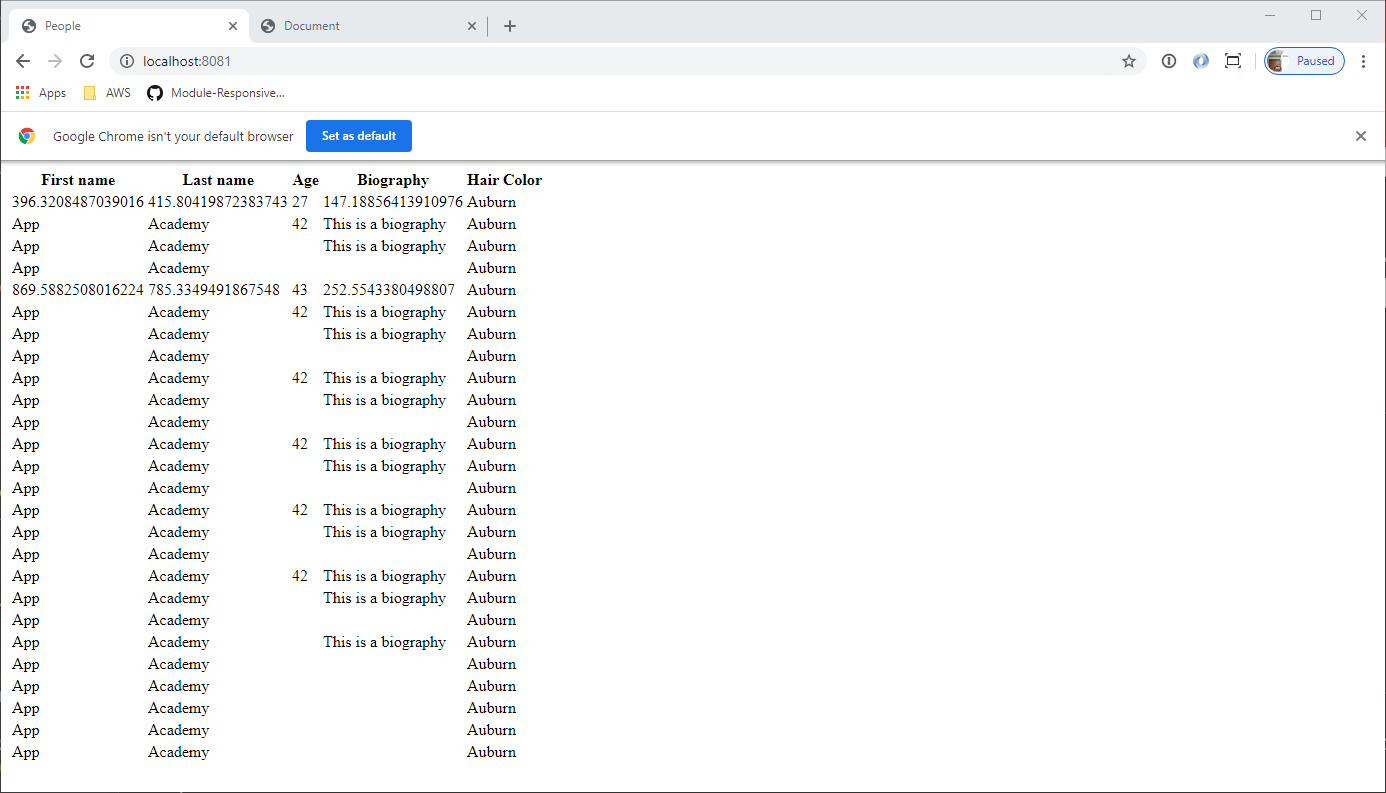
When someone accesses your application, they should see a list of people that are stored in your database. The list should contain:
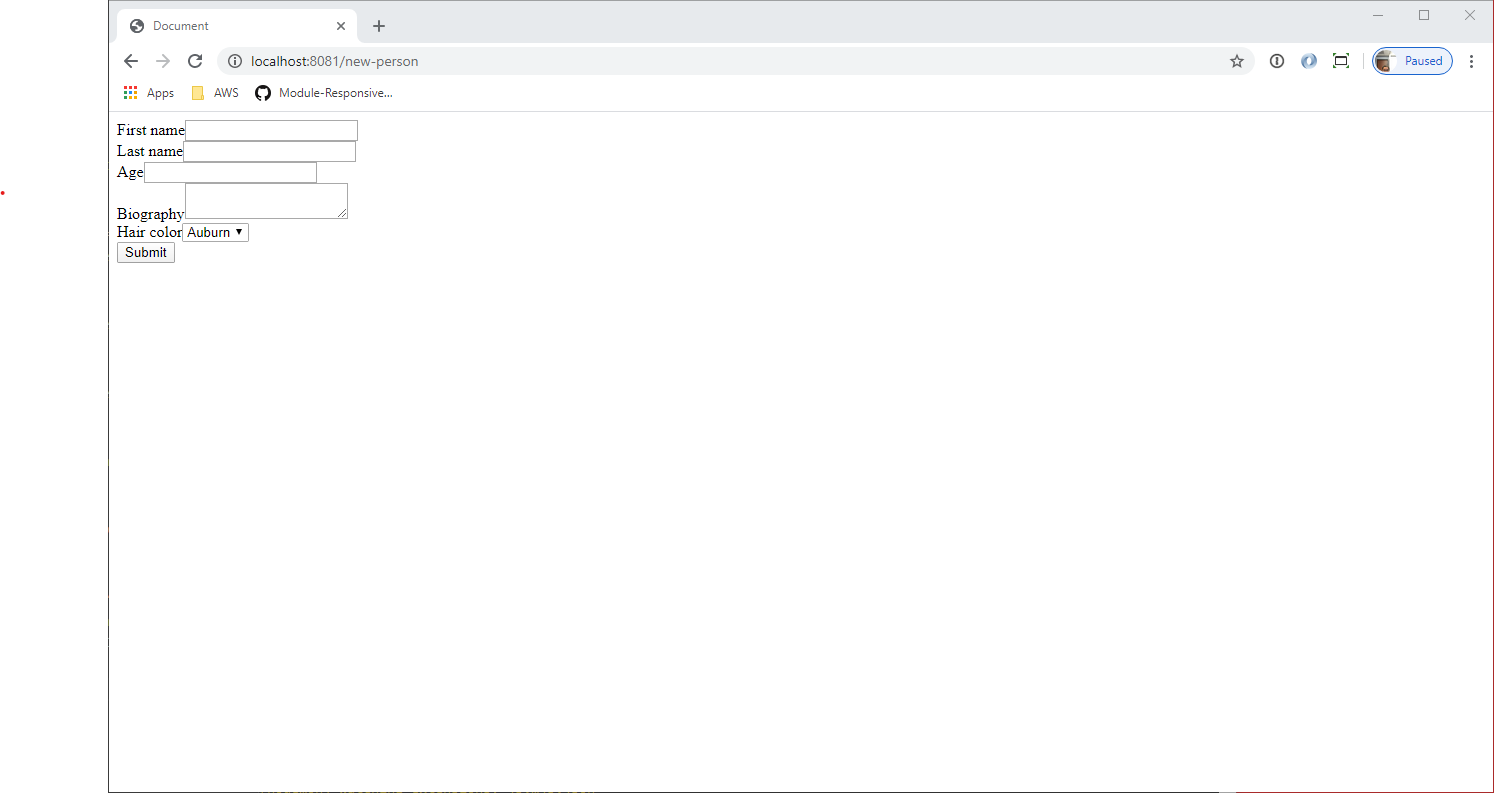
This page shows a form in which a visitor can add a new person. The form must have
In the form, you should have these inputs with the provided name:
| Field HTML name | Field type | Constraints | Default values |
|---|---|---|---|
| firstName | single-line text | required | |
| lastName | single-line text | required | |
| age | number | ||
| biography | multi-line text | ||
| hairColorId | dropdown | required | One of the pre-defined hair colors |
| _csrf | hidden | The value provided by the CSURF middleware |
You should also have a submit button.
Please refer to the screenshot.
The post handler should validate the data from the HTTP request. If everything is fine, then it should create a new person and redirect to the route “/”.
If the data does not pass validation, then no new record should be created. It is ok to just return an error code of 400 in this case.