
In this project, you’ll use Create React App to create a simple React application. You’ll experiment with some of the features that Create React App provides and deploy a production build of your application to a standalone Express application.
Begin by using the create-react-app package to create a React application:
Remember that using the
create-react-appcommand initializes your project as a Git repository. If you use thels -ato view the hidden files in your project, you’ll see the.gitfile.
Update the App component:
<h1> element with a <div> element; and<h1> element content to something like “Exploring React Builds”.// ./src/App.js
import React from 'react';
function App() {
return (
<div>
<h1>Exploring React Builds</h1>
</div>
);
}
export default App;You’ve already seen an example of using the import keyword to import a stylesheet into a module so that it’ll be included in your application build. That’s the technique being used to include the global index.css stylesheet:
// ./src/index.js

import React from 'react';
import ReactDOM from 'react-dom';
import './index.css';
import App from './App';

ReactDOM.render(
  <React.StrictMode>
    <App />
  </React.StrictMode>,
  document.getElementById('root')
);
You can also leverage CSS modules in your Create React App projects. CSS Modules scope stylesheet class names so that they are unique to a specific React component. This allows you to create class names without having to worry if they might collide with class names used in another component.
Add a new css-modules folder to the src folder. Within that folder, add the following files:
HeadingA.jsHeadingA.module.cssHeadingB.jsHeadingB.module.cssThen update the contents of each file to the following:
// ./src/css-modules/HeadingA.js

import React from 'react';
import styles from './HeadingA.module.css';

function HeadingA() {
  return (
    <h1 className={styles.heading}>Heading A</h1>
  );
}

export default HeadingA;// ./src/css-modules/HeadingB.js
import React from 'react';
import styles from './HeadingB.module.css';
function HeadingB() {
return (
<h1 className={styles.heading}>Heading B</h1>
);
}
export default HeadingB;Notice how the .heading CSS class name is being used within each component to set the color of the <h1> element. For the HeadingA component, the color is green, and for the HeadingB component, the color is red. Using the file naming convention [name].module.css let’s Create React App know that we want these stylesheets to be processed as CSS Modules. Using CSS Modules allows the .heading class name to be reused across components without any issue.
To see this feature in action, update your App component to render both of your new components:
import React from 'react';
import HeadingA from './css-modules/HeadingA';
import HeadingB from './css-modules/HeadingB';

function App() {
  return (
    <div>
      <h1>Exploring React Builds</h1>
      <HeadingA />
      <HeadingB />
    </div>
  );
}

export default App;
Then run your application (npm start) to see “Heading A” and “Heading B” displayed respectively in green and red. If you use the browser’s developer tools to inspect “Heading A”, you’ll see that the .heading class name has been modified so that it’s unique to the HeadingA component:
CSS Modules is an example of how a front-end build process can be used to modify code to enable a feature that’s not natively supported by browsers.
Create React App configures webpack with support for loading images (as well as CSS, fonts, and other file types). What this means, for you as the developer, is that you can add an image file to your project, import it directly into a module, and render it in a React component.
Download any image of off the Web or click here to download the below image.

Then within the src folder add a new folder named image. Within that folder add a new component file named Image.js. Also add your downloaded image file to the image folder (so it’s a sibling to the Image.js file).
Update the contents of the Image.js file to this:
// ./src/image/Image.js

import React from 'react';
import cat from './react-builds-cat.png';

console.log(cat); // /static/media/react-builds-cat.45f7f4d2.png

function Image() {
  // Import result is the URL of your image.
  return <img src={cat} alt="images/images/Cat" />;
}

export default Image;
You can import an image into a component using the import keyword. This tells webpack to include the image in the build. Notice that when you import an image into a module, you’ll get a path to the image’s location within the build. You can use this path to set the src attribute on an <img> element.
Be sure to update the image
importstatement to the correct file name if you’re using your own image!
Now update the App component to import and render the Image component:
// ./src/App.js
import React from 'react';
import HeadingA from './css-modules/HeadingA';
import HeadingB from './css-modules/HeadingB';
import Image from './image/Image';
function App() {
return (
<div>
<h1>Exploring React Builds</h1>
<HeadingA />
<HeadingB />
<Image />
</div>
);
}
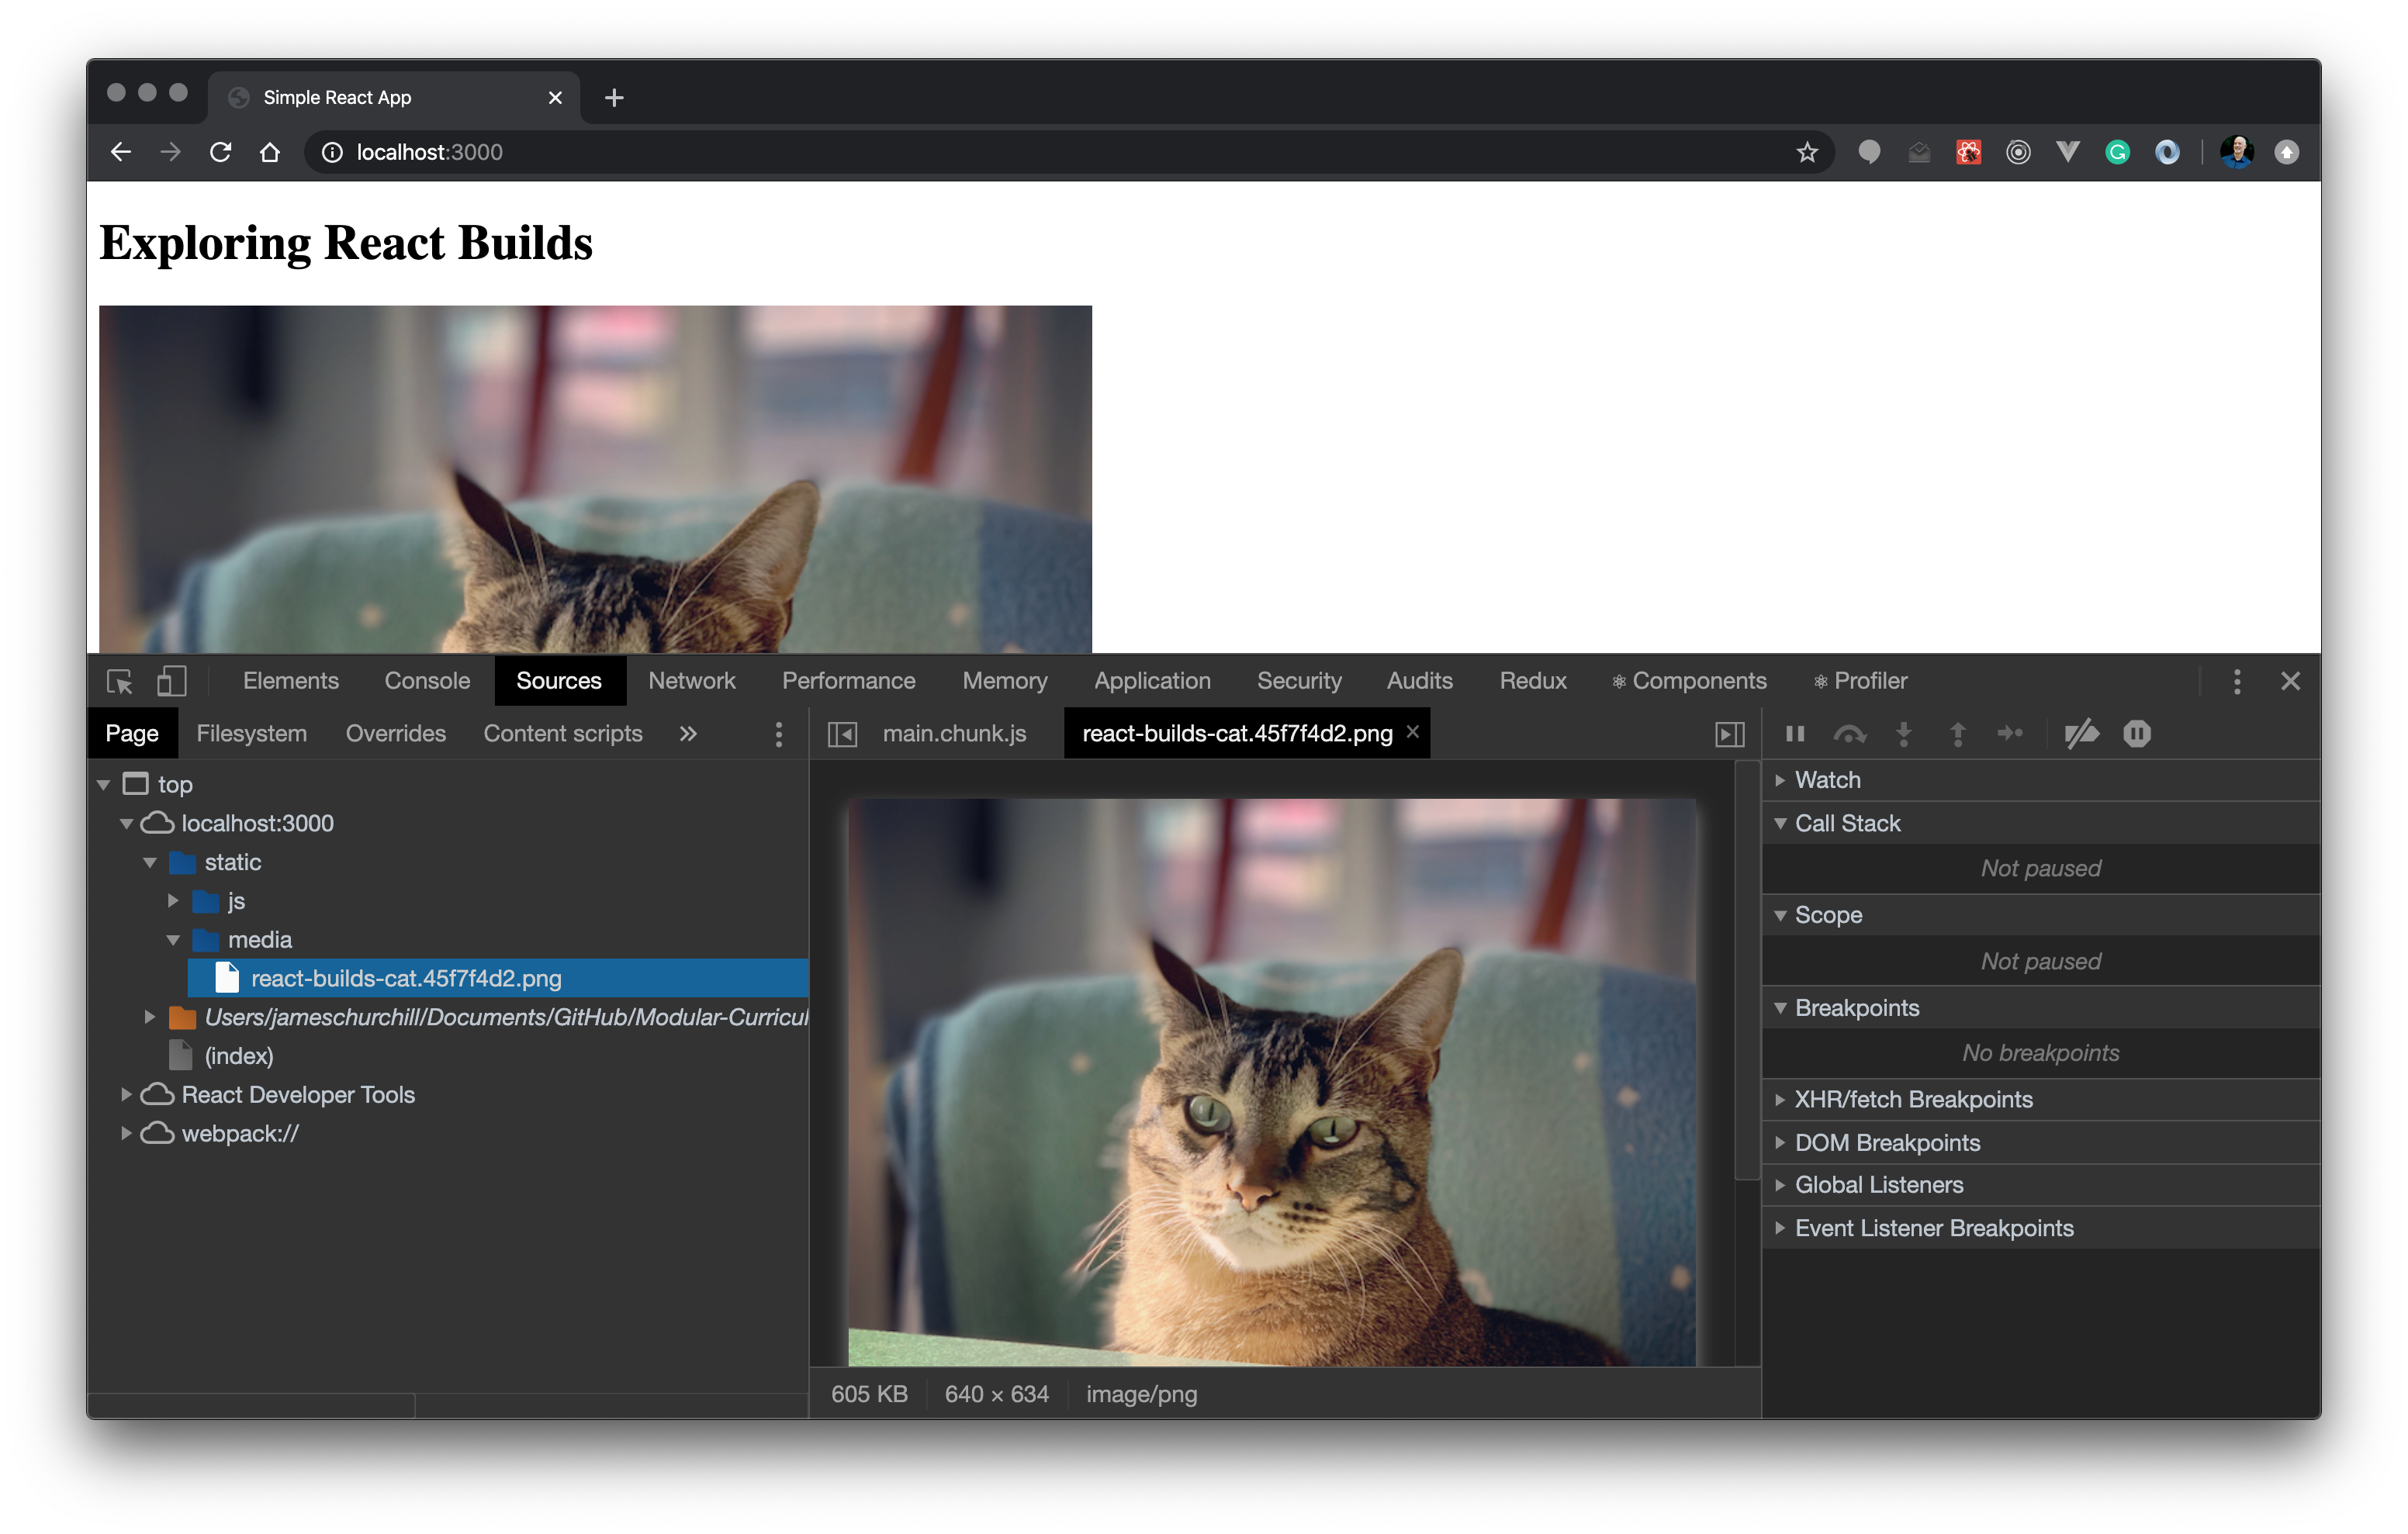
export default App;If you run your application (npm start) you’ll see your image displayed on the page! You can also open your browser’s developer tools and view the “Sources” for the current page. If you can expand the localhost:3000 > static > media node on the left, you can see the image file that webpack copied to your build.
You can also reference images in your CSS files too. Add a CSS file named Image.css to the ./src/image folder and update its contents to this:
/* ./src/image/Image.css */

.cat {
  background-image: url(./react-builds-cat.png);
  width: 400px;
  height: 400px;
}
Then update the Image component to this:
// ./src/image/Image.js

import React from 'react';
import './Image.css';
import cat from './react-builds-cat.png';

console.log(cat); // /static/media/react-builds-cat.45f7f4d2.png

function Image() {
  return (
    <div>
      {/* Import result is the URL of your image. */}
      <img src={cat} alt="Cat" />
      <div className='cat'></div>
    </div>
  );
}

export default Image;
Now you’ll see the image displayed twice on the page!
Earlier you learned about the browerslist setting in the package.json file and now adjusting these targets affect how your code will be transpiled:
{
  "browserslist": {
    "production": [
      ">0.2%",
      "not dead",
      "not op_mini all"
    ],
    "development": [
      "last 1 chrome version",
      "last 1 firefox version",
      "last 1 safari version"
    ]
  }
}
The production list specifies the browsers to target when creating a production build and the development list specifics the browsers to target when running the application using npm start. Currently, you’re targeting relatively recent versions of the major browsers when creating a development build. Targeting older browser versions results in your code being transpiled to an older version of JavaScript.
To experiment with this configuration option, let’s add a class component to the project. Add a new folder named class-component to the src folder. Within that folder, add a file named ClassComponent.js containing the following code:
// ./src/class-component/ClassComponent.js

import React from 'react';

class ClassComponent extends React.Component {
  render() {
    return (
      <h1>Class Component</h1>
    );
  }
}

export default ClassComponent;
Don’t forget to update your App component to render the new component:
// ./src/App.js
import React from 'react';
import HeadingA from './css-modules/HeadingA';
import HeadingB from './css-modules/HeadingB';
import Image from './image/Image';
import ClassComponent from './class-component/ClassComponent';
function App() {
return (
<div>
<h1>Exploring React Builds</h1>
<HeadingA />
<HeadingB />
<Image />
<ClassComponent />
</div>
);
}
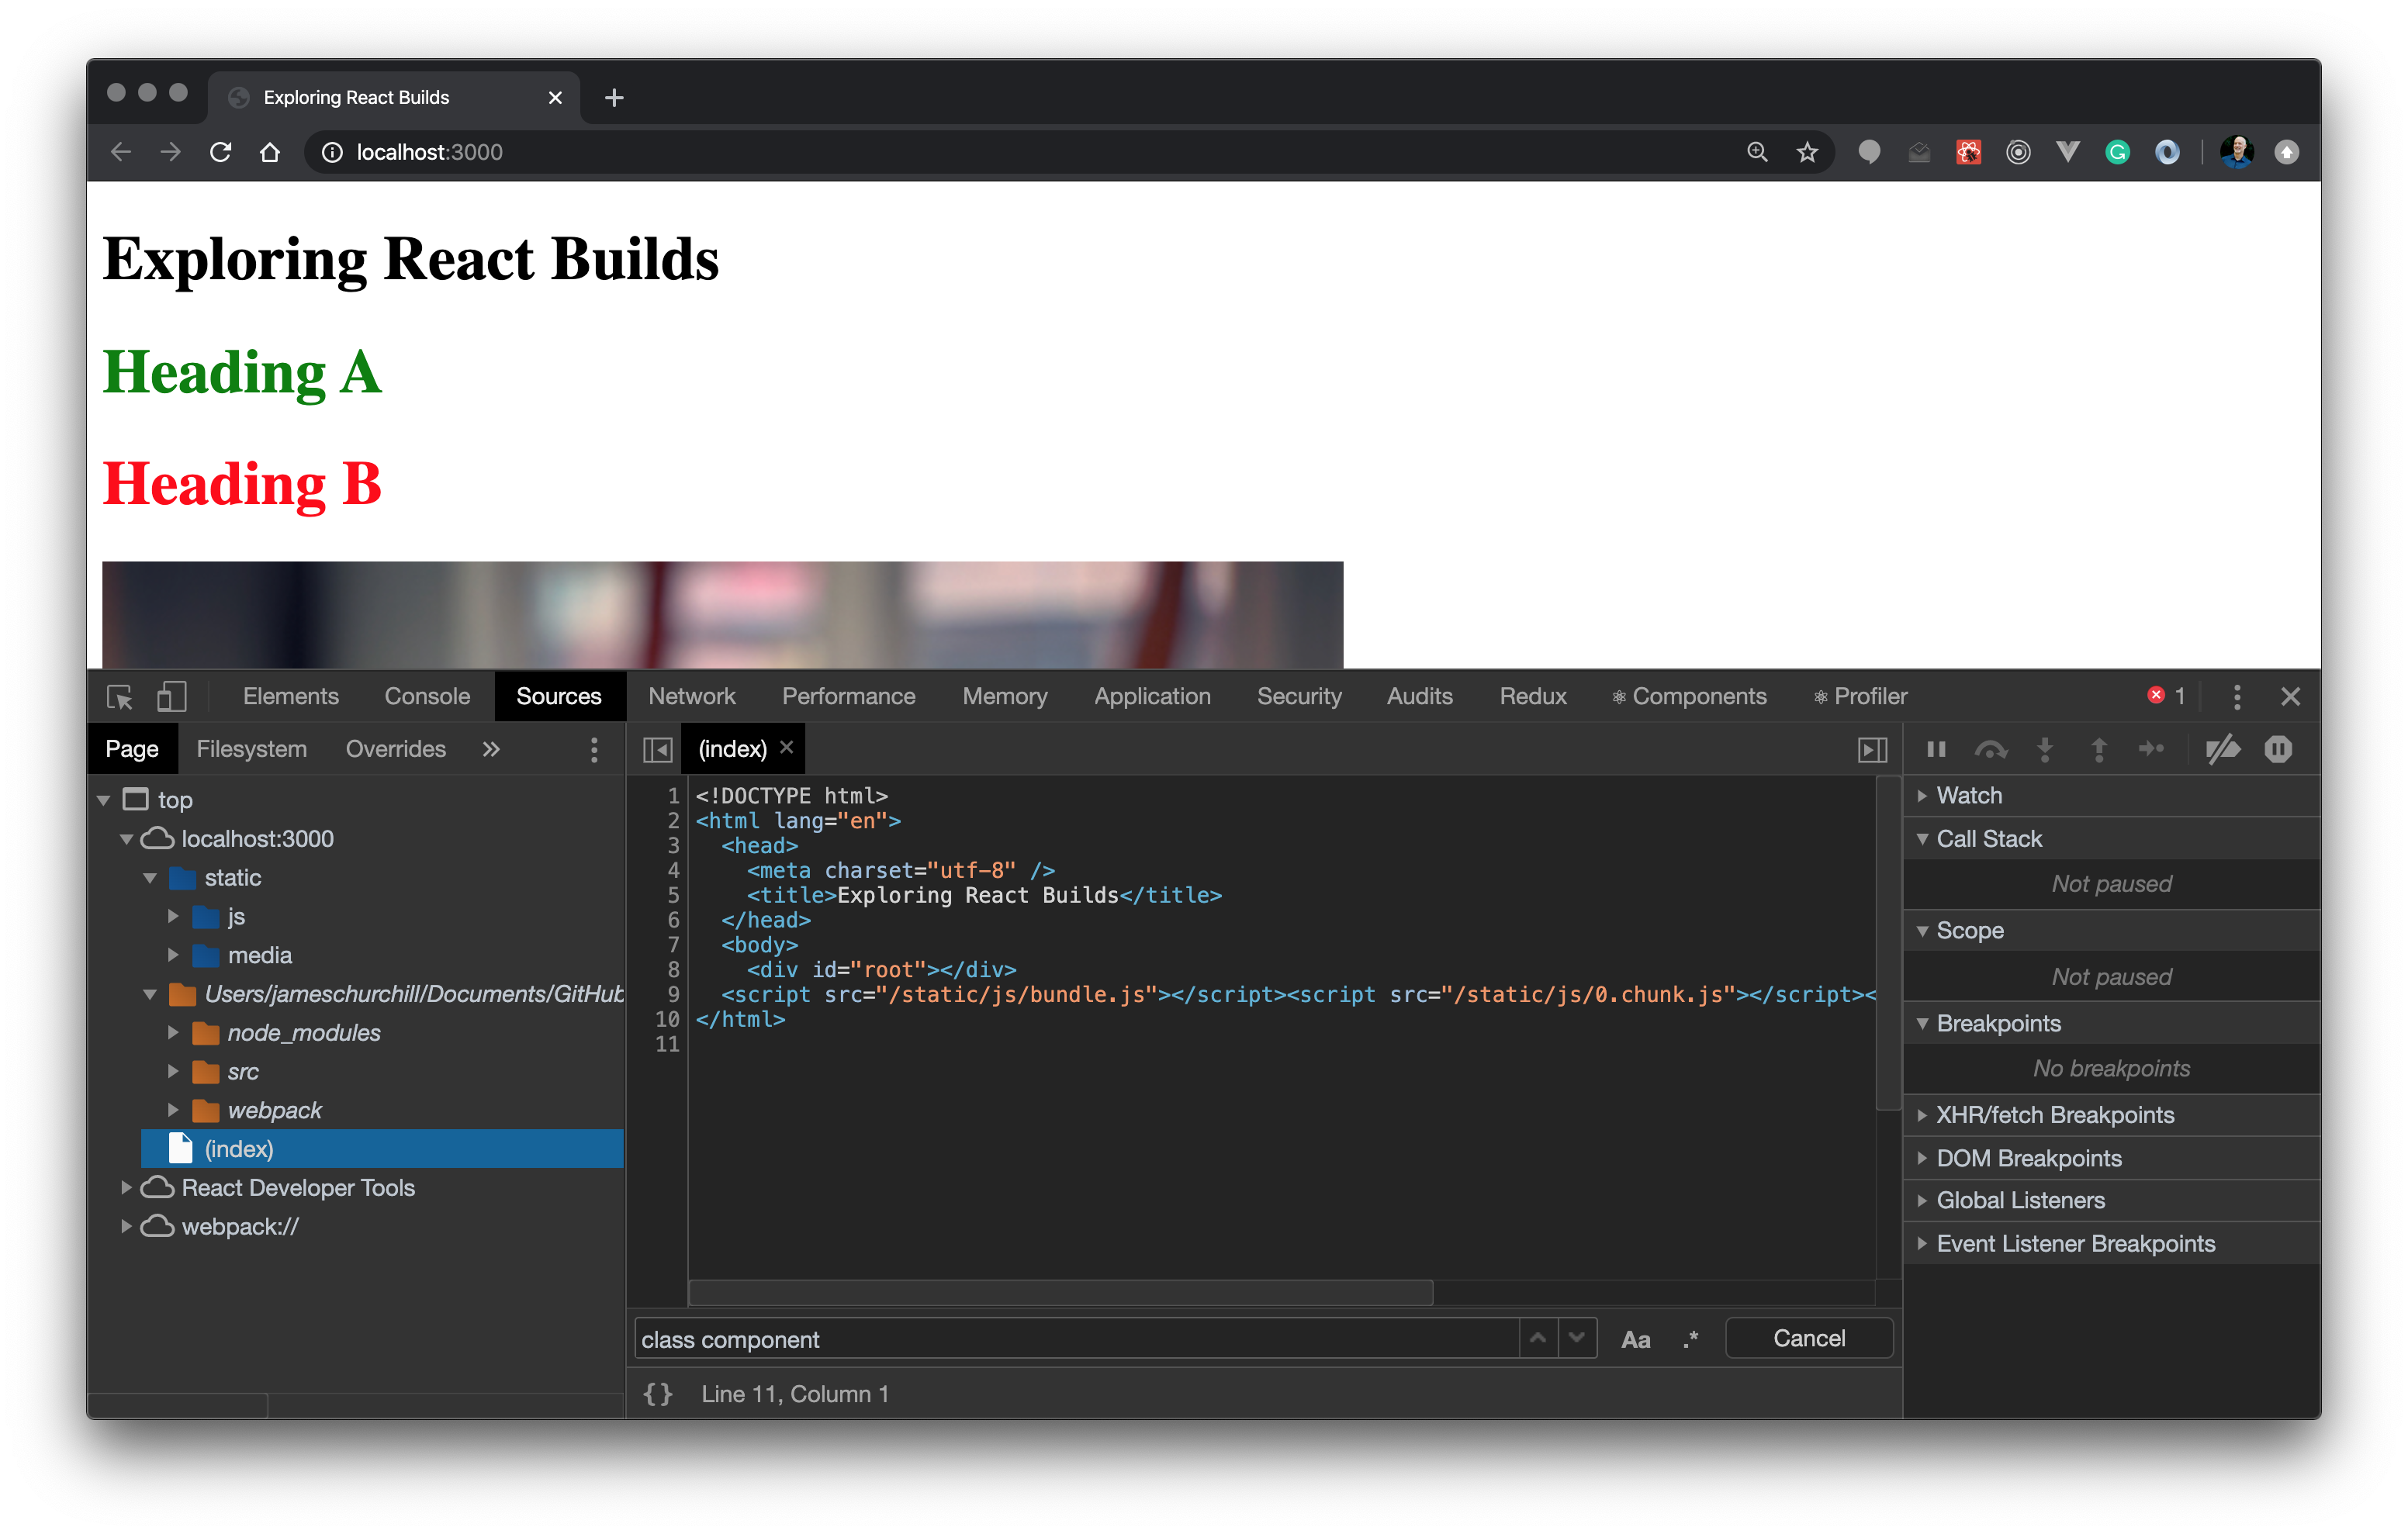
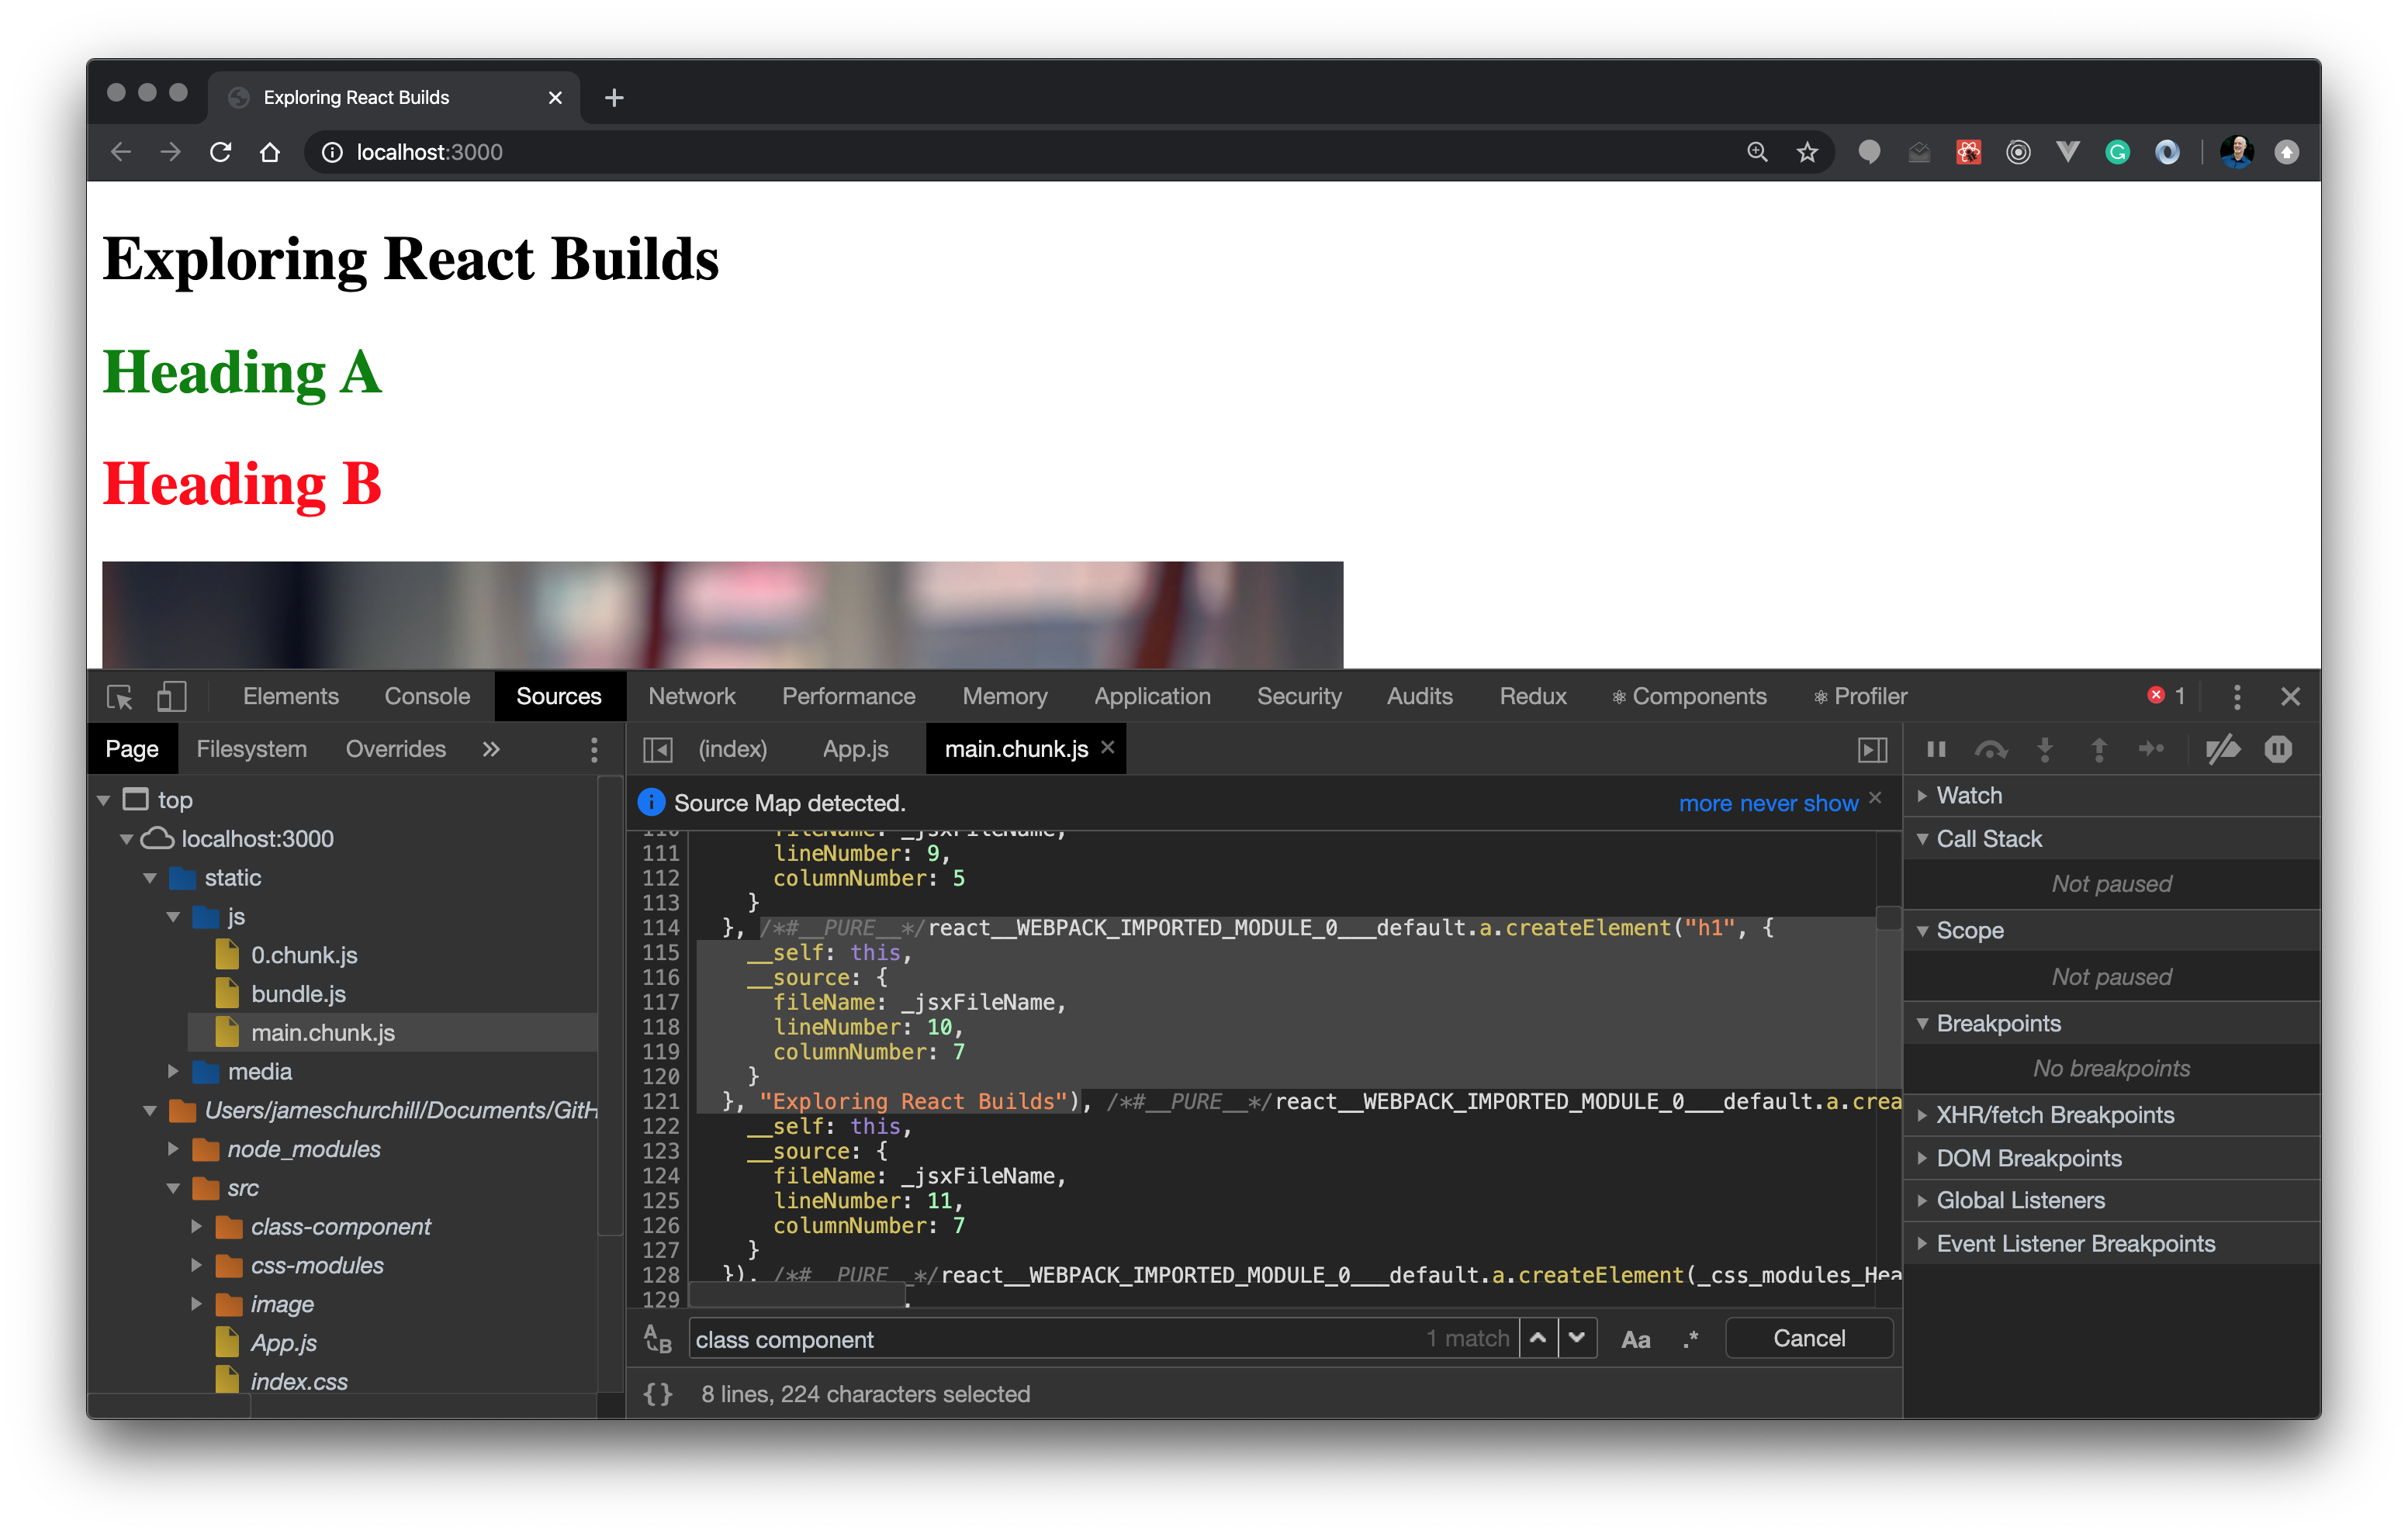
export default App;Now run your application using npm start. Open your browser’s developer tools and view the “Sources” for the current page. Expand the localhost:3000 > static > js node on the left and select the main.chunk.js file. Press CMD+F on macOS or CTRL+F on Windows to search the file for “Class Component”. Here’s what the transpiled code looks like for the ClassComponent class:
class ClassComponent extends react__WEBPACK_IMPORTED_MODULE_0___default.a.Component {
  render() {
    return /*#__PURE__*/react__WEBPACK_IMPORTED_MODULE_0___default.a.createElement("h1", {
      __self: this,
      __source: {
        fileName: _jsxFileName,
        lineNumber: 7,
        columnNumber: 7
      }
    }, "Class Component");
  }
}
Have you wondered yet why you need to use the developer tools to view the bundles generated by Create React App? Remember that when you run
npm start, Create React App builds your application usingwebpack-dev-server. To keep things as performant as possible, the bundles generated bywebpack-dev-serverare stored in memory instead of writing them to the file system.
The JSX in the component’s render method has been converted to JavaScript but the ClassComponent ES2015 class is left alone. This makes sense though as JSX isn’t natively supported by any browser while ES2015 classes have been natively supported by browsers for awhile now.
But what if you need to target a version of a browser that doesn’t support ES2015 classes? You can use the “Can I use…” website to see when browsers started supporting ES2105 (or ES6) classes. Starting with version 49, Chrome natively supported classes. But imagine that you need to support Chrome going back to version 30, a version of Chrome that doesn’t support classes.
Change the browserslist.development property in the package.json file to this:
{
  "browserslist": {
    "production": [
      ">0.2%",
      "not dead",
      "not op_mini all"
    ],
    "development": [
      "chrome >= 30",
      "last 1 firefox version",
      "last 1 safari version"
    ]
  }
}
The query chrome >= 30 specifies that you want to target Chrome version 30 or newer.
The browserl.ist website can be used to see the browsers supported by your configured
browserslist.
Stop your application if it’s currently running. Delete the ./node_modules/.cache folder and run npm start again. Then view the main.chunk.js bundle again in the developer tools:

Now your ES2015 class component is being converted to a constructor function! Here’s the transpiled code for reference:
var ClassComponent = /*#__PURE__*/function (_React$Component) {
  Object(_Users_jameschurchill_Documents_GitHub_Modular_Curriculum_content_react_redux_topics_react_builds_projects_exploring_react_builds_solution_node_modules_babel_preset_react_app_node_modules_babel_runtime_helpers_esm_inherits__WEBPACK_IMPORTED_MODULE_2__["default"])(ClassComponent, _React$Component);

  var _super = Object(_Users_jameschurchill_Documents_GitHub_Modular_Curriculum_content_react_redux_topics_react_builds_projects_exploring_react_builds_solution_node_modules_babel_preset_react_app_node_modules_babel_runtime_helpers_esm_createSuper__WEBPACK_IMPORTED_MODULE_3__["default"])(ClassComponent);

  function ClassComponent() {
    Object(_Users_jameschurchill_Documents_GitHub_Modular_Curriculum_content_react_redux_topics_react_builds_projects_exploring_react_builds_solution_node_modules_babel_preset_react_app_node_modules_babel_runtime_helpers_esm_classCallCheck__WEBPACK_IMPORTED_MODULE_0__["default"])(this, ClassComponent);

    return _super.apply(this, arguments);
  }

  Object(_Users_jameschurchill_Documents_GitHub_Modular_Curriculum_content_react_redux_topics_react_builds_projects_exploring_react_builds_solution_node_modules_babel_preset_react_app_node_modules_babel_runtime_helpers_esm_createClass__WEBPACK_IMPORTED_MODULE_1__["default"])(ClassComponent, [{
    key: "render",
    value: function render() {
      return /*#__PURE__*/react__WEBPACK_IMPORTED_MODULE_4___default.a.createElement("h1", {
        __self: this,
        __source: {
          fileName: _jsxFileName,
          lineNumber: 7,
          columnNumber: 7
        }
      }, "Class Component");
    }
  }]);

  return ClassComponent;
}(react__WEBPACK_IMPORTED_MODULE_4___default.a.Component);
Luckily it’s very rare that you’ll need to read the code in your generated bundles. webpack, by default, is configured to generate sourcemaps. Sourcemaps are a mapping of the code in a generated file, like a bundle file, to the original source code. This gives you access to your original source code in the browser’s developer tools:

You can even set a breakpoint in your source within the developer tools to stop execution on a specific line of code!
Earlier you learned that Create React App supports defining environment variables in an .env file. This gives you a convenient way to avoid hard coding values that vary across environments.
Let’s experiment with this feature so that you can see how the Create React App build process embeds environment variables into your HTML, CSS, and JavaScript bundles.
Add an .env file to the root of your Create React App project. Define an environment variable named REACT_APP_TITLE:
REACT_APP_TITLE=Exploring React BuildsRemember that environment variables need to be prefixed with REACT_APP_ for Create React App to process them. After defining your environment variable, you can refer to it within JSX using an expression and process.env:
// ./src/App.js

import React from 'react';
import HeadingA from './css-modules/HeadingA';
import HeadingB from './css-modules/HeadingB';
import Image from './image/Image';
import ClassComponent from './class-component/ClassComponent';

function App() {
  return (
    <div>
      <h1>{process.env.REACT_APP_TITLE}</h1>
      <HeadingA />
      <HeadingB />
      <Image />
      <ClassComponent />
    </div>
  );
}

export default App;
Environment variables can also be referred to in regular JavaScript code:
You can also reference environment variables in your ./public/index.html file like this:
<!DOCTYPE html>
<html lang="en">
  <head>
    <meta charset="utf-8" />
    <title>%REACT_APP_TITLE%</title>
  </head>
  <body>
    <div id="root"></div>
  </body>
</html>
Run your application again using npm start. Open your browser’s developer tools and view the “Sources” for the current page. Expand the localhost:3000 node on the left and select (index). Notice that the text %REACT_APP_TITLE% within the <title> element has been converted to the text literal Exploring React Builds:
If you expand the localhost:3000 > static > js node on the left and select the main.chunk.js file, you can see how the App component’s JSX has been converted to JavaScript:
Here’s a closer look at the relevant React.createElement method call:
/*#__PURE__*/react__WEBPACK_IMPORTED_MODULE_0___default.a.createElement("h1", {
    __self: this,
    __source: {
      fileName: _jsxFileName,
      lineNumber: 10,
      columnNumber: 7
    }
  }, "Exploring React Builds")
Again, notice how the environment variable has been replaced with a text literal. This has important security implications for you to consider. Because environment variables are embedded into your HTML, CSS, and JavaScript bundles during the build process, it’s very important to not store any secrets, like API keys, in your environment variables. Remember, anyone can view your bundled code in the browser by inspecting your files!
In the last phase of this project, let’s add routing to the React application, create a production build, and deploy the build to an Express application!
To add React Router to the application, start by installing the react-router-dom npm package:
Then update the App component to this code:
// ./src/App.js

import React from 'react';
import {
  BrowserRouter,
  Switch,
  Route,
  Link
} from 'react-router-dom';
import HeadingA from './css-modules/HeadingA';
import HeadingB from './css-modules/HeadingB';
import Image from './image/Image';
import ClassComponent from './class-component/ClassComponent';

function App() {
  return (
    <BrowserRouter>
      <div>
        <h1>{process.env.REACT_APP_TITLE}</h1>
        <nav>
          <ul>
            <li>
              <Link to="/">Home</Link>
            </li>
            <li>
              <Link to="/image">Image</Link>
            </li>
            <li>
              <Link to="/class-component">Class Component</Link>
            </li>
          </ul>
        </nav>
        <Switch>
          <Route path="/image">
            <Image />
          </Route>
          <Route path="/class-component">
            <ClassComponent />
          </Route>
          <Route path="/">
            <HeadingA />
            <HeadingB />
          </Route>
        </Switch>
      </div>
    </BrowserRouter>
  );
}

export default App;
Be sure to run and test your application to ensure that the defined routes work as expected:
/ - Should display the HeadingA and HeadingB components;/image - Should display the Image component; and/class-component - Should display the ClassComponent component.To create a production build, run the command npm run build from the root of your project. The output in the terminal should look something like this:
> solution@0.1.0 build [absolute path to your project]
> react-scripts build

Creating an optimized production build...
Compiled successfully.

File sizes after gzip:

  47.83 KB  build/static/js/2.722c16c4.chunk.js
  773 B     build/static/js/runtime-main.b7d1e5ee.js
  745 B     build/static/js/main.12299197.chunk.js
  197 B     build/static/css/main.e9a0d1f8.chunk.css

The project was built assuming it is hosted at /.
You can control this with the homepage field in your package.json.

The build folder is ready to be deployed.
You may serve it with a static server:

  npm install -g serve
  serve -s build

Find out more about deployment here:

  bit.ly/CRA-deploy
Ignore the comments about using serve to deploy your application (i.e. npm install -g serve and serve -s build). In the next step, you’ll create a simple Express application to server your React application.
Create a new folder for your Express application outside of the Create React App project folder.
For example, from the root of your project, use
cd ..to go up a level and then create a new folder namedexpress-serverby running the commandmkdir express-server. This makes theexpress-serverfolder a sibling to your Create React App project folder.
Browse into the express-server folder and initialize it to use npm (i.e. npm init -y). Then install Express by running the command npm install express@^4.0.0.
App a file named app.js with the following contents:
// ./app.js

const express = require('express');
const path = require('path');

const app = express();

app.use(express.static(path.join(__dirname, 'public')));

app.get('*', function(req, res) {
  res.sendFile(path.join(__dirname, 'public', 'index.html'));
});

const port = 9000;

app.listen(port, () => console.log(`Listening on port ${port}...`));
This simple Express application will:
public folder; and./public/index.html file will be served for all other requests.Now add a folder named public to the root of your Express project. Copy the files from the build folder in your Create React App project to the public folder in the Express application project. Then run your application using the command node app.js.
Open a browser and browse to the URL http://localhost:9000/. You should see your React application served from your Express application! Be sure to click the navigation links to verify that all of your configured routes work as expected.
Also, because you configured Express to serve the ./public/index.html file for any request that doesn’t match a static file, you can “deep link” to any of your React application’s routes: