

github repo Clean Code Javascript
Bad:>
const yyyymmdstr = moment().format("YYYY/MM/DD");
Good:>
const currentDate = moment().format("YYYY/MM/DD");
Bad:>
getUserInfo();
getClientData();
getCustomerRecord();
Good:>
getUser();
We will read more code than we will ever write. It's important that the code we do write is readable and searchable. By not naming variables that end up being meaningful for understanding our program, we hurt our readers. Make your names searchable. Tools like buddy.js and ESLint can help identify unnamed constants.
Bad:>
// What the heck is 86400000 for?
setTimeout(blastOff, 86400000);
Good:>
// Declare them as capitalized named constants.
const MILLISECONDS_IN_A_DAY = 60 * 60 * 24 * 1000; //86400000;

setTimeout(blastOff, MILLISECONDS_IN_A_DAY);
Bad:>
const address = "One Infinite Loop, Cupertino 95014";
const cityZipCodeRegex = /^[^,\\]+[,\\\s]+(.+?)\s*(\d{5})?$/;
saveCityZipCode(
    address.match(cityZipCodeRegex)[1],
    address.match(cityZipCodeRegex)[2]
);
Good:>
const address = "One Infinite Loop, Cupertino 95014";
const cityZipCodeRegex = /^[^,\\]+[,\\\s]+(.+?)\s*(\d{5})?$/;
const [_, city, zipCode] = address.match(cityZipCodeRegex) || [];
saveCityZipCode(city, zipCode);
Explicit is better than implicit.
Bad:>
const locations = ["Austin", "New York", "San Francisco"];
locations.forEach(l => {
    doStuff();
    doSomeOtherStuff();
    // ...
    // ...
    // ...
    // Wait, what is `l` for again?
    dispatch(l);
});
Good:>
const locations = ["Austin", "New York", "San Francisco"];
locations.forEach(location => {
    doStuff();
    doSomeOtherStuff();
    // ...
    // ...
    // ...
    dispatch(location);
});
If your class/object name tells you something, don't repeat that in your variable name.
Bad:>
const Car = {
    carMake: "Honda",
    carModel: "Accord",
    carColor: "Blue"
};

function paintCar(car) {
    car.carColor = "Red";
}
Good:>
const Car = {
    make: "Honda",
    model: "Accord",
    color: "Blue"
};

function paintCar(car) {
    car.color = "Red";
}
Default arguments are often cleaner than short circuiting. Be aware that if you
use them, your function will only provide default values for undefined
arguments. Other "falsy" values such as '' , "" ,
false , null , 0 , and
NaN , will not be replaced by a default value.
Bad:>
function createMicrobrewery(name) {
    const breweryName = name || "Hipster Brew Co.";
    // ...
}
Good:>
function createMicrobrewery(name = "Hipster Brew Co.") {
    // ...
}
Limiting the amount of function parameters is incredibly important because it makes testing your function easier. Having more than three leads to a combinatorial explosion where you have to test tons of different cases with each separate argument.
One or two arguments is the ideal case, and three should be avoided if possible. Anything more than that should be consolidated. Usually, if you have more than two arguments then your function is trying to do too much. In cases where it's not, most of the time a higher-level object will suffice as an argument.
Since JavaScript allows you to make objects on the fly, without a lot of class boilerplate, you can use an object if you are finding yourself needing a lot of arguments.
To make it obvious what properties the function expects, you can use the ES2015/ES6 destructuring syntax. This has a few advantages:
When someone looks at the function signature, it's immediately clear what
properties are being used.
It can be used to simulate named parameters.
Destructuring also clones the specified primitive values of the argument
object passed into the function. This can help prevent side effects. Note: objects and arrays that are destructured from the argument object are NOT cloned.
Linters can warn you about unused properties, which would be impossible
without destructuring.
Bad:>
function createMenu(title, body, buttonText, cancellable) {
    // ...
}

createMenu("Foo", "Bar", "Baz", true);
Good:>
function createMenu({
    title,
    body,
    buttonText,
    cancellable
}) {
    // ...
}

createMenu({
    title: "Foo",
    body: "Bar",
    buttonText: "Baz",
    cancellable: true
});
This is by far the most important rule in software engineering. When functions do more than one thing, they are harder to compose, test, and reason about. When you can isolate a function to just one action, it can be refactored easily and your code will read much cleaner. If you take nothing else away from this guide other than this, you'll be ahead of many developers.
Bad:>
function emailClients(clients) {
    clients.forEach(client => {
        const clientRecord = database.lookup(client);
        if (clientRecord.isActive()) {
            email(client);
        }
    });
}
Good:>
function emailActiveClients(clients) {
    clients.filter(isActiveClient).forEach(email);
}

function isActiveClient(client) {
    const clientRecord = database.lookup(client);
    return clientRecord.isActive();
}
Bad:>
function addToDate(date, month) {
    // ...
}

const date = new Date();

// It's hard to tell from the function name what is added
addToDate(date, 1);
Good:>
function addMonthToDate(month, date) {
    // ...
}

const date = new Date();
addMonthToDate(1, date);
When you have more than one level of abstraction your function is usually doing too much. Splitting up functions leads to reusability and easier testing.
Bad:>
function parseBetterJSAlternative(code) {
    const REGEXES = [
        // ...
    ];

    const statements = code.split(" ");
    const tokens = [];
    REGEXES.forEach(REGEX => {
        statements.forEach(statement => {
            // ...
        });
    });

    const ast = [];
    tokens.forEach(token => {
        // lex...
    });

    ast.forEach(node => {
        // parse...
    });
}
Good:>
function parseBetterJSAlternative(code) {
    const tokens = tokenize(code);
    const syntaxTree = parse(tokens);
    syntaxTree.forEach(node => {
        // parse...
    });
}

function tokenize(code) {
    const REGEXES = [
        // ...
    ];

    const statements = code.split(" ");
    const tokens = [];
    REGEXES.forEach(REGEX => {
        statements.forEach(statement => {
            tokens.push( /* ... */ );
        });
    });

    return tokens;
}

function parse(tokens) {
    const syntaxTree = [];
    tokens.forEach(token => {
        syntaxTree.push( /* ... */ );
    });

    return syntaxTree;
}
Do your absolute best to avoid duplicate code. Duplicate code is bad because it means that there's more than one place to alter something if you need to change some logic.
Imagine if you run a restaurant and you keep track of your inventory: all your tomatoes, onions, garlic, spices, etc. If you have multiple lists that you keep this on, then all have to be updated when you serve a dish with tomatoes in them. If you only have one list, there's only one place to update!
Oftentimes you have duplicate code because you have two or more slightly different things, that share a lot in common, but their differences force you to have two or more separate functions that do much of the same things. Removing duplicate code means creating an abstraction that can handle this set of different things with just one function/module/class.
Getting the abstraction right is critical, that's why you should follow the SOLID principles laid out in the Classes section. Bad abstractions can be worse than duplicate code, so be careful! Having said this, if you can make a good abstraction, do it! Don't repeat yourself, otherwise you'll find yourself updating multiple places anytime you want to change one thing.
Bad:>
function showDeveloperList(developers) {
    developers.forEach(developer => {
        const expectedSalary = developer.calculateExpectedSalary();
        const experience = developer.getExperience();
        const githubLink = developer.getGithubLink();
        const data = {
            expectedSalary,
            experience,
            githubLink
        };

        render(data);
    });
}

function showManagerList(managers) {
    managers.forEach(manager => {
        const expectedSalary = manager.calculateExpectedSalary();
        const experience = manager.getExperience();
        const portfolio = manager.getMBAProjects();
        const data = {
            expectedSalary,
            experience,
            portfolio
        };

        render(data);
    });
}
Good:>
function showEmployeeList(employees) {
    employees.forEach(employee => {
        const expectedSalary = employee.calculateExpectedSalary();
        const experience = employee.getExperience();

        const data = {
            expectedSalary,
            experience
        };

        switch (employee.type) {
            case "manager":
                data.portfolio = employee.getMBAProjects();
                break;
            case "developer":
                data.githubLink = employee.getGithubLink();
                break;
        }

        render(data);
    });
}
Bad:>
const menuConfig = {
    title: null,
    body: "Bar",
    buttonText: null,
    cancellable: true
};

function createMenu(config) {
    config.title = config.title || "Foo";
    config.body = config.body || "Bar";
    config.buttonText = config.buttonText || "Baz";
    config.cancellable =
        config.cancellable !== undefined ? config.cancellable : true;
}

createMenu(menuConfig);
Good:>
const menuConfig = {
    title: "Order",
    // User did not include 'body' key
    buttonText: "Send",
    cancellable: true
};

function createMenu(config) {
    let finalConfig = Object.assign({
            title: "Foo",
            body: "Bar",
            buttonText: "Baz",
            cancellable: true
        },
        config
    );
    return finalConfig
    // config now equals: {title: "Order", body: "Bar", buttonText: "Send", cancellable: true}
    // ...
}

createMenu(menuConfig);
Flags tell your user that this function does more than one thing. Functions should do one thing. Split out your functions if they are following different code paths based on a boolean.
Bad:>
function createFile(name, temp) {
    if (temp) {
        fs.create( `./temp/${name}` );
    } else {
        fs.create(name);
    }
}
Good:>
function createFile(name) {
    fs.create(name);
}

function createTempFile(name) {
    createFile( `./temp/${name}` );
}
A function produces a side effect if it does anything other than take a value in and return another value or values. A side effect could be writing to a file, modifying some global variable, or accidentally wiring all your money to a stranger.
Now, you do need to have side effects in a program on occasion. Like the previous example, you might need to write to a file. What you want to do is to centralize where you are doing this. Don't have several functions and classes that write to a particular file. Have one service that does it. One and only one.
The main point is to avoid common pitfalls like sharing state between objects without any structure, using mutable data types that can be written to by anything, and not centralizing where your side effects occur. If you can do this, you will be happier than the vast majority of other programmers.
Bad:>
// Global variable referenced by following function.
// If we had another function that used this name, now it'd be an array and it could break it.
let name = "Ryan McDermott";

function splitIntoFirstAndLastName() {
    name = name.split(" ");
}

splitIntoFirstAndLastName();

console.log(name); // ['Ryan', 'McDermott'];
Good:>
function splitIntoFirstAndLastName(name) {
    return name.split(" ");
}

const name = "Ryan McDermott";
const newName = splitIntoFirstAndLastName(name);

console.log(name); // 'Ryan McDermott';
console.log(newName); // ['Ryan', 'McDermott'];
In JavaScript, some values are unchangeable (immutable) and some are changeable (mutable). Objects and arrays are two kinds of mutable values so it's important to handle them carefully when they're passed as parameters to a function. A JavaScript function can change an object's properties or alter the contents of an array which could easily cause bugs elsewhere.
Suppose there's a function that accepts an array parameter representing a
shopping cart. If the function makes a change in that shopping cart array -
by adding an item to purchase, for example - then any other function that
uses that same cart array will be affected by this addition. That may be
great, however it could also be bad. Let's imagine a bad situation:
The user clicks the "Purchase" button which calls a purchase function that
spawns a network request and sends the cart array to the server. Because
of a bad network connection, the purchase function has to keep retrying the
request. Now, what if in the meantime the user accidentally clicks an "Add to Cart"
button on an item they don't actually want before the network request begins?
If that happens and the network request begins, then that purchase function
will send the accidentally added item because the cart array was modified.
A great solution would be for the addItemToCart function to always clone the
cart , edit it, and return the clone. This would ensure that functions that are still
using the old shopping cart wouldn't be affected by the changes.
Two caveats to mention to this approach:
There might be cases where you actually want to modify the input object,
but when you adopt this programming practice you will find that those cases are pretty rare. Most things can be refactored to have no side effects!
Cloning big objects can be very expensive in terms of performance. Luckily,
this isn't a big issue in practice because there are great libraries that allow this kind of programming approach to be fast and not as memory intensive as it would be for you to manually clone objects and arrays.
Bad:>
const addItemToCart = (cart, item) => {
    cart.push({
        item,
        date: Date.now()
    });
};
Good:>
const addItemToCart = (cart, item) => {
    return [...cart, {
        item,
        date: Date.now()
    }];
};
Polluting globals is a bad practice in JavaScript because you could clash with another
library and the user of your API would be none-the-wiser until they get an
exception in production. Let's think about an example: what if you wanted to
extend JavaScript's native Array method to have a diff method that could
show the difference between two arrays? You could write your new function
to the Array.prototype , but it could clash with another library that tried
to do the same thing. What if that other library was just using diff to find
the difference between the first and last elements of an array? This is why it
would be much better to just use ES2015/ES6 classes and simply extend the Array global.
Bad:>
Array.prototype.diff = function diff(comparisonArray) {
    const hash = new Set(comparisonArray);
    return this.filter(elem => !hash.has(elem));
};
Good:>
class SuperArray extends Array {
    diff(comparisonArray) {
        const hash = new Set(comparisonArray);
        return this.filter(elem => !hash.has(elem));
    }
}
Modern programming languages fall into two categories: imperative (also called procedural) and declarative (also called functional). Object-oriented programming (OOP), procedural programming, and parallel processing are examples of the imperative programming paradigm. Functional programming, logic programming, and database processing are examples of the declarative programming paradigm. Why JavaScript is a "multi-paradigm" language JavaScript supports both object-oriented programming with prototypal inheritance as well as functional programming. Java was traditionally an example of pure object-oriented programming, though the 2018 release added functional programming in the form of something that we will discuss called lambdas. SQL is an example of pure declarative programming, though there are extensions available from vendors that add procedural elements.
Functional languages can be cleaner and easier to test. Favor this style of programming when you can.
Bad:>
const programmerOutput = [{
        name: "Uncle Bobby",
        linesOfCode: 500
    },
    {
        name: "Suzie Q",
        linesOfCode: 1500
    },
    {
        name: "Jimmy Gosling",
        linesOfCode: 150
    },
    {
        name: "Gracie Hopper",
        linesOfCode: 1000
    }
];

let totalOutput = 0;

for (let i = 0; i < programmerOutput.length; i++) {
    totalOutput += programmerOutput[i].linesOfCode;
}
Good:>
const programmerOutput = [{
        name: "Uncle Bobby",
        linesOfCode: 500
    },
    {
        name: "Suzie Q",
        linesOfCode: 1500
    },
    {
        name: "Jimmy Gosling",
        linesOfCode: 150
    },
    {
        name: "Gracie Hopper",
        linesOfCode: 1000
    }
];

const totalOutput = programmerOutput.reduce(
    (totalLines, output) => totalLines + output.linesOfCode,
    0
);
Bad:>
if (fsm.state === "fetching" && isEmpty(listNode)) {
    // ...
}
Good:>
function shouldShowSpinner(fsm, listNode) {
    return fsm.state === "fetching" && isEmpty(listNode);
}

if (shouldShowSpinner(fsmInstance, listNodeInstance)) {
    // ...
}
Bad:>
function isDOMNodeNotPresent(node) {
    // ...
}

if (!isDOMNodeNotPresent(node)) {
    // ...
}
Good:>
function isDOMNodePresent(node) {
    // ...
}

if (isDOMNodePresent(node)) {
    // ...
}
This seems like an impossible task. Upon first hearing this, most people say,
"how am I supposed to do anything without an if statement?" The answer is that
you can use polymorphism to achieve the same task in many cases. The second
question is usually, "well that's great but why would I want to do that?" The
answer is a previous clean code concept we learned: a function should only do
one thing. When you have classes and functions that have if statements, you
are telling your user that your function does more than one thing. Remember,
just do one thing.
Bad:>
class Airplane {
    // ...
    getCruisingAltitude() {
        switch (this.type) {
            case "777":
                return this.getMaxAltitude() - this.getPassengerCount();
            case "Air Force One":
                return this.getMaxAltitude();
            case "Cessna":
                return this.getMaxAltitude() - this.getFuelExpenditure();
        }
    }
}
Good:>
class Airplane {
    // ...
}

class Boeing777 extends Airplane {
    // ...
    getCruisingAltitude() {
        return this.getMaxAltitude() - this.getPassengerCount();
    }
}

class AirForceOne extends Airplane {
    // ...
    getCruisingAltitude() {
        return this.getMaxAltitude();
    }
}

class Cessna extends Airplane {
    // ...
    getCruisingAltitude() {
        return this.getMaxAltitude() - this.getFuelExpenditure();
    }
}
JavaScript is untyped, which means your functions can take any type of argument. Sometimes you are bitten by this freedom and it becomes tempting to do type-checking in your functions. There are many ways to avoid having to do this. The first thing to consider is consistent APIs.
Bad:>
function travelToTexas(vehicle) {
    if (vehicle instanceof Bicycle) {
        vehicle.pedal(this.currentLocation, new Location("texas"));
    } else if (vehicle instanceof Car) {
        vehicle.drive(this.currentLocation, new Location("texas"));
    }
}
Good:>
function travelToTexas(vehicle) {
    vehicle.move(this.currentLocation, new Location("texas"));
}
If you are working with basic primitive values like strings and integers, and you can't use polymorphism but you still feel the need to type-check, you should consider using TypeScript. It is an excellent alternative to normal JavaScript, as it provides you with static typing on top of standard JavaScript syntax. The problem with manually type-checking normal JavaScript is that doing it well requires so much extra verbiage that the faux "type-safety" you get doesn't make up for the lost readability. Keep your JavaScript clean, write good tests, and have good code reviews. Otherwise, do all of that but with TypeScript (which, like I said, is a great alternative!).
Bad:>
function combine(val1, val2) {
    if (
        (typeof val1 === "number" && typeof val2 === "number") ||
        (typeof val1 === "string" && typeof val2 === "string")
    ) {
        return val1 + val2;
    }

    throw new Error("Must be of type String or Number");
}
Good:>
function combine(val1, val2) {
    return val1 + val2;
}
Modern browsers do a lot of optimization under-the-hood at runtime. A lot of times, if you are optimizing then you are just wasting your time. There are good resources for seeing where optimization is lacking. Target those in the meantime, until they are fixed if they can be.
Bad:>
// On old browsers, each iteration with uncached `list.length` would be costly
// because of `list.length` recomputation. In modern browsers, this is optimized.
for (let i = 0, len = list.length; i < len; i++) {
    // ...
}
Good:>
for (let i = 0; i < list.length; i++) {
    // ...
}
Dead code is just as bad as duplicate code. There's no reason to keep it in your codebase. If it's not being called, get rid of it! It will still be safe in your version history if you still need it.
Bad:>
function oldRequestModule(url) {
    // ...
}

function newRequestModule(url) {
    // ...
}

const req = newRequestModule;
inventoryTracker("apples", req, "www.inventory-awesome.io");
Good:>
function newRequestModule(url) {
    // ...
}

const req = newRequestModule;
inventoryTracker("apples", req, "www.inventory-awesome.io");
Using getters and setters to access data on objects could be better than simply looking for a property on an object. "Why?" you might ask. Well, here's an unorganized list of reasons why:
When you want to do more beyond getting an object property, you don't have
to look up and change every accessor in your codebase.
Makes adding validation simple when doing a set .
You can lazy load your object's properties, let's say getting it from a
server.
Bad:>
function makeBankAccount() {
    // ...

    return {
        balance: 0
        // ...
    };
}

const account = makeBankAccount();
account.balance = 100;
Good:>
function makeBankAccount() {
    // this one is private
    let balance = 0;

    // a "getter", made public via the returned object below
    function getBalance() {
        return balance;
    }

    // a "setter", made public via the returned object below
    function setBalance(amount) {
        // ... validate before updating the balance
        balance = amount;
    }

    return {
        // ...
        getBalance,
        setBalance
    };
}

const account = makeBankAccount();
account.setBalance(100);
This can be accomplished through closures (for ES5 and below).
Bad:>
const Employee = function(name) {
    this.name = name;
};

Employee.prototype.getName = function getName() {
    return this.name;
};

const employee = new Employee("John Doe");
console.log( `Employee name: ${employee.getName()}` ); // Employee name: John Doe
delete employee.name;
console.log( `Employee name: ${employee.getName()}` ); // Employee name: undefined
Good:>
function makeEmployee(name) {
    return {
        getName() {
            return name;
        }
    };
}

const employee = makeEmployee("John Doe");
console.log( `Employee name: ${employee.getName()}` ); // Employee name: John Doe
delete employee.name;
console.log( `Employee name: ${employee.getName()}` ); // Employee name: John Doe
It's very difficult to get readable class inheritance, construction, and method definitions for classical ES5 classes. If you need inheritance (and be aware that you might not), then prefer ES2015/ES6 classes. However, prefer small functions over classes until you find yourself needing larger and more complex objects.
Bad:>
const Animal = function(age) {
    if (!(this instanceof Animal)) {
        throw new Error("Instantiate Animal with `new` ");
    }

    this.age = age;
};

Animal.prototype.move = function move() {};

const Mammal = function(age, furColor) {
    if (!(this instanceof Mammal)) {
        throw new Error("Instantiate Mammal with `new` ");
    }

    Animal.call(this, age);
    this.furColor = furColor;
};

Mammal.prototype = Object.create(Animal.prototype);
Mammal.prototype.constructor = Mammal;
Mammal.prototype.liveBirth = function liveBirth() {};

const Human = function(age, furColor, languageSpoken) {
    if (!(this instanceof Human)) {
        throw new Error("Instantiate Human with `new` ");
    }

    Mammal.call(this, age, furColor);
    this.languageSpoken = languageSpoken;
};

Human.prototype = Object.create(Mammal.prototype);
Human.prototype.constructor = Human;
Human.prototype.speak = function speak() {};
Good:>
class Animal {
    constructor(age) {
        this.age = age;
    }

    move() {
        /* ... */
    }
}

class Mammal extends Animal {
    constructor(age, furColor) {
        super(age);
        this.furColor = furColor;
    }

    liveBirth() {
        /* ... */
    }
}

class Human extends Mammal {
    constructor(age, furColor, languageSpoken) {
        super(age, furColor);
        this.languageSpoken = languageSpoken;
    }

    speak() {
        /* ... */
    }
}
This pattern is very useful in JavaScript and you see it in many libraries such
as jQuery and Lodash. It allows your code to be expressive, and less verbose.
For that reason, I say, use method chaining and take a look at how clean your code
will be. In your class functions, simply return this at the end of every function,
and you can chain further class methods onto it.
Bad:>
class Car {
    constructor(make, model, color) {
        this.make = make;
        this.model = model;
        this.color = color;
    }

    setMake(make) {
        this.make = make;
    }

    setModel(model) {
        this.model = model;
    }

    setColor(color) {
        this.color = color;
    }

    save() {
        console.log(this.make, this.model, this.color);
    }
}

const car = new Car("Ford", "F-150", "red");
car.setColor("pink");
car.save();
Good:>
class Car {
    constructor(make, model, color) {
        this.make = make;
        this.model = model;
        this.color = color;
    }

    setMake(make) {
        this.make = make;
        // NOTE: Returning this for chaining
        return this;
    }

    setModel(model) {
        this.model = model;
        // NOTE: Returning this for chaining
        return this;
    }

    setColor(color) {
        this.color = color;
        // NOTE: Returning this for chaining
        return this;
    }

    save() {
        console.log(this.make, this.model, this.color);
        // NOTE: Returning this for chaining
        return this;
    }
}

const car = new Car("Ford", "F-150", "red").setColor("pink").save();
As stated famously in Design Patterns by the Gang of Four, you should prefer composition over inheritance where you can. There are lots of good reasons to use inheritance and lots of good reasons to use composition. The main point for this maxim is that if your mind instinctively goes for inheritance, try to think if composition could model your problem better. In some cases it can.
You might be wondering then, "when should I use inheritance?" It depends on your problem at hand, but this is a decent list of when inheritance makes more sense than composition:
Your inheritance represents an "is-a" relationship and not a "has-a"
relationship (Human->Animal vs. User->UserDetails).
You can reuse code from the base classes (Humans can move like all animals).
You want to make global changes to derived classes by changing a base class.
(Change the caloric expenditure of all animals when they move).
Bad:>
class Employee {
    constructor(name, email) {
        this.name = name;
        this.email = email;
    }

    // ...
}

// Bad because Employees "have" tax data. EmployeeTaxData is not a type of Employee
class EmployeeTaxData extends Employee {
    constructor(ssn, salary) {
        super();
        this.ssn = ssn;
        this.salary = salary;
    }

    // ...
}
Good:>
class EmployeeTaxData {
    constructor(ssn, salary) {
        this.ssn = ssn;
        this.salary = salary;
    }

    // ...
}

class Employee {
    constructor(name, email) {
        this.name = name;
        this.email = email;
    }

    setTaxData(ssn, salary) {
        this.taxData = new EmployeeTaxData(ssn, salary);
    }
    // ...
}
As stated in Clean Code, "There should never be more than one reason for a class to change". It's tempting to jam-pack a class with a lot of functionality, like when you can only take one suitcase on your flight. The issue with this is that your class won't be conceptually cohesive and it will give it many reasons to change. Minimizing the amount of times you need to change a class is important. It's important because if too much functionality is in one class and you modify a piece of it, it can be difficult to understand how that will affect other dependent modules in your codebase.
Bad:>
class UserSettings {
    constructor(user) {
        this.user = user;
    }

    changeSettings(settings) {
        if (this.verifyCredentials()) {
            // ...
        }
    }

    verifyCredentials() {
        // ...
    }
}
Good:>
class UserAuth {
    constructor(user) {
        this.user = user;
    }

    verifyCredentials() {
        // ...
    }
}

class UserSettings {
    constructor(user) {
        this.user = user;
        this.auth = new UserAuth(user);
    }

    changeSettings(settings) {
        if (this.auth.verifyCredentials()) {
            // ...
        }
    }
}
As stated by Bertrand Meyer, "software entities (classes, modules, functions, etc.) should be open for extension, but closed for modification." What does that mean though? This principle basically states that you should allow users to add new functionalities without changing existing code.
Bad:>
class AjaxAdapter extends Adapter {
    constructor() {
        super();
        this.name = "ajaxAdapter";
    }
}

class NodeAdapter extends Adapter {
    constructor() {
        super();
        this.name = "nodeAdapter";
    }
}

class HttpRequester {
    constructor(adapter) {
        this.adapter = adapter;
    }

    fetch(url) {
        if (this.adapter.name === "ajaxAdapter") {
            return makeAjaxCall(url).then(response => {
                // transform response and return
            });
        } else if (this.adapter.name === "nodeAdapter") {
            return makeHttpCall(url).then(response => {
                // transform response and return
            });
        }
    }
}

function makeAjaxCall(url) {
    // request and return promise
}

function makeHttpCall(url) {
    // request and return promise
}
Good:>
class AjaxAdapter extends Adapter {
    constructor() {
        super();
        this.name = "ajaxAdapter";
    }

    request(url) {
        // request and return promise
    }
}

class NodeAdapter extends Adapter {
    constructor() {
        super();
        this.name = "nodeAdapter";
    }

    request(url) {
        // request and return promise
    }
}

class HttpRequester {
    constructor(adapter) {
        this.adapter = adapter;
    }

    fetch(url) {
        return this.adapter.request(url).then(response => {
            // transform response and return
        });
    }
}
This is a scary term for a very simple concept. It's formally defined as "If S is a subtype of T, then objects of type T may be replaced with objects of type S (i.e., objects of type S may substitute objects of type T) without altering any of the desirable properties of that program (correctness, task performed, etc.)." That's an even scarier definition.
The best explanation for this is if you have a parent class and a child class, then the base class and child class can be used interchangeably without getting incorrect results. This might still be confusing, so let's take a look at the classic Square-Rectangle example. Mathematically, a square is a rectangle, but if you model it using the "is-a" relationship via inheritance, you quickly get into trouble.
Bad:>
class Rectangle {
    constructor() {
        this.width = 0;
        this.height = 0;
    }

    setColor(color) {
        // ...
    }

    render(area) {
        // ...
    }

    setWidth(width) {
        this.width = width;
    }

    setHeight(height) {
        this.height = height;
    }

    getArea() {
        return this.width * this.height;
    }
}

class Square extends Rectangle {
    setWidth(width) {
        this.width = width;
        this.height = width;
    }

    setHeight(height) {
        this.width = height;
        this.height = height;
    }
}

function renderLargeRectangles(rectangles) {
    rectangles.forEach(rectangle => {
        rectangle.setWidth(4);
        rectangle.setHeight(5);
        const area = rectangle.getArea(); // BAD: Returns 25 for Square. Should be 20.
        rectangle.render(area);
    });
}

const rectangles = [new Rectangle(), new Rectangle(), new Square()];
renderLargeRectangles(rectangles);
Good:>
class Shape {
    setColor(color) {
        // ...
    }

    render(area) {
        // ...
    }
}

class Rectangle extends Shape {
    constructor(width, height) {
        super();
        this.width = width;
        this.height = height;
    }

    getArea() {
        return this.width * this.height;
    }
}

class Square extends Shape {
    constructor(length) {
        super();
        this.length = length;
    }

    getArea() {
        return this.length * this.length;
    }
}

function renderLargeShapes(shapes) {
    shapes.forEach(shape => {
        const area = shape.getArea();
        shape.render(area);
    });
}

const shapes = [new Rectangle(4, 5), new Rectangle(4, 5), new Square(5)];
renderLargeShapes(shapes);
JavaScript doesn't have interfaces so this principle doesn't apply as strictly as others. However, it's important and relevant even with JavaScript's lack of type system.
ISP states that "Clients should not be forced to depend upon interfaces that they do not use." Interfaces are implicit contracts in JavaScript because of duck typing.
A good example to look at that demonstrates this principle in JavaScript is for classes that require large settings objects. Not requiring clients to setup huge amounts of options is beneficial, because most of the time they won't need all of the settings. Making them optional helps prevent having a "fat interface".
Bad:>
class DOMTraverser {
    constructor(settings) {
        this.settings = settings;
        this.setup();
    }

    setup() {
        this.rootNode = this.settings.rootNode;
        this.settings.animationModule.setup();
    }

    traverse() {
        // ...
    }
}

const $ = new DOMTraverser({
    rootNode: document.getElementsByTagName("body"),
    animationModule() {} // Most of the time, we won't need to animate when traversing.
    // ...
});
Good:>
class DOMTraverser {
    constructor(settings) {
        this.settings = settings;
        this.options = settings.options;
        this.setup();
    }

    setup() {
        this.rootNode = this.settings.rootNode;
        this.setupOptions();
    }

    setupOptions() {
        if (this.options.animationModule) {
            // ...
        }
    }

    traverse() {
        // ...
    }
}

const $ = new DOMTraverser({
    rootNode: document.getElementsByTagName("body"),
    options: {
        animationModule() {}
    }
});
This principle states two essential things:
High-level modules should not depend on low-level modules. Both should
depend on abstractions.
Abstractions should not depend upon details. Details should depend on
abstractions.
This can be hard to understand at first, but if you've worked with AngularJS, you've seen an implementation of this principle in the form of Dependency Injection (DI). While they are not identical concepts, DIP keeps high-level modules from knowing the details of its low-level modules and setting them up. It can accomplish this through DI. A huge benefit of this is that it reduces the coupling between modules. Coupling is a very bad development pattern because it makes your code hard to refactor.
As stated previously, JavaScript doesn't have interfaces so the abstractions
that are depended upon are implicit contracts. That is to say, the methods
and properties that an object/class exposes to another object/class. In the
example below, the implicit contract is that any Request module for an
InventoryTracker will have a requestItems method.
Bad:>
class InventoryRequester {
    constructor() {
        this.REQ_METHODS = ["HTTP"];
    }

    requestItem(item) {
        // ...
    }
}

class InventoryTracker {
    constructor(items) {
        this.items = items;

        // BAD: We have created a dependency on a specific request implementation.
        // We should just have requestItems depend on a request method: `request`
        this.requester = new InventoryRequester();
    }

    requestItems() {
        this.items.forEach(item => {
            this.requester.requestItem(item);
        });
    }
}

const inventoryTracker = new InventoryTracker(["apples", "bananas"]);
inventoryTracker.requestItems();
Good:>
class InventoryTracker {
    constructor(items, requester) {
        this.items = items;
        this.requester = requester;
    }

    requestItems() {
        this.items.forEach(item => {
            this.requester.requestItem(item);
        });
    }
}

class InventoryRequesterV1 {
    constructor() {
        this.REQ_METHODS = ["HTTP"];
    }

    requestItem(item) {
        // ...
    }
}

class InventoryRequesterV2 {
    constructor() {
        this.REQ_METHODS = ["WS"];
    }

    requestItem(item) {
        // ...
    }
}

// By constructing our dependencies externally and injecting them, we can easily
// substitute our request module for a fancy new one that uses WebSockets.
const inventoryTracker = new InventoryTracker(
    ["apples", "bananas"],
    new InventoryRequesterV2()
);
inventoryTracker.requestItems();
Testing is more important than shipping. If you have no tests or an inadequate amount, then every time you ship code you won't be sure that you didn't break anything. Deciding on what constitutes an adequate amount is up to your team, but having 100% coverage (all statements and branches) is how you achieve very high confidence and developer peace of mind. This means that in addition to having a great testing framework, you also need to use a good coverage tool.
There's no excuse to not write tests. There are plenty of good JS test frameworks, so find one that your team prefers. When you find one that works for your team, then aim to always write tests for every new feature/module you introduce. If your preferred method is Test Driven Development (TDD), that is great, but the main point is to just make sure you are reaching your coverage goals before launching any feature, or refactoring an existing one.
Bad:>
import assert from "assert";

describe("MomentJS", () => {
    it("handles date boundaries", () => {
        let date;

        date = new MomentJS("1/1/2015");
        date.addDays(30);
        assert.equal("1/31/2015", date);

        date = new MomentJS("2/1/2016");
        date.addDays(28);
        assert.equal("02/29/2016", date);

        date = new MomentJS("2/1/2015");
        date.addDays(28);
        assert.equal("03/01/2015", date);
    });
});
Good:>
import assert from "assert";

describe("MomentJS", () => {
    it("handles 30-day months", () => {
        const date = new MomentJS("1/1/2015");
        date.addDays(30);
        assert.equal("1/31/2015", date);
    });

    it("handles leap year", () => {
        const date = new MomentJS("2/1/2016");
        date.addDays(28);
        assert.equal("02/29/2016", date);
    });

    it("handles non-leap year", () => {
        const date = new MomentJS("2/1/2015");
        date.addDays(28);
        assert.equal("03/01/2015", date);
    });
});
Callbacks aren't clean, and they cause excessive amounts of nesting. With ES2015/ES6, Promises are a built-in global type. Use them!
Bad:>
import {
    get
} from "request";
import {
    writeFile
} from "fs";

get(
    "https://en.wikipedia.org/wiki/Robert_Cecil_Martin",
    (requestErr, response, body) => {
        if (requestErr) {
            console.error(requestErr);
        } else {
            writeFile("article.html", body, writeErr => {
                if (writeErr) {
                    console.error(writeErr);
                } else {
                    console.log("File written");
                }
            });
        }
    }
);
Good:>
import {
    get
} from "request-promise";
import {
    writeFile
} from "fs-extra";

get("https://en.wikipedia.org/wiki/Robert_Cecil_Martin")
    .then(body => {
        return writeFile("article.html", body);
    })
    .then(() => {
        console.log("File written");
    })
    .catch(err => {
        console.error(err);
    });
Promises are a very clean alternative to callbacks, but ES2017/ES8 brings async and await
which offer an even cleaner solution. All you need is a function that is prefixed
in an async keyword, and then you can write your logic imperatively without
a then chain of functions. Use this if you can take advantage of ES2017/ES8 features
today!
Bad:>
import {
    get
} from "request-promise";
import {
    writeFile
} from "fs-extra";

get("https://en.wikipedia.org/wiki/Robert_Cecil_Martin")
    .then(body => {
        return writeFile("article.html", body);
    })
    .then(() => {
        console.log("File written");
    })
    .catch(err => {
        console.error(err);
    });
Good:>
import {
    get
} from "request-promise";
import {
    writeFile
} from "fs-extra";

async function getCleanCodeArticle() {
    try {
        const body = await get(
            "https://en.wikipedia.org/wiki/Robert_Cecil_Martin"
        );
        await writeFile("article.html", body);
        console.log("File written");
    } catch (err) {
        console.error(err);
    }
}

getCleanCodeArticle()
Thrown errors are a good thing! They mean the runtime has successfully identified when something in your program has gone wrong and it's letting you know by stopping function execution on the current stack, killing the process (in Node), and notifying you in the console with a stack trace.
Doing nothing with a caught error doesn't give you the ability to ever fix
or react to said error. Logging the error to the console ( console.log )
isn't much better as often times it can get lost in a sea of things printed
to the console. If you wrap any bit of code in a try/catch it means you
think an error may occur there and therefore you should have a plan,
or create a code path, for when it occurs.
Bad:>
try {
    functionThatMightThrow();
} catch (error) {
    console.log(error);
}
Good:>
try {
    functionThatMightThrow();
} catch (error) {
    // One option (more noisy than console.log):
    console.error(error);
    // Another option:
    notifyUserOfError(error);
    // Another option:
    reportErrorToService(error);
    // OR do all three!
}
For the same reason you shouldn't ignore caught errors
from try/catch .
Bad:>
getdata()
    .then(data => {
        functionThatMightThrow(data);
    })
    .catch(error => {
        console.log(error);
    });
Good:>
getdata()
    .then(data => {
        functionThatMightThrow(data);
    })
    .catch(error => {
        // One option (more noisy than console.log):
        console.error(error);
        // Another option:
        notifyUserOfError(error);
        // Another option:
        reportErrorToService(error);
        // OR do all three!
    });
Formatting is subjective. Like many rules herein, there is no hard and fast rule that you must follow. The main point is DO NOT ARGUE over formatting. There are tons of tools to automate this. Use one! It's a waste of time and money for engineers to argue over formatting.
For things that don't fall under the purview of automatic formatting (indentation, tabs vs. spaces, double vs. single quotes, etc.) look here for some guidance.
JavaScript is untyped, so capitalization tells you a lot about your variables, functions, etc. These rules are subjective, so your team can choose whatever they want. The point is, no matter what you all choose, just be consistent.
Bad:>
const DAYS_IN_WEEK = 7;
const daysInMonth = 30;

const songs = ["Back In Black", "Stairway to Heaven", "Hey Jude"];
const Artists = ["ACDC", "Led Zeppelin", "The Beatles"];

function eraseDatabase() {}

function restore_database() {}

class animal {}
class Alpaca {}
Good:>
const DAYS_IN_WEEK = 7;
const DAYS_IN_MONTH = 30;

const SONGS = ["Back In Black", "Stairway to Heaven", "Hey Jude"];
const ARTISTS = ["ACDC", "Led Zeppelin", "The Beatles"];

function eraseDatabase() {}

function restoreDatabase() {}

class Animal {}
class Alpaca {}
If a function calls another, keep those functions vertically close in the source file. Ideally, keep the caller right above the callee. We tend to read code from top-to-bottom, like a newspaper. Because of this, make your code read that way.
Bad:>
class PerformanceReview {
    constructor(employee) {
        this.employee = employee;
    }

    lookupPeers() {
        return db.lookup(this.employee, "peers");
    }

    lookupManager() {
        return db.lookup(this.employee, "manager");
    }

    getPeerReviews() {
        const peers = this.lookupPeers();
        // ...
    }

    perfReview() {
        this.getPeerReviews();
        this.getManagerReview();
        this.getSelfReview();
    }

    getManagerReview() {
        const manager = this.lookupManager();
    }

    getSelfReview() {
        // ...
    }
}

const review = new PerformanceReview(employee);
review.perfReview();
Good:>
class PerformanceReview {
    constructor(employee) {
        this.employee = employee;
    }

    perfReview() {
        this.getPeerReviews();
        this.getManagerReview();
        this.getSelfReview();
    }

    getPeerReviews() {
        const peers = this.lookupPeers();
        // ...
    }

    lookupPeers() {
        return db.lookup(this.employee, "peers");
    }

    getManagerReview() {
        const manager = this.lookupManager();
    }

    lookupManager() {
        return db.lookup(this.employee, "manager");
    }

    getSelfReview() {
        // ...
    }
}

const review = new PerformanceReview(employee);
review.perfReview();
Comments are an apology, not a requirement. Good code mostly documents itself.
Bad:>
function hashIt(data) {
    // The hash
    let hash = 0;

    // Length of string
    const length = data.length;

    // Loop through every character in data
    for (let i = 0; i < length; i++) {
        // Get character code.
        const char = data.charCodeAt(i);
        // Make the hash
        hash = (hash << 5) - hash + char;
        // Convert to 32-bit integer
        hash &= hash;
    }
}
Good:>
function hashIt(data) {
    let hash = 0;
    const length = data.length;

    for (let i = 0; i < length; i++) {
        const char = data.charCodeAt(i);
        hash = (hash << 5) - hash + char;

        // Convert to 32-bit integer
        hash &= hash;
    }
}
Version control exists for a reason. Leave old code in your history.
Bad:>
doStuff();
// doOtherStuff();
// doSomeMoreStuff();
// doSoMuchStuff();
Good:>
doStuff();
Remember, use version control! There's no need for dead code, commented code,
and especially journal comments. Use git log to get history!
Bad:>
/>
 * 2016-12-20: Removed monads, didn't understand them (RM)
 * 2016-10-01: Improved using special monads (JP)
 * 2016-02-03: Removed type-checking (LI)
 * 2015-03-14: Added combine with type-checking (JR)
 */
function combine(a, b) {
    return a + b;
}
Good:>
function combine(a, b) {
    return a + b;
}
They usually just add noise. Let the functions and variable names along with the proper indentation and formatting give the visual structure to your code.
Bad:>
////////////////////////////////////////////////////////////////////////////////
// Scope Model Instantiation
////////////////////////////////////////////////////////////////////////////////
$scope.model = {
    menu: "foo",
    nav: "bar"
};

////////////////////////////////////////////////////////////////////////////////
// Action setup
////////////////////////////////////////////////////////////////////////////////
const actions = function() {
    // ...
};
Good:>
$scope.model = {
    menu: "foo",
    nav: "bar"
};

const actions = function() {
    // ...
};
A. Parens, Braces, Linebreaks
// if/else/for/while/try always have spaces, braces and span multiple lines
// this encourages readability

// 2.A.1.1
// Examples of really cramped syntax

if (condition) doSomething();

while (condition) iterating++;

for (var i = 0; i < 100; i++) someIterativeFn();

// 2.A.1.1
// Use whitespace to promote readability

if (condition) {
    // statements
}

while (condition) {
    // statements
}

for (var i = 0; i < 100; i++) {
    // statements
}

// Even better:

var i,
    length = 100;

for (i = 0; i < length; i++) {
    // statements
}

// Or...

var i = 0,
    length = 100;

for (; i < length; i++) {
    // statements
}

var prop;

for (prop in object) {
    // statements
}

if (true) {
    // statements
} else {
    // statements
}
B. Assignments, Declarations, Functions ( Named, Expression, Constructor )
// 2.B.1.1
// Variables
var foo = "bar",
    num = 1,
    undef;

// Literal notations:
var array = [],
    object = {};

// 2.B.1.2
// Using only one `var` per scope (function) or one `var` for each variable,
// promotes readability and keeps your declaration list free of clutter.
// Using one `var` per variable you can take more control of your versions
// and makes it easier to reorder the lines.
// One `var` per scope makes it easier to detect undeclared variables
// that may become implied globals.
// Choose better for your project and never mix them.

// Bad
var foo = "",
    bar = "";
var qux;

// Good
var foo = "";
var bar = "";
var qux;

// or..
var foo = "",
    bar = "",
    qux;

// or..
var // Comment on these
    foo = "",
    bar = "",
    quux;

// 2.B.1.3
// var statements should always be in the beginning of their respective scope (function).

// Bad
function foo() {

    // some statements here

    var bar = "",
        qux;
}

// Good
function foo() {
    var bar = "",
        qux;

    // all statements after the variables declarations.
}

// 2.B.1.4
// const and let, from ECMAScript 6, should likewise be at the top of their scope (block).

// Bad
function foo() {
    let foo,
        bar;
    if (condition) {
        bar = "";
        // statements
    }
}
// Good
function foo() {
    let foo;
    if (condition) {
        let bar = "";
        // statements
    }
}
// 2.B.2.1
// Named Function Declaration
function foo(arg1, argN) {

}

// Usage
foo(arg1, argN);

// 2.B.2.2
// Named Function Declaration
function square(number) {
    return number * number;
}

// Usage
square(10);

// Really contrived continuation passing style
function square(number, callback) {
    callback(number * number);
}

square(10, function(square) {
    // callback statements
});

// 2.B.2.3
// Function Expression
var square = function(number) {
    // Return something valuable and relevant
    return number * number;
};

// Function Expression with Identifier
// This preferred form has the added value of being
// able to call itself and have an identity in stack traces:
var factorial = function factorial(number) {
    if (number < 2) {
        return 1;
    }

    return number * factorial(number - 1);
};

// 2.B.2.4
// Constructor Declaration
function FooBar(options) {

    this.options = options;
}

// Usage
var fooBar = new FooBar({
    a: "alpha"
});

fooBar.options;
// { a: "alpha" }
C. Exceptions, Slight Deviations
// 2.C.1.1
// Functions with callbacks
foo(function() {
    // Note there is no extra space between the first paren
    // of the executing function call and the word "function"
});

// Function accepting an array, no space
foo(["alpha", "beta"]);

// 2.C.1.2
// Function accepting an object, no space
foo({
    a: "alpha",
    b: "beta"
});

// Single argument string literal, no space
foo("bar");

// Expression parens, no space
if (!("foo" in obj)) {
    obj = (obj.bar || defaults).baz;
}
 D. Consistency Always Wins

In sections 2.A-2.C, the whitespace rules are set forth as a recommendation with a simpler, higher purpose: consistency.
It's important to note that formatting preferences, such as "inner whitespace" should be considered optional, but only one style should exist across the entire source of your project.
// 2.D.1.1

if (condition) {
    // statements
}

while (condition) {
    // statements
}

for (var i = 0; i < 100; i++) {
    // statements
}

if (true) {
    // statements
} else {
    // statements
}
 E. Quotes

Whether you prefer single or double shouldn't matter, there is no difference in how JavaScript parses them. What >ABSOLUTELY MUST> be enforced is consistency. >Never mix quotes in the same project. Pick one style and stick with it.>

F. End of Lines and Empty Lines

Whitespace can ruin diffs and make changesets impossible to read. Consider incorporating a pre-commit hook that removes end-of-line whitespace and blanks spaces on empty lines automatically.
Type Checking (Courtesy jQuery Core Style Guidelines)
A. Actual Types
String:
typeof variable === "string"
Number:
typeof variable === "number"
Boolean:
typeof variable === "boolean"
Object:
typeof variable === "object"
Array:
  Array.isArray( arrayLikeObject )
 (wherever possible)
Node:
elem.nodeType === 1
null:
variable === null
null or undefined:
variable == null
undefined:
Global Variables:
typeof variable === "undefined"
Local Variables:
variable === undefined
Properties:
  object.prop === undefined
 object.hasOwnProperty( prop )
 "prop" in object
B. Coerced Types
Consider the implications of the following...
Given this HTML:
<input type="text" id="foo-input" value="1">
// 3.B.1.1

// `foo` has been declared with the value `0` and its type is `number`
var foo = 0;

// typeof foo;
// "number"
...

// Somewhere later in your code, you need to update `foo`
// with a new value derived from an input element

foo = document.getElementById("foo-input").value;

// If you were to test `typeof foo` now, the result would be `string`
// This means that if you had logic that tested `foo` like:

if (foo === 1) {

    importantTask();

}

// `importantTask()` would never be evaluated, even though `foo` has a value of "1"

// 3.B.1.2

// You can preempt issues by using smart coercion with unary + or - operators:

foo = +document.getElementById("foo-input").value;
//    ^ unary + operator will convert its right side operand to a number

// typeof foo;
// "number"

if (foo === 1) {

    importantTask();

}

// `importantTask()` will be called
Here are some common cases along with coercions:
// 3.B.2.1

var number = 1,
    string = "1",
    bool = false;

number;
// 1

number + "";
// "1"

string;
// "1"

+
string;
// 1

+
string++;
// 1

string;
// 2

bool;
// false

+
bool;
// 0

bool + "";
// "false"
    // 3.B.2.2

    var number = 1,
        string = "1",
        bool = true;

    string === number;
    // false

    string === number + "";
    // true

    +
    string === number;
    // true

    bool === number;
    // false

    +
    bool === number;
    // true

    bool === string;
    // false

    bool === !!string;
    // true
    // 3.B.2.3

    var array = ["a", "b", "c"];

    !!~array.indexOf("a");
    // true

    !!~array.indexOf("b");
    // true

    !!~array.indexOf("c");
    // true

    !!~array.indexOf("d");
    // false

    // Note that the above should be considered "unnecessarily clever"
    // Prefer the obvious approach of comparing the returned value of
    // indexOf, like:

    if (array.indexOf("a") >= 0) {
        // ...
    }
    // 3.B.2.4

    var num = 2.5;

    parseInt(num, 10);

    // is the same as...

    ~~num;

    num >> 0;

    num >>> 0;

    // All result in 2

    // Keep in mind however, that negative numbers will be treated differently...

    var neg = -2.5;

    parseInt(neg, 10);

    // is the same as...

    ~~neg;

    neg >> 0;

    // All result in -2
    // However...

    neg >>> 0;

    // Will result in 4294967294
// 4.1.1
// When only evaluating that an array has length,
// instead of this:
if (array.length > 0)...

    // ...evaluate truthiness, like this:
    if (array.length)...

        // 4.1.2
        // When only evaluating that an array is empty,
        // instead of this:
        if (array.length === 0)...

            // ...evaluate truthiness, like this:
            if (!array.length)...

                // 4.1.3
                // When only evaluating that a string is not empty,
                // instead of this:
                if (string !== "")...

                    // ...evaluate truthiness, like this:
                    if (string)...

                        // 4.1.4
                        // When only evaluating that a string _is_ empty,
                        // instead of this:
                        if (string === "")...

                            // ...evaluate falsy-ness, like this:
                            if (!string)...

                                // 4.1.5
                                // When only evaluating that a reference is true,
                                // instead of this:
                                if (foo === true)...

                                    // ...evaluate like you mean it, take advantage of built in capabilities:
                                    if (foo)...

                                        // 4.1.6
                                        // When evaluating that a reference is false,
                                        // instead of this:
                                        if (foo === false)...

                                            // ...use negation to coerce a true evaluation
                                            if (!foo)...

                                                // ...Be careful, this will also match: 0, "", null, undefined, NaN
                                                // If you _MUST_ test for a boolean false, then use
                                                if (foo === false)...

                                                    // 4.1.7
                                                    // When only evaluating a ref that might be null or undefined, but NOT false, "" or 0,
                                                    // instead of this:
                                                    if (foo === null || foo === undefined)...

                                                        // ...take advantage of == type coercion, like this:
                                                        if (foo == null)...

                                                            // Remember, using == will match a `null` to BOTH `null` and `undefined`
                                                            // but not `false` , "" or 0
                                                            null == undefined
ALWAYS evaluate for the best, most accurate result - the above is a guideline, not a dogma.
// 4.2.1
// Type coercion and evaluation notes

// Prefer `===` over `==` (unless the case requires loose type evaluation)

// === does not coerce type, which means that:

"1" === 1;
// false

// == does coerce type, which means that:

"1" == 1;
// true

// 4.2.2
// Booleans, Truthies & Falsies

// Booleans:
true, false

    // Truthy:
    "foo", 1

// Falsy:
"", 0, null, undefined, NaN, void 0
// 5.1.1
// A Practical Module

(function(global) {
    var Module = (function() {

        var data = "secret";

        return {
            // This is some boolean property
            bool: true,
            // Some string value
            string: "a string",
            // An array property
            array: [1, 2, 3, 4],
            // An object property
            object: {
                lang: "en-Us"
            },
            getData: function() {
                // get the current value of `data`
                return data;
            },
            setData: function(value) {
                // set the value of `data` and return it
                return (data = value);
            }
        };
    })();

    // Other things might happen here

    // expose our module to the global object
    global.Module = Module;

})(this);
// 5.2.1
// A Practical Constructor

(function(global) {

    function Ctor(foo) {

        this.foo = foo;

        return this;
    }

    Ctor.prototype.getFoo = function() {
        return this.foo;
    };

    Ctor.prototype.setFoo = function(val) {
        return (this.foo = val);
    };

    // To call constructor's without `new` , you might do this:
    var ctor = function(foo) {
        return new Ctor(foo);
    };

    // expose our constructor to the global object
    global.ctor = ctor;

})(this);
A. You are not a human code compiler/compressor, so don't try to be one.
The following code is an example of egregious naming:
// 6.A.1.1
// Example of code with poor names

function q(s) {
    return document.querySelectorAll(s);
}
var i, a = [],
    els = q("#foo");
for (i = 0; i < els.length; i++) {
    a.push(els[i]);
}
 Without a doubt, you've written code like this - hopefully that ends today.

Here's the same piece of logic, but with kinder, more thoughtful naming (and a readable structure):
// 6.A.2.1
// Example of code with improved names

function query(selector) {
    return document.querySelectorAll(selector);
}

var idx = 0,
    elements = [],
    matches = query("#foo"),
    length = matches.length;

for (; idx < length; idx++) {
    elements.push(matches[idx]);
}
A few additional naming pointers:
// 6.A.3.1
// Naming strings

 `dog`
is a string

    // 6.A.3.2
    // Naming arrays

 `dogs`
is an array of `dog`
strings

// 6.A.3.3
// Naming functions, objects, instances, etc

camelCase;

function and
var declarations

// 6.A.3.4
// Naming constructors, prototypes, etc.

PascalCase;
constructor
function

// 6.A.3.5
// Naming regular expressions

rDesc = //;

// 6.A.3.6
// From the Google Closure Library Style Guide

functionNamesLikeThis;
variableNamesLikeThis;
ConstructorNamesLikeThis;
EnumNamesLikeThis;
methodNamesLikeThis;
SYMBOLIC_CONSTANTS_LIKE_THIS;
 B. Faces of `this`
Beyond the generally well known use cases of `call` and `apply` , always prefer `.bind( this )` or a functional equivalent, for creating `BoundFunction` definitions for later invocation. Only resort to aliasing when no preferable option is available.
// 6.B.1
function Device(opts) {

    this.value = null;

    // open an async stream,
    // this will be called continuously
    stream.read(opts.path, function(data) {

        // Update this instance's current value
        // with the most recent value from the
        // data stream
        this.value = data;

    }.bind(this));

    // Throttle the frequency of events emitted from
    // this Device instance
    setInterval(function() {

        // Emit a throttled event
        this.emit("event");

    }.bind(this), opts.freq || 100);
}

// Just pretend we've inherited EventEmitter ;)
When unavailable, functional equivalents to `.bind` exist in many modern JavaScript libraries.
    // 6.B.2

    // eg. lodash/underscore, _.bind()
    function Device(opts) {

        this.value = null;

        stream.read(opts.path, _.bind(function(data) {

            this.value = data;

        }, this));

        setInterval(_.bind(function() {

            this.emit("event");

        }, this), opts.freq || 100);
    }

    // eg. jQuery.proxy
    function Device(opts) {

        this.value = null;

        stream.read(opts.path, jQuery.proxy(function(data) {

            this.value = data;

        }, this));

        setInterval(jQuery.proxy(function() {

            this.emit("event");

        }, this), opts.freq || 100);
    }

    // eg. dojo.hitch
    function Device(opts) {

        this.value = null;

        stream.read(opts.path, dojo.hitch(this, function(data) {

            this.value = data;

        }));

        setInterval(dojo.hitch(this, function() {

            this.emit("event");

        }), opts.freq || 100);
    }
As a last resort, create an alias to `this` using `self` as an Identifier. This is extremely bug prone and should be avoided whenever possible.
// 6.B.3

function Device(opts) {
    var self = this;

    this.value = null;

    stream.read(opts.path, function(data) {

        self.value = data;

    });

    setInterval(function() {

        self.emit("event");

    }, opts.freq || 100);
}
 C. Use `thisArg`
Several prototype methods of ES 5.1 built-ins come with a special `thisArg` signature, which should be used whenever possible
// 6.C.1

var obj;

obj = {
    f: "foo",
    b: "bar",
    q: "qux"
};

Object.keys(obj).forEach(function(key) {

    // |this| now refers to `obj`
    console.log(this[key]);

}, obj); // <-- the last arg is `thisArg`
// Prints...

// "foo"
// "bar"
// "qux"
thisArg can be used with Array.prototype.every , Array.prototype.forEach ,
Array.prototype.some , Array.prototype.map , Array.prototype.filterThe Document Object Model (DOM) is an API for HTML and XML documents. It provides a structural representation of the document, enabling you to modify its content and visual presentation by using a scripting language such as JavaScript. See more at Mozilla Developer Network - DOM.
As every language, JavaScript has many code style guides. Maybe the most used and recommended is the Google Code Style Guide for JavaScript, but we recommend you read Idiomatic.js.
Nowadays the best tool for linting your JavaScript code is JSHint. We recommend that whenever possible you verify your code style and patterns with a Lint tool.
JavaScript has strong object-oriented programming capabilities, even though some debates have taken place due to the differences in object-oriented JavaScript compared to other languages.
Source: Introduction to Object-Oriented JavaScript
Anonymous functions are functions that are dynamically declared at runtime. They're called anonymous functions because they aren't given a name in the same way as normal functions.
Source: JavaScript anonymous functions
Functions in JavaScript are first class objects. This means that JavaScript functions are just a special type of object that can do all the things that regular objects can do.
Source: Functions are first class objects in JavaScript
For many front-end developers, JavaScript was their first taste of a scripting and/or interpretive language. To these developers, the concept and implications of loosely typed variables may be second nature. However, the explosive growth in demand for modern web applications has resulted in a growing number of back-end developers that have had to dip their feet into the pool of client-side technologies. Many of these developers are coming from a background of strongly typed languages, such as C# or Java, and are unfamiliar with both the freedom and the potential pitfalls involved in working with loosely typed variables.
Source: Understanding Loose Typing in JavaScript
Scoping:> In JavaScript, functions are our de facto scope delimiters for declaring vars, which means that usual blocks from loops and conditionals (such as if, for, while, switch and try) DON'T delimit scope, unlike most other languages. Therefore, those blocks will share the same scope as the function which contains them. This way, it might be dangerous to declare vars inside blocks as it would seem the var belongs to that block only.
Hoisting:> On runtime, all var and function declarations are moved to the beginning of each function (its scope) - this is known as Hoisting. Having said so, it is a good practice to declare all the vars altogether on the first line, in order to avoid false expectations with a var that got declared late but happened to hold a value before - this is a common problem for programmers coming from languages with block scope.
Source: JavaScript Scoping and Hoisting
Function binding is most probably the least of your concerns when beginning with JavaScript, but when you realize that you need a solution to the problem of how to keep the context of this within another function, then you might realize that what you actually need is >Function.prototype.bind()>.
Source: Understanding JavaScript's Function.prototype.bind
Closures are functions that refer to independent (free) variables. In other words, the function defined in the closure 'remembers' the environment in which it was created in. It is an important concept to understand as it can be useful during development, like emulating private methods. It can also help to learn how to avoid common mistakes, like creating closures in loops.
Source: MDN - Closures
ECMAScript 5's strict mode is a way to opt in to a restricted variant of JavaScript. Strict mode isn't just a subset: it intentionally has different semantics from normal code. Browsers not supporting strict mode will run strict mode code with different behavior from browsers that do, so don't rely on strict mode without feature-testing for support for the relevant aspects of strict mode. Strict mode code and non-strict mode code can coexist, so scripts can opt into strict mode incrementally.
Source: MDN - Strict mode
An immediately-invoked function expression is a pattern which produces a lexical scope using JavaScript's function scoping. Immediately-invoked function expressions can be used to avoid variable hoisting from within blocks, protect against polluting the global environment and simultaneously allow public access to methods while retaining privacy for variables defined within the function.
This pattern has been referred to as a self-executing anonymous function, but @cowboy (Ben Alman) introduced the term IIFE as a more semantically accurate term for the pattern.
Source: Immediately-Invoked Function Expression (IIFE)
jQuery is a fast, small, and feature-rich JavaScript library. Built by John Resig.
Built by Yahoo!, YUI is a free, open source JavaScript and CSS library for building richly interactive web applications. New development has stopped since August 29th, 2014.
Zepto is a minimalist JavaScript library for modern browsers with a largely jQuery-compatible API. If you use jQuery, you already know how to use Zepto.
Dojo is a free, open-source JavaScript toolkit for building high performance web applications. Project sponsors include IBM and SitePen.
Underscore.js is a JavaScript library that provides a whole mess of useful functional programming helpers without extending any built-in objects.
Very popular JavaScript client-side framework, built by @jashkenas.
Built by @wycats, jQuery and Ruby on Rails core developer.
Simplify dynamic JavaScript UIs by applying the Model-View-View Model (MVVM).
Built by Google, Angular.js is like a polyfill for the future of HTML.
One framework. Mobile & desktop. One way to build applications with Angular and reuse your code and abilities to build apps for any deployment target. For web, mobile web, native mobile and native desktop.
Cappuccino is an open-source framework that makes it easy to build desktop-caliber applications that run in a web browser.
JavaScriptMVC is an open-source framework containing the best ideas in jQuery development.
Meteor is an open-source platform for building top-quality web apps in a fraction of the time, whether you're an expert developer or just getting started.
Spice is a super minimal (< 3k) and flexible MVC framework for javascript. Spice was built to be easily added to any existent application and play well with other technologies such as jQuery, pjax, turbolinks, node or whatever else you are using.
Riot is an incredibly fast, powerful yet tiny client side (MV*) library for building large scale web applications. Despite the small size all the building blocks are there: a template engine, router, event library and a strict MVP pattern to keep things organized.
CanJS is a JavaScript framework that makes developing complex applications simple and fast. Easy-to-learn, small, and unassuming of your application structure, but with modern features like custom tags and 2-way binding.
Built by Facebook. React is a JavaScript library for creating user interfaces by Facebook and Instagram. Many people choose to think of React as the V in MVC.
Is an MVVM library providing two-way data binding, HTML extended behaviour (through directives) and reactive components. By using native add-ons a developer can also have routing, AJAX, a Flux-like state management, form validation and more. Provides a helpful Chrome extension to inspect components built with Vue.
Handlebars provides the power necessary to let you build semantic templates effectively with no frustration.
Asynchronous templates for the browser and node.js.
GSAP is the fastest full-featured scripted animation tool on the planet. It's even faster than CSS3 animations and transitions in many cases.
Velocity is an animation engine with the same API as jQuery's $.animate().
Bounce.js is a tool and JS library that lets you create beautiful CSS3 powered animations.
A simple but powerful JavaScript library for tweening and animating HTML5 and JavaScript properties.
Move.js is a small JavaScript library making CSS3 backed animation extremely simple and elegant.
SVG is an excellent way to create interactive, resolution-independent vector graphics that will look great on any size screen.
Rekapi is a library for making canvas and DOM animations with JavaScript, as well as CSS @keyframe animations for modern browsers.
Make use of your favicon with badges, images or videos.
Textillate.js combines some awesome libraries to provide a ease-to-use plugin for applying CSS3 animations to any text.
Motio is a small JavaScript library for simple but powerful sprite based animations and panning.
With Anima it's easy to animate over a hundred objects at a time. Each item can have it's mass and viscosity to emulate reallife objects!
MelonJS is a free, light-weight HTML5 game engine. The engine integrates the tiled map format making level design easier.
ImpactJS is one of the more tested-and-true HTML5 game engines with the initial release all the way back at the end of 2010. It is very well maintained and updated, and has a good-sized community backing it. There exists plenty of documentation - even two books on the subject of creating games with the engine.
LimeJS is a HTML5 game framework for building fast, native-experience games for all modern touchscreens and desktop browsers.
Crafty is a game engine that dates back to late 2010. Crafty makes it really easy to get started making JavaScript games.
Cocos2d-html5 is an open-source web 2D game framework, released under MIT License. It is a HTML5 version of Cocos2d-x project. The focus for Cocos2d-html5 development is around making Cocos2d cross platforms between browsers and native application.
Phaser is based heavily on Flixel. It is maintained by Richard Davey (Photon Storm) who has been very active in the HTML5 community for years.
Goo is a 3D JavaScript gaming engine entirely built on WebGL/HTML5
LycheeJS is a JavaScript Game library that offers a complete solution for prototyping and deployment of HTML5 Canvas, WebGL or native OpenGL(ES) based games inside the Web Browser or native environments.
Quintus is an HTML5 game engine designed to be modular and lightweight, with a concise JavaScript-friendly syntax.
Kiwi.js is a fun and friendly Open Source HTML5 Game Engine. Some people call it the WordPress of HTML5 game engines
Panda.js is a HTML5 game engine for mobile and desktop with Canvas and WebGL rendering.
Rot.js is a set of JavaScript libraries, designed to help with a roguelike development in browser environment.
Isogenic is an advanced game engine that provides the most advanced networking and realtime multiplayer functionality available in any HTML 5 game engine. The system is based on entity streaming and includes powerful simulation options and client-side entity interpolation from delta updates.
Super-fast 3D framework for Web Applications & Games. Based on Three.js. Includes integrated physics support and ReactJS integration.
Knowing your tools can make a significant difference when it comes to getting things done. Despite JavaScript's reputation as being difficult to debug, if you keep a couple of tricks up your sleeve errors and bugs will take less time to resolve.
We've put together a list of 16 debugging tips that you may not know, but might want to keep in mind for next time you find yourself needing to debug your JavaScript code!
Most of these tips are for Chrome and Firefox, although many will also work with other inspectors.
After console.log, debugger is my favorite quick and dirty debugging tool. If you place a debugger; line in your code, Chrome will automatically stop there when executing. You can even wrap it in conditionals, so it only runs when you need it.
if (thisThing) {
debugger; }
Sometimes, you have a complex set of objects that you want to view. You can either console.log them and scroll through the list, or break out the console.table helper. It makes it easier to see what you're dealing with!
var animals = [
 { animal: 'Horse', name: 'Henry', age: 43 },
{ animal: 'Dog', name: 'Fred', age: 13 },
{ animal: 'Cat', name: 'Frodo', age: 18 }
];
console.table(animals);
Will output:

While having every single mobile device on your desk would be awesome, it's not feasible in the real world. How about resizing your viewport instead? Chrome provides you with everything you need. Jump into your inspector and click the toggle device mode button. Watch your media queries come to life!
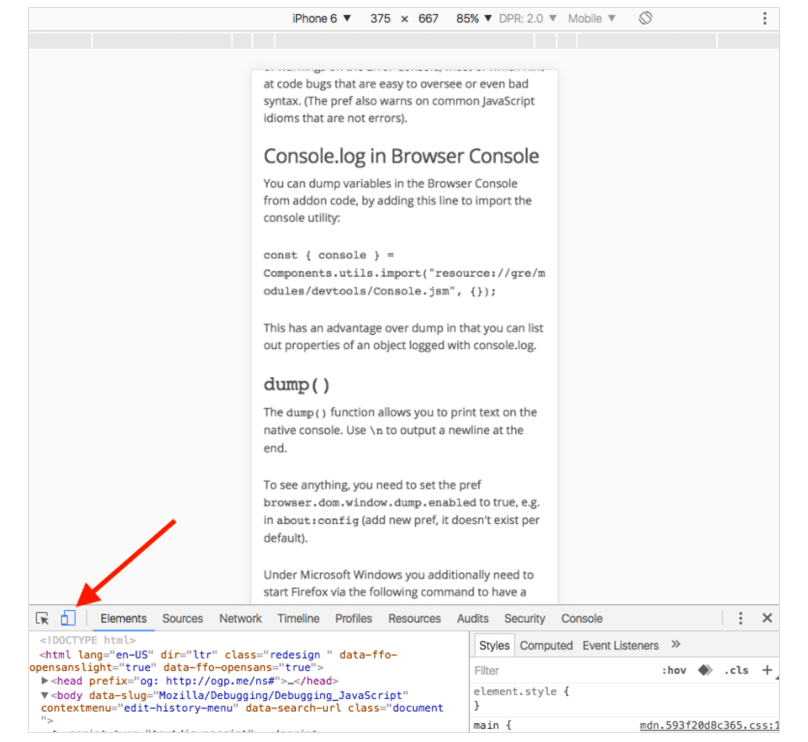
Mark a DOM element in the elements panel and use it in your console. Chrome Inspector keeps the last five elements in its history so that the final marked element displays with $0, the second to last marked element $1 and so on. If you mark following items in order 'item-4′, 'item-3', 'item-2', 'item-1', 'item-0' then you can access the DOM nodes like this in the console:

It can be super useful to know exactly how long something has taken to execute, especially when debugging slow loops. You can even set up multiple timers by assigning a label to the method. Let's see how it works:
console.time('Timer1');
var items = [];
for(var i = 0; i < 100000; i++){ items.push({index: i}); }
console.timeEnd('Timer1');
Will output:

You probably know JavaScript frameworks produce a lot of code – quickly.
You will have a lot of views and be triggering a lot of events, so eventually you will come across a situation where you want to know what caused a particular function call. Since JavaScript is not a very structured language, it can sometimes be hard to get an overview of what happened and when. This is when console.trace (or just trace in the console) comes in handy to be able to debug JavaScript. Imagine you want to see the entire stack trace for the function call funcZ in the car instance on Line 33:
var car; var func1 = function() {
func2();
}
var func2 = function() {
func4();
} var func3 = function() { }
var func4 = function() {
 car = new Car();
car.funcX();
} var Car = function() {
 this.brand = 'volvo';
this.color = 'red';
this.funcX = function() {
    this.funcY();
}

this.funcY = function() {
    this.funcZ();
}

this.funcZ = function() {
    console.trace('trace car')
}
} func1(); var car; var func1 = function() {
func2();
} var func2 = function() {
func4();
} var func3 = function() { } var func4 = function() {
 car = new Car();
car.funcX();
} var Car = function() {
 this.brand = 'volvo';
this.color = 'red';
this.funcX = function() {
    this.funcY();
}

this.funcY = function() {
    this.funcZ();
}

 this.funcZ = function() {
    console.trace('trace car')
}
} func1();
Line 33 will output:

Now we can see that >func1> called >func2, > which called >func4>. >Func4> then created an instance of >Car> and then called the function >car.funcX>, and so on. Even though you think you know your script well this can still be quite handy. Let's say you want to improve your code. Get the trace and your great list of all related functions. Every single one is clickable, and you can now go back and forth between them. It's like a menu just for you.
Sometimes you may have an issue in production, and your source maps didn't quite make it to the server. Fear not. Chrome can unminify your Javascript files to a more human-readable format. The code won't be as helpful as your real code – but at the very least you can see what's happening. Click the {} Pretty Print button below the source viewer in the inspector.

Let's say you want to set a breakpoint in a function. The two most common ways to do that are:
>1. Find the line in your inspector and add a breakpoint
2. Add a debugger in your script>
>
In both of these solutions, you have to navigate manually around in your files to isolate the particular line you want to debug. What's probably less common is to use the console. Use debug(funcName) in the console and the script will stop when it reaches the function you passed in.
It's quick, but the downside is that it doesn't work on private or anonymous functions. Otherwise, it's probably the fastest way to find a function to debug. (Note: there's a function called console.debug which is not the same thing, despite the similar naming.)
var car; var func1 = function() {
func2();
}
var func2 = function() {
func4();
} var func3 = function() { }
var func4 = function() {
 car = new Car();
car.funcX();
} var Car = function() {
 this.brand = 'volvo';
this.color = 'red';
this.funcX = function() {
    this.funcY();
}

this.funcY = function() {
    this.funcZ();
}

this.funcZ = function() {
    console.trace('trace car')
}
} func1(); var car; var func1 = function() {
func2();
} var func2 = function() {
func4();
} var func3 = function() { } var func4 = function() {
 car = new Car();
car.funcX();
} var Car = function() {
 this.brand = 'volvo';
this.color = 'red';
this.funcX = function() {
    this.funcY();
}

this.funcY = function() {
    this.funcZ();
}

 this.funcZ = function() {
    console.trace('trace car')
}
} func1();
Type debug(car.funcY) in the console and the script will stop in debug mode when it gets a function call to car.funcY:

Today we often have a few libraries and frameworks on our web apps. Most of them are well tested and relatively bug-free. But, the debugger still steps into all the files that have no relevance for this debugging task. The solution is to black box the script you don't need to debug. This could also include your own scripts. Read more about debugging black box in this article.
In more complex debugging we sometimes want to output many lines. One thing you can do to keep a better structure of your outputs is to use more console functions, for example, console.log, console.debug, console.warn, console.info, console.error and so on. You can then filter them in your inspector. Sometimes this is not really what you want when you need to debug JavaScript. You can get creative and style your messages, if you so choose. Use CSS and make your own structured console messages when you want to debug JavaScript:
console.todo = function(msg) {
console.log(' % c % s % s % s', 'color: yellow; background - color: black;', '–', msg, '–');
}
console.important = function(msg) {
console.log(' % c % s % s % s', 'color: brown; font - weight: bold; text - decoration: underline;', '–', msg, '–');
}
console.todo("This is something that' s need to be fixed"); console.important('This is an important message');
Will output:

In the console.log() you can set %s for a string, %i for integers and %c for custom style. You can probably find better ways to use these styles. If you use a single page framework, you might want to have one style for view messages and another for models, collections, controllers and so on.
In the Chrome console, you can keep an eye on specific functions. Every time the function is called, it will be logged with the values that it was passed in.
var func1 = function(x, y, z) { //.... };
Will output:

This is a great way to see which arguments are passed into a function. Ideally, the console could tell how many arguments to expect, but it cannot. In the above example, func1 expects three arguments, but only two are passed in. If that's not handled in the code it could lead to a possible bug.
A faster way to do a querySelector in the console is with the dollar sign. $('css-selector') will return the first match of CSS selector. $$('css-selector') will return all of them. If you are using an element more than once, it's worth saving it as a variable.

Many developers are using Postman to play around with Ajax requests. Postman is excellent, but it can be a bit annoying to open up a new browser window, write new request objects and then test them.
Sometimes it's easier to use your browser. When you do, you no longer need to worry about authentication cookies if you are sending to a password-secure page.
This is how you would edit and resend requests in Firefox. Open up the Inspector and go to the Network tab. Right-click on the desired request and choose Edit and Resend.
Now you can change anything you want. Change the header and edit your parameters and hit resend.
Below I present a request twice with different properties:

The DOM can be a funny thing. Sometimes things change and you don't know why. However, when you need to debug JavaScript, Chrome lets you pause when a DOM element changes. You can even monitor its attributes. In Chrome Inspector, right-click on the element and pick a break on setting to use:

There are plenty of services and tools out there that can be used to audit your page's JavaScript and help you to find slowdowns or problems. One of those tools is Raygun Real User Monitoring. This can be useful for other reasons beyond locating JavaScript problems — slow loading external scripts, unnecessary CSS, oversized images. It can help you to become aware of JavaScript issues that are causing unintentionally long loading times, or failing to execute properly.
You'll also be able to measure improvements in JavaScript performance and track them over time.

Lastly, the tried and true breakpoint can be a success. Try using breakpoints in different ways for different situations.

You can click on an element and set a breakpoint, to stop execution when a certain element gets modified. You can also go into the Debugger tab or Sources tab (depending on your browser) in your developer tools, and set XHR breakpoints for any specific source to stop on Ajax requests. In the same location, you can also have it pause your code execution when exceptions occur. You can use these various kinds of breakpoints in your browser tools to maximize your chances of finding a bug while not having to invest time in outside tool sets.
Every modern browser has tools available within it to debug code. Let's take a look at some of the basic methods you might use to debug JavaScript using these browser tools, and then highlight each major browser and its dev tools in turn.
Outputting JavaScript debugging messages to the browser
>One of the easiest ways to debug JavaScript has always been to output data to the browser. Here are the three main ways to do so:Popping up messages with \
alert()\>
A tried and true method to debug JavaScript items, \alert()\will create a popup alert when your code meets a particular condition. The problem with alerts is that you end up with a series of popups. If you need more than one, they become unwieldy rather fast. This makes them more useful for a quick check of a value or to find out if a certain bit of code is executing, but not much more.Logging lines to console with \
console.log()\>
Logging to the console is the norm for JavaScript debugging. Adding a \console.log('foo');\line to your code will create a \foo\log entry in the JavaScript console of your respective dev tools set. This can be useful for a variety of reasons. For example, you can verify the value of a variable after you pass it to a method, or output the contents of an API response or results of a database query.Pausing code execution with the \
debugger\The \debugger;\statement will pause code execution wherever you insert it in the code. The \debugger\statement will function as a breakpoint, pausing code execution. This allows you to investigate with the dev tools while the code is in a paused state.
>
The Chrome Developer Tools are a quick way to debug your JavaScript code. You can open the Dev Tools to the Console tab by using the following shortcuts:
macOS \CMD\+\OPT\+\I\Windows \CTRL\+\SHIFT\+\I\The Chrome Developer Tools are some of the best in the industry, and many developers trust these tools for their day-to-day debugging needs. Chrome Developer Tools include the standard JavaScript console, as well as tools for network and performance monitoring and security features. The majority of JavaScript debugging takes place in the Console and the Network activity tabs.
If you work with React as well as with JavaScript, there is an extension available called React Developer Tools. This tool set adds a React tab to your dev tools window. The React tools allow you to inspect the contents of components. You can also view and edit their properties and state. The tools provide insight on the component which created the selected component, as well. If you use Chrome as your main development browser, and develop in React, it is well worth picking up this extension to make your React debugging easier.
Firefox users in the past have relied on Firebug, an extension which gave Firefox users a set of competitive developer tools. The Firefox Developer Tools included in the latest versions of Firefox absorbed the functionality of Firebug. This brings the Firefox browser and its built-in tool suite on par with Google Chrome.
To find the Firefox Developer Tools, take a look in the Tools menu under Web Developer. There, you will find the JavaScript console, and many other useful items.
Users of Safari have to enable the Safari Develop Menu to gain access to Safari's built in developer tools.
- Go to the Safari tab and choose Preferences
- Choose Advanced
- Enable the option titled Show Develop menu
in menu bar
Once you have followed the above steps, a Develop menu will appear in the toolbar. In the Develop menu, there are options to show the JavaScript Console, a debugger, a network traffic monitor, and an inspector for page elements. The Safari Dev Tools are comparable to the JavaScript debugging tools offered by Chrome. You can see the trend of improvement amongst the developer tools from all browsers, as they grow more capable of meeting the needs of developers.
>
Previously, Opera's built in developer tools suite was called Dragonfly. At one point it was a standalone project, then became a baked-in part of Opera, and included the standard dev tools items. It was particularly useful at remotely debugging another instance of Opera. After Opera 12, Opera began shipping with Chromium Dev Tools instead, which are opened and operated similarly to the standard Chrome Dev Tools described above.
Microsoft Edge is a modern browser that broke away from many of the preconceived negative views of Internet Explorer. As a result, Microsoft Edge includes an excellent dev tools package, which can be accessed via the same shortcut keys as the other options. These tools include a JavaScript console, as well as Network, Performance, and Memory tabs. More information about Edge dev tools can be found in the Microsoft Edge Developer Tools Guide.
The Firefox dev tools team maintains a standalone tool dubbed simply "debugger" that you can use to debug in either Firefox or Chrome, and you can switch between them as necessary to ensure that your application is functioning correctly in both. If you are willing to set this node app up with just a few simple steps, you can use it in lieu of using the in-browser tools in either browser, and get the same exact experience and identical comparison in both. Pretty neat!
Debugging the Node.js on your application's backend can be challenging. The following tools take advantage of the capabilities of the Node.js Inspector to assist you:
The Node Debug library for Node Inspector is a library can be included in your projects to assist you in implementing Node Inspector.
Node.js V8 Inspector Manager is a Chrome extension which adds Node Inspector tools to the Dev Tools in Chrome
The Visual Studio Code editor allows for easy built-in Node Inspector usage
- Click the Debug tab at the top
- Choose Open Configurations
- If none are set already, choose Node.js to
start with
- If you already have settings in the launch.json, you can hit Add Configuration to add the Node.js
configuration
For more information on the various parameters and configurations that VS Code can use when debugging Node.js, check out the Node.js debugging documentation.
A non-trivial amount of JavaScript development revolves around sending requests to APIs and receiving responses. These requests and responses are often in JSON format. Your application may need to conduct API requests for innumerable reasons, such as interacting with authentication servers, fetching calendars or news feeds, checking the weather, and countless others.
Postman is one of the best JavaScript debugging tools for troubleshooting the requests and responses in your application. Postman offers software for Windows, macOS, and Linux. With Postman, you can tweak requests, analyze responses, debug problems. Within the software, you can tailor clean transactions that you can then duplicate in your application.
Additionally, Postman has a feature called Collections. Collections allow you to save sets of requests and responses for your application or for an API. You save valuable time when collaborating with others or repeating the same testing tasks. When using Postman collections, you update the collection if necessary and then use it. This is much faster than repeatedly writing out every test.
ESLint is a linter for JavaScript. Linters will analyze code as it is written and identify a variety of basic syntax problems. The use of ESLint will allow you to catch errors, particularly easy to resolve but annoying ones such as missing brackets or typos, before executing the code. ESLint is available as a Node package. It has also been set up as a plugin for many code editors such as Sublime Text 3 and VS Code, which will then mark the offending errors right in your editor window.
JS Bin is one of the best JavaScript debugging tools for collaborative debugging of your JavaScript. It allows you to test and debug scripts right along with other people. You can run the JavaScript, see a debug console and the output of the scripts, add libraries and dependencies, and so much more. Pro accounts can also take their code private, as well as other benefits. One of the primary reasons you might consider using a tool like JS Bin is simplicity. In JS Bin, you can test the functionality of a small subset of your JavaScript in an isolated environment, without having to set an entire environment for it. When testing in JS Bin, you can be sure that your results aren't tainted by conflicting scripts or styles from other parts of your application. Another key feature of JS Bin is the immediate result you get from altering your JavaScript, HTML, or CSS. You can see your changes in real time. You can copy some code to JS Bin and have a working (or not working!) demo in no time. Then you are ready to debug it or share it.
It can be incredibly difficult to spot syntax errors or keys which have incorrect values when looking at unformatted JSON. If you have a condensed or minified JSON object, missing line returns, indentations, and spaces, it may be a challenge to read. You need to be able to quickly scan that object and check for errors in formatting or content. To do that, you will expand the object and format it, wasting valuable time. The JSON Formatter & Validator relieves that pain point, so we've added it to this list of what I feel are the best JavaScript debugging tools. Postman automatically formats the object and allows you to easily validate both its JSON syntax as well as the actual content. You simply paste your JSON in, and it outputs the correctly formatted version. The tool will even automatically validate syntax to RFC standards, depending on which you select, if any.
Webpack is a bundling tool used by developers for all manner of sites and applications. If you use Webpack to do your bundling, you have the advantage of the stats data available from the tool.
This data can range from module contents, build logs and errors, relationships that exist between modules, and much more. If you already use Webpack, this is an incredibly useful feature that sometimes gets overlooked. You can even use pre-built tools, such as the Webpack Analyse Web App, to visualize the stats that you generate from Webpack.
SessionStack is a monitoring software that provides you with a set of monitoring tools. These tools collect client-side data and assist you in figuring out exactly what your clients are doing on your website. In situations where problems occur, being able to track precisely what happened and how is vital.
This is where SessionStack shines. SessionStack uses a video replay to help developers replicate user issues and error conditions.
Tip: If you use both SessionStack and Raygun, you can attach SessionStack video replays to Raygun reports.
Tired of spending time digging through logs to find your JavaScript errors? Raygun Crash Reporting is the answer, and has everything you need to find and assess the impact of JavaScript bugs and performance problems. It's quick and easy to set up:
1. Sign up for a free trial of Raygun
2. Insert the following
snippet somewhere in your application's \ <head>\ to fetch Raygun's script
asynchronously.
! function ( a, b, c, d, e, f, g, h ) {
    a.RaygunObject = e, a\[ e\ ] = a\[ e\ ] || function () {
            ( a\[ e\ ].o = a\[ e\ ].o || \[ \] ).push( arguments )
        }, f = b.createElement( c ), g = b.getElementsByTagName( c )\[ 0\ ],
        f.async = 1, f.src = d, g.parentNode.insertBefore( f, g ), h = a.onerror, a.onerror = function ( b, c, d, f, g ) {
            h && h( b, c, d, f, g ), g || ( g = new Error( b ) ), a\[ e\ ].q = a\[ e\ ].q || \[ \], a\[ e\ ].q.push( {
                e: g
            } )
        }
}( window, document, "script", ",//cdn.raygun.io/raygun4js/raygun.min.js", "rg4js" );
3. Paste the following lines just before your body tag (replacing the API key with yours, which you can get from your Raygun dashboard:
rg4js('apiKey', 'paste_your_api_key_here'); rg4js('enableCrashReporting', true);
4. At this point, Raygun will begin collecting data and notifying you of issues.
As I continue to learn web development I will do my best to catalogue the things that spare my time energy and frustration.
C:\Users\15512\Google Drive\a-A-September\misc\Extension Guides\Guides\00RUNNINGCOMPILATION.md
🦖🐒🧬🧑🤝🧑🧮📺💻🖧📚🖥️⌨️💾📀📁🔗🤖🧑🤝🧑🧬🐒🦖
<🧑💻👩🧑👨🏻💻👨🏿💻(🟥💊)-OR-(🟦💊)🚁⚔️👩💻🧑💻☮️>
markdown-pdf.styles
- markdown-pdf.stylesRelativePathFile - markdown-pdf.includeDefaultStyles - Syntax highlight options - markdown-pdf.highlight - markdown-pdf.highlightStyle - Markdown options - markdown-pdf.breaks
- Emoji options - markdown-pdf.emoji -
Configuration options - markdown-pdf.executablePath - Common
Options - markdown-pdf.scale - PDF
options - markdown-pdf.displayHeaderFooter - PNG JPEG options
<---------------------------------------------------------------------->
<---------------------------------------------------------------------->
<---------------------------------------------------------------------->
<---------------------------------------------------------------------->
<---------------------------------------------------------------------->
<---------------------------------------------------------------------->
<---------------------------------------------------------------------->
<---------------------------------------------------------------------->
<---------------------------------------------------------------------->
<---------------------------------------------------------------------->
<---------------------------------------------------------------------->
<---------------------------------------------------------------------->
<---------------------------------------------------------------------->
<---------------------------------------------------------------------->
<---------------------------------------------------------------------->
<---------------------------------------------------------------------->
<---------------------------------------------------------------------->
<---------------------------------------------------------------------->
<---------------------------------------------------------------------->
<---------------------------------------------------------------------->
<---------------------------------------------------------------------->
<---------------------------------------------------------------------->
<---------------------------------------------------------------------->
<---------------------------------------------------------------------->
<---------------------------------------------------------------------->
<---------------------------------------------------------------------->
<---------------------------------------------------------------------->
<---------------------------------------------------------------------->
<---------------------------------------------------------------------->
<---------------------------------------------------------------------->
<---------------------------------------------------------------------->
<---------------------------------------------------------------------->
<---------------------------------------------------------------------->
<---------------------------------------------------------------------->
<---------------------------------------------------------------------->
<---------------------------------------------------------------------->
<---------------------------------------------------------------------->
<---------------------------------------------------------------------->
<---------------------------------------------------------------------->
<---------------------------------------------------------------------->
<---------------------------------------------------------------------->
<---------------------------------------------------------------------->
<---------------------------------------------------------------------->
<---------------------------------------------------------------------->
<---------------------------------------------------------------------->
<---------------------------------------------------------------------->
<---------------------------------------------------------------------->
<---------------------------------------------------------------------------------->
<---------------------------------------------------------------------->
<------------------------------------------------------------------------------------------>
<---------------------------------------------------------------------->
<---------------------------------------------------------------------->
<---------------------------------------------------------------------->
<------------------------------------------------------------------------------------------>
<---------------------------------------------------------------------->
<---------------------------------------------------------------------->
<------------------------------------------------------------------------------------------
<---------------------------------------------------------------------->
<---------------------------------------------------------------------->
<---------------------------------------------------------------------->
<---------------------------------------------------------------------->
<---------------------------------------------------------------------->
<---------------------------------------------------------------------->
<---------------------------------------------------------------------->
<---------------------------------------------------------------------->
<---------------------------------------------------------------------->
<---------------------------------------------------------------------->
<🦖🐒🧬🧑🤝🧑🧮📺💻🖧📚🖥️⌨️💾📀📁🔗🤖🧑🤝🧑🧬🐒🦖🧑💻👩🧑👨🏻💻👨🏿💻(🟥💊)-OR-(🟦💊)🚁⚔️👩💻🧑💻☮️>
::: warning
*here be dragons*
:::
OUTPUT
html
<div class="warning">
    <p><em>here be dragons</em></p>
</div>
### markdown-it-plantuml
INPUT
@startuml
Bob -[#red]> Alice : hello
Alice -[#0000FF]->Bob : ok
@enduml
OUTPUT
 ### markdown-it-include
Include markdown fragment files:
### markdown-it-include
Include markdown fragment files: :
.
```
├── [plugins]
│ └── README.md
├── CHANGELOG.md
└── README.md
```
INPUT
```
README Content
:[Plugins](./plugins/README.md)
:[Changelog](CHANGELOG.md)
```
OUTPUT
```
Content of README.md
Content of plugins/README.md
Content of CHANGELOG.md
```
### mermaid
INPUT
<pre>
```mermaid
stateDiagram
[*] --> First
state First {
[*] --> second
second --> [*]
}
```
</pre>
OUTPUT

## Install
Chromium download starts automatically when Markdown PDF is installed and Markdown file is first opened with Visual Studio Code.
However, it is time-consuming depending on the environment because of its large size (~ 170Mb Mac, ~ 282Mb Linux, ~ 280Mb Win).
During downloading, the messageInstalling Chromium is displayed in the status bar.
If you are behind a proxy, set thehttp.proxy option to settings.json and restart Visual Studio Code.
If the download is not successful or you want to avoid downloading every time you upgrade Markdown PDF, please specify the installed [Chrome](https://www.google.co.jp/chrome/) or 'Chromium' with [markdown-pdf.executablePath](#markdown-pdfexecutablepath) option.
<div class="page"/>
## Usage
### Command Palette
1. Open the Markdown file
1. PressF1 orCtrl+Shift+P 1. Typeexport and select below
-markdown-pdf: Export (settings.json) -markdown-pdf: Export (pdf) -markdown-pdf: Export (html) -markdown-pdf: Export (png) -markdown-pdf: Export (jpeg) -markdown-pdf: Export (all: pdf, html, png, jpeg) 
### Menu
1. Open the Markdown file
1. Right click and select below
-markdown-pdf: Export (settings.json) -markdown-pdf: Export (pdf) -markdown-pdf: Export (html) -markdown-pdf: Export (png) -markdown-pdf: Export (jpeg) -markdown-pdf: Export (all: pdf, html, png, jpeg) 
### Auto convert
1. Add"markdown-pdf.convertOnSave": true option to **settings.json**
1. Restart Visual Studio Code
1. Open the Markdown file
1. Auto convert on save
## Extension Settings
[Visual Studio Code User and Workspace Settings](https://code.visualstudio.com/docs/customization/userandworkspace)
1. Select **File > Preferences > UserSettings or Workspace Settings**
1. Find markdown-pdf settings in the **Default Settings**
1. Copymarkdown-pdf.` settings
1. Paste to the *settings.json, and change the value
 ## Options
### List
| Category | Option name | Configuration scope |
| ----------------------------------------------------------- | -------------------------------------------------------------------------------------------- | --------------------------------------------------------------------------------------------------------------------- |
| Save options | markdown-pdf.type | |
| | markdown-pdf.convertOnSave | |
| | markdown-pdf.convertOnSaveExclude | |
| | markdown-pdf.outputDirectory | |
| | markdown-pdf.outputDirectoryRelativePathFile | |
| Styles options | markdown-pdf.styles | |
| | markdown-pdf.stylesRelativePathFile | |
| | markdown-pdf.includeDefaultStyles | |
| Syntax highlight options | markdown-pdf.highlight | |
| | markdown-pdf.highlightStyle | |
| Markdown options | markdown-pdf.breaks | |
| Emoji options | markdown-pdf.emoji | |
| Configuration options | markdown-pdf.executablePath | |
| Common Options | markdown-pdf.scale | |
| PDF options | markdown-pdf.displayHeaderFooter | resource |
| | markdown-pdf.headerTemplate | resource |
| | markdown-pdf.footerTemplate | resource |
| | markdown-pdf.printBackground | resource |
| | markdown-pdf.orientation | resource |
| | markdown-pdf.pageRanges | resource |
| | markdown-pdf.format | resource |
| | markdown-pdf.width | resource |
| | markdown-pdf.height | resource |
| | markdown-pdf.margin.top | resource |
| | markdown-pdf.margin.bottom | resource |
| | markdown-pdf.margin.right | resource |
| | markdown-pdf.margin.left | resource |
| PNG JPEG options | markdown-pdf.quality | |
| | markdown-pdf.clip.x | |
| | markdown-pdf.clip.y | |
| | markdown-pdf.clip.width | |
| | markdown-pdf.clip.height | |
| | markdown-pdf.omitBackground | |
| PlantUML options | markdown-pdf.plantumlOpenMarker | |
| | markdown-pdf.plantumlCloseMarker | |
| | markdown-pdf.plantumlServer | |
| markdown-it-include options | markdown-pdf.markdown-it-include.enable | |
| mermaid options | markdown-pdf.mermaidServer | |
### Save options
####
## Options
### List
| Category | Option name | Configuration scope |
| ----------------------------------------------------------- | -------------------------------------------------------------------------------------------- | --------------------------------------------------------------------------------------------------------------------- |
| Save options | markdown-pdf.type | |
| | markdown-pdf.convertOnSave | |
| | markdown-pdf.convertOnSaveExclude | |
| | markdown-pdf.outputDirectory | |
| | markdown-pdf.outputDirectoryRelativePathFile | |
| Styles options | markdown-pdf.styles | |
| | markdown-pdf.stylesRelativePathFile | |
| | markdown-pdf.includeDefaultStyles | |
| Syntax highlight options | markdown-pdf.highlight | |
| | markdown-pdf.highlightStyle | |
| Markdown options | markdown-pdf.breaks | |
| Emoji options | markdown-pdf.emoji | |
| Configuration options | markdown-pdf.executablePath | |
| Common Options | markdown-pdf.scale | |
| PDF options | markdown-pdf.displayHeaderFooter | resource |
| | markdown-pdf.headerTemplate | resource |
| | markdown-pdf.footerTemplate | resource |
| | markdown-pdf.printBackground | resource |
| | markdown-pdf.orientation | resource |
| | markdown-pdf.pageRanges | resource |
| | markdown-pdf.format | resource |
| | markdown-pdf.width | resource |
| | markdown-pdf.height | resource |
| | markdown-pdf.margin.top | resource |
| | markdown-pdf.margin.bottom | resource |
| | markdown-pdf.margin.right | resource |
| | markdown-pdf.margin.left | resource |
| PNG JPEG options | markdown-pdf.quality | |
| | markdown-pdf.clip.x | |
| | markdown-pdf.clip.y | |
| | markdown-pdf.clip.width | |
| | markdown-pdf.clip.height | |
| | markdown-pdf.omitBackground | |
| PlantUML options | markdown-pdf.plantumlOpenMarker | |
| | markdown-pdf.plantumlCloseMarker | |
| | markdown-pdf.plantumlServer | |
| markdown-it-include options | markdown-pdf.markdown-it-include.enable | |
| mermaid options | markdown-pdf.mermaidServer | |
### Save options
#### markdown-pdf.type
- Output format: pdf, html, png, jpeg
- Multiple output formats support
- Default: pdf
javascript
"markdown-pdf.type": [
  "pdf",
  "html",
  "png",
  "jpeg"
],
#### markdown-pdf.convertOnSave
- Enable Auto convert on save
- boolean. Default: false
- To apply the settings, you need to restart Visual Studio Code
#### markdown-pdf.convertOnSaveExclude
- Excluded file name of convertOnSave option
javascript
"markdown-pdf.convertOnSaveExclude": [
  "^work",
  "work.md$",
  "work|test",
  "[0-9][0-9][0-9][0-9]-work",
  "work\\test"  // All '\' need to be written as '\\' (Windows)
],
#### markdown-pdf.outputDirectory
- Output Directory
- All \ need to be written as \\ (Windows)
javascript
"markdown-pdf.outputDirectory": "C:\\work\\output",
- Relative path
- If you open the Markdown file, it will be interpreted as a relative path from the file
- If you open a folder, it will be interpreted as a relative path from the root folder
- If you open the workspace, it will be interpreted as a relative path from the each root folder
- See Multi-root Workspaces
javascript
"markdown-pdf.outputDirectory": "output",
- Relative path (home directory)
- If path starts with ~, it will be interpreted as a relative path from the home directory
javascript
"markdown-pdf.outputDirectory": "~/output",
- If you set a directory with a relative path, it will be created if the directory does not exist
- If you set a directory with an absolute path, an error occurs if the directory does not exist
#### markdown-pdf.outputDirectoryRelativePathFile
- If markdown-pdf.outputDirectoryRelativePathFile option is set to true, the relative path set with markdown-pdf.outputDirectory is interpreted as relative from the file
- It can be used to avoid relative paths from folders and workspaces
- boolean. Default: false
### Styles options
#### markdown-pdf.styles
- A list of local paths to the stylesheets to use from the markdown-pdf
- If the file does not exist, it will be skipped
- All \ need to be written as \\ (Windows)
javascript
"markdown-pdf.styles": [
  "C:\\Users\\<USERNAME>\\Documents\\markdown-pdf.css",
  "/home/<USERNAME>/settings/markdown-pdf.css",
],
- Relative path
- If you open the Markdown file, it will be interpreted as a relative path from the file
- If you open a folder, it will be interpreted as a relative path from the root folder
- If you open the workspace, it will be interpreted as a relative path from the each root folder
- See Multi-root Workspaces
javascript
"markdown-pdf.styles": [
  "markdown-pdf.css",
],
- Relative path (home directory)
- If path starts with ~, it will be interpreted as a relative path from the home directory
javascript
"markdown-pdf.styles": [
  "~/.config/Code/User/markdown-pdf.css"
],
- Online CSS (https://xxx/xxx.css) is applied correctly for JPG and PNG, but problems occur with PDF #67
javascript
"markdown-pdf.styles": [
  "https://xxx/markdown-pdf.css"
],
#### markdown-pdf.stylesRelativePathFile
- If markdown-pdf.stylesRelativePathFile option is set to true, the relative path set with markdown-pdf.styles is interpreted as relative from the file
- It can be used to avoid relative paths from folders and workspaces
- boolean. Default: false
#### markdown-pdf.includeDefaultStyles
- Enable the inclusion of default Markdown styles (VSCode, markdown-pdf)
- boolean. Default: true
### Syntax highlight options
#### markdown-pdf.highlight
- Enable Syntax highlighting
- boolean. Default: true
#### markdown-pdf.highlightStyle
- Set the style file name. for example: github.css, monokai.css ...
- file name list
- demo site : https://highlightjs.org/static/demo/
javascript
"markdown-pdf.highlightStyle": "github.css",
### Markdown options
#### markdown-pdf.breaks
- Enable line breaks
- boolean. Default: false
### Emoji options
#### markdown-pdf.emoji
- Enable emoji. EMOJI CHEAT SHEET
- boolean. Default: true
### Configuration options
#### markdown-pdf.executablePath
- Path to a Chromium or Chrome executable to run instead of the bundled Chromium
- All \ need to be written as \\ (Windows)
- To apply the settings, you need to restart Visual Studio Code
javascript
"markdown-pdf.executablePath": "C:\\Program Files (x86)\\Google\\Chrome\\Application\\chrome.exe"
### Common Options
#### markdown-pdf.scale
- Scale of the page rendering
- number. default: 1
javascript
"markdown-pdf.scale": 1
### PDF options
- pdf only. puppeteer page.pdf options
#### markdown-pdf.displayHeaderFooter
- Enable display header and footer
- boolean. Default: true
#### markdown-pdf.headerTemplate
#### markdown-pdf.footerTemplate
- HTML template for the print header and footer
- <span class='date'></span> : formatted print date
- <span class='title'></span> : markdown file name
- <span class='url'></span> : markdown full path name
- <span class='pageNumber'></span> : current page number
- <span class='totalPages'></span> : total pages in the document
javascript
"markdown-pdf.headerTemplate": "<div style=\"font-size: 9px; margin-left: 1cm;\"> <span class='title'></span></div> <div style=\"font-size: 9px; margin-left: auto; margin-right: 1cm; \"> <span class='date'></span></div>",
javascript
"markdown-pdf.footerTemplate": "<div style=\"font-size: 9px; margin: 0 auto;\"> <span class='pageNumber'></span> / <span class='totalPages'></span></div>",
#### markdown-pdf.printBackground
- Print background graphics
- boolean. Default: true
#### markdown-pdf.orientation
- Paper orientation
- portrait or landscape
- Default: portrait
#### markdown-pdf.pageRanges
- Paper ranges to print, e.g., '1-5, 8, 11-13'
- Default: all pages
javascript
"markdown-pdf.pageRanges": "1,4-",
#### markdown-pdf.format
- Paper format
- Letter, Legal, Tabloid, Ledger, A0, A1, A2, A3, A4, A5, A6
- Default: A4
javascript
"markdown-pdf.format": "A4",
#### markdown-pdf.width
#### markdown-pdf.height
- Paper width / height, accepts values labeled with units(mm, cm, in, px)
- If it is set, it overrides the markdown-pdf.format option
javascript
"markdown-pdf.width": "10cm",
"markdown-pdf.height": "20cm",
#### markdown-pdf.margin.top
#### markdown-pdf.margin.bottom
#### markdown-pdf.margin.right
#### markdown-pdf.margin.left
- Paper margins.units(mm, cm, in, px)
javascript
"markdown-pdf.margin.top": "1.5cm",
"markdown-pdf.margin.bottom": "1cm",
"markdown-pdf.margin.right": "1cm",
"markdown-pdf.margin.left": "1cm",
### PNG JPEG options
- png and jpeg only. puppeteer page.screenshot options
#### markdown-pdf.quality
- jpeg only. The quality of the image, between 0-100. Not applicable to png images
javascript
"markdown-pdf.quality": 100,
#### markdown-pdf.clip.x
#### markdown-pdf.clip.y
#### markdown-pdf.clip.width
#### markdown-pdf.clip.height
- An object which specifies clipping region of the page
- number
javascript
//  x-coordinate of top-left corner of clip area
"markdown-pdf.clip.x": 0,

// y-coordinate of top-left corner of clip area
"markdown-pdf.clip.y": 0,

// width of clipping area
"markdown-pdf.clip.width": 1000,

// height of clipping area
"markdown-pdf.clip.height": 1000,
#### markdown-pdf.omitBackground
- Hides default white background and allows capturing screenshots with transparency
- boolean. Default: false
### PlantUML options
#### markdown-pdf.plantumlOpenMarker
- Oppening delimiter used for the plantuml parser.
- Default: @startuml
#### markdown-pdf.plantumlCloseMarker
- Closing delimiter used for the plantuml parser.
- Default: @enduml
#### markdown-pdf.plantumlServer
- Plantuml server. e.g. http://localhost:8080
- Default: http://www.plantuml.com/plantuml
- For example, to run Plantuml Server locally #139 :
docker run -d -p 8080:8080 plantuml/plantuml-server:jetty
plantuml/plantuml-server - Docker Hub
### markdown-it-include options
#### markdown-pdf.markdown-it-include.enable
- Enable markdown-it-include.
- boolean. Default: true
### mermaid options
#### markdown-pdf.mermaidServer
- mermaid server
- Default: https://unpkg.com/mermaid/dist/mermaid.min.js
## FAQ
### How can I change emoji size ?
1. Add the following to your stylesheet which was specified in the markdown-pdf.styles
css
.emoji {
    height: 2em;
}
### Auto guess encoding of files
Using files.autoGuessEncoding option of the Visual Studio Code is useful because it automatically guesses the character code. See files.autoGuessEncoding
javascript
"files.autoGuessEncoding": true,
### Output directory
If you always want to output to the relative path directory from the Markdown file.
For example, to output to the "output" directory in the same directory as the Markdown file, set it as follows.
javascript
"markdown-pdf.outputDirectory" : "output",
"markdown-pdf.outputDirectoryRelativePathFile": true,
### Page Break
Please use the following to insert a page break.
html
<div class="page" />
## Known Issues
### markdown-pdf.styles option
- Online CSS (https://xxx/xxx.css) is applied correctly for JPG and PNG, but problems occur with PDF. #67
## Release Notes
### <========(Open in External App)========>
VSCode is a very excellent editor, but sometime I prefer to use external application to work with some files. For example, I like to use typora to edit the markdown files. Usually, I will right click to the file, and select Reveal in File Explorer , then open the file using external application.
But, with this extension, you can do it more simply. Just right click to the file, and select Open in External App, that file would be opened by system default application. You can also use this way to open .psd files with photoshop, .html files with browser, and so on...
Extensions: Install Extensions command from Command Palette.YuTengjing.open-in-external-app into the search form and install.Read the extension installation guide for more details.
Via custom configuration, you can make extensions more powerful. For example, to see the rendering differences, You can open one HTML in chrome and Firefox at the same time.
Example configuration:
{
    "openInExternalApp.openMapper": [
        {
            // represent file extension name
            "extensionName": "html",
            // the external applications to open the file which extension name is html
            "apps": [
                // openCommand can be shell command or the complete executable application path
                // title will be shown in the drop list if there are several apps
                {
                    "title": "chrome",
                    "openCommand": "C:\\Program Files (x86)\\Google\\Chrome\\Application\\chrome.exe"
                },
                {
                    "title": "firefox",
                    "openCommand": "C:\\Program Files\\Firefox Developer Edition\\firefox.exe",
                    // open in firefox under private mode
                    "args": ["-private-window"]
                }
            ]
        },
        {
            "extensionName": "tsx",
            // apps can be Object array or just is openCommand
            // the code is command you can access from shell
            "apps": "code"
        },
        {
            "extensionName": "psd",
            "apps": "/path/to/photoshop.exe"
        }
    ]
}

In VSCode, Right-clicking is different from right-clicking while holding alt key. If you just right click the file, you will see the command Open in External App, but if you right click file while holding alt key, you will see the command Open in Multiple External Apps.
This extension use two ways to open file in external applications.
This package has one limit that can't open a file which is also made by electron. For example, you can't open md file in typora using this package. The openCommand, args configuration item is also supported by this package. When isElectronApp: false(by default), extension will use this way.
vscode.env.openExternal(target: Uri)This API has one limit that can't open file path which includes Non-ascii characters, but support open file in application which is made by electron. This API can only pass one argument target, so openCommand and args configuration item is not work.
If you want to open file in application which is made by electron, you can choose one of two ways:
don not config it in VSCode settings, and set the default application of your operation system to open that file format.
using isElectronApp option:
 {
      "extensionName": "md",
      "isElectronApp": true,
 }
multiple apps example:
 {
      "extensionName": "md",
      "apps": [
          {
              "title": "typora",
              "isElectronApp": true,
              // following config item is not work
              // "openCommand": "/path/to/typora.exe",
              // "args": ["--slient"]
          },
          {
              "title": "idea",
              "extensionName": "md",
              "openCommand": "/path/to/idea.exe",
              "args": ["--slient"],
          }
      ]
  }
A wrapper around node-change-case for Visual Studio Code. Quickly change the case of the current selection or current word.
If only one word is selected, the extension.changeCase.commands command gives you a preview of each option:

change-case also works with multiple cursors:

Note: Please read the documentation on how to use multiple cursors in Visual Studio Code.
Launch VS Code Quick Open (Ctrl/Cmd+P), paste the following command, and press enter.
ext install change-case
extension.changeCase.commands: List all Change Case commands, with preview if only one word is selectedextension.changeCase.camel: Change Case 'camel': Convert to a string with the separators denoted by having the next letter capitalisedextension.changeCase.constant: Change Case 'constant': Convert to an upper case, underscore separated stringextension.changeCase.dot: Change Case 'dot': Convert to a lower case, period separated stringextension.changeCase.kebab: Change Case 'kebab': Convert to a lower case, dash separated string (alias for param case)extension.changeCase.lower: Change Case 'lower': Convert to a string in lower caseextension.changeCase.lowerFirst: Change Case 'lowerFirst': Convert to a string with the first character lower casedextension.changeCase.no: Convert the string without any casing (lower case, space separated)extension.changeCase.param: Change Case 'param': Convert to a lower case, dash separated stringextension.changeCase.pascal: Change Case 'pascal': Convert to a string denoted in the same fashion as camelCase, but with the first letter also capitalisedextension.changeCase.path: Change Case 'path': Convert to a lower case, slash separated stringextension.changeCase.sentence: Change Case 'sentence': Convert to a lower case, space separated stringextension.changeCase.snake: Change Case 'snake': Convert to a lower case, underscore separated stringextension.changeCase.swap: Change Case 'swap': Convert to a string with every character case reversedextension.changeCase.title: Change Case 'title': Convert to a space separated string with the first character of every word upper casedextension.changeCase.upper: Change Case 'upper': Convert to a string in upper caseextension.changeCase.upperFirst: Change Case 'upperFirst': Convert to a string with the first character upper casedCreate an issue, or ping @waynemaurer on Twitter.
Easily insert and remove console.log statements, by @whtouche

This extension is available for free in the Visual Studio Code Marketplace
VS Code comes with a ton of features for Node.js development out of the box. This extension pack adds more!
These are some of my favorite extensions to make Node.js development easier and fun.
package.json.Open a PR and I'd be happy to take a look.
Enjoy!
Install via VS Code Marketplace
Helps you identify reoccurring CSS class name combinations in your markup. This is especially useful if you are working with an utility-first CSS framework like TailwindCSS, Tachyons,…
Class names are highlighted if they have more than 3 unique classes and this combination of classes appears more than 3 times in the current document. These numbers can be changed in the settings.
Hovering over classes highlights all other elements with the same combination of classes.
The order of the class names does not matter.
See CHANGELOG.
Extension for Visual Studio Code - JavaScript Snippets for fast development
How fast do you want to be to transform an idea into code?
It's not an extension that forces you to remember some "custom prefix" to call the snippets. Treedbox Javascript was designed to serve snippets in the most logical way, delivering the most commons code structures and combinations to make your combo's code speedy and powerful.
Javascript snippets Visual Studio Code Extension for fast development.
By: Jonimar Marques Policarpo at Treedbox
Screenshot 1: Using snippet for fetch DELETE:

Screenshot 2: Accessing all fetch snippets:

Launch VS Code Quick Open (Ctrl+P), paste the following command, and press enter
ext install treedbox.treedboxjavascript
Or search for treedbox in the VS Code Extensions tab.
![]()
GitHub: https://github.com/treedbox/treedboxjavascript
VS Code extension: https://marketplace.visualstudio.com/items?itemName=treedbox.treedboxjavascript
Version 1.0.0: 501 javascript snippets!
fetchGET, fetchPOST, fetchPUT, fetchDELETE;URLcreateObjectURL, URLrevokeObjectURL;parseInt.Including an extra complete functions as MathRandomCompleteFunc or randomCompleteFunc:
const random = (min,max) => Math.floor(Math.random() * (max - min + 1)) + min
and many others Extras that you will find out when you need it :)
in a .js file or in a .html file, between the HTML tag <script></script>, type: fetchblob and press "Tab/Enter" to generate:
 fetch(url)
  .then(response => response.blob())
  .then(data =>{
      console.log('data:',data)
  }).catch(error => console.log('ERROR:',error))
Like fetchblob, you have a lot of snippets to help you with import, forEach, map, generator and so on.
https://github.com/treedbox/treedboxjavascript/
Display pdf in VSCode.

To not use sample pdf.
Remove sample pdf called compressed.tracemonkey-pldi-09.pdf.
defaultUrl: {
  value: "", // "compressed.tracemonkey-pldi-09.pdf"
  kind: OptionKind.VIEWER
},
See CHANGELOG.md.
Please see LICENSE
This VSCode extension gives you superpowers in the form of JavaScript expressions, that can be used to map or sort multi-selections.


Cmd to select multiple regions.Cmd + Shift + P to open the command palette.Type "super" to show a list of available commands;
Custom map function
Type a JavaScript map callback function and press enter. Your function will get applied to each selection.
Map Presets
Pick a preset to use as the map function.
Custom sort function
Type a JavaScript sort comparison function and press enter to sort the selections.
Sort Presets
Pick a preset to use as the sort function.
Custom reduce function
Type a JavaScript reduce function and press enter to output the result after the selections.
Currently, only plaintext and markdown documents are supported, and only two snippets are available;
RT - Inserts the current time, rounded to 15 minutesTD - Calculates the time delta between two timesType a snippet, and the autocompletion menu should appear.
This extension contributes the following settings:
superpowers.mapPresets: List of map presets as an array of objects.
Example:
{
    "name": "replace with index",
    "function": "(_, i) => i + 1"
}
superpowers.sortPresets: List of sort presets as an array of objects.
Example:
{
    "name": "sort by codepoint",
    "function": "(a, b) => a.charCodeAt(0) - b.charCodeAt(0)"
}
A VSCode extension that generates README.md files
Created my free logo at LogoMakr.com
Smartly paste for Markdown.
Support Mac/Windows/Linux!.

Paste smart
Smartly paste in markdown by pressing 'Ctrl+Alt+V' ('Cmd+Alt+V' on Mac)

Download file
Use Markdown Download command (Linux or Windows: Ctrl+Alt+D, Mac: Cmd+Alt+D) to download file and insert link code into Markdown.

Ruby tag
Also if you want to write article for learning asian language like Chinese or Japanese, ruby tag(for example:聪明) may be useful. Now a ruby tag snippet are prepare for you, select some text and press 'Ctrl+Alt+T'.
<ruby>聪明<rp>(</rp><rt>pronunciation</rt><rp>)</rp></ruby>
This extension will not get the pronunciation for you in this version. You have to replace 'pronunciation' by yourself.
Insert latex math symbol and emoji
You can insert latex math symbol and emoji to any text file, such as Julia source file.
press 'Ctrl+Alt+\' or input "Insert latex math symbol" in vscode command panel, then input latex symbol name and choose symbol you want.

MarkdownPaste.path
The folder path that image will be saved. Support absolute path and relative path and the following predefined variables
Default value is ./, mean save image in the folder contains current file.
MarkdownPaste.silence
enable/disable showing confirm box while paste image. Set this config option to true, filename confirm box will not be shown while paste image.
Default value is false
MarkdownPaste.enableImgTag
enable/disable using HTML img tag with width and height for pasting image. If this option be enabled, you can input width and height by using <filepath>[,width,height] in filename confirm input box. for example input \abc\filename.png,200,100, then <img src='\abc\filename.png' width='200' height='100' /> will be inserted. Note that if MarkdownPaste.silence be enabled, this option will be not work.
Default value is true
MarkdownPaste.rules
If you want to define your own regex to parse and replace content for pasting text. You can fill the following JSON, and set it to this option.
[{
    // rule 1
    "regex": "(https?:\/\/.*)", // your javascript style regex
    "options": "ig",            // regex option
    "replace": "[]($1)"         // replace string
},
{
    // rule 2
    "regex": "(https?:\/\/.*)", // your javascript style regex
    "options": "ig",            // regex option
    "replace": "[]($1)"         // replace string
},
...
]
The extension will try to test text content by regex defined in this option, if matched it whill replace content by using the TypeScript function string.replace().
Default value is
[{
"regex": "^(?:https?:\/\/)?(?:(?:(?:www\\.?)?youtube\\.com(?:\/(?:(?:watch\\?.*?v=([^&\\s]+).*)|))?))",
"options": "g",
"replace": "[](https://www.youtube.com/watch?v=$1)"
},
{
"regex": "^(https?:\/\/.*)",
"options": "ig",
"replace": "[]($1)"
}]
If you selected some text in editor, then extension will use it as the image file name. If not the image will be saved in this format: "Y-MM-DD-HH-mm-ss.png".
When you editing a markdown, it will pasted as markdown image link format , the imagePath will be resolve to relative path of current markdown file. In other file, it just paste the image's path.
A basic spell checker that works well with camelCase code.
The goal of this spell checker is to help catch common spelling errors while keeping the number of false positives low.
Load a TypeScript, JavaScript, Text, etc. file. Words not in the dictionary files will have a squiggly underline.
To see the list of suggestions:
After positioning the cursor in the word, any of the following should display the list of suggestions:
Quick Fix Editor action command:⌘+ . or Cmd+ .Ctrl+ .Open up VS Code and hit F1 and type ext select install and type code-spell-checker hit enter and reload window to enable.
"cSpell.language": "en" to "cSpell.language": "en-GB"To Enable or Disable spell checking for a file type:
Click on the Spell Checker status in the status bar:

On the Info screen, click the Enable link.
The concept is simple, split camelCase words before checking them against a list of known English words.
I is associated with Input and not HTMLThere are a few special cases to help will common spelling practices for ALL CAPS words.
Trailing s, ing, ies, es, ed are kept with the previous word.
sedIt is possible to add spell check settings into your source code. This is to help with file specific issues that may not be applicable to the entire project.
All settings are prefixed with cSpell: or spell-checker:.
disable -- turn off the spell checker for a section of code.enable -- turn the spell checker back on after it has been turned off.ignore -- specify a list of words to be ignored.words -- specify a list of words to be considered correct and will appear in the suggestions list.ignoreRegExp -- Any text matching the regular expression will NOT be checked for spelling.includeRegExp -- Only text matching the collection of includeRegExp will be checked.enableCompoundWords / disableCompoundWords -- Allow / disallow words like: "stringlength".It is possible to disable / enable the spell checker by adding comments to your code.
/* cSpell:disable *//* spell-checker: disable *//* spellchecker: disable *//* cspell: disable-line *//* cspell: disable-next-line */
/* cSpell:enable *//* spell-checker: enable *//* spellchecker: enable */// cSpell:disable
const wackyWord = ["zaallano", "wooorrdd", "zzooommmmmmmm"];
/* cSpell:enable */
// Nest disable / enable is not Supported
// spell-checker:disable
// It is now disabled.
var liep = 1;
/* cspell:disable */
// It is still disabled
// cSpell:enable
// It is now enabled
const str = "goededag"; // <- will be flagged as an error.
// spell-checker:enable <- doesn't do anything
// cSPELL:DISABLE <-- also works.
// if there isn't an enable, spelling is disabled till the end of the file.
const str = "goedemorgen"; // <- will NOT be flagged as an error.
Ignore allows you the specify a list of words you want to ignore within the document.
// cSpell:ignore zaallano, wooorrdd
// cSpell:ignore zzooommmmmmmm
const wackyWord = ["zaallano", "wooorrdd", "zzooommmmmmmm"];
Note: words defined with ignore will be ignored for the entire file.
The words list allows you to add words that will be considered correct and will be used as suggestions.
// cSpell:words woorxs sweeetbeat
const companyName = "woorxs sweeetbeat";
Note: words defined with words will be used for the entire file.
In some programing language it is common to glue words together.
// cSpell:enableCompoundWords
char * errormessage;  // Is ok with cSpell:enableCompoundWords
int    errornumber;   // Is also ok.
Note: Compound word checking cannot be turned on / off in the same file. The last setting in the file determines the value for the entire file.
By default, the entire document is checked for spelling.
cSpell:disable/ cSpell:enable above allows you to block off sections of the document.
ignoreRegExp and includeRegExp give you the ability to ignore or include patterns of text.
By default the flags gim are added if no flags are given.
The spell checker works in the following way:
includeRegExpexcludeRegExp// cSpell:ignoreRegExp 0x[0-9a-f]+ -- will ignore c style hex numbers
// cSpell:ignoreRegExp /0x[0-9A-F]+/g -- will ignore upper case c style hex numbers.
// cSpell:ignoreRegExp g{5} h{5} -- will only match ggggg, but not hhhhh or 'ggggg hhhhh'
// cSpell:ignoreRegExp g{5}|h{5} -- will match both ggggg and hhhhh
// cSpell:ignoreRegExp /g{5} h{5}/ -- will match 'ggggg hhhhh'
/* cSpell:ignoreRegExp /n{5}/ -- will NOT work as expected because of the ending comment -> */
/*
cSpell:ignoreRegExp /q{5}/ -- will match qqqqq just fine but NOT QQQQQ
*/
// cSpell:ignoreRegExp /[^\s]{40,}/ -- will ignore long strings with no spaces.
// cSpell:ignoreRegExp Email -- this will ignore email like patterns -- see Predefined RegExp expressions
var encodedImage =
"HR+cPzr7XGAOJNurPL0G8I2kU0UhKcqFssoKvFTR7z0T3VJfK37vS025uKroHfJ9nA6WWbHZ/ASn...";
var email1 = "emailaddress@myfancynewcompany.com";
var email2 = "<emailaddress@myfancynewcompany.com>";
Note: ignoreRegExp and includeRegExp are applied to the entire file. They do not start and stop.
In general you should not need to use includeRegExp. But if you are mixing languages then it could come in helpful.
# cSpell:includeRegExp #.*
# cSpell:includeRegExp ("""|''')[^\1]*\1
# only comments and block strings will be checked for spelling.
def sum_it(self, seq):
    """This is checked for spelling"""
    variabele = 0
    alinea = 'this is not checked'
    for num in seq:
        # The local state of 'value' will be retained between iterations
        variabele += num
        yield variabele
Urls1 -- Matches urlsHexDigits -- Matches hex digits: /^x?[0-1a-f]+$/iHexValues -- Matches common hex format like #aaa, 0xfeef, \u0134EscapeCharacters1 -- matches special characters: '\n', '\t' etc.Base641 -- matches base64 blocks of text longer than 40 characters.Email -- matches most email addresses.Everything1 -- By default we match an entire document and remove the excludes.string -- This matches common string formats like '...', "...", and `...`CStyleComment -- These are C Style comments /* */ and //PhpHereDoc -- This matches PHPHereDoc strings.1. These patterns are part of the default include/exclude list for every file.
The spell checker configuration can be controlled via VS Code preferences or cspell.json configuration file.
Order of precedence:
cspell.json.vscode/cspell.jsoncSpell section.You have the option to add you own words to the workspace dictionary. The easiest, is to put your cursor
on the word you wish to add, when you lightbulb shows up, hit Ctrl+. (windows) / Cmd+. (Mac). You will get a list
of suggestions and the option to add the word.
You can also type in a word you want to add to the dictionary: F1 add word -- select Add Word to Dictionary and type in the word you wish to add.
Words added to the dictionary are placed in the cspell.json file in the workspace folder.
Note, the settings in cspell.json will override the equivalent cSpell settings in VS Code's settings.json.
// cSpell Settings
{
    // Version of the setting file.  Always 0.1
    "version": "0.1",
    // language - current active spelling language
    "language": "en",
    // words - list of words to be always considered correct
    "words": [
        "mkdirp",
        "tsmerge",
        "githubusercontent",
        "streetsidesoftware",
        "vsmarketplacebadge",
        "visualstudio"
    ],
    // flagWords - list of words to be always considered incorrect
    // This is useful for offensive words and common spelling errors.
    // For example "hte" should be "the"
    "flagWords": [
        "hte"
    ]
}
    //-------- Code Spell Checker Configuration --------
    // The Language local to use when spell checking. "en", "en-US" and "en-GB" are currently supported by default.
    "cSpell.language": "en",

    // Controls the maximum number of spelling errors per document.
    "cSpell.maxNumberOfProblems": 100,

    // Controls the number of suggestions shown.
    "cSpell.numSuggestions": 8,

    // The minimum length of a word before checking it against a dictionary.
    "cSpell.minWordLength": 4,

    // Specify file types to spell check.
    "cSpell.enabledLanguageIds": [
        "csharp",
        "go",
        "javascript",
        "javascriptreact",
        "markdown",
        "php",
        "plaintext",
        "typescript",
        "typescriptreact",
        "yml"
    ],

    // Enable / Disable the spell checker.
    "cSpell.enabled": true,

    // Display the spell checker status on the status bar.
    "cSpell.showStatus": true,

    // Words to add to dictionary for a workspace.
    "cSpell.words": [],

    // Enable / Disable compound words like 'errormessage'
    "cSpell.allowCompoundWords": false,

    // Words to be ignored and not suggested.
    "cSpell.ignoreWords": ["behaviour"],

    // User words to add to dictionary.  Should only be in the user settings.
    "cSpell.userWords": [],

    // Specify paths/files to ignore.
    "cSpell.ignorePaths": [
        "node_modules",        // this will ignore anything the node_modules directory
        "**/node_modules",     // the same for this one
        "**/node_modules/**",  // the same for this one
        "node_modules/**",     // Doesn't currently work due to how the current working directory is determined.
        "vscode-extension",    //
        ".git",                // Ignore the .git directory
        "*.dll",               // Ignore all .dll files.
        "**/*.dll"             // Ignore all .dll files
    ],

    // flagWords - list of words to be always considered incorrect
    // This is useful for offensive words and common spelling errors.
    // For example "hte" should be "the"`
    "cSpell.flagWords": ["hte"],

    // Set the delay before spell checking the document. Default is 50.
    "cSpell.spellCheckDelayMs": 50,
The spell checker includes a set of default dictionaries.
Based upon the programming language, different dictionaries will be loaded.
Here are the default rules: "*" matches any language.
"local" is used to filter based upon the "cSpell.language" setting.
{
"cSpell.languageSettings": [
    { "languageId": '*',      "local": 'en',               "dictionaries": ['wordsEn'] },
    { "languageId": '*',      "local": 'en-US',            "dictionaries": ['wordsEn'] },
    { "languageId": '*',      "local": 'en-GB',            "dictionaries": ['wordsEnGb'] },
    { "languageId": '*',                                   "dictionaries": ['companies', 'softwareTerms', 'misc'] },
    { "languageId": "python", "allowCompoundWords": true,  "dictionaries": ["python"]},
    { "languageId": "go",     "allowCompoundWords": true,  "dictionaries": ["go"] },
    { "languageId": "javascript",                          "dictionaries": ["typescript", "node"] },
    { "languageId": "javascriptreact",                     "dictionaries": ["typescript", "node"] },
    { "languageId": "typescript",                          "dictionaries": ["typescript", "node"] },
    { "languageId": "typescriptreact",                     "dictionaries": ["typescript", "node"] },
    { "languageId": "html",                                "dictionaries": ["html", "fonts", "typescript", "css"] },
    { "languageId": "php",                                 "dictionaries": ["php", "html", "fonts", "css", "typescript"] },
    { "languageId": "css",                                 "dictionaries": ["fonts", "css"] },
    { "languageId": "less",                                "dictionaries": ["fonts", "css"] },
    { "languageId": "scss",                                "dictionaries": ["fonts", "css"] },
];
}
To add a global dictionary, you will need change your user settings.
In your user settings, you will need to tell the spell checker where to find your word list.
Example adding medical terms, so words like acanthopterygious can be found.
// A List of Dictionary Definitions.
"cSpell.dictionaryDefinitions": [
    { "name": "medicalTerms", "path": "/Users/guest/projects/cSpell-WordLists/dictionaries/medicalterms-en.txt"},
    // To specify a path relative to the workspace folder use ${workspaceFolder} or ${workspaceFolder:Name}
    { "name": "companyTerms", "path": "${workspaceFolder}/../company/terms.txt"}
],
// List of dictionaries to use when checking files.
"cSpell.dictionaries": [
    "medicalTerms",
    "companyTerms"
]
Explained: In this example, we have told the spell checker where to find the word list file. Since it is in the user settings, we have to use absolute paths.
Once the dictionary is defined. We need to tell the spell checker when to use it.
Adding it to cSpell.dictionaries advises the spell checker to always include the medical terms when spell checking.
Note: Adding large dictionary files to be always used will slow down the generation of suggestions.
To add a dictionary at the project level, it needs to be in the cspell.json file.
This file can be either at the project root or in the .vscode directory.
Example adding medical terms, where the terms are checked into the project and we only want to use it for .md files.
{
    "dictionaryDefinitions": [
        { "name": "medicalTerms", "path": "./dictionaries/medicalterms-en.txt"},
        { "name": "cities", "path": "./dictionaries/cities.txt"}
    ],
    "dictionaries": [
        "cities"
    ],
    "languageSettings": [
        { "languageId": "markdown", "dictionaries": ["medicalTerms"] },
        { "languageId": "plaintext", "dictionaries": ["medicalTerms"] }
    ]
}
Explained: In this example, two dictionaries were defined: cities and medicalTerms. The paths are relative to the location of the cSpell.json file. This allows for dictionaries to be checked into the project.
The cities dictionary is used for every file type, because it was added to the list to dictionaries. The medicalTerms dictionary is only used when editing markdown or plaintext files.
See: FAQ
The settings viewer is a single-page webapp using MobX, React and TypeScript with TSX.
To speed up development of the settings viewer, it is possible to run the viewer in the browser without needing to debug the extension.
Getting started
from the _settingsViewer directory do the following:
npm installnpm run buildnpm test -- just to make sure everything is working as expectednpm run start:dev -- Re-build and launch dev server.Launching the viewer in a browser:
Open two tabs:
test.html simulates the webview of the extension. It sends and responds to messages from the settings viewer.
localhost:3000 is the interactive viewer.

This extension lets you quickly bring up helpful MDN documentation in the editor by typing //mdn [api];. For example, to see documentation for Object, type //mdn Object;, and to view a method or property, such as Object.assign, type //mdn Object.assign;. Don't forget the semicolon!
Load documentation of top level or global objects:
//mdn [api]; example: //mdn Array;
Load documentation of a method or property:
 //mdn [api].[method];
example: //mdn Array.from;
[api] and [method] are case-insensitive, so //mdn array.from; is also fine.
Yes! A search won't happen without it.
 //mdn document;
//mdn Object.keys;
//mdn object.values;
//mdn Array.slice;
//mdn array.splice;
js, vue, jsx, ts, tsx
Launch a local development server with live reload feature for static & dynamic pages.

[NOTE: In case if you don't have any .html or .htm file in your workspace then you have to follow method no 4 & 5 to start server.]
Open a project and click to Go Live from the status bar to turn the server on/off.

Right click on a HTML file from Explorer Window and click on Open with Live Server.
 .
.
Open a HTML file and right-click on the editor and click on Open with Live Server.

Hit (alt+L, alt+O) to Open the Server and (alt+L, alt+C) to Stop the server (You can change the shortcut form keybinding). [On MAC, cmd+L, cmd+O and cmd+L, cmd+C]
Open the Command Pallete by pressing F1 or ctrl+shift+P and type Live Server: Open With Live Server to start a server or type Live Server: Stop Live Server to stop a server.
Body or head)https Support.Open VSCode and type ctrl+P, type ext install ritwickdey.liveserver.
All settings are now listed here Settings Docs.


![]()
This extension extends HTML and ejs code editing with Go To Definition and Go To Symbol in Workspace support for css/scss/less (classes and IDs) found in strings within the source code.
This was heavily inspired by a similar feature in Brackets called CSS Inline Editors.

The extension supports all the normal capabilities of symbol definition tracking, but does it for css selectors (classes, IDs and HTML tags). This includes:
Ctrl+Shift+F12)F12)Ctrl+hover)In addition, it supports the Symbol Provider so you can quickly jump to the right CSS/SCSS/LESS code if you already know the class or ID name

cssPeek.supportTags - Enable Peeking from HTML tags in addition to classnames and IDs. React components are ignored, but it's a good idea to disable this feature when using Angular.cssPeek.peekFromLanguages - A list of vscode language names where the extension should be used.cssPeek.peekToExclude - A list of file globs that filters out style files to not look for. By default, node_modules and bower_componentsSee editor docs for more details
Contributions are greatly appreciated. Please fork the repository and submit a pull request.
/i/Perkovec.jsdoc-live-preview?label=Installs&logo=Visual%20Studio%20Code&style=flat-square)
A simple extension for preview jsdoc using markdown
Run ext install jsdoc-live-preview in the command palette.
Open .js file
Open command palette with shift + command/ctrl + p
type > select JSDoc: Show Preview
Run JSDoc: Show Preview in the command palette by hitting enter
Display CPU frequency, usage, memory consumption, and battery percentage remaining within the VSCode status bar.
 .
.
Just the system information node module.
resmon.show.cpuusage: Show CPU Usage. In Windows, this percentage is calculated with processor time, which doesn't quite match the task manager figure.resmon.show.cpufreq: Show CPU Frequency. This may just display a static frequency on Windows.resmon.show.mem: Show consumed and total memory as a fraction.resmon.show.battery: Show battery percentage remaining.resmon.show.disk: Show disk space information.resmon.show.cputemp: Show CPU temperature. May not work without the lm-sensors module on Linux. May require running VS Code as admin on Windows.resmon.disk.format: Configures how the disk space is displayed (percentage remaining/used, absolute remaining, used out of totel).resmon.disk.drives: Drives to show. For example, 'C:' on Windows, and '/dev/sda1' on Linux.resmon.updatefrequencyms: How frequently to query systeminformation. The minimum is 200 ms as to prevent accidentally updating so fast as to freeze up your machine.resmon.freq.unit: Unit used for the CPU frequency (GHz-Hz).resmon.mem.unit: Unit used for the RAM consumption (GB-B).resmon.alignLeft: Toggles the alignment of the status bar.resmon.color: Color of the status bar text in hex code (for example, #FFFFFF is white). The color must be in the format #RRGGBB, using hex digits.A better solution for Windows CPU Usage would be great. I investigated alternatives to counting Processor Time, but none of them seemed to match the Task Manager percentage.
Show flowchart of selected Javascript code.
Flowchart is synchronized with the selected code in real-time.
After install jsflowchart extension from Marketplace,
-Right click the selected js code, then click "Show Flowchart".
Clone the source locally:
\$ git clone https://github.com/MULU-github/jsflowchart
\$ cd jsflowchart
\$ npm install
\$ npm run watch
-Hit F5.
-Open js file.
-Right click the selected js code in debug window, then click "Show Flowchart".
 |
Visual Studio Code Remote Development Open any folder in a container, on a remote machine, or in WSL and take advantage of VS Code's full feature set. Learn more!  |
This repository is for providing feedback on the Visual Studio Remote Development extension pack and its related extensions. You can use the repository to report issues or submit feature requests on any of these extensions:
If you are running into an issue with another extension you'd like to use with the Remote Development extensions, please raise an issue in the extension's repository. You can reference our summary of tips for remote related issues and our extension guide to help the extension author get started. Issues related to dev container definitions can also be reported in the vscode-dev-containers repository.
Running into trouble? Wondering what you can do? These articles can help.
Extension for Visual Studio Code - Makes it easy to create, manage, and debug containerized applications.


The Docker extension makes it easy to build, manage, and deploy containerized applications from Visual Studio Code. It also provides one-click debugging of Node.js, Python, and .NET Core inside a container.

Check out the Working with containers topic on the Visual Studio Code documentation site to get started.
The Docker extension wiki has troubleshooting tips and additional technical information.
Install Docker on your machine and add it to the system path.
On Linux, you should also enable Docker CLI for the non-root user account that will be used to run VS Code.
To install the extension, open the Extensions view, search for docker to filter results and select Docker extension authored by Microsoft.
You can get IntelliSense when editing your Dockerfile and docker-compose.yml files, with completions and syntax help for common commands.

In addition, you can use the Problems panel (Ctrl+Shift+M on Windows/Linux, Shift+Command+M on Mac) to view common errors for Dockerfile and docker-compose.yml files.
You can add Docker files to your workspace by opening the Command Palette (F1) and using Docker: Add Docker Files to Workspace command. The command will generate Dockerfile and .dockerignore files and add them to your workspace. The command will also query you if you want the Docker Compose files added as well; this is optional.
The extension recognizes workspaces that use most popular development languages (C#, Node.js, Python, Ruby, Go, and Java) and customizes generated Docker files accordingly.
The Docker extension contributes a Docker view to VS Code. The Docker view lets you examine and manage Docker assets: containers, images, volumes, networks, and container registries. If the Azure Account extension is installed, you can browse your Azure Container Registries as well.
The right-click menu provides access to commonly used commands for each type of asset.

You can rearrange the Docker view panes by dragging them up or down with a mouse and use the context menu to hide or show them.

Many of the most common Docker commands are built right into the Command Palette:

You can run Docker commands to manage images, networks, volumes, image registries, and Docker Compose. In addition, the Docker: Prune System command will remove stopped containers, dangling images, and unused networks and volumes.
Docker Compose lets you define and run multi-container applications with Docker. Visual Studio Code's experience for authoring docker-compose.yml is very rich, providing IntelliSense for valid Docker compose directives:

For the image directive, you can press ctrl+space and VS Code will query the Docker Hub index for public images:

VS Code will first show a list of popular images along with metadata such as the number of stars and description. If you continue typing, VS Code will query the Docker Hub index for matching images, including searching public profiles. For example, searching for 'Microsoft' will show you all the public Microsoft images.

You can display the content and push/pull/delete images from Docker Hub and Azure Container Registry:

An image in an Azure Container Registry can be deployed to Azure App Service directly from VS Code; see Deploy images to Azure App Service page. For more information about how to authenticate to and work with registries see Using container registries page.
You can debug services built using Node.js, Python, or .NET (C#) that are running inside a container. The extension offers custom tasks that help with launching a service under the debugger and with attaching the debugger to a running service instance. For more information see Debug container application and Extension Properties and Tasks pages.
You can start Azure CLI (command-line interface) in a standalone, Linux-based container with Docker Images: Run Azure CLI command. This allows access to full Azure CLI command set in an isolated environment. See Get started with Azure CLI page for more information on available commands.
Integrates the HTMLHint static analysis tool into Visual Studio Code.

The HTMLHint extension will attempt to use the locally installed HTMLHint module (the project-specific module if present, or a globally installed HTMLHint module). If a locally installed HTMLHint isn't available, the extension will use the embedded version (current version 0.11.0).
To install a version to the local project folder, run npm install --save-dev htmlhint. To install a global version on the current machine, run npm install --global htmlhint.
The HTMLHint extension will run HTMLHint on your open HTML files and report the number of errors on the Status Bar with details in the Problems panel (View > Problems).

Errors in HTML files are highlighted with squiggles and you can hover over the squiggles to see the error message.

Note: HTMLHint will only analyze open HTML files and does not search for HTML files in your project folder.
The HTMLHint extension uses the default rules provided by HTMLHint.
{
    "tagname-lowercase": true,
    "attr-lowercase": true,
    "attr-value-double-quotes": true,
    "doctype-first": true,
    "tag-pair": true,
    "spec-char-escape": true,
    "id-unique": true,
    "src-not-empty": true,
    "attr-no-duplication": true,
    "title-require": true
}
If you'd like to modify the rules, you can provide a .htmlhintrc file in the root of your project folder with a reduced ruleset or modified values.
You can learn more about rule configuration at the HTMLHint Usage page.
By default, HTMLHint will run on any files associated with the "html" language service (i.e., ".html" and ".htm" files). If you'd like to use the HTMLHint extension with additional file types, you have two options:
If you would like the file type to be treated as any other html file (including syntax highlighting, as well as HTMLHint linting), you'll need to associate the extension with the html language service. Add the following to your VS Code settings, replacing "*.ext" with your file extension.
{
    "files.associations": {
        "*.ext": "html"
    }
}
If your file type already has an associated language service other than "html", and you'd like HTMLHint to process those file types, you will need to associate the HTMLHint extension with that language service. Add the following to your VS Code settings, replacing "mylang" with your language service. For example, if you want HTMLHint to process .twig files, you would use "twig". Note that with this configuration, you need to open an html file first to activate the HTMLHint extension. Otherwise, you won't see any linter errors, (the extension is hard-coded to activate when the html language service activates).
{
    "htmlhint.documentSelector": ["html", "mylang"]
}
The HTMLHint extension provides these settings:
htmlhint.enable - disable the HTMLHint extension globally or per workspace.htmlhint.documentSelector - specify additional language services to be lintedhtmlhint.options - provide a rule set to override on disk .htmlhintrc or HTMLHint defaults.htmlhint.configFile - specify a custom HTMLHint configuration file. Please specify either 'htmlhint.configFile' or 'htmlhint.options', but not both.You can change settings globally (File > Preferences > User Settings) or per workspace (File > Preferences > Workspace Settings). The Preferences menu is under Code on macOS.
Here's an example using the htmlhint.documentSelector and htmlhint.options settings:
"htmlhint.documentSelector: [
    "html",
    "htm",
    "twig"
],
"htmlhint.options": {
    "tagname-lowercase": false,
    "attr-lowercase": true,
    "attr-value-double-quotes":  true,
    "doctype-first": true
}
Note that in order to have the linter apply to addi
View a Git Graph of your repository, and easily perform Git actions from the graph. Configurable to look the way you want!

git-graph.customBranchGlobPatterns)git-graph.customPullRequestProviders (e.g. for use with privately hosted Pull Request providers). Information on how to configure custom providers is available here.CTRL/CMD + F: Open the Find Widget.CTRL/CMD + H: Scrolls the Git Graph View to be centered on the commit referenced by HEAD.CTRL/CMD + R: Refresh the Git Graph View.CTRL/CMD + S: Scrolls the Git Graph View to the first (or next) stash in the loaded commits.CTRL/CMD + SHIFT + S: Scrolls the Git Graph View to the last (or previous) stash in the loaded commits.Up / Down: The Commit Details View will be opened on the commit directly above or below it on the Git Graph View.CTRL/CMD + Up / CTRL/CMD + Down: The Commit Details View will be opened on its child or parent commit on the same branch.Enter: If a dialog is open, pressing enter submits the dialog, taking the primary (left) action.Escape: Closes the active dialog, context menu or the Commit Details View.git-graph.customEmojiShortcodeMappings.Detailed information of all Git Graph settings is available here, including: descriptions, screenshots, default values and types.
A summary of the Git Graph extension settings are:
[{"name":"Feature Requests", "glob":"heads/feature/*"}][{"shortcode": ":sparkles:", "emoji":"✨"}]{"Date": true, "Author": true, "Commit": true}This extension consumes the following settings:
git.path: Specifies the path and filename of a portable Git installation.This extension contributes the following commands:
git-graph.view: Git Graph: View Git Graphgit-graph.addGitRepository: Git Graph: Add Git Repository... (used to add sub-repos to Git Graph)git-graph.clearAvatarCache: Git Graph: Clear Avatar Cachegit-graph.endAllWorkspaceCodeReviews: Git Graph: End All Code Reviews in Workspacegit-graph.endSpecificWorkspaceCodeReview: Git Graph: End a specific Code Review in Workspace... (used to end a specific Code Review without having to first open it in the Git Graph View)git-graph.removeGitRepository: Git Graph: Remove Git Repository... (used to remove repositories from Git Graph)git-graph.resumeWorkspaceCodeReview: Git Graph: Resume a specific Code Review in Workspace... (used to open the Git Graph View to a Code Review that is already in progress)Detailed Release Notes are available here.
This extension is available on the Visual Studio Marketplace for Visual Studio Code.
Thank you to all of the contributors that help with the development of Git Graph!
Some of the icons used in Git Graph are from the following sources, please support them for their excellent work!
Handy shortcuts for editing Markdown ( .md, .markdown) files. You can also use markdown formats in any other file (see configuration settings)
Quickly toggle bullet points
Easily generate URLs
Convert tabular data to tables
Context and title menu integration
You can show and hide icons in the title bar with the markdownShortcuts.icons.* config settings.
| Name | Description | Default key binding |
|---|---|---|
| md-shortcut.showCommandPalette | Display all commands | ctrl+M ctrl+M |
| md-shortcut.toggleBold | Make **bold** | ctrl+B |
| md-shortcut.toggleItalic | Make _italic_ | ctrl+I |
| md-shortcut.toggleStrikethrough | Make ~~strikethrough~~ | |
| md-shortcut.toggleLink | Make [a hyperlink](www.example.org) | ctrl+L |
| md-shortcut.toggleImage | Make an image  | ctrl+shift+L |
| md-shortcut.toggleCodeBlock | Make ```a code block``` | ctrl+M ctrl+C |
| md-shortcut.toggleInlineCode | Make `inline code` | ctrl+M ctrl+I |
| md-shortcut.toggleBullets | Make * bullet point | ctrl+M ctrl+B |
| md-shortcut.toggleNumbers | Make 1. numbered list | ctrl+M ctrl+1 |
| md-shortcut.toggleCheckboxes | Make - [ ] check list (Github flavored markdown) | ctrl+M ctrl+X |
| md-shortcut.toggleTitleH1 | Toggle # H1 title | |
| md-shortcut.toggleTitleH2 | Toggle ## H2 title | |
| md-shortcut.toggleTitleH3 | Toggle ### H3 title | |
| md-shortcut.toggleTitleH4 | Toggle #### H4 title | |
| md-shortcut.toggleTitleH5 | Toggle ##### H5 title | |
| md-shortcut.toggleTitleH6 | Toggle ###### H6 title | |
| md-shortcut.addTable | Add Tabular values | |
| md-shortcut.addTableWithHeader | Add Tabular values with header |
A markdown-converter for [Visual Studio Code][vscode]
MarkdownConverter?MarkdownConverter is a Visual Studio Code-extension which allows you to export your Markdown-file as PDF-, HTML or Image-files.
It provides many features, such as DateTime-Formatting, configuring your own CSS-styles, setting Headers and Footers, FrontMatter and much more.
PDF:markdownConverter.ConversionType to an array of types:{
"markdownConverter.ConversionType": ["HTML", "PDF"]
}
{
    "markdownConverter.DestinationPattern": "${workspaceFolder}/output/${dirname}/${basename}.${extension}"
}
Markdown: Convert Document ( Markdown: Dokument Konvertieren in German) or mco ( mk in German) for shortMarkdown: Convert all Documents ( Markdown: Alle Dokumente konvertieren) or mcd ( madk in German) for shortMarkdown: Chain all Documents ( Markdown: Alle Dokumente verketten) or mcad ( madv in German) for short![]()

Microsoft Visual Studio Code extension integrating node.js module: opn
Opens files directly by default, or on your local web server using the default app set by the OS, or an app set by you.
Great for rapid prototyping!
Start VS Code.
From within VS Code press F1, then type ext install.
Select Extensions: Install Extension and click or press Enter.
Wait a few seconds for the list to populate and type Open File in App.
Click the install icon next to the Open File in App extension.
Restart VS Code to complete installing the extension.
Download the latest vscode-opn.vsix from GitHub Releases.
You can manually install the VS Code extension packaged in a .vsix file.
Option 1)
Execute the VS Code command line below providing the path to the .vsix file;
code myExtensionFolder\vscode-opn.vsix
Depending on your platform replace myExtensionFolder\ with;
%USERPROFILE%\.vscode\extensions\$HOME/.vscode/extensions/$HOME/.vscode/extensions/Option 2)
Start VS Code.
From within VS Code open the 'File' menu, select 'Open File...' or press Ctrl+O, navigate to the .vsix file location and select it to open.
The extension will be installed under your user .vscode/extensions folder.
Execute the extension with the keyboard shortcut;
Command + Alt + OCtrl + Alt + OBy default plain text based files will open directly in the app set by your OS.
To change this default behaviour you will need to edit 'Workspace Settings' or 'User Settings'.
From within VS Code open the 'File' menu, select 'Preferences', and then select either 'Workspace Settings' or 'User Settings'.
Options are set per 'language', not per file type, so for example setting options for the language 'plaintext', will change the behaviour of several file types including '.txt' and '.log'.
The minimum JSON to change the behaviour of a single language, e.g. html is;
"vscode-opn.perLang": {
    "opnOptions": [
      {
        "forLang": "html",
        "openInApp": "chrome"
      }
    ]
  }
Required
Type: string
Examples include;
Required
Type: string
Examples include;
Notes: The app name examples above are platform dependent and valid for an MS Windows environment. For Google's Chrome web browser for example, you would use google chrome on OS X, google-chrome on Linux and chrome on Windows.
The following example sets all available options for html and plaintext languages;
"vscode-opn.perLang": {
    "opnOptions": [
      {
        "forLang": "html",
        "openInApp": "chrome",
        "openInAppArgs": ["--incognito"],
        "isUseWebServer": true,
        "isUseFsPath": false,
        "isWaitForAppExit": true
      },
      {
        "forLang": "plaintext",
        "openInApp": "notepad++",
        "openInAppArgs": [],
        "isUseWebServer": false,
        "isUseFsPath": true,
        "isWaitForAppExit": true
      }
    ]
  },
  "vscode-opn.webServerProtocol": "http",
  "vscode-opn.webServerHostname": "localhost",
  "vscode-opn.webServerPort": 8080
Optional
Type: array
Examples include: ["--incognito", "-private-window"]
Notes: A string array of arguments to pass to the app. For example, --incognito will tell Google Chrome to open a new window in "Private Browsing Mode", whereas -private-window will do something similar in Mozilla Firefox.
Optional
Type: boolean
Default: false
Notes: If you set up a site on your local web server such as MS Windows IIS and your VS Code project folder is within the site root, you can open file URLs instead of URIs. This is useful for code that requires a server environment to run, such as AJAX. You will first need to update the vscode-opn default web server settings with your own.
Optional
Type: boolean
Default: false
Notes: During testing in an MS Win 10 environment both Notepad++ and MS WordPad did not support file URIs. This option will use the local file system path instead. This issue may affect other apps and other platforms too.
Optional
Type: boolean
Default: true
Notes: See node.js module opn option: wait for more info.
Required by the per language option: isUseWebServer.
Optional
Type: string
Default: "http"
Notes: Enter a protocol, e.g. "http" or "https".
Optional
Type: string
Default: "localhost"
Notes: Enter the hostname or IP of your local web server.
Optional
Type: number
Default: 8080
Notes: Enter the port of your local web server.
Tested in MS Win 10 environment.
Works with plain text based file types including;
.html.htm.xml.json.log .txt
Does not work with other file types including;
.png.gif.jpg.docx.xlsx.pdfVersion 1.1.2
Date: 25 Feb 2016
Version 1.0.2
Date: 17 Feb 2016


![]()


Visual Studio Code plugin that autocompletes JavaScript / TypeScript modules in import statements.
This plugin was inspired by Npm Intellisense and AutoFileName.

Launch VS Code Quick Open (⌘+P), paste the following command, and press enter.
ext install node-module-intellisense
View detail on Visual Studio Code Marketplace
If there is any bug, create a pull request or an issue please. Github
Node.js Module Intellisense scans builtin modules, dependencies, devDependencies and file modules by default. Set scanBuiltinModules, scanDevDependencies and scanFileModules to false to disable it.
{
    // Scans builtin modules as well
  "node-module-intellisense.scanBuiltinModules": true,

  // Scans devDependencies as well
  "node-module-intellisense.scanDevDependencies": true,

  // Scans file modules as well
  "node-module-intellisense.scanFileModules": true,

  /**
   * Scans alternative module paths (eg. Search on ${workspaceFolder}/lib).
   * Useful when using packages like (https://www.npmjs.com/package/app-module-path) to manage require paths folder.
   **/
  "node-module-intellisense.modulePaths": [],

  // Auto strip module extensions
  "node-module-intellisense.autoStripExtensions": [
    ".js",
    ".jsx",
    ".ts",
    ".d.ts",
    ".tsx"
  ],
}
This VSCode extension allows the user to format one or multiple files with right-click context menu.
This extension contributes the following settings:
formatContextMenu.saveAfterFormat: enable/disable saving after formatting (default: true).formatContextMenu.closeAfterSave: enable/disable closing closing after saving (default: false). This does nothing unless you have enabled saving after formatting.


![]()
This vscode extension integrates with GitHub.
Note: I recommend to use GitHub Pull Requests instead of this, because most usecases are supported and there is a team at Microsoft/GitHub supporting development
Currently it is possible to do the following:
github.statusBarCommand configuration value.
To use this extension one needs to create a new GitHub Personal Access Token and registers it in the extension. The 'GitHub: Set Personal Access Token' should be executed for that. To execute the 'GitHub: Set Personal Access Token' type Ctrl+Shift+p in VSCode to open the command palette and type 'GitHub: Set Personal Access Token'. You will then be prompted to enter the token generated from GitHub.


Additionally, by default this extension assumes your remote for a checked out repo is named "origin". If
you wish to use a remote with a different name, you can control this by the github.remoteName setting.
There are additional settings for this extension as well, enter github. in the User Settings pane of
VS Code to see them all.
Create pull request from current branch in current repository (quick)Create pull request...Checkout open pull request...Browse open pull request...Merge pull request (current branch)...This extension collects telemetry data to track and improve usage. The collection of data could be disabled as described here https://code.visualstudio.com/docs/supporting/faq#_how-to-disable-telemetry-reporting.
Kite is an AI-powered programming assistant that helps you write Python & JavaScript code inside Visual Studio Code. Kite helps you write code faster by saving you keystokes and showing you the right information at the right time. Learn more about how Kite heightens VS Code's capabilities at https://kite.com/integrations/vs-code/.
At a high level, Kite provides you with:
Use another editor? Check out Kite's other editor integrations.
The Kite Engine needs to be installed in order for the package to work properly. The package itself provides the frontend that interfaces with the Kite Engine, which performs all the code analysis and machine learning 100% locally on your computer (no code is sent to a cloud server).
macOS Instructions
.dmg file.Applications folder.Kite.app to start the Kite Engine.Windows Instructions
.exe file.Linux Instructions
When running the Kite Engine for the first time, you'll be guided through a setup process which will allow you to install the VS Code extension. You can also install or uninstall the VS Code extension at any time using the Kite Engine's plugin manager.
Alternatively, you have 2 options to manually install the package:
code --install-extension kiteco.kite in your terminal.Learn about the capabilities Kite adds to VS Code.
The following is a brief guide to using Kite in its default configuration.
Simply start typing in a saved Python or JavaScript file and Kite will automatically suggest completions for what you're typing. Kite's autocompletions are all labeled with the ⟠ symbol.

Hover your mouse cursor over a symbol to view a short summary of what the symbol represents.

Click on the Docs link in the hover popup to open the documentation for the symbol inside the Copilot, Kite's standalone
reference tool.

If a Def link is available in the hover popup, clicking on it will jump to the definition of the symbol.
When you call a function, Kite will show you the arguments required to call it. Kite's function signatures are also all
labeled with the ⟠ symbol.

Note: If you have the Microsoft Python extension installed, Kite will not be able to show you information on function signatures.
Kite comes with sevaral commands that you can run from VS Code's command palette.
| Command | Description |
|---|---|
kite.open-copilot |
Open the Copilot |
kite.docs-at-cursor |
Show documentation of the symbol underneath your cursor in the Copilot |
kite.engine-settings |
Open the settings for the Kite Engine |
kite.python-tutorial |
Open the Kite Python tutorial file |
kite.javascript-tutorial |
Open the Kite JavaScript tutorial file |
kite.go-tutorial |
Open the Kite Go tutorial file |
kite.help |
Open Kite's help website in the browser |
Visit our help docs for FAQs and troubleshooting support.
Happy coding!
Kite is built by a team in San Francisco devoted to making programming easier and more enjoyable for all. Follow Kite on Twitter and get the latest news and programming tips on the Kite Blog. Kite has been featured in Wired, VentureBeat, The Next Web, and TechCrunch.
Computes complexity in TypeScript / JavaScript / Lua files.
The steps of the calculation:
Please note that it is not a standard metric, but it is a close approximation of Cyclomatic complexity.
Please also note that it is possible to balance the complexity calculation for the project / team / personal taste by adjusting the relevant configuration entries (content assist is provided for all of them for easier configuration).
For example if one prefers guard clauses, and is ok with all the branches in switch statements then the following could be applied:
"codemetrics.nodeconfiguration.ReturnStatement": 0,
"codemetrics.nodeconfiguration.CaseClause": 0,
"codemetrics.nodeconfiguration.DefaultClause": 0
If You want to know the causes You can click on the code lens to list all the entries for a given method or class. (This also allows You to quickly navigate to the corresponding code)
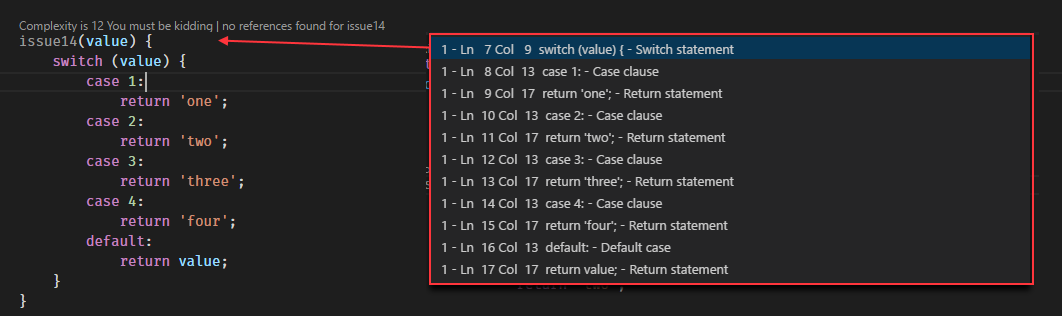


How to install Visual Studio Code extensions
Direct link to Visual Studio Code Marketplace
In the workspace settings one can override the defaults.
For a complete list please check the configuration section in the package.json.
For the most commonly used ones, one should do a search for codemetrics.basics
in the settings ui.
{
  // highest complexity level will be set when it exceeds 15
  "codemetrics.basics.ComplexityLevelExtreme" : 15,

  // Hides code lenses with complexity lesser than the given value
  "codemetrics.basics.CodeLensHiddenUnder" : 5,

  // Description for the highest complexity level
  "codemetrics.basics.ComplexityLevelExtremeDescription" : "OMG split this up!",

  // someone uses 'any', it must be punished
  "codemetrics.nodeconfiguration.AnyKeyword": 100
}
They can be bound in the keybindings.json (File -> Preferences -> Keyboard Shortcuts)
{ "key": "f4",                    "command": "codemetrics.toggleCodeMetricsForArrowFunctions",
                                     "when": "editorTextFocus" },
{ "key": "f5",                    "command": "codemetrics.toggleCodeMetricsDisplayed",
                                     "when": "editorTextFocus" }
Licensed under MIT
title: Guide
description: Documentation guide for the Visual Studio Code Peacock extension meta:
Subtly change the color of your Visual Studio Code workspace. Ideal when you have multiple VS Code instances, use VS Live Share, or use VS Code's Remote features, and you want to quickly identify your editor.
Peacock docs are hosted on Azure -> Get a Free Azure Trial
View → ExtensionsYou can also install Peacock from the marketplace here
Let's see Peacock in action!
F1 to open the command palettePeacockPeacock: Change to a favorite colorNow enjoy exploring the rest of the features explained in the docs, here!

Commands can be found in the command palette. Look for commands beginning with "Peacock:"
peacock.affect* in the Settings section) to.vscode/settings.json file| Property | Description |
|---|---|
| peacock.affectActivityBar | Specifies whether Peacock should affect the activity bar |
| peacock.affectStatusBar | Specifies whether Peacock should affect the status bar |
| peacock.affectTitleBar | Specifies whether Peacock should affect the title bar (see title bar coloring) |
| peacock.affectAccentBorders | Specifies whether Peacock should affect accent borders (panel, sideBar, editorGroup) Defaults to false. |
| peacock.affectStatusAndTitleBorders | Specifies whether Peacock should affect the status or title borders. Defaults to false. |
| peacock.affectTabActiveBorder | Specifies whether Peacock should affect the active tab's border. Defaults to false |
| peacock.elementAdjustments | fine tune coloring of affected elements |
| peacock.favoriteColors | array of objects for color names and hex values |
| peacock.keepForegroundColor | Specifies whether Peacock should change affect colors |
| peacock.surpriseMeOnStartup | Specifies whether Peacock apply a random color on startup |
| peacock.darkForeground | override for the dark foreground |
| peacock.lightForeground | override for the light foreground |
| peacock.darkenLightenPercentage | the percentage to darken or lighten the color |
| peacock.surpriseMeFromFavoritesOnly | Specifies whether Peacock should choose a random color from the favorites list or a purely random color |
| peacock.showColorInStatusBar | Show the Peacock color in the status bar |
| peacock.remoteColor | The Peacock color that will be applied to remote workspaces |
| peacock.color | The Peacock color that will be applied to workspaces |
| peacock.vslsShareColor | Peacock color for Live Share Color when acting as a Guest |
| peacock.vslsJoinColor | Peacock color for Live Share color when acting as the Host |
After setting 1 or more colors (hex or named) in the user setting for peacock.favoriteColors, you can select Peacock: Change to a Favorite Color and you will be prompted with the list from peacock.favoriteColors from user settings.
Gatsby Purple -> #123456
Auth0 Orange -> #eb5424
Azure Blue -> #007fff
Favorite colors require a user-defined name ( name) and a value ( value ), as shown in the example below.
  "peacock.favoriteColors": [
    { "name": "Gatsby Purple", "value": "#639" },
    { "name": "Auth0 Orange", "value": "#eb5424" },
    { "name": "Azure Blue", "value": "#007fff" }
  ]
You can find brand color hex codes from https://brandcolors.net
When opening the Favorites command in the command palette, Peacock now previews (applies) the color as you cycle through them. If you cancel (press ESC), your colors revert to what you had prior to trying the Favorites command

When you apply a color you enjoy, you can go to the workspace settings.json and copy the color's hex code, then create your own favorite color in your user settings.json. This involves a few manual steps and arguably is not obvious at first.
The Peacock: Save Current Color as Favorite Color feature allows you to save the currently set color as a favorite color, and prompts you to name it.
You can tell peacock which parts of VS Code will be affected by when you select a color. You can do this by checking the appropriate setting that applies to the elements you want to be colored. The choices are:

You can fine tune the coloring of affected elements by making them slightly darker or lighter to provide a subtle visual contrast between them. Options for adjusting elements are:
"darken": reduces the value of the selected color to make it slightly darker"lighten": increases the value of the selected color to make it slightly lighter"none": no adjustment will be made to the selected colorAn example of using this might be to make the Activity Bar slightly lighter than the Status Bar and Title Bar to better visually distinguish it as present in several popular themes. This can be achieved with the setting in the example below.
  "peacock.affectActivityBar": true,
  "peacock.affectStatusBar": true,
  "peacock.affectTitleBar": true,
  "peacock.elementAdjustments": {
    "activityBar": "lighten"
  }
This results in the Activity Bar being slightly lighter than the Status Bar and Title Bar (see below).

Recommended to remain false (the default value).
When set to true Peacock will not colorize the foreground of any of the affected elements and will only alter the background. Some users may desire this if their theme's foreground is their preference over Peacock. In this case, when set to true, the foreground will not be affected.
Recommended to remain false (the default value).
When set to true Peacock will automatically apply a random color when opening a workspace that does not define color customizations. This can be useful if you frequently open many instances of VS Code and you are interested in identifying them, but are not overly committed to the specific color applied.
If this setting is true and there is no peacock color set, then Peacock will choose a new color. If there is already a color set, Peacock will not choose a random color as this would prevent users from choosing a specific color for some workspaces and surprise in others.
You may like a color but want to lighten or darken it. You can do this through the corresponding commands. When you choose one of these commands the current color will be lightened or darkened by the percentage that is in the darkenLightenPercentage setting. You may change this setting to be a value between 1 and 10 percent.
There are key bindings for the lighten command alt+cmd+= and for darken command alt+cmd+-, to make it easier to adjust the colors.
| Command | Description |
|---|---|
| Peacock: Reset Workspace Colors | Removes any of the color settings from the .vscode/settings.json file. If colors exist in the user settings, they may be applied |
| Peacock: Remove All Global and Workspace Colors | Removes all of the color settings from both the Workspace .vscode/settings.json file and the Global user settings.json file. |
| Peacock: Enter a Color | Prompts you to enter a color (see input formats) |
| Peacock: Color to Peacock Green | Sets the color to Peacock main color, #42b883 |
| Peacock: Surprise me with a Random Color | Sets the color to a random color |
| Peacock: Change to a Favorite Color | Prompts user to select from their Favorites |
| Peacock: Save Current Color to Favorites | Save Current Color to their Favorites |
| Peacock: Add Recommended Favorites | Add the recommended favorites to user settings (override same names) |
| Peacock: Darken | Darkens the current color by darkenLightenPercentage |
| Peacock: Lighten | Lightens the current color by darkenLightenPercentage |
| Peacock: Show and Copy Current Color | Shows the current color and copies it to the clipboard |
| Peacock: Show the Documentation | Opens the Peacock documentation web site in a browser |
| description | key binding | command |
|---|---|---|
| Darken the colors | alt+cmd+- | peacock.darken |
| Lighten the colors | alt+cmd+= | peacock.lighten |
| Surprise Me with a Random Color | cmd+shift+k | peacock.changeColorToRandom |
Peacock integrates with other extensions, as described in this section.

Peacock detects when the Live Share extension is installed and automatically adds two commands that allow the user to change color of their Live Share sessions as a Host or a Guest, depending on their role.
| Command | Description |
|---|---|
| Peacock: Change Live Share Color (Host) | Prompts user to select a color for Live Share Host session from the Favorites |
| Peacock: Change Live Share Color (Guest) | Prompts user to select a color for Live Share Guest session from the Favorites |
When a Live Share session is started, the selected workspace color will be applied. When the session is finished, the workspace color is reverted back to the previous one (if set).
Peacock integrates with the Remote Development features of VS Code.
Peacock detects when the VS Code Remote extension is installed and adds commands that allow the user to change color when in a remote context. All remote contexts share the same color (wsl, ssh, containers).
When a workspace is opened in a remote context, if a peacock.remoteColor is set, it will be applied. Otherwise, the regular peacock.color is applied.

VS Code distinguishes two classes of extensions: UI Extensions and Workspace Extensions. Peacock is classified as a UI extension as it makes contributions to the VS Code user interface and is always run on the user's local machine. UI Extensions cannot directly access files in the workspace, or run scripts/tools installed in that workspace or on the machine. Example UI Extensions include: themes, snippets, language grammars, and keymaps.
In version 2.1.2 Peacock enabled integration with the Remote Development by adding "extensionKind": "ui" in the extension's package.json.
When entering a color in Peacock several formats are acceptable. These include
| Format | Examples |
|---|---|
| Named HTML colors | purple, blanchedalmond |
| Short Hex | #8b2, f00 |
| Short Hex8 (RGBA) | #8b2c, f00c |
| Hex | #88bb22, ff0000 |
| Hex8 (RGBA) | #88bb22cc, ff0000cc |
| RGB | rgb (136, 187, 34), rgb 255 0 0 |
| RGBA | rgba (136, 187, 34, .8), rgba 255 0 0 .8 |
| HSL | hsl (80, 69%, 43%), hsl (0 1 .5) |
| HSLA | hsla (80, 69%, 43%, 0.8), hsla (0 1 .5 .8) |
| HSV | hsv (80, 82%, 73%), hsv (0 1 1) |
| HSVA | hsva (80, 82%, 73%, 0.8), hsva (0,100%,100%,0.8) |
All formats offer flexible data validation:
# is optional.User selects a color, then later changes which elements are affected.
User opens VS Code, already has colors in their workspace, and immediately changes which elements are affected.
User opens VS Code, has no colors in workspace, and immediately changes which elements are affected.
The VS Code Title Bar style can be configured to be custom or native with the window.titleBarStyle setting. When operating in native mode, Peacock is unable to colorize the Title Bar because VS Code defers Title Bar management to the OS. In order to leverage the Affect Title Bar setting to colorize the Title Bar, the window.titleBarStyle must be set to custom.
On macOS there are additional settings that can impact the Title Bar style and force it into native mode regardless of the window.titleBarStyle setting. These include:
window.nativeTabs should be set to false. If using native tabs, the rendering of the title bar is deferred to the OS and native mode is forced.window.nativeFullScreen should be set to true. If not using native full screen mode, the custom title bar rendering presents issues in the OS and native mode is forced.A successful and recommended settings configuration to colorize the Title Bar is:

Peacock is using tinycolor which provides some basic color theory mechanisms to determine whether or not to show a light or dark foreground color based on the perceived brightness of the background. More or less, if it thinks the background is darker than 50% then Peacock uses the light foreground. If it thinks the background is greater than 50% then Peacock uses the dark foreground.
Brightness is measured on a scale of 0-255 where a value of 127.5 is perfectly 50%.
Example:
const lightForeground = "#e7e7e7";
const darkForegound = "#15202b";
const background = "#498aff";

const perceivedBrightness = tinycolor(background).getBrightness(); // 131.903, so 51.7%
const isDark = tinycolor(background).isDark(); // false, since brightness is above 50%
const textColor = isDark ? lightForeground : darkForeground; // We end up using dark text
This particular color ( #498aff) is very near 50% on the perceived brightness, but the determination is binary so the color is either light or dark based on which side of 50% it is (exactly 50% is considered as light by the library). For the particular color #498aff, all of the theory aspects that tinycolor provides show that using the dark foreground is the right approach.
const readability = tinycolor.readability(darkForeground, background); // 4.996713
const isReadable = tinycolor.isReadable(darkForeground, background); // true
The readability calculations and metrics are based on Web Content Accessibility Guidelines (Version 2.0) and, in general, a ratio close to 5 is considered good based on that information. If we run the lightForeground through the same algorithm you can see that readability actually suffers with a reduced contrast ratio:
const readability = tinycolor.readability(lightForeground, background); // 2.669008
const isReadable = tinycolor.isReadable(lightForeground, background); // false
The readability calculations that Peacock uses to determine an appropriate foreground color are based only on the color information of the entered background color. The alpha component is currently ignored in these calculations because of complications with VS Code that make it difficult to determine the actual background color of the affected elements. See Alpha Support for more information.
Peacock allows you to enter colors that can be transparent, but the VS Code window itself is not transparent. If the entered color has some level of transparency, the resulting color of the affected elements will be based on the transparent color overlaying the default color of the VS Code workbench. In light themes the VS Code workbench color will be a very light gray and in dark themes a very dark gray.
Recommended favorites are a list of constants found in favorites.ts. These are alphabetized.
Recommended favorites are a starting point for favorites. They will be installed whenever a new version is installed. They will extend your existing favorites, so feel free to continue to add to your local favorites! However be careful not to change the color of the recommended favorites as they will be overridden when a new version is installed.
This list may change from version to version depending on the Peacock authoring team.
Peacock takes advantage of a memento (a value stored between sessions and not in settings).
| Name | Type | Description |
|---|---|---|
| peacockMementos.favoritesVersion | Global | The version of Peacock. Helps identify when the list of favorites should be written to the user's settings |
Migration notes between versions are documented here.
Note: If at any time Peacock is writing colors unexpectedly, it may be due to a migration (see migration notes below). However, as always, you can run the command
Peacock: Reset Workspace Colorsand all color settings will be removed from the.vscode/settings.jsonfile.
Version 3+ of Peacock stores the color in the settings peacock.color. When migrating from version 2.5, the peacock color was in a memento. When migrating from version < 2.5, the color was not stored, but can often be derived through a calculation by grabbing the color from one of the workbench.colorCustomizations that Peacock uses.
Once the color is determined, peacock removes the memento, and writes the color to the settings peacock.color. Fixes #230 and addresses #258
This is an aggressive approach, as it is possible to have a color customization that peacock uses, and if it sees this, it will set Peacock up to use it.
This logic is marked as deprecated but will not be removed until version 4.0 is released and enough time has passed reasonably for people to migrate.
Examples:
#ff0, then the peacock.color will bet set to match it.// .vscode/settings.json
{
"workbench.colorCustomizations": {
"activityBar.background": "#ff0"
}
}
peacock.color will set set to match the memento color.// .vscode/settings.json
{}
// .vscode/settings.json
{}
peacock.color, no migration will occur.// .vscode/settings.json
{}
If you want to try the extension out start by cloning this repo, cd into the folder, and then run npm install.
Then you can run the debugger for the launch configuration Run Extension. Set breakpoints, step through the code, and enjoy!


Markdown Extended is an extension extends syntaxes and abilities to VSCode built-in markdown function.
Markdown Extended includes lots of editing helpers and a what you see is what you get exporter, which means export files are consistent to what you see in markdown preview, even it contains syntaxes and styles contributed by other plugins.
Exporter (View Detail)
Editing Helpers (View Detail):
Extended Language Features (View Detail):
Post an issue on [GitHub][issues] if you want other plugins.
To disable integrated plugins, put their names separated with ,:
"markdownExtended.disabledPlugins": "underline, toc"
Available names: toc, container, admonition, footnote, abbr, sup, sub, checkbox, attrs, kbd, underline, mark, deflist, emoji, multimd-table, html5-embed
The extension works with other markdown plugin extensions (those who contribute to built-in Markdown engine) well, Both Preview and Export. Like:
The extension does not tend to do all the work, so just use them, those plugins could be deeper developed, with better experience.
Find in command palette, or right click on an editor / workspace folder, and execute:
Markdown: Export to FileMarkdown: Export Markdown to FileThe export files are organized in out directory in the root of workspace folder by default.
You can configure exporting for multiple documents with user settings.
Further, you can add per-file settings inside markdown to override user settings, it has the highest priority:
---
puppeteer:
pdf:
format: A4
displayHeaderFooter: true
margin:
top: 1cm
right: 1cm
bottom: 1cm
left: 1cm
image:
quality: 90
fullPage: true
---
contents goes here...
See all available settings for puppeteer.pdf, and puppeteer.image
Inspired by joshbax.mdhelper, but totally new implements.
| Command | Keyboard Shortcut |
|---|---|
| Format: Toggle Bold | Ctrl+B |
| Format: Toggle Italics | Ctrl+I |
| Format: Toggle Underline | Ctrl+U |
| Format: Toggle Mark | Ctrl+M |
| Format: Toggle Strikethrough | Alt+S |
| Format: Toggle Code Inline | Alt+` |
| Format: Toggle Code Block | Alt+Shift+` |
| Format: Toggle Block Quote | Ctrl+Shift+Q |
| Format: Toggle Superscript | Ctrl+Shift+U |
| Format: Toggle Subscript | Ctrl+Shift+L |
| Format: Toggle Unordered List | Ctrl+L, Ctrl+U |
| Format: Toggle Ordered List | Ctrl+L, Ctrl+O |
| Table: Paste as Table | Ctrl+Shift+T, Ctrl+Shift+P |
| Table: Format Table | Ctrl+Shift+T, Ctrl+Shift+F |
| Table: Add Columns to Left | Ctrl+Shift+T, Ctrl+Shift+L |
| Table: Add Columns to Right | Ctrl+Shift+T, Ctrl+Shift+R |
| Table: Add Rows Above | Ctrl+Shift+T, Ctrl+Shift+A |
| Table: Add Row Below | Ctrl+Shift+T, Ctrl+Shift+B |
| Table: Move Columns Left | Ctrl+Shift+T Ctrl+Shift+Left |
| Table: Move Columns Right | Ctrl+Shift+T Ctrl+Shift+Right |
| Table: Delete Rows | Ctrl+Shift+D, Ctrl+Shift+R |
| Table: Delete Columns | Ctrl+Shift+D, Ctrl+Shift+C |
Looking for
Move Rows Up / Down?
You can use vscode built-inMove Line Up / Down, shortcuts arealt+↑andalt+↓


Move columns key bindings has been changed to
ctrl+shift+t ctrl+shift+left/right, due to #57, #68
Copy a table from Excel, Web and other applications which support the format of Comma-Separated Values (CSV), then run the command Paste as Markdown Table, you will get the markdown table.


Inspired by MkDocs
Nesting supported (by indent) admonition, the following shows a danger admonition nested by a note admonition.
!!! note
This is the **note** admonition body
!!! danger Danger Title
This is the **danger** admonition body

!!! danger ""
This is the danger admonition body

note | summary, abstract, tldr | info, todo | tip, hint | success, check, done | question, help, faq | warning, attention, caution | failure, fail, missing | danger, error, bug | example, snippet | quote, cite
Now, you're able to write anchor links consistent to heading texts.
Go to
[简体中文](#简体中文),
[Español Título](#Español-Título).
## 简体中文
Lorem ipsum dolor sit amet, consectetur adipiscing elit.
Aenean euismod bibendum laoreet.
## Español Título
Lorem ipsum dolor sit amet, consectetur adipiscing elit.
Aenean euismod bibendum laoreet.
[[TOC]]
Here is a footnote reference,[^1] and another.[^longnote]
[^1]: Here is the footnote.
[^longnote]: Here's one with multiple blocks.
Here is a footnote reference,[1] and another.[2]
*[HTML]: Hyper Text Markup Language
*[W3C]: World Wide Web Consortium
The HTML specification
is maintained by the W3C.
The HTML specification is maintained by the W3C.
Apple
: Pomaceous fruit of plants of the genus Malus in the family Rosaceae.
29^th^, H~2~O
29th, H2O
[ ] unchecked
[x] checked
item **bold red**{style="color:red"}
item bold red
[[Ctrl+Esc]]
Ctrl+Esc
_underline_
underline
::::: container
:::: row
::: col-xs-6 alert alert-success
success text
:::
::: col-xs-6 alert alert-warning
warning text
:::
::::
:::::

(Rendered with style bootstrap, to see the same result, you need the follow config)
"markdown.styles": [
"https://maxcdn.bootstrapcdn.com/bootstrap/4.0.0/css/bootstrap.min.css"
]


Simple plugin for VS Code that allows you to quickly navigate the file inside your project's node_modules directory.
Chances are you have the node_modules folder excluded from the built-in search in VS Code, which means if you want to open and/or edit a file inside node_modules, you can have to find it manually, which can be annoying when your node_modules folder is large.
node_modules by traversing the folder tree.search-node-modules.useLastFolder: Default to folder of last opened file when searching (defaults to false).search-node-modules.path: Relative path to node_modules folder (defaults to node_modules).Some of my friends ask me for similar requrest so I create this extension. It aims to integrate browser sync with VSCode to provide live preview of website.
It can run without installing browser-sync and Node.js runtime becasues the extension containing the codes of browser-sync is running on a separated extension host node process.
Although many enhancements can be done, the basic functions are finished. For any issue, you can leave a comment below or leave a issue at github.
The preview can be opened at the right panel and in the default browser in different command, and there are two modes: Server mode and Proxy mode.
html filephp, jsp, asp etc ...With opening or Without opening folder
Without opening a folder

html file: Browser Sync: Server mode at side panelYou can also try the browser mode by command: Browser Sync: Server mode in browser

With opening a folder

html file: Browser Sync: Server mode at side panelWithout opening a folder
The image below is a Laravel web application hosted on a docker machine, the guideline don't just applies for Laravel, this also applied for other web application.

Browser Sync: Proxy mode at side panelhttp://localhost:8080, or 8080With opening a folder
Browser Sync: Proxy mode at side panelhttp://localhost:8080, or 8080Refresh Side Panel
Run command Browser Sync: Refresh Side Panel which acts like F5 in browser to refresh the side panel
Sometimes the page may crash and no <body> tag is returned, then the script of the browser sync cannot be injected and the codeSync will stop. In this situation,
Add setting as JSON format into user setting or workspace setting to override default behaviour. The setting options come from here, please use the option for Browser Sync version 2.18.13
Note from issue: Use "google chrome" under window, "chrome" under Mac
{
"browserSync.config": {
"browser": ["chrome", "firefox"],
"codeSync": false
}
}
{
"browserSync.config": {
"files": ["*.html", "*.log", "C:\\Users\\jason\\Desktop\\db.txt"]
}
}
Node.js server will be started, it handle request of the HTML file, and listen to the changes of files.src pointing to the URL of the HTML file.Node.js proxy will be started, it forward your request to the target URL with injecting the script in the returned HTML.src pointing to the URL of the proxy server.VSCode Essentials is a collection of many individual extensions that includes all of the functionality needed to turn VSCode into a ⚡ supercharged ⚡ integrated development environment (IDE).
This extension pack is language-agnostic, and does not include functionality for specific programming languages or frameworks. Instead, this extension's objective is to remain relatively lean while delivering powerful features that all developers can benefit from.
{
// // TODO: Add files that you want to be included in IntelliSense at all times.
// // Enable to get autocomplete for the entire project (as opposed to just open files). It's a
// // good idea to read the All Autocomplete extension's documentation to understand the performance
// // impact of specific settings.
// "AllAutocomplete.wordListFiles": ["/src/"],
}
{
"codestream.autoSignIn": false
}
{
"customizeUI.stylesheet": {
// NOTE: Only hide icons if you're already familiar with their functionality and shortcuts
// Hides specific editor action icons
".editor-actions a[title^=\"Toggle File Blame Annotations\"]": "display: none !important;",
".editor-actions a[title^=\"Open Changes\"]": "display: none !important;",
".editor-actions a[title^=\"More Actions...\"]": "display: none !important;",
".editor-actions a[title^=\"Split Editor Right (⌘\\\\)\"]": "display: none !important;",
".editor-actions a[title^=\"Run Code (⌃⌥N)\"]": "display: none !important;",
// Adds a border below the sidebar title.
// TODO: Update `19252B` in the setting below with the hex color of your choice.
".sidebar .composite.title": "border-bottom: 1px solid #19252B;",
// Leaves only the bottom border on matching bracket border.
".monaco-editor .bracket-match": "border-top: none; border-right: none; border-left: none;",
// Changes color of the circle that appears in a dirty file's editor tab.
// TODO: Update `00bcd480` in the setting below with the hex color of your choice.
".monaco-workbench .part.editor>.content .editor-group-container.active>.title .tabs-container>.tab.dirty>.tab-close .action-label:not(:hover):before, .monaco-workbench .part.editor>.content .editor-group-container>.title .tabs-container>.tab.dirty>.tab-close .action-label:not(:hover):before": "color: #00bcd480;"
}
}
{
// Toggle from command palette as needed.
"gitlens.codeLens.enabled": false,
"gitlens.currentLine.enabled": false,
// Keep source control tools in same view.
"gitlens.views.compare.location": "scm",
"gitlens.views.fileHistory.location": "scm",
"gitlens.views.lineHistory.location": "scm",
"gitlens.views.repositories.location": "scm",
"gitlens.views.search.location": "scm"
}
{
// TODO: Add your own macros. Below are some examples to get you started. Execute these commands with the command palette, or assign them to keyboard shortcuts.
// NOTE: Use in combination with the Settings Cycler settings listed further down this page.
"macros.list": {
// Toggle zoom setting and panel position when moving from laptop to external monitor and vice versa.
"toggleDesktop": [
"workbench.action.togglePanelPosition",
"settings.cycle.desktopZoom"
],
// Copy line and paste it below, comment out the original line, and move cursor down to the pasted line. Great for debugging/experimenting with code while keeping the original intact.
"commentDown": [
"editor.action.copyLinesDownAction",
"cursorUp",
"editor.action.addCommentLine",
"cursorDown"
]
}
}
{
// TODO: Update styling to fit your theme. The following works well with Material Theme.
"metaGo.decoration.borderColor": "#253036",
"metaGo.decoration.backgroundColor": "red, blue",
"metaGo.decoration.backgroundOpacity": "1",
"metaGo.decoration.color": "white",
// TODO: Update font settings to fit your preference.
"metaGo.decoration.fontFamily": "'Operator Mono SSm Lig', 'Fira Code', Menlo, Monaco, 'Courier New', monospace",
"metaGo.decoration.fontWeight": "normal",
"metaGo.jumper.timeout": 60
}
{
// TODO: Add the folders where you keep your code projects at.
"projectManager.any.baseFolders": ["$home/Code"],
"projectManager.any.maxDepthRecursion": 1,
"projectManager.sortList": "Recent",
"projectManager.removeCurrentProjectFromList": false
}
{
"rewrap.autoWrap.enabled": true,
"rewrap.reformat": true,
"rewrap.wrappingColumn": 100
}
{
// Use in combination with the Macro settings listed further up this page.
"settings.cycle": [
{
"id": "desktopZoom",
"values": [
{
"window.zoomLevel": 1
},
{
"window.zoomLevel": 1.4
}
]
}
]
}
{
"sync.quietSync": true,
// TODO: Add your gist ID
"sync.gist": "00000000000000000000000000000000"
}
{
"todo-tree.highlights.customHighlight": {
"TODO": {
"foreground": "#FFEB95"
},
"NOTE": {
"foreground": "#FFEB95",
"icon": "note"
},
"FIXME": {
"foreground": "#FFEB95",
"icon": "alert"
},
// Clearly mark comments that belong to disabled (commented-out) code.
"// //": {
"foreground": "#5d7783",
"textDecoration": "line-through",
"type": "text",
"hideFromTree": true
}
},
"todo-tree.tree.grouped": true,
"todo-tree.tree.hideIconsWhenGroupedByTag": true,
"todo-tree.tree.labelFormat": "∙ ${after}",
"todo-tree.tree.showCountsInTree": true,
"todo-tree.tree.showInExplorer": false,
"todo-tree.tree.showScanOpenFilesOrWorkspaceButton": true,
"todo-tree.tree.tagsOnly": true,
"todo-tree.highlights.highlightDelay": 0,
"todo-tree.general.tags": ["TODO", "FIXME", "NOTE", "// //"],
// Allow for matches inside of VSCode files (e.g. `settings.json`).
"todo-tree.highlights.schemes": ["file", "untitled", "vscode-userdata"],
// Allows for matches inside of JSDoc comments.
"todo-tree.regex.regex": "((\\*|//|#|<!--|;|/\\*|^)\\s*($TAGS)|^\\s*- \\[ \\])"
}
Bug reports should be filed at the repository belonging to the individual extension that is causing the issue (click on the extension's marketplace link below and then look for the repo link in the sidebar, under "Project Details").
Some extensions will prevent the Output Colorizer extension from adding syntax highlighting in the output/debug panels. This is a VSCode limitation waiting for a fix. The current workaround is to disable extensions (when not needed) that conflict with the Output Colorizer extension. Code Runner is one of the known, conflicting extensions (which itself is also included in this extension pack).
| Extension | Link |
|---|---|
| All Autocomplete |  |
| Bookmarks |  |
| Checkpoints |  |
| Code Runner |  |
| Code Spell Checker |  |
| CodeStream |  |
| Control Snippets |  |
| Customize UI |  |
| DotENV |  |
| Easy Snippet |  |
| Explorer Exclude |  |
| Format All |  |
| GistPad |  |
| Git Graph |  |
| GitHub Pull Requests |  |
| Gitignore |  |
| GitLens |  |
| Gremlins |  |
| Hungry Delete |  |
| IntelliCode |  |
| Live Share |  |
| Live Share Audio |  |
| Live Share Chat |  |
| Live Share Whiteboard |  |
| Local History |  |
| Macros |  |
| MetaGo |  |
| Monkey Patch |  |
| Multiple Clipboards |  |
| Output Colorizer |  |
 |
|
| Peacock |  |
| Polacode |  |
| Project Manager |  |
| Rewrap |  |
| Search Editor: Apply Changes | |
| Settings Cycler |  |
| Settings Sync |  |
| Text Pastry |  |
| Todo Tree |  |
This extension contains code snippets for Unit Test use describe in JavaScript for Vs Code editor (supports both JavaScript and TypeScript).
In order to install an extension you need to launch the Command Pallete (Ctrl + Shift + P or Cmd + Shift + P) and type Extensions. There you have either the option to show the already installed snippets or install new ones.
Below is a list of all available snippets and the triggers of each one. The ⇥ means the TAB key.
| Trigger | Content |
|---|---|
det→ |
add describe with it describe('{description}',() => { it('{1}', () => {}) }); |
deb→ |
add describe describe('{description}',() => {}); |
dit→ |
add it it('{1}',() => {}); |
ete→ |
add expect expect({object}).toExist(); |
ene→ |
add expect expect({object}).toNotExist() |
etb→ |
add expect expect({object}).toBe({value}) |
enb→ |
add expect expect({object}).toNotBe({value}) |
etq→ |
add expect expect({object}).toEqual({value}) |
enq→ |
add expect expect({object}).toNotEqual({value}) |
Provides path completion for visual studio code.

path-autocomplete.excludedItems optionpath-autocomplete.pathMappings optionpath-autocomplete.transformationspath-autocomplete.useBackslashYou can install it from the marketplace.
ext install path-autocomplete
path-autocomplete.extensionOnImport - boolean If true it will append the extension as well when inserting the file name on import or require statements.path-autocomplete.includeExtension - boolean If true it will append the extension as well when inserting the file name. path-autocomplete.excludedItems
This option allows you to exclude certain files from the suggestions.
"path-autocomplete.excludedItems": {
"**/*.js": { "when": "**/*.ts" }, // ignore js files if i'm inside a ts file
"**/*.map": { "when": "**" }, // always ignore *.map files
"**/{.git,node_modules}": { "when": "**" }, // always ignore .git and node_modules folders
"**": { "when": "**", "isDir": true }, // always ignore `folder` suggestions
"**/*.ts": { "when": "**", "context": "import.*" }, // ignore .ts file suggestions in all files when the current line matches the regex from the `context`
}
minimatch is used to check if the files match the pattern.
path-autocomplete.pathMappings
Useful for defining aliases for absolute or relative paths.
"path-autocomplete.pathMappings": {
"/test": "${folder}/src/Actions/test", // alias for /test
"/": "${folder}/src", // the absolute root folder is now /src,
"$root": ${folder}/src // the relative root folder is now /src
// or multiple folders for one mapping
"$root": ["${folder}/p1/src", "${folder}/p2/src"] // the root is now relative to both p1/src and p2/src
}
path-autocomplete.pathSeparators - string Lists the separators used for extracting the inserted path when used outside strings.
The default value is: \t({[
path-autocomplete.transformations
List of custom transformation applied to the inserted text.
Example: replace _ with an empty string when selecting a SCSS partial file.
"path-autocomplete.transformations": [{
"type": "replace",
"parameters": ["^_", ""],
"when": {
"fileName": "\\.scss$"
}
}],
Supported transformation:
replace - Performs a string replace on the selected item text.
Parameters:regex - a regex patternreplaceString - the replacement string path-autocomplete.triggerOutsideStrings boolean - if true it will trigger the autocomplete outside of quotes
path-autocomplete.enableFolderTrailingSlash boolean - if true it will add a slash after the insertion of a folder path that will trigger the autocompletion.path-autocomplete.useBackslash boolean - if true it will use \\ when iserting the paths.path-autocomplete.ignoredFilesPattern - string - Glob patterns for disabling the path completion in the specified file types. Example: "*/.{css,scss}"path-autocomplete.ignoredPrefixes array - list of ignored prefixes to disable suggestions
on certain preceeding words/characters.
Example: "path-autocomplete.ignoredPrefixes": [
"//" // type double slash and no suggesstions will be displayed
]
VSCode doesn't automatically recognize path aliases so you cannot alt+click to open files. To fix this you need to create jsconfig.json or tsconfig.json to the root of your project and define your alises. An example configuration:
{
"compilerOptions": {
"target": "esnext", // define to your liking
"baseUrl": "./",
"paths": {
"test/*": ["src/actions/test"],
"assets/*": ["src/assets"]
}
},
"exclude": ["node_modules"] // Optional
}
if you want to use this in markdown or simple text files you need to enable path-autocomplete.triggerOutsideStrings
./ for relative paths
If
./doesn't work properly, add this tokeybindings.json:{ "key": ".", "command": "" }. Refer to https://github.com/ChristianKohler/PathIntellisense/issues/9
When I use aliases I can't jump to imported file on Ctrl + Click
This is controlled by the compiler options in jsconfig.json. You can create the JSON file in your project root and add paths for your aliases. jsconfig.json Reference https://code.visualstudio.com/docs/languages/jsconfig#_using-webpack-aliases
path-autocomplete.ignoredFilesPattern option to disable the path autocomplete in certain file typespath-autocomplete.excludedItems option as follows: // disable all suggestions in HTML files, when the current line contains the href or src attributes
"path-autocomplete.excludedItems": {
"**": {
"when": "**/*.html",
"context": "(src|href)=.*"
}
},
// for js and typescript you can disable the vscode suggestions using the following options
"javascript.suggest.paths": false,
"typescript.suggest.paths": false
another easy way to manage snippet


default keymaps cmd+k shift+cmd+s
change default keymaps cmd+. cmd+s to cmd+k shift+cmd+s, issue#5
support insiders version, improve the marketplace listing
first release
![]()


Language extension for VSCode/Bluemix Code that adds syntax colorization for both the output/debug/extensions panel and *.log files.
Note: If you are using other extensions that colorize the output panel, it could override and disable this extension.
Colorization should work with most themes because it uses common theme token style names. It also works with most instances of the output panel. Initially attempts to match common literals (strings, dates, numbers, guids) and warning|info|error|server|local messages.
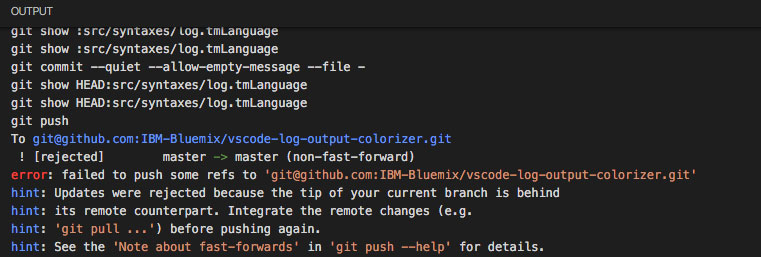
You can open an issue on the GitHub repo
Portions of the language grammar are based off of a StackOverflow question, asked by user emilast and answered by user Wosi, availble under Creative Commons at: http://stackoverflow.com/questions/33403324/how-to-create-a-simple-custom-language-colorization-to-vs-code
![]()


REST Client allows you to send HTTP request and view the response in Visual Studio Code directly.
cURL command### delimiter){{$guid}}{{$randomInt min max}}{{$timestamp [offset option]}}{{$datetime rfc1123|iso8601 [offset option]}}{{$localDatetime rfc1123|iso8601 [offset option]}}{{$processEnv [%]envVarName}}{{$dotenv [%]variableName}}{{$aadToken [new] [public|cn|de|us|ppe] [<domain|tenantId>] [aud:<domain|tenantId>]}}Python, JavaScript and more!HTTP language support.http and .rest file extensions support# or //) supportjson and xml body indentation, comment shortcut and auto closing bracketsGET and POSThttp fileIn editor, type an HTTP request as simple as below:
https://example.com/comments/1
Or, you can follow the standard RFC 2616 that including request method, headers, and body.
POST https://example.com/comments HTTP/1.1
content-type: application/json
{
"name": "sample",
"time": "Wed, 21 Oct 2015 18:27:50 GMT"
}
Once you prepared a request, click the Send Request link above the request (this will appear if the file's language mode is HTTP, by default .http files are like this), or use shortcut Ctrl+Alt+R( Cmd+Alt+R for macOS), or right-click in the editor and then select Send Request in the menu, or press F1 and then select/type Rest Client: Send Request, the response will be previewed in a separate webview panel of Visual Studio Code. If you'd like to use the full power of searching, selecting or manipulating in Visual Studio Code, you can also preview response in an untitled document by setting rest-client.previewResponseInUntitledDocument to true. Once a request is issued, the waiting spin icon will be displayed in the status bar until the response is received. You can click the spin icon to cancel the request. After that, the icon will be replaced with the total duration and response size.
You can view the breakdown of the response time when hovering over the total duration in status bar, you could view the duration details of Socket, DNS, TCP, First Byte and Download.
When hovering over the response size in status bar, you could view the breakdown response size details of headers and body.
All the shortcuts in REST Client Extension are ONLY available for file language mode
httpandplaintext.Send Request link above each request will only be visible when the request file is in
httpmode, more details can be found in http language section.
You may even want to save numerous requests in the same file and execute any of them as you wish easily. REST Client extension could recognize requests separated by lines begin with three or more consecutive # as a delimiter. Place the cursor anywhere between the delimiters, issuing the request as above, and the underlying request will be sent out.
GET https://example.com/comments/1 HTTP/1.1
###
GET https://example.com/topics/1 HTTP/1.1
###
POST https://example.com/comments HTTP/1.1
content-type: application/json
{
"name": "sample",
"time": "Wed, 21 Oct 2015 18:27:50 GMT"
}
REST Client extension also provides the flexibility that you can send the request with your selected text in editor.
Press F1, type ext install then search for rest-client.
The first non-empty line of the selection (or document if nothing is selected) is the Request Line. Below are some examples of Request Line:
GET https://example.com/comments/1 HTTP/1.1
GET https://example.com/comments/1
https://example.com/comments/1
If request method is omitted, request will be treated as GET, so above requests are the same after parsing.
You can always write query strings in the request line, like:
GET https://example.com/comments?page=2&pageSize=10
Sometimes there may be several query parameters in a single request, putting all the query parameters in Request Line is difficult to read and modify. So we allow you to spread query parameters into multiple lines(one line one query parameter), we will parse the lines in immediately after the Request Line which starts with ? and &, like
GET https://example.com/comments
?page=2
&pageSize=10
The lines immediately after the request line to first empty line are parsed as Request Headers. Please provide headers with the standard field-name: field-value format, each line represents one header. By default REST Client Extension will add a User-Agent header with value vscode-restclient in your request if you don't explicitly specify. You can also change the default value in setting rest-client.defaultHeaders.
Below are examples of Request Headers:
User-Agent: rest-client
Accept-Language: en-GB,en-US;q=0.8,en;q=0.6,zh-CN;q=0.4
Content-Type: application/json
If you want to provide the request body, please add a blank line after the request headers like the POST example in usage, and all content after it will be treated as Request Body. Below are examples of Request Body:
POST https://example.com/comments HTTP/1.1
Content-Type: application/xml
Authorization: token xxx
<request>
<name>sample</name>
<time>Wed, 21 Oct 2015 18:27:50 GMT</time>
</request>
You can also specify file path to use as a body, which starts with <, the file path(whitespaces should be preserved) can be either in absolute or relative(relative to workspace root or current http file) formats:
POST https://example.com/comments HTTP/1.1
Content-Type: application/xml
Authorization: token xxx
< C:\Users\Default\Desktop\demo.xml
POST https://example.com/comments HTTP/1.1
Content-Type: application/xml
Authorization: token xxx
< ./demo.xml
If you want to use variables in that file, you'll have to use an @ to ensure variables are processed when referencing a file (UTF-8 is assumed as the default encoding)
POST https://example.com/comments HTTP/1.1
Content-Type: application/xml
Authorization: token xxx
<@ ./demo.xml
to override the default encoding, simply type it next to the @ like the below example
POST https://example.com/comments HTTP/1.1
Content-Type: application/xml
Authorization: token xxx
<@latin1 ./demo.xml
When content type of request body is multipart/form-data, you may have the mixed format of the request body as follows:
POST https://api.example.com/user/upload
Content-Type: multipart/form-data; boundary=----WebKitFormBoundary7MA4YWxkTrZu0gW
------WebKitFormBoundary7MA4YWxkTrZu0gW
Content-Disposition: form-data; name="text"
title
------WebKitFormBoundary7MA4YWxkTrZu0gW
Content-Disposition: form-data; name="image"; filename="1.png"
Content-Type: image/png
< ./1.png
------WebKitFormBoundary7MA4YWxkTrZu0gW--
When content type of request body is application/x-www-form-urlencoded, you may even divide the request body into multiple lines. And each key and value pair should occupy a single line which starts with &:
POST https://api.example.com/login HTTP/1.1
Content-Type: application/x-www-form-urlencoded
name=foo
&password=bar
When your mouse is over the document link, you can
Ctrl+Click(Cmd+Clickfor macOS) to open the file in a new tab.
With GraphQL support in REST Client extension, you can author and send GraphQL query using the request body. Besides that you can also author GraphQL variables in the request body. GraphQL variables part in request body is optional, you also need to add a blank line between GraphQL query and variables if you need it.
You can specify a request as GraphQL Request by adding a custom request header X-Request-Type: GraphQL in your headers. The following code illustrates this:
POST https://api.github.com/graphql
Content-Type: application/json
Authorization: Bearer xxx
X-REQUEST-TYPE: GraphQL
query ($name: String!, $owner: String!) {
repository(name: $name, owner: $owner) {
name
fullName: nameWithOwner
description
diskUsage
forkCount
stargazers(first: 5) {
totalCount
nodes {
login
name
}
}
watchers {
totalCount
}
}
}
{
"name": "vscode-restclient",
"owner": "Huachao"
}
 We add the capability to directly run curl request in REST Client extension. The issuing request command is the same as raw HTTP one. REST Client will automatically parse the request with specified parser.
REST Client doesn't fully support all the options of cURL, since underneath we use request library to send request which doesn't accept all the cURL options. Supported options are listed below:
Sometimes you may want to get the curl format of an http request quickly and save it to clipboard, just pressing F1 and then selecting/typing Rest Client: Copy Request As cURL or simply right-click in the editor, and select Copy Request As cURL.
Once you want to cancel a processing request, click the waiting spin icon or use shortcut Ctrl+Alt+K( Cmd+Alt+K for macOS), or press F1 and then select/type Rest Client: Cancel Request.
Sometimes you may want to refresh the API response, now you could do it simply using shortcut Ctrl+Alt+L( Cmd+Alt+L for macOS), or press F1 and then select/type Rest Client: Rerun Last Request to rerun the last request.
 Each time we sent an http request, the request details(method, url, headers, and body) would be persisted into file. By using shortcut
 Ctrl+Alt+H( Cmd+Alt+H for macOS), or press F1 and then select/type Rest Client: Request History, you can view the last 50 request items(method, url and request time) in the time reversing order, you can select any request you wish to trigger again. After specified request history item is selected, the request details would be displayed in a temp file, you can view the request details or follow previous step to trigger the request again.
You can also clear request history by pressing F1 and then selecting/typing Rest Client: Clear Request History.
 In the upper right corner of the response preview tab, we add a new icon to save the latest response to local file system. After you click the
 Save Full Response icon, it will prompt the window with the saved response file path. You can click the Open button to open the saved response file in current workspace or click Copy Path to copy the saved response path to clipboard.
Another icon in the upper right corner of the response preview tab is the Save Response Body button, it will only save the response body ONLY to local file system. The extension of saved file is set according to the response MIME type, like if the Content-Type value in response header is application/json, the saved file will have extension .json. You can also overwrite the MIME type and extension mapping according to your requirement with the rest-client.mimeAndFileExtensionMapping setting.
"rest-client.mimeAndFileExtensionMapping": {
"application/atom+xml": "xml"
}
In the response webview panel, there are two options Fold Response and Unfold Response after clicking the More Actions... button. Sometimes you may want to fold or unfold the whole response body, these options provide a straightforward way to achieve this.
We have supported some most common authentication schemes like Basic Auth, Digest Auth, SSL Client Certificates, Azure Active Directory(Azure AD) and AWS Signature v4.
HTTP Basic Auth is a widely used protocol for simple username/password authentication. We support three formats of Authorization header to use Basic Auth.
username:password.username:password.username and password, which is separated by space. REST Client extension will do the base64 encoding automatically.The corresponding examples are as follows, they are equivalent:
GET https://httpbin.org/basic-auth/user/passwd HTTP/1.1
Authorization: Basic user:passwd
and
GET https://httpbin.org/basic-auth/user/passwd HTTP/1.1
Authorization: Basic dXNlcjpwYXNzd2Q=
and
GET https://httpbin.org/basic-auth/user/passwd HTTP/1.1
Authorization: Basic user passwd
HTTP Digest Auth is also a username/password authentication protocol that aims to be slightly safer than Basic Auth. The format of Authorization header for Digest Auth is similar to Basic Auth. You just need to set the scheme to Digest, as well as the raw user name and password.
GET https://httpbin.org/digest-auth/auth/user/passwd
Authorization: Digest user passwd
We support PFX, PKCS12, and PEM certificates. Before using your certificates, you need to set the certificates paths(absolute/relative to workspace/relative to current http file) in the setting file for expected host name(port is optional). For each host, you can specify the key cert, key, pfx and passphrase.
cert: Path of public x509 certificatekey: Path of private keypfx: Path of PKCS #12 or PFX certificatepassphrase: Optional passphrase for the certificate if required
You can add following piece of code in your setting file if your certificate is in PEM format:"rest-client.certificates": {
"localhost:8081": {
"cert": "/Users/demo/Certificates/client.crt",
"key": "/Users/demo/Keys/client.key"
},
"example.com": {
"cert": "/Users/demo/Certificates/client.crt",
"key": "/Users/demo/Keys/client.key"
}
}
Or if you have certificate in PFX or PKCS12 format, setting code can be like this:
"rest-client.certificates": {
"localhost:8081": {
"pfx": "/Users/demo/Certificates/clientcert.p12",
"passphrase": "123456"
}
}
Azure AD is Microsoft's multi-tenant, cloud-based directory and identity management service, you can refer to the System Variables section for more details.
Microsoft identity platform is an evolution of the Azure Active Directory (Azure AD) developer platform. It allows developers to build applications that sign in all Microsoft identities and get tokens to call Microsoft APIs such as Microsoft Graph or APIs that developers have built. Microsoft Identity platform supports OAuth2 scopes, incremental consent and advanced features like multi-factor authentication and conditional access.
AWS Signature version 4 authenticates requests to AWS services. To use it you need to set the Authorization header schema to AWS and provide your AWS credentials separated by spaces:
<accessId>: AWS Access Key Id<accessKey>: AWS Secret Access Keytoken:<sessionToken>: AWS Session Token - required only for temporary credentialsregion:<regionName>: AWS Region - required only if region can't be deduced from URLservice:<serviceName>: AWS Service - required only if service can't be deduced from URLGET https://httpbin.org/aws-auth HTTP/1.1
Authorization: AWS <accessId> <accessKey> [token:<sessionToken>] [region:<regionName>] [service:<serviceName>]
 Once you've finalized your request in REST Client extension, you might want to make the same request from your source code. We allow you to generate snippets of code in various languages and libraries that will help you achieve this. Once you prepared a request as previously, use shortcut
 Ctrl+Alt+C( Cmd+Alt+C for macOS), or right-click in the editor and then select Generate Code Snippet in the menu, or press F1 and then select/type Rest Client: Generate Code Snippet, it will pop up the language pick list, as well as library list. After you selected the code snippet language/library you want, the generated code snippet will be previewed in a separate panel of Visual Studio Code, you can click the Copy Code Snippet icon in the tab title to copy it to clipboard.
Add language support for HTTP request, with features like syntax highlight, auto completion, code lens and comment support, when writing HTTP request in Visual Studio Code. By default, the language association will be automatically activated in two cases:
.http or .restMethod SP Request-URI SP HTTP-Version formatIf you want to enable language association in other cases, just change the language mode in the right bottom of Visual Studio Code to HTTP.
Currently, auto completion will be enabled for following seven categories:
Accept and Content-Type headersBasic and DigestA single http file may define lots of requests and file level custom variables, it will be difficult to find the request/variable you want. We leverage from the Goto Symbol Feature of Visual Studio Code to support to navigate(goto) to request/variable with shortcut Ctrl+Shift+O( Cmd+Shift+O for macOS), or simply press F1, type @.
Environments give you the ability to customize requests using variables, and you can easily switch environment without changing requests in http file. A common usage is having different configurations for different web service environments, like devbox, sandbox, and production. We also support the shared environment(identified by special environment name \$shared) to provide a set of variables that are available in all environments. And you can define the same name variable in your specified environment to overwrite the value in shared environment. Currently, active environment's name is displayed at the right bottom of Visual Studio Code, when you click it, you can switch environment in the pop-up list. And you can also switch environment using shortcut Ctrl+Alt+E( Cmd+Alt+E for macOS), or press F1 and then select/type Rest Client: Switch Environment.
Environments and including variables are defined directly in Visual Studio Code setting file, so you can create/update/delete environments and variables at any time you wish. If you DO NOT want to use any environment, you can choose No Environment in the environment list. Notice that if you select No Environment, variables defined in shared environment are still available. See Environment Variables for more details about environment variables.
We support two types of variables, one is Custom Variables which is defined by user and can be further divided into Environment Variables, File Variables and Request Variables, the other is System Variables which is a predefined set of variables out-of-box.
The reference syntax of system and custom variables types has a subtle difference, for the former the syntax is {{$SystemVariableName}}, while for the latter the syntax is {{CustomVariableName}}, without preceding $ before variable name. The definition syntax and location for different types of custom variables are different. Notice that when the same name used for custom variables, request variables takes higher resolving precedence over file variables, file variables takes higher precedence over environment variables.
Custom variables can cover different user scenarios with the benefit of environment variables, file variables, and request variables. Environment variables are mainly used for storing values that may vary in different environments. Since environment variables are directly defined in Visual Studio Code setting file, they can be referenced across different http files. File variables are mainly used for representing values that are constant throughout the http file. Request variables are used for the chaining requests scenarios which means a request needs to reference some part(header or body) of another request/response in the same http file, imagine we need to retrieve the auth token dynamically from the login response, request variable fits the case well. Both file and request variables are defined in the http file and only have File Scope.
For environment variables, each environment comprises a set of key value pairs defined in setting file, key and value are variable name and value respectively. Only variables defined in selected environment and shared environment are available to you. You can also reference the variables in shared environment with {{$shared variableName}} syntax in your active environment. Below is a sample piece of setting file for custom environments and environment level variables:
"rest-client.environmentVariables": {
"$shared": {
"version": "v1",
"prodToken": "foo",
"nonProdToken": "bar"
},
"local": {
"version": "v2",
"host": "localhost",
"token": "{{$shared nonProdToken}}",
"secretKey": "devSecret"
},
"production": {
"host": "example.com",
"token": "{{$shared prodToken}}",
"secretKey" : "prodSecret"
}
}
A sample usage in http file for above environment variables is listed below, note that if you switch to local environment, the version would be v2, if you change to production environment, the version would be v1 which is inherited from the \$shared environment:
GET https://{{host}}/api/{{version}}comments/1 HTTP/1.1
Authorization: {{token}}
For file variables, the definition follows syntax @variableName = variableValue which occupies a complete line. And variable name MUST NOT contain any spaces. As for variable value, it can consist of any characters, even whitespaces are allowed for them (leading and trailing whitespaces will be trimmed). If you want to preserve some special characters like line break, you can use the backslash \ to escape, like \n. File variable value can even contain references to all of other kinds of variables. For instance, you can create a file variable with value of other request variables like @token = {{loginAPI.response.body.token}}.
File variables can be defined in a separate request block only filled with variable definitions, as well as define request variables before any request url, which needs an extra blank line between variable definitions and request url. However, no matter where you define the file variables in the http file, they can be referenced in any requests of whole file. For file variables, you can also benefit from some Visual Studio Code features like Go To Definition and Find All References. Below is a sample of file variable definitions and references in an http file.
@hostname = api.example.com
@port = 8080
@host = {{hostname}}:{{port}}
@contentType = application/json
@createdAt = {{$datetime iso8601}}
@modifiedBy = {{$processEnv USERNAME}}
###
@name = hello
GET https://{{host}}/authors/{{name}} HTTP/1.1
###
PATCH https://{{host}}/authors/{{name}} HTTP/1.1
Content-Type: {{contentType}}
{
"content": "foo bar",
"created_at": "{{createdAt}}",
"modified_by": "{{modifiedBy}}"
}
Request variables are similar to file variables in some aspects like scope and definition location. However, they have some obvious differences. The definition syntax of request variables is just like a single-line comment, and follows // @name requestName or # @name requestName just before the desired request url. You can think of request variable as attaching a name metadata to the underlying request, and this kind of requests can be called with Named Request, while normal requests can be called with Anonymous Request. Other requests can use requestName as an identifier to reference the expected part of the named request or its latest response. Notice that if you want to refer the response of a named request, you need to manually trigger the named request to retrieve its response first, otherwise the plain text of variable reference like {{requestName.response.body.$.id}} will be sent instead.
The reference syntax of a request variable is a bit more complex than other kinds of custom variables. The request variable reference syntax follows {{requestName.(response|request).(body|headers).(*|JSONPath|XPath|Header Name)}}. You have two reference part choices of the response or request: body and headers. For body part, you can use * to reference the full response body, and for JSON and XML responses, you can use JSONPath and XPath to extract specific property or attribute. For example, if a JSON response returns body {"id": "mock"}, you can set the JSONPath part to $.id to reference the id. For headers part, you can specify the header name to extract the header value. Additionally, the header name is case-insensitive.
If the JSONPath or XPath of body, or Header Name of headers can't be resolved, the plain text of variable reference will be sent instead. And in this case, diagnostic information will be displayed to help you to inspect this. And you can also hover over the request variables to view the actual resolved value.
Below is a sample of request variable definitions and references in an http file.
@baseUrl = https://example.com/api
# @name login
POST {{baseUrl}}/api/login HTTP/1.1
Content-Type: application/x-www-form-urlencoded
name=foo&password=bar
###
@authToken = {{login.response.headers.X-AuthToken}}
# @name createComment
POST {{baseUrl}}/comments HTTP/1.1
Authorization: {{authToken}}
Content-Type: application/json
{
"content": "fake content"
}
###
@commentId = {{createComment.response.body.$.id}}
# @name getCreatedComment
GET {{baseUrl}}/comments/{{commentId}} HTTP/1.1
Authorization: {{authToken}}
###
# @name getReplies
GET {{baseUrl}}/comments/{{commentId}}/replies HTTP/1.1
Accept: application/xml
###
# @name getFirstReply
GET {{baseUrl}}/comments/{{commentId}}/replies/{{getReplies.response.body.//reply[1]/@id}}
System variables provide a pre-defined set of variables that can be used in any part of the request(Url/Headers/Body) in the format {{$variableName}}. Currently, we provide a few dynamic variables which you can use in your requests. The variable names are case-sensitive.
{{$aadToken [new] [public|cn|de|us|ppe] [<domain|tenantId>] [aud:<domain|tenantId>]}}: Add an Azure Active Directory token based on the following options (must be specified in order):
new: Optional. Specify new to force re-authentication and get a new token for the specified directory. Default: Reuse previous token for the specified directory from an in-memory cache. Expired tokens are refreshed automatically. (Use F1 > Rest Client: Clear Azure AD Token Cache or restart Visual Studio Code to clear the cache.)
public|cn|de|us|ppe: Optional. Specify top-level domain (TLD) to get a token for the specified government cloud, public for the public cloud, or ppe for internal testing. Default: TLD of the REST endpoint; public if not valid.
<domain|tenantId>: Optional. Domain or tenant id for the directory to sign in to. Default: Pick a directory from a drop-down or press Esc to use the home directory ( common for Microsoft Account).
aud:<domain|tenantId>: Optional. Target Azure AD app id (aka client id) or domain the token should be created for (aka audience or resource). Default: Domain of the REST endpoint.
{{$aadV2Token [new] [appOnly ][scopes:<scope[,]>] [tenantid:<domain|tenantId>] [clientid:<clientId>]}}: Add an Azure Active Directory token based on the following options (must be specified in order):
new: Optional. Specify new to force re-authentication and get a new token for the specified directory. Default: Reuse previous token for the specified tenantId and clientId from an in-memory cache. Expired tokens are refreshed automatically. (Restart Visual Studio Code to clear the cache.)
appOnly: Optional. Specify appOnly to use make to use a client credentials flow to obtain a token. aadV2ClientSecret and aadV2AppUrimust be provided as REST Client environment variables. aadV2ClientId and aadV2TenantId may also be optionally provided via the environment. aadV2ClientId in environment will only be used for appOnly calls.
scopes:<scope[,]>: Optional. Comma delimited list of scopes that must have consent to allow the call to be successful. Not applicable for appOnly calls.
tenantId:<domain|tenantId>: Optional. Domain or tenant id for the tenant to sign in to. ( common to determine tenant from sign in).
clientId:<clientid>: Optional. Identifier of the application registration to use to obtain the token. Default uses an application registration created specifically for this plugin.
{{$guid}}: Add a RFC 4122 v4 UUID
{{$processEnv [%]envVarName}}: Allows the resolution of a local machine environment variable to a string value. A typical use case is for secret keys that you don't want to commit to source control.
For example: Define a shell environment variable in .bashrc or similar on windows
export DEVSECRET="XlII3JUaEZldVg="
export PRODSECRET="qMTkleUgjclRoRmV1WA=="
export USERNAME="sameUsernameInDevAndProd"
and with extension setting environment variables.
"rest-client.environmentVariables": {
"$shared": {
"version": "v1"
},
"local": {
"version": "v2",
"host": "localhost",
"secretKey": "DEVSECRET"
},
"production": {
"host": "example.com",
"secretKey" : "PRODSECRET"
}
}
You can refer directly to the key (e.g. PRODSECRET) in the script, for example if running in the production environment
# Lookup PRODSECRET from local machine environment
GET https://{{host}}/{{version}}/values/item1?user={{$processEnv USERNAME}}
Authorization: {{$processEnv PRODSECRET}}
or, it can be rewritten to indirectly refer to the key using an extension environment setting (e.g. %secretKey) to be environment independent using the optional % modifier.
# Use secretKey from extension environment settings to determine which local machine environment variable to use
GET https://{{host}}/{{version}}/values/item1?user={{$processEnv USERNAME}}
Authorization: {{$processEnv %secretKey}}
envVarName: Mandatory. Specifies the local machine environment variable
%: Optional. If specified, treats envVarName as an extension setting environment variable, and uses the value of that for the lookup.
{{$dotenv [%]variableName}}: Returns the environment value stored in the .env file which exists in the same directory of your .http file.
{{$randomInt min max}}: Returns a random integer between min (included) and max (excluded){{$timestamp [offset option]}}: Add UTC timestamp of now. You can even specify any date time based on current time in the format {{$timestamp number option}}, e.g., to represent 3 hours ago, simply {{$timestamp -3 h}}; to represent the day after tomorrow, simply {{$timestamp 2 d}}.{{$datetime rfc1123|iso8601|"custom format"|'custom format' [offset option]}}: Add a datetime string in either ISO8601, RFC1123 or a custom display format. You can even specify a date time relative to the current date similar to timestamp like: {{$datetime iso8601 1 y}} to represent a year later in ISO8601 format. If specifying a custom format, wrap it in single or double quotes like: {{$datetime "DD-MM-YYYY" 1 y}}. The date is formatted using Day.js, read here for information on format strings.{{$localDatetime rfc1123|iso8601|"custom format"|'custom format' [offset option]}}: Similar to $datetime except that $localDatetime returns a time string in your local time zone.The offset options you can specify in timestamp and datetime are:
| Option | Description |
|---|---|
| y | Year |
| M | Month |
| w | Week |
| d | Day |
| h | Hour |
| m | Minute |
| s | Second |
| ms | Millisecond |
Below is a example using system variables:
POST https://api.example.com/comments HTTP/1.1
Content-Type: application/xml
Date: {{$datetime rfc1123}}
{
"user_name": "{{$dotenv USERNAME}}",
"request_id": "{{$guid}}",
"updated_at": "{{$timestamp}}",
"created_at": "{{$timestamp -1 d}}",
"review_count": "{{$randomInt 5 200}}",
"custom_date": "{{$datetime 'YYYY-MM-DD'}}",
"local_custom_date": "{{$localDatetime 'YYYY-MM-DD'}}"
}
More details about
aadToken(Azure Active Directory Token) can be found on Wiki
REST Client Extension adds the ability to control the font family, size and weight used in the response preview.
By default, REST Client Extension only previews the full response in preview panel(status line, headers and body). You can control which part should be previewed via the rest-client.previewOption setting:
| Option | Description |
|---|---|
| full | Default. Full response is previewed |
| headers | Only the response headers(including status line) are previewed |
| body | Only the response body is previewed |
| exchange | Preview the whole HTTP exchange(request and response) |
rest-client.followredirect: Follow HTTP 3xx responses as redirects. (Default is true)rest-client.defaultHeaders: If particular headers are omitted in request header, these will be added as headers for each request. (Default is { "User-Agent": "vscode-restclient", "Accept-Encoding": "gzip" })rest-client.timeoutinmilliseconds: Timeout in milliseconds. 0 for infinity. (Default is 0)rest-client.showResponseInDifferentTab: Show response in different tab. (Default is false)rest-client.requestNameAsResponseTabTitle: Show request name as the response tab title. Only valid when using html view, if no request name is specified defaults to "Response". (Default is false)rest-client.rememberCookiesForSubsequentRequests: Save cookies from Set-Cookie header in response and use for subsequent requests. (Default is true)rest-client.enableTelemetry: Send out anonymous usage data. (Default is true)rest-client.excludeHostsForProxy: Excluded hosts when using proxy settings. (Default is [])rest-client.fontSize: Controls the font size in pixels used in the response preview. (Default is 13)rest-client.fontFamily: Controls the font family used in the response preview. (Default is Menlo, Monaco, Consolas, "Droid Sans Mono", "Courier New", monospace, "Droid Sans Fallback")rest-client.fontWeight: Controls the font weight used in the response preview. (Default is normal)rest-client.environmentVariables: Sets the environments and custom variables belongs to it (e.g., {"production": {"host": "api.example.com"}, "sandbox":{"host":"sandbox.api.example.com"}}). (Default is {})rest-client.mimeAndFileExtensionMapping: Sets the custom mapping of mime type and file extension of saved response body. (Default is {})rest-client.previewResponseInUntitledDocument: Preview response in untitled document if set to true, otherwise displayed in html view. (Default is false)rest-client.certificates: Certificate paths for different hosts. The path can be absolute path or relative path(relative to workspace or current http file). (Default is {})rest-client.suppressResponseBodyContentTypeValidationWarning: Suppress response body content type validation. (Default is false)rest-client.previewOption: Response preview output option. Option details is described above. (Default is full)rest-client.disableHighlightResonseBodyForLargeResponse: Controls whether to highlight response body for response whose size is larger than limit specified by rest-client.largeResponseSizeLimitInMB. (Default is true)rest-client.disableAddingHrefLinkForLargeResponse: Controls whether to add href link in previewed response for response whose size is larger than limit specified by rest-client.largeResponseSizeLimitInMB. (Default is true)rest-client.largeResponseBodySizeLimitInMB: Set the response body size threshold of MB to identify whether a response is a so-called 'large response', only used when rest-client.disableHighlightResonseBodyForLargeResponse and/or rest-client.disableAddingHrefLinkForLargeResponse is set to true. (Default is 5)rest-client.previewColumn: Response preview column option. 'current' for previewing in the column of current request file. 'beside' for previewing at the side of the current active column and the side direction depends on workbench.editor.openSideBySideDirection setting, either right or below the current editor column. (Default is beside)rest-client.previewResponsePanelTakeFocus: Preview response panel will take focus after receiving response. (Default is True)rest-client.formParamEncodingStrategy: Form param encoding strategy for request body of x-www-form-urlencoded. automatic for detecting encoding or not automatically and do the encoding job if necessary. never for treating provided request body as is, no encoding job will be applied. always for only use for the scenario that automatic option not working properly, e.g., some special characters( +) are not encoded correctly. (Default is automatic)rest-client.addRequestBodyLineIndentationAroundBrackets: Add line indentation around brackets( {}, <>, []) in request body when pressing enter. (Default is true)rest-client.decodeEscapedUnicodeCharacters: Decode escaped unicode characters in response body. (Default is false)rest-client.logLevel: The verbosity of logging in the REST output panel. (Default is error)rest-client.enableSendRequestCodeLens: Enable/disable sending request CodeLens in request file. (Default is true)rest-client.enableCustomVariableReferencesCodeLens: Enable/disable custom variable references CodeLens in request file. (Default is true)Rest Client extension respects the proxy settings made for Visual Studio Code ( http.proxy and http.proxyStrictSSL). Only HTTP and HTTPS proxies are supported.
REST Client Extension also supports request-level settings for each independent request. The syntax is similar with the request name definition, # @settingName [settingValue], a required setting name as well as the optional setting value. Available settings are listed as following:
| Name | Syntax | Description |
|---|---|---|
| note | # @note |
Use for request confirmation, especially for critical request |
All the above leading
#can be replaced with//
See CHANGELOG here
All the amazing contributors❤️
Please provide feedback through the GitHub Issue system, or fork the repository and submit PR.


An extension that lets the developer mark resources (files or folders) as favorites, so they can be easily accessed.
Launch VS Code Quick Open ( cmd/ ctrl + p), paste the following command, and press Enter.
ext install howardzuo.vscode-favorites
An Add to Favorites command in Explorer's context menu saves links to your favorite files or folders into your XYZ .code-workspace file if you are using one, else into the .vscode/settings.json file of your root folder.
Your favorites are listed in a separate view and can be quickly accessed from there.
{
"favorites.resources": [], // resources path you prefer to mark
"favorites.sortOrder": "ASC", // DESC, MANUAL
"favorites.saveSeparated": false // whether to use an extra config file
}
You normally don't need to modify this config manually. Use context menus instead.


![]()
Beautify javascript, JSON, CSS, Sass, and HTML in Visual Studio Code.
VS Code uses js-beautify internally, but it lacks the ability to modify the style you wish to use. This extension enables running js-beautify in VS Code, AND honouring any .jsbeautifyrc file in the open file's path tree to load your code styling. Run with F1 Beautify (to beautify a selection) or F1 Beautify file.
For help on the settings in the .jsbeautifyrc see Settings.md
When not using a multi-root workspace:
.jsbeautifyrc in the file's path tree, up to project root, these will be the only settings used."beautify.config" : "string|Object.<string,string|number|boolean>", these will be the only settings used. The file path is interpreted relative to the workspace's root folder..jsbeautifyrc in the file's path tree, above project root, these will be the only settings used..jsbeautifyrc in your home directory, these will be the only settings used.When using a multi-root workspace: Same as above, but the search ends at the nearest parent workspace root to the open file.
otherwise...
| .jsbeautifyrc setting | VS Code setting |
|---|---|
| eol | files.eol |
| tab_size | editor.tabSize |
| indentwith_tabs (inverted)_ | editor.insertSpaces |
| wrap_line_length | html.format.wrapLineLength |
| wrap_attributes | html.format.wrapAttributes |
| unformatted | html.format.unformatted |
| indent_inner_html | html.format.indentInnerHtml |
| preserve_newlines | html.format.preserveNewLines |
| max_preserve_newlines | html.format.maxPreserveNewLines |
| indent_handlebars | html.format.indentHandlebars |
| end_with_newline | html.format.endWithNewline (html) |
| end_with_newline | file.insertFinalNewLine (css, js) |
| extra_liners | html.format.extraLiners |
| space_after_anon_function | javascript.format .insertSpaceAfterFunctionKeywordForAnonymousFunctions |
| space_in_paren | javascript.format .insertSpaceAfterOpeningAndBeforeClosingNonemptyParenthesis |
Note that the html.format settings will ONLY be used when the document is html. javascript.format settings are included always.
Also runs html and css beautify from the same package, as determined by the file extension. The schema indicates which beautifier each of the settings pertains to.
The .jsbeautifyrc config parser accepts sub elements of html, js and css so that different settings can be used for each of the beautifiers (like sublime allows). Note that this will cause the config file to be incorrectly structured for running js-beautify from the command line.
Settings are inherited from the base of the file. Thus:
{
"indent_size": 4,
"indent_char": " ",
"css": {
"indent_size": 2
}
}
Will result in the indent_size being set to 4 for JavaScript and HTML, but set to 2 for CSS. All will get the same indent_char setting.
If the file is unsaved, or the type is undetermined, you'll be prompted for which beautifier to use.
You can control which file types, extensions, or specific file names should be beautified with the beautify.language setting.
{
"beautify.language": {
"js": {
"type": ["javascript", "json"],
"filename": [".jshintrc", ".jsbeautifyrc"]
// "ext": ["js", "json"]
// ^^ to set extensions to be beautified using the javascript beautifier
},
"css": ["css", "scss"],
"html": ["htm", "html"]
// ^^ providing just an array sets the VS Code file type
}
}
Beautify on save will be enabled when "editor.formatOnSave" is true.
Beautification on particular files using the built in Format Document (which includes formatting on save) can be skipped with the beautify.ignore option. Using the Beautify file and Beautify selection will still work. For files opened from within the workspace directory, the glob patterns will match from the workspace folder root. For files opened from elsewhere, or when no workspace is open, the patterns will match from the system root.
Examples:
/* ignore all files named 'test.js' not in the root folder,
all files directly in any 'spec' directory, and
all files in any 'test' directory at any depth
*/
"beautify.ignore": ["*/test.js", "**/spec/*", "**/test/**/*"]
/* ignore all files ending in '_test.js' anywhere */
"beautify.ignore": "**/*_test.js"
Note that the glob patterns are not used to test against the containing folder. You must match the filename as well.
Embedded version of js-beautify is v1.8.4
Use the following to embed a beautify shortcut in keybindings.json. Replace with your preferred key bindings.
{
"key": "cmd+b",
"command": "HookyQR.beautify",
"when": "editorFocus"
}

This extension quickly searches (using ripgrep your workspace for comment tags like TODO and FIXME, and displays them in a tree view in the explorer pane. Clicking a TODO within the tree will open the file and put the cursor on the line containing the TODO.
Found TODOs can also be highlighted in open files.
Please see the wiki for configuration examples.
Notes:
todo-tree.tree.hideTreeWhenEmpty is set to false.rg.conf files are ignored.Highlighting tags is configurable. Use defaultHighlight to set up highlights for all tags. If you need to configure individual tags differently, use customHighlight. If settings are not specified in customHighlight, the value from defaultHighlight is used. If a setting is not specified in defaultHighlight then the older, deprecated icon, iconColour and iconColours settings are used.
Both defaultHighlight and customHighlight allow for the following settings:
foreground - used to set the foreground colour of the highlight in the editor and the marker in the ruler.
background - used to set the background colour of the highlight in the editor.
_Note: Foreground and background colours can be specified using HTML/CSS colour names (e.g. "Salmon"), RGB hex values (e.g. "#80FF00"), RGB CSS style values (e.g. "rgb(255,128,0)" or colours from the current theme, e.g. peekViewResult.background. Hex and RGB values can also have an alpha specified, e.g. "#ff800080" or "rgba(255,128,0,0.5)"._
opacity - percentage value used with the background colour. 100% will produce an opaque background which will obscure selection and other decorations. Note: opacity can only be specified when hex or rgb colours are used.
fontWeight, fontStyle, textDecoration - can be used to style the highlight with standard CSS values.
borderRadius - used to set the border radius of the background of the highlight.
icon - used to set a different icon in the tree view. Must be a valid octicon (see https://octicons.github.com) or codicon (see https://microsoft.github.io/vscode-codicons/dist/codicon.html). If using codicons, specify them in the format "\$(icon)". The icon defaults to a tick if it's not valid. You can also use "todo-tree", or "todo-tree-filled" if you want to use the icon from the activity view.
iconColour - used to set the colour of the icon in the tree. If not specified, it will try to use the foreground colour or the background colour. Colour can be specified as per foreground and background colours, except that theme colours are not available.
gutterIcon - set to true to show the icon in the editor gutter.
rulerColour - used to set the colour of the marker in the overview ruler. If not specified, it will default to use the foreground colour. Colour can be specified as per foreground and background colours.
rulerLane - used to set the lane for the marker in the overview ruler. If not specified, it will default to the right hand lane. Use one of "left", "center", "right", or "full". You can also use "none" to disable the ruler markers.
type - used to control how much is highlighted in the editor. Valid values are:
tag - highlights just the tagtext - highlights the tag and any text after the tagtag-and-comment - highlights the comment characters (or the start of the match) and the tagtext-and-comment - highlights the comment characters (or the start of the match), the tag and the text after the tagline - highlights the entire line containing the tagwhole-line - highlights the entire line containing the tag to the full width of the editor hideFromTree - used to hide tags from the tree, but still highlight in files
hideFromStatusBar - prevents the tag from being included in the status bar counts
Example:
"todo-tree.highlights.defaultHighlight": {
"icon": "alert",
"type": "text",
"foreground": "red",
"background": "white",
"opacity": 50,
"iconColour": "blue"
},
"todo-tree.highlights.customHighlight": {
"TODO": {
"icon": "check",
"type": "line"
},
"FIXME": {
"foreground": "black",
"iconColour": "yellow",
"gutterIcon": true
}
}
Note: The highlight configuration is separate from the settings for the search. Adding settings in customHighlight does not automatically add the tags into todo-tree.general.tags.
You can install the latest version of the extension via the Visual Studio Marketplace here.
Alternatively, open Visual Studio code, press Ctrl+P or Cmd+P and type:
> ext install Gruntfuggly.todo-tree
Note: Don't forget to reload the window to activate the extension!
The source code is available on GitHub here.
The tree view header can contain the following buttons:
![]() - Collapse all tree nodes
- Collapse all tree nodes
![]() - Expand all tree nodes
- Expand all tree nodes
![]() - Show the tree view as a flat list, with the full filename for each TODO
- Show the tree view as a flat list, with the full filename for each TODO
![]() - Show the view as a list of tags
- Show the view as a list of tags
![]() - Show the tree view as a tree with expandable nodes for each folder (default)
- Show the tree view as a tree with expandable nodes for each folder (default)
![]() - Group the TODOs in the tree by the tag
- Group the TODOs in the tree by the tag
![]() - Organise the TODOs by file (default)
- Organise the TODOs by file (default)
![]() - Only show items in the tree which match the entered filter text
- Only show items in the tree which match the entered filter text
![]() - Remove any active filter
- Remove any active filter
![]() - Rebuild the tree
- Rebuild the tree
![]() - Show tags from open files only
- Show tags from open files only
![]() - Show tags from workspace
- Show tags from workspace
![]() - Show the current file in the tree
- Show the current file in the tree
Right clicking on a folder in the tree will bring up a context menu with the following options:
Hide This Folder - removes the folder from the tree
Only Show This Folder - remove all other folders and subfolders from the tree
Only Show This Folder And Subfolders - remove other folders from the tree, but keep subfolders
Reset Folder Filter - reset any folders previously filtered using the above
Note: The current filters are shown in the debug log. Also, the filter can always be reset by right clicking the Nothing Found item in the tree. If your tree becomes invisible because everything is filtered and hideTreeWhenEmpty is set to true, you can reset the filter by pressing F1 and selecting the Todo Tree: Reset Folder Filter command.
To make it easier to configure the tags, there are two commands available:
Todo Tree: Add Tag - allows entry of a new tag for searching
Todo Tree: Remove Tag - shows a list of current tags which can be selected for removing
Note: The Remove Tag command can be used to show current tags - just press Escape or Enter with out selecting any to close it.
The contents of the tree can be exported using Todo Tree: Export Tree. A read-only file will be created using the path specified with todo-tree.general.exportPath. The file can be saved using File: Save As.... Note: Currently File: Save does not work which seems to be a VSCode bug (see https://github.com/microsoft/vscode/issues/101952).
The extension can be customised as follows (default values in brackets):
todo-tree.general.debug ( false)
Show a debug channel in the output view.
todo-tree.general.enableFileWatcher ( false)
Set this to true to turn on automatic updates when files in the workspace are created, changed or deleted.
todo-tree.general.exportPath ( ~/todo-tree-%Y%m%d-%H%M.txt)
Path to use when exporting the tree. Environment variables will be expanded, e.g ${HOME} and the path is passed through strftime (see https://github.com/samsonjs/strftime). Set the extension to .json to export as a JSON record.
todo-tree.general.rootFolder ( "")
By default, any open workspaces will have a tree in the view. Use this to force another folder to be the root of the tree. You can include environment variables and also use \${workspaceFolder}. e.g.
"todo-tree.general.rootFolder": "${workspaceFolder}/test"
or
"todo-tree.general.rootFolder": "${HOME}/project".
Note: Other open files (outside of the rootFolder) will be shown (as they are opened) with their full path in brackets.
todo-tree.general.tags ( ["TODO","FIXME","BUG"])
This defines the tags which are recognised as TODOs. This list is automatically inserted into the regex.
todo-tree.general.tagGroups ( {})
This setting allows multiple tags to be treated as a single group. Example:
"todo-tree.general.tagGroups": {
"FIXME": [
"FIXME",
"FIXIT",
"FIX",
]
},
This treats any of FIXME, FIXIT or FIX as FIXME. When the tree is grouped by tag, all of these will appear under the FIXME node. This also means that custom highlights are applied to the group, not each tag type. Note: all tags in the group should also appear in todo-tree.general.tags.
todo-tree.general.revealBehaviour ( start of todo)
Change the cursor behaviour when selecting a todo from the explorer. Yo.u can choose from: start of todo (moves the cursor to the beginning of the todo), end of todo (moves the cursor to the end of the todo) highlight todo (selects the todo text), start of line (moves the cursor to the start of the line) and highlight line (selected the whole line)
todo-tree.general.statusBar ( none)
What to show in the status bar - nothing ( none), total count ( total), counts per tag ( tags), counts for the top three tags ( top three) or counts for the current file only ( current file).
todo-tree.general.statusBarClickBehaviour ( cycle)
Set the behaviour of clicking the status bar to either cycle display formats, or reveal the tree.
todo-tree.filtering.includeGlobs ( [])
Globs for use in limiting search results by inclusion, e.g. [\"**/unit-tests/*.js\"] to only show .js files in unit-tests subfolders. Globs help. Note: globs paths are absolute - not relative to the current workspace.
todo-tree.filtering.excludeGlobs ( [])
Globs for use in limiting search results by exclusion (applied after includeGlobs), e.g. [\"**/*.txt\"] to ignore all .txt files
todo-tree.filtering.includedWorkspaces ( [])
A list of workspace names to include as roots in the tree (wildcards can be used). An empty array includes all workspace folders.
todo-tree.filtering.excludedWorkspaces ( [])
A list of workspace names to exclude as roots in the tree (wildcards can be used).
todo-tree.filtering.passGlobsToRipgrep ( true)
Set this to false to apply the globs after the search (legacy behaviour).
todo-tree.filtering.useBuiltInExcludes ( none)
Set this to use VSCode's built in files or search excludes. Can be one of none, file excludes (uses Files:Exclude), search excludes (Uses Search:Exclude) or file and search excludes (uses both).
todo-tree.filtering.ignoreGitSubmodules ( false)
If true, any subfolders containing a .git file will be ignored when searching.
todo-tree.filtering.includeHiddenFiles ( false)
If true, files starting with a period (.) will be included.
todo-tree.highlights.enabled ( true)
Set this to false to turn off highlighting.
todo-tree.highlights.highlightDelay ( 500)
The delay before highlighting (milliseconds).
todo-tree.highlights.defaultHighlight ( {})
Set default highlights. Example:
{
"foreground": "white",
"background": "red",
"icon": "check",
"type": "text"
}
todo-tree.highlights.customHighlight ( {})
Set highlights per tag (or tag group). Example:
{
"TODO": {
"foreground": "white",
"type": "text"
},
"FIXME": {
"icon": "beaker"
}
}
todo-tree.highlights.schemes ( ['file','untitled'])
Editor schemes to show highlights in. To show highlights in settings files, for instance, add vscode-userdata or for output windows, add output.
todo-tree.regex.regex ("((//|#|<!--|;|/\\*)\\s*(\$TAGS)|^\\s*- \\[ \\])")
This defines the regex used to locate TODOs. By default, it searches for tags in comments starting with //, #, ;, <!-- or /. This should cover most languages. However if you want to refine it, make sure that the (\$TAGS) is kept. The second part of the expression allows matching of Github markdown task lists. Note: This is a Rust regular expression, not javascript.*
todo-tree.regex.regexCaseSensitive ( true)
Set to false to allow tags to be matched regardless of case.
todo-tree.ripgrep.ripgrep ( "")
Normally, the extension will locate ripgrep itself as and when required. If you want to use an alternate version of ripgrep, set this to point to wherever it is installed.
todo-tree.ripgrep.ripgrepArgs ( "--max-columns=1000")
Use this to pass additional arguments to ripgrep. e.g. "-i" to make the search case insensitive. Use with caution!
todo-tree.ripgrep.ripgrepMaxBuffer ( 200)
By default, the ripgrep process will have a buffer of 200KB. However, this is sometimes not enough for all the tags you might want to see. This setting can be used to increase the buffer size accordingly.
todo-tree.tree.showInExplorer ( true)
The tree is shown in the explorer view and also has it's own view in the activity bar. If you no longer want to see it in the explorer view, set this to false.
todo-tree.tree.hideTreeWhenEmpty ( true)
Normally, the tree is removed from the explorer view if nothing is found. Set this to false to keep the view present.
todo-tree.tree.filterCaseSensitive ( false)
Use this if you need the filtering to be case sensitive. Note: this does not the apply to the search.
todo-tree.tree.trackFile ( true)
Set to false if you want to prevent tracking the open file in the tree view.
todo-tree.tree.showBadges ( true)
Set to false to disable SCM status and badges in the tree. Note: This also unfortunately turns off themed icons.
todo-tree.tree.expanded* ( false)
Set to true if you want new views to be expanded by default.
todo-tree.tree.flat* ( false)
Set to true if you want new views to be flat by default.
todo-tree.tree.grouped* ( false)
Set to true if you want new views to be grouped by default.
todo-tree.tree.tagsOnly* ( false)
Set to true if you want new views with tags only by default.
todo-tree.tree.sortTagsOnlyViewAlphabetically ( false)
Sort items in the tags only view alphabetically instead of by file and line number.
todo-tree.tree.showCountsInTree ( false)
Set to true to show counts of TODOs in the tree.
todo-tree.tree.labelFormat ( ${tag} ${after})
Format of the TODO item labels. Available placeholders are ${line}, ${column}, ${tag}, ${before} (text from before the tag), ${after} (text from after the tag), ${filename}, ${filepath} and ${afterOrBefore} (use "after" text or "before" text if after is empty).
todo-tree.tree.scanMode ( workspace)
By default the extension scans the whole workspace ( workspace). Use this to limit the search to only open files ( open files) or only the current file ( current file).
todo-tree.tree.showScanModeButton ( false)
Show a button on the tree view header to switch the scanMode (see above).
todo-tree.tree.hideIconsWhenGroupedByTag ( false)
Hide item icons when grouping by tag.
todo-tree.tree.disableCompactFolders ( false)
The tree will normally respect the VSCode's explorer.compactFolders setting. Set this to true if you want to disable compact folders in the todo tree.
todo-tree.tree.tooltipFormat ( ${filepath}, ${line})
Format of the tree item tooltips. Uses the same placeholders as todo-tree.tree.labelFormat (see above).
todo-tree.tree.buttons.reveal ( true)
Show a button in the tree view title bar to reveal the current item (only when track file is not enabled).
todo-tree.tree.buttons.scanMode ( false)
Show a button in the tree view title bar to change the Scan Mode setting.
todo-tree.tree.buttons.viewStyle ( true)
Show a button in the tree view title bar to change the view style (tree, flat or tags only).
todo-tree.tree.buttons.groupByTag ( true)
Show a button in the tree view title bar to enable grouping items by tag.
todo-tree.tree.buttons.filter ( true)
Show a button in the tree view title bar allowing the tree to be filtered by entering some text.
todo-tree.tree.buttons.refresh ( true)
Show a refresh button in the tree view title bar.
todo-tree.tree.buttons.expand ( true)
Show a button in the tree view title bar to expand or collapse the whole tree.
todo-tree.tree.buttons.export ( false)
Show a button in the tree view title bar to create a text file showing the tree content.
Only applies to new workspaces. Once the view has been changed in the workspace, the current state is stored.*
If the regex contains \n, then multiline TODOs will be enabled. In this mode, the search results are processed slightly differently. If results are found which do not contain any tags from todo-tree.general.tags it will be assumed that they belong to the previous result that did have a tag. For example, if you set the regex to something like:
"todo-tree.regex.regex": "(//)\\s*($TAGS).*(\\n\\s*//\\s{2,}.*)*"
This will now match multiline TODOs where the extra lines have at least two spaces between the comment characters and the TODO item. e.g.
// TODO multiline example
// second line
// third line
If you want to match multiline TODOs in C++ style multiline comment blocks, you'll need something like:
"todo-tree.regex.regex": "(/\\*)\\s*($TAGS).*(\\n\\s*(//|/\\*|\\*\\*)\\s{2,}.*)*"
which should match:
/* TODO multiline example
** second line
** third line
*/
Note: If you are modifying settings using the settings GUI, you don't need to escape each backslash.
Warning: Multiline TODOs will not work with markdown TODOs and may have other unexpected results. There may also be a reduction in performance.
To restrict the set of folders which is searched, you can define todo-tree.filtering.includeGlobs. This is an array of globs which the search results are matched against. If the results match any of the globs, they will be shown. By default the array is empty, which matches everything. See here for more information on globs. Note: globs paths are absolute - not relative to the current workspace.
To exclude folders/files from your search you can define todo-tree.filtering.excludeGlobs. If the search results match any of these globs, then the results will be ignored.
You can also include and exclude folders from the tree using the context menu. This folder filter is applied separately to the include/exclude globs.
Note: By default, ripgrep ignores files and folders from your .gitignore or .ignore files. If you want to include these files, set todo-tree.ripgrep.ripgrepArgs to --no-ignore.
This extension enables the user to open a file under the current cursor position. Just right-click on a pathname within a open document and select the open file under cursor option (or just press Alt + P without right-click).
If the file is found by vscode then it will open a new tab with this file.
If the string is has an tailing number separated by a colon (i.e. :23) it will open the file at the specified line number. :23:45 means line 23 column 45.
It is also possible to select one or more text segments in the document and open them.
You have a document, containing some text, that exists in a folder, say c:\Users\guest\Documents\myfile.txt.
In that file the path strings could look like as follows:
[...]
c:\Users\guest\Documents\Temp\stuff.txt
[...]
"..\..\administrator\readme.txt"
[...]
"..\user\readme.txt:33"
[...]
With this extension you can right-click on such a path and choose open file under cursor and VSCode will open a new tab with that file.
'file-path'.src, defined search paths, etc.file:line:column.[src/]class/SomeClass.php from just someClass. (Use case insensitive file system to support the different in letter case.)/path/to/sth to be lookup as both absolute and relative path. Useful for code like projectFolder + '/path/to/sth'.grep output with line number, which has the line pattern file:line[:column]:content (content is discarded).Relative paths are relative to the these folders (in listed order):
Currently opened document's folder, and
(if it is within a workspace folder) the document's parent folders (up to the workspace folder).
All workspace folders, and their sub-folders listed in the option seito-openfile.searchSubFoldersOfWorkspaceFolders.
All search paths in the option seito-openfile.searchPaths.
Remarks:
/... ( / or \), if not found, are searched like relative paths too.~/... paths not found from user's home, the step 2 of "Relative paths" is searched if option seito-openfile.lookupTildePathAlsoFromWorkspace is true.


Run code snippet or code file for multiple languages: C, C++, Java, JavaScript, PHP, Python, Perl, Perl 6, Ruby, Go, Lua, Groovy, PowerShell, BAT/CMD, BASH/SH, F# Script, F# (.NET Core), C# Script, C# (.NET Core), VBScript, TypeScript, CoffeeScript, Scala, Swift, Julia, Crystal, OCaml Script, R, AppleScript, Elixir, Visual Basic .NET, Clojure, Haxe, Objective-C, Rust, Racket, Scheme, AutoHotkey, AutoIt, Kotlin, Dart, Free Pascal, Haskell, Nim, D, Lisp, Kit, V, SCSS, Sass, CUDA, Less, and custom command
Ctrl+Alt+NF1 and then select/type Run Code,Run Code in editor context menuRun Code button in editor title menuRun Code button in context menu of file explorerCtrl+Alt+MF1 and then select/type Stop Code RunStop Code Run in context menu
Ctrl+Alt+J, or press F1 and then select/type Run By Language, then type or select the language to run: e.g php, javascript, bat, shellscript...
Ctrl+Alt+K, or press F1 and then select/type Run Custom CommandMake sure the executor PATH of each language is set in the environment variable.
You could also add entry into code-runner.executorMap to set the executor PATH.
e.g. To set the executor PATH for ruby, php and html:
{
"code-runner.executorMap": {
"javascript": "node",
"php": "C:\\php\\php.exe",
"python": "python",
"perl": "perl",
"ruby": "C:\\Ruby23-x64\\bin\\ruby.exe",
"go": "go run",
"html": "\"C:\\Program Files (x86)\\Google\\Chrome\\Application\\chrome.exe\"",
"java": "cd $dir && javac $fileName && java $fileNameWithoutExt",
"c": "cd $dir && gcc $fileName -o $fileNameWithoutExt && $dir$fileNameWithoutExt"
}
}
Supported customized parameters
Python: Select Interpreter command)Please take care of the back slash and the space in file path of the executor
\\\" to surround your file pathYou could set the executor per filename glob>):
{
"code-runner.executorMapByGlob": {
"pom.xml": "cd $dir && mvn clean package",
"*.test.js": "tap",
"*.js": "node"
}
}
Besides, you could set the default language to run:
{
"code-runner.defaultLanguage": "javascript"
}
For the default language: It should be set with language id defined in VS Code. The languages you could set are java, c, cpp, javascript, php, python, perl, ruby, go, lua, groovy, powershell, bat, shellscript, fsharp, csharp, vbscript, typescript, coffeescript, swift, r, clojure, haxe, objective-c, rust, racket, ahk, autoit, kotlin, dart, pascal, haskell, nim, d, lisp
Also, you could set the executor per file extension:
{
"code-runner.executorMapByFileExtension": {
".vbs": "cscript //Nologo"
}
}
To set the custom command to run:
{
"code-runner.customCommand": "echo Hello"
}
To set the the working directory:
{
"code-runner.cwd": "path/to/working/directory"
}
To set whether to clear previous output before each run (default is false):
{
"code-runner.clearPreviousOutput": false
}
To set whether to save all files before running (default is false):
{
"code-runner.saveAllFilesBeforeRun": false
}
To set whether to save the current file before running (default is false):
{
"code-runner.saveFileBeforeRun": false
}
To set whether to show extra execution message like [Running] ... and [Done] ... (default is true):
{
"code-runner.showExecutionMessage": true
}
[REPL support] To set whether to run code in Integrated Terminal (only support to run whole file in Integrated Terminal, neither untitled file nor code snippet) (default is false):
{
"code-runner.runInTerminal": false
}
To set whether to preserve focus on code editor after code run is triggered (default is true, the code editor will keep focus; when it is false, Terminal or Output Channel will take focus):
{
"code-runner.preserveFocus": true
}
code-runner.ignoreSelection: Whether to ignore selection to always run entire file. (Default is false)
code-runner.showRunIconInEditorTitleMenu: Whether to show 'Run Code' icon in editor title menu. (Default is true)
code-runner.showRunCommandInEditorContextMenu: Whether to show 'Run Code' command in editor context menu. (Default is true)
code-runner.showRunCommandInExplorerContextMenu: Whether to show 'Run Code' command in explorer context menu. (Default is true)
code-runner.terminalRoot: For Windows system, replaces the Windows style drive letter in the command with a Unix style root when using a custom shell as the terminal, like Bash or Cgywin. Example: Setting this to /mnt/ will replace C:\path with /mnt/c/path (Default is "")
code-runner.temporaryFileName: Temporary file name used in running selected code snippet. When it is set as empty, the file name will be random. (Default is "tempCodeRunnerFile")
code-runner.respectShebang: Whether to respect Shebang to run code. (Default is true)
code-runner.cwd settingcode-runner.cwd is not set and code-runner.fileDirectoryAsCwd is true, use the directory of the file to be executedcode-runner.cwd is not set and code-runner.fileDirectoryAsCwd is false, use the path of root folder that is open in VS CodeBy default, telemetry data collection is turned on to understand user behavior to improve this extension. To disable it, update the settings.json as below:
{
"code-runner.enableAppInsights": false
}
See Change Log here
Submit the issues if you find any bug or have any suggestion.
Fork the repo and submit pull requests.

Git Project Manager (GPM) is a Microsoft VSCode extension that allows you to open a new window targeting a git repository directly from VSCode window.
Currently there are 3 avaliable commands, all of them can be accessed via Ctrl+Shift+P (Cmd+Alt+P on Mac) typing GPM
Show a list of the available git repositories in all folders configured in gitProjectManager.baseProjectsFolders. The first time it searchs all folders, after that it uses a cached repository info.

This commands refresh the cached repositories info for all configured folders.
This commands allows you to select a specific folder to refresh its repositories, without refreshing all folders.
This command will bring a list of your most recent git projects, leting you swap even faster between them.
The size of the list if configured in gitProjectManager.recentProjectsListSize
Before start using GPM you need to configure the base folders that the extension will search for git repositories. Edit settings.json from the File -> Preferences -> Settings and add the following config
{
"gitProjectManager.baseProjectsFolders": [
"/home/user/nodeProjects",
"/home/user/personal/pocs"
]
}
Another available configuration is gitProjectManager.storeRepositoriesBetweenSessions that allows git repositories information to be stored between sessions, avoiding the waiting time in the first time you load the repositories list. It's false by default.
{
"gitProjectManager.storeRepositoriesBetweenSessions": true
}
If nothing happens when trying to open a found project it could be due to the Code command being used. To work around this issue set gitProjectManager.codePath to the full path of the Code command to use when launching new instances. This configuration can be defined in 3 formats (this was done to solve issue #7):
First: Define it as a simple string, with the path to code app
//Windows
{
"gitProjectManager.codePath": "C:\\Program Files (x86)\\Microsoft VS Code\\bin\\code.cmd"
}
//Linux
{
"gitProjectManager.codePath": "/usr/local/bin/code"
}
Second: Use a object notation to define the path to code path on each platform
{
"gitProjectManager.codePath" : {
"windows": "C:\\Program Files (x86)\\Microsoft VS Code\\bin\\code.cmd",
"linux": "/usr/local/bin/code"
}
}
Third: An array of file paths, where at least one is a valid path
{
"gitProjectManager.codePath" : [
"C:\\Program Files (x86)\\Microsoft VS Code\\bin\\code.cmd",
"/usr/local/bin/code"
]
}
To improve performance there are 2 new and important configurations that are: ignoredFolders: an array of folder names that will be ignored (_nodemodules for example)
{
"gitProjectManager.ignoredFolders": ["node_modules"]
}
maxDepthRecursion: indicates the maximum recursion depth that will be searched starting in the configured folder (default: 2)
{
"gitProjectManager.maxDepthRecursion": 4
}
In version 0.1.10 we also added the "gitProjectManager.checkRemoteOrigin" configuration that allows users to not check remote repository origin to improve performance
{
"gitProjectManager.checkRemoteOrigin": false
}
Added in version 0.1.12, you can configure the behavior when opening a project if it'll be opened in the same window or in a new window. (this option is ignored if there aren't any opened folders in current window)):
{
"gitProjectManager.openInNewWindow": false
}
If you have any idea, feel free to create issues and pull requests.
![]()
Switch between Code and Code Insiders with ease.
Follow the instructions in the Marketplace, or run the following in the command palette:
ext install fabiospampinato.vscode-open-in-code
It adds 2 commands to the command palette:
"Open in Code"; // Open the current project and file in Code
"Open in Code Insiders"; // Open the current project and file in Code Insiders
If you found a problem, or have a feature request, please open an issue about it.
If you want to make a pull request you can debug the extension using Debug Launcher.
MIT © Fabio Spampinato


This extension contains code snippets for Reactjs and is based on the awesome babel-sublime-snippets package.
In order to install an extension you need to launch the Command Palette (Ctrl + Shift + P or Cmd + Shift + P) and type Extensions. There you have either the option to show the already installed snippets or install new ones.
Removed support for jsx language as it was giving errors in developer tools #39
Up until verion 1.0.0 all the JavaScript snippets where part of the extension. In order to avoid duplication the snippets are now included only to this extension and if you want to use them you have to install it explicitly.
When installing the extension React development could be really fun

As VS Code from version 0.10.10 supports React components syntax inside js files the snippets are available for JavaScript language as well.
In the following example you can see the usage of a React stateless component with prop types snippets inside a js and not jsx file.

Below is a list of all available snippets and the triggers of each one. The ⇥ means the TAB key.
| Trigger | Content |
|---|---|
rcc→ |
class component skeleton |
rrc→ |
class component skeleton with react-redux connect |
rrdc→ |
class component skeleton with react-redux connect and dispatch |
rccp→ |
class component skeleton with prop types after the class |
rcjc→ |
class component skeleton without import and default export lines |
rcfc→ |
class component skeleton that contains all the lifecycle methods |
rwwd→ |
class component without import statements |
rpc→ |
class pure component skeleton with prop types after the class |
rsc→ |
stateless component skeleton |
rscp→ |
stateless component with prop types skeleton |
rscm→ |
memoize stateless component skeleton |
rscpm→ |
memoize stateless component with prop types skeleton |
rsf→ |
stateless named function skeleton |
rsfp→ |
stateless named function with prop types skeleton |
rsi→ |
stateless component with prop types and implicit return |
fcc→ |
class component with flow types skeleton |
fsf→ |
stateless named function skeleton with flow types skeleton |
fsc→ |
stateless component with flow types skeleton |
rpt→ |
empty propTypes declaration |
rdp→ |
empty defaultProps declaration |
con→ |
class default constructor with props |
conc→ |
class default constructor with props and context |
est→ |
empty state object |
cwm→ |
componentWillMount method |
cdm→ |
componentDidMount method |
cwr→ |
componentWillReceiveProps method |
scu→ |
shouldComponentUpdate method |
cwup→ |
componentWillUpdate method |
cdup→ |
componentDidUpdate method |
cwun→ |
componentWillUnmount method |
gsbu→ |
getSnapshotBeforeUpdate method |
gdsfp→ |
static getDerivedStateFromProps method |
cdc→ |
componentDidCatch method |
ren→ |
render method |
sst→ |
this.setState with object as parameter |
ssf→ |
this.setState with function as parameter |
props→ |
this.props |
state→ |
this.state |
bnd→ |
binds the this of method inside the constructor |
disp→ |
MapDispatchToProps redux function |
The following table lists all the snippets that can be used for prop types.
Every snippet regarding prop types begins with pt so it's easy to group it all together and explore all the available options.
On top of that each prop type snippets has one equivalent when we need to declare that this property is also required.
For example pta creates the PropTypes.array and ptar creates the PropTypes.array.isRequired
| Trigger | Content |
|---|---|
pta→ |
PropTypes.array, |
ptar→ |
PropTypes.array.isRequired, |
ptb→ |
PropTypes.bool, |
ptbr→ |
PropTypes.bool.isRequired, |
ptf→ |
PropTypes.func, |
ptfr→ |
PropTypes.func.isRequired, |
ptn→ |
PropTypes.number, |
ptnr→ |
PropTypes.number.isRequired, |
pto→ |
PropTypes.object, |
ptor→ |
PropTypes.object.isRequired, |
pts→ |
PropTypes.string, |
ptsr→ |
PropTypes.string.isRequired, |
ptsm→ |
PropTypes.symbol, |
ptsmr→ |
PropTypes.symbol.isRequired, |
ptan→ |
PropTypes.any, |
ptanr→ |
PropTypes.any.isRequired, |
ptnd→ |
PropTypes.node, |
ptndr→ |
PropTypes.node.isRequired, |
ptel→ |
PropTypes.element, |
ptelr→ |
PropTypes.element.isRequired, |
pti→ |
PropTypes.instanceOf(ClassName), |
ptir→ |
PropTypes.instanceOf(ClassName).isRequired, |
pte→ |
PropTypes.oneOf(['News', 'Photos']), |
pter→ |
PropTypes.oneOf(['News', 'Photos']).isRequired, |
ptet→ |
PropTypes.oneOfType([PropTypes.string, PropTypes.number]), |
ptetr→ |
PropTypes.oneOfType([PropTypes.string, PropTypes.number]).isRequired, |
ptao→ |
PropTypes.arrayOf(PropTypes.number), |
ptaor→ |
PropTypes.arrayOf(PropTypes.number).isRequired, |
ptoo→ |
PropTypes.objectOf(PropTypes.number), |
ptoor→ |
PropTypes.objectOf(PropTypes.number).isRequired, |
ptoos→ |
PropTypes.objectOf(PropTypes.shape()), |
ptoosr→ |
PropTypes.objectOf(PropTypes.shape()).isRequired, |
ptsh→ |
PropTypes.shape({color: PropTypes.string, fontSize: PropTypes.number}), |
ptshr→ |
PropTypes.shape({color: PropTypes.string, fontSize: PropTypes.number}).isRequired, |
Over 130 jQuery Code Snippets for JavaScript code.
Just type the letters 'jq' to get a list of all available jQuery Code Snippets.
| Trigger | Description | |||
|---|---|---|---|---|
| func | An anonymous function. | |||
| jqAfter | Insert content, specified by the parameter, after each element in the set of matched elements. | |||
| jqAjax | Perform an asynchronous HTTP (Ajax) request. | |||
| jqAjaxAspNetWebService | Perform an asynchronous HTTP (Ajax) request to a ASP.NET web service. | |||
| jqAppend | Insert content, specified by the parameter, to the end of each element in the set of matched elements. | |||
| jqAppendTo | Insert every element in the set of matched elements to the end of the target. | |||
| jqAttrGet | Get the value of an attribute for the first element in the set of matched elements. | |||
| jqAttrRemove | Remove an attribute from each element in the set of matched elements. | |||
| jqAttrSet | Set one or more attributes for the set of matched elements. | |||
| jqAttrSetFn | Set one or more attributes for the set of matched elements. | |||
| jqAttrSetObj | Set one or more attributes for the set of matched elements. | |||
| jqBefore | Insert content, specified by the parameter, before each element in the set of matched elements. | |||
| jqBind | Attach a handler to an event for the elements. | |||
| jqBindWithData | Attach a handler to an event for the elements. | |||
| jqBlur | Bind an event handler to the "blur" JavaScript event, or trigger that event on an element. | |||
| jqChange | Bind an event handler to the "change" JavaScript event, or trigger that event on an element. | |||
| jqClassAdd | Adds the specified class(es) to each of the set of matched elements. | |||
| jqClassRemove | Remove a single class, multiple classes, or all classes from each element in the set of matched elements. | |||
| jqClassToggle | Add or remove one or more classes from each element in the set of matched elements, depending on either the class's presence. | |||
| jqClassToggleSwitch | Add or remove one or more classes from each element in the set of matched elements, depending on either the class's presence or the value of the switch argument. | |||
| jqClick | Bind an event handler to the "click" JavaScript event, or trigger that event on an element. | |||
| jqClone | Create a deep copy of the set of matched elements. | |||
| jqCloneWithEvents | Create a deep copy of the set of matched elements. | |||
| jqCssGet | Get the computed style properties for the first element in the set of matched elements. | |||
| jqCssSet | Set one or more CSS properties for the set of matched elements. | |||
| jqCssSetObj | Set one or more CSS properties for the set of matched elements. | |||
| jqDataGet | Return the value at the named data store for the first element in the jQuery collection, as set by data(name, value) or by an HTML5 data-* attribute. | |||
| jqDataRemove | Remove a previously-stored piece of data. | |||
| jqDataSet | Store arbitrary data associated with the matched elements. | |||
| jqDataSetObj | Store arbitrary data associated with the matched elements. | |||
| jqDie | Remove event handlers previously attached using .live() from the elements. | |||
| jqDieAll | Remove event handlers previously attached using .live() from the elements. | |||
| jqDieFn | Remove event handlers previously attached using .live() from the elements. | |||
| jqDocReady | Function to execute when the DOM is fully loaded. | |||
| jqDocReadyShort | Function to execute when the DOM is fully loaded. | |||
| jqEach | A generic iterator function, which can be used to seamlessly iterate over both objects and arrays. Arrays and array-like objects with a length property (such as a function's arguments object) are iterated by numeric index, from 0 to length-1. Other objects are iterated via their named properties. | |||
| jqEachElement | Iterate over a jQuery object, executing a function for each matched element. | |||
| jqEmpty | Remove all child nodes of the set of matched elements from the DOM. | |||
| jqFadeIn | Display the matched elements by fading them to opaque. | |||
| jqFadeInFull | Display the matched elements by fading them to opaque. | |||
| jqFadeOut | Hide the matched elements by fading them to transparent. | |||
| jqFadeOutFull | Hide the matched elements by fading them to transparent. | |||
| jqFadeTo | Adjust the opacity of the matched elements. | |||
| jqFadeToFull | Adjust the opacity of the matched elements. | |||
| jqFind | Get the descendants of each element in the current set of matched elements, filtered by a selector, jQuery object, or element. | |||
| jqFocus | Bind an event handler to the "focus" JavaScript event, or trigger that event on an element. | |||
| jqGet | Load data from the server using a HTTP GET request. | |||
| jqGetJson | Load JSON-encoded data from the server using a GET HTTP request. | |||
| jqGetScript | Load a JavaScript file from the server using a GET HTTP request, then execute it. | |||
| jqHasClass | Determine whether any of the matched elements are assigned the given class. | |||
| jqHeightGet | Get the current computed height for the first element in the set of matched elements. | |||
| jqHeightSet | Set the CSS height of every matched element. | |||
| jqHide | Hide the matched elements. | |||
| jqHideFull | Hide the matched elements. | |||
| jqHover | Bind two handlers to the matched elements, to be executed when the mouse pointer enters and leaves the elements. | |||
| jqHtmlGet | Get the HTML contents of the first element in the set of matched elements. | |||
| jqHtmlSet | Set the HTML contents of each element in the set of matched elements. | |||
| jqInnerHeight | Get the current computed height for the first element in the set of matched elements, including padding but not border. | |||
| jqInnerWidth | Get the current computed inner width for the first element in the set of matched elements, including padding but not border. | |||
| jqInsertAfter | Insert every element in the set of matched elements after the target. | |||
| jqInsertBefore | Insert every element in the set of matched elements before the target. | |||
| jqKeyDown | Bind an event handler to the "keydown" JavaScript event, or trigger that event on an element. | |||
| jqKeyPress | Bind an event handler to the "keypress" JavaScript event, or trigger that event on an element. | |||
| jqKeyUp | Bind an event handler to the "keyup" JavaScript event, or trigger that event on an element. | |||
| jqLoadGet | Load data from the server and place the returned HTML into the matched element. | |||
| jqLoadPost | Load data from the server and place the returned HTML into the matched element. | |||
| jqMap | Translate all items in an array or object to new array of items. | |||
| jqMouseDown | Bind an event handler to the "mousedown" JavaScript event, or trigger that event on an element. | |||
| jqMouseEnter | Bind an event handler to be fired when the mouse enters an element, or trigger that handler on an element. | |||
| jqMouseLeave | Bind an event handler to be fired when the mouse leaves an element, or trigger that handler on an element. | |||
| jqMouseMove | Bind an event handler to the "mousemove" JavaScript event, or trigger that event on an element. | |||
| jqMouseOut | Bind an event handler to the "mouseout" JavaScript event, or trigger that event on an element. | |||
| jqMouseOver | Bind an event handler to the "mouseover" JavaScript event, or trigger that event on an element. | |||
| jqMouseUp | Bind an event handler to the "mouseup" JavaScript event, or trigger that event on an element. | |||
| jqNamespace | A namespace template. ref: http://enterprisejquery.com/2010/10/how-good-c-habits-can-encourage-bad-javascript-habits-part-1/ | |||
| jqOffsetGet | Get the current coordinates of the first element, or set the coordinates of every element, in the set of matched elements, relative to the document. | |||
| jqOffsetParent | Get the closest ancestor element that is positioned. | |||
| jqOn | Attach an event handler function for one or more events to the selected elements. | |||
| jqOne | Attach a handler to an event for the elements. The handler is executed at most once per element per event type. | |||
| jqOneWithData | Attach a handler to an event for the elements. The handler is executed at most once per element per event type. | |||
| jqOuterHeight | Get the current computed height for the first element in the set of matched elements, including padding, border, and optionally margin. Returns a number (without "px") representation of the value or null if called on an empty set of elements. | |||
| jqOuterWidth | Get the current computed width for the first element in the set of matched elements, including padding and border. | |||
| jqPlugin | Plugin template. | |||
| jqPosition | Get the current coordinates of the first element in the set of matched elements, relative to the offset parent. | |||
| jqPost | Load data from the server using a HTTP POST request. | |||
| jqPrepend | Insert content, specified by the parameter, to the beginning of each element in the set of matched elements. | |||
| jqPrependTo | Insert every element in the set of matched elements to the beginning of the target. | |||
| jqRemove | Remove the set of matched elements from the DOM. | |||
| jqRemoveExp | Remove the set of matched elements from the DOM. | |||
| jqReplaceAll | Replace each target element with the set of matched elements. | |||
| jqReplaceWith | Replace each element in the set of matched elements with the provided new content and return the set of elements that was removed. | |||
| jqResize | Bind an event handler to the "resize" JavaScript event, or trigger that event on an element. | |||
| jqScroll | Bind an event handler to the "scroll" JavaScript event, or trigger that event on an element. | |||
| jqScrollLeftGet | Get the current horizontal position of the scroll bar for the first element in the set of matched elements. | |||
| jqScrollLeftSet | Set the current horizontal position of the scroll bar for each of the set of matched elements. | |||
| jqScrollTopGet | Get the current vertical position of the scroll bar for the first element in the set of matched elements or set the vertical position of the scroll bar for every matched element. | |||
| jqScrollTopSet | Set the current vertical position of the scroll bar for each of the set of matched elements. | |||
| jqSelect | Bind an event handler to the "select" JavaScript event, or trigger that event on an element. | |||
| jqSelectTrigger | Bind an event handler to the "select" JavaScript event, or trigger that event on an element. | |||
| jqShow | Display the matched elements. | |||
| jqShowFull | Display the matched elements. | |||
| jqSlideDown | Display the matched elements with a sliding motion. | |||
| jqSlideDownFull | Display the matched elements with a sliding motion. | |||
| jqSlideToggle | Display or hide the matched elements with a sliding motion. | |||
| jqSlideToggleFull | Display or hide the matched elements with a sliding motion. | |||
| jqSlideUp | Display the matched elements with a sliding motion. | |||
| jqSlideUpFull | Display the matched elements with a sliding motion. | |||
| jqSubmit | Bind an event handler to the "submit" JavaScript event, or trigger that event on an element. | |||
| jqSubmitTrigger | Bind an event handler to the "submit" JavaScript event, or trigger that event on an element. | |||
| jqTextGet | Get the combined text contents of each element in the set of matched elements, including their descendants. | |||
| jqTextSet | Set the content of each element in the set of matched elements to the specified text. | |||
| jqToggle | Display or hide the matched elements. | |||
| jqToggleFull | Display or hide the matched elements. | |||
| jqToggleSwitch | Display or hide the matched elements. | |||
| jqTrigger | Execute all handlers and behaviors attached to the matched elements for the given event type. | |||
| jqTriggerHandler | Execute all handlers attached to an element for an event. | |||
| jqTriggerHandlerWithData | Execute all handlers attached to an element for an event. | |||
| jqTriggerWithData | Execute all handlers and behaviors attached to the matched elements for the given event type. | |||
| jqUnbind | Remove a previously-attached event handler from the elements. | |||
| jqUnbindAll | Remove a previously-attached event handler from the elements. | |||
| jqUnload | Bind an event handler to the "unload" JavaScript event. | |||
| jqValGet | Get the current value of the first element in the set of matched elements. | |||
| jqValSet | Set the value of each element in the set of matched elements. | |||
| jqWidthGet | Get the current computed width for the first element in the set of matched elements. | |||
| jqWidthSet | Set the CSS width of each element in the set of matched elements. | |||
| jqWrap | Wrap an HTML structure around each element in the set of matched elements. | |||
| jqWrapAll | Wrap an HTML structure around all elements in the set of matched elements. | |||
| jqWrapInner | Wrap an HTML structure around the content of each element in the set of matched elements. |
All snippets have been taken from the Visual Studio 2015 jQuery Code Snippets Extension. Credit given where due.

Makes tables more readable for humans. Compatible with the Markdown writer plugin's table formatter feature in Atom.

Formatting files or checking if they're already formatted is possible from the command line. This requires node and npm.
The extension has to be downloaded and compiled:
npm install.npm run compile.The typical location of the installed extension (your actual version might differ):
Available features from the command line:
npm run --silent prettify-md < input.md.npm run --silent prettify-md < input.md > output.md.npm run --silent check-md < input.md. This will fail with an exception and return code 1 if the file is not prettyfied.Note: the
--silentswitch sets the npm log level to silent, which is useful to hide the executed file name and concentrate on the actual output.
Available features from docker:
docker container run -i darkriszty/prettify-md < input.md.docker container run -i darkriszty/prettify-md < input.md > output.md.docker container run -i darkriszty/prettify-md --check < input.md. This will fail with an exception and return code 1 if the file is not prettyfied.The extension is available for markdown language mode. It can either prettify a selected table ( Format Selection) or the entire document ( Format Document).
A VSCode command called Prettify markdown tables is also available to format format the currently opened document.
Configurable settings:
A Visual Studio Code extension to jump to documentation for the current keyword, ported from sublime-text-2-goto-documentation
Search for goto documentation
Move the cursor inside the word you want the docs for and:
Super+Shift+H orGotoDocumentation allows you to edit the url that opens by editing the settings.
"goto-documentation.customDocs": {
// the key value pair represent scope -> doc url
// supported placeholders:
// - ${query} the selected text/word
"css": "http://devdocs.io/#q=${query}",
}
A VSCode extension to host the chrome devtools inside of a webview.
If you are looking for a more streamlined and officially supported devtools extension, you should try VS Code - Elements for Microsoft Edge (Chromium)


You can launch the Chrome DevTools hosted in VS Code like you would a debugger, by using a launch.json config file. However, the Chrome DevTools aren't a debugger and any breakpoints set in VS Code won't be hit, you can of course use the script debugger in Chrome DevTools.
To do this in your launch.json add a new debug config with two parameters.
type - The name of the debugger which must be devtools-for-chrome. Required.url - The url to launch Chrome at. Optional.file - The local file path to launch Chrome at. Optional.request - Whether a new tab in Chrome should be opened launch or to use an exsisting tab attach matched on URL. Optional.name - A friendly name to show in the VS Code UI. Required. {
"version": "0.1.0",
"configurations": [
{
"type": "devtools-for-chrome",
"request": "launch",
"name": "Launch Chrome DevTools",
"file": "${workspaceFolder}/index.html"
},
{
"type": "devtools-for-chrome",
"request": "attach",
"name": "Attach Chrome DevTools",
"url": "http://localhost:8000/"
}
]
}
chrome.exe --disable-extensions --remote-debugging-port=9222DevTools for Chrome: Attach to a targetDevTools for Chrome: Launch Chrome and then attach to a targetchrome.exe --disable-extensions --remote-debugging-port=9222npm installnpm run watch or npm run buildF5 to start debuggingDevTools for Chrome: Attach to a targetJS Refactor is the Javascript automated refactoring tool for Visual Studio Code, built to smooth and streamline your development experience. It provides an extensive list of automated actions including the commonly needed: Extract Method, Extract Variable, Inline Variable, and an alias for the built-in VS Code rename. JS Refactor also supports many common snippets and associated actions for wrapping existing code in common block expressions.
Experimental Support
Click on the extensions icon on the left-hand side of your editor. In the search bar type "JS Refactor." Find the extension in the list and click the install button.
Open VS Code, press F1 and enter ext install to open the extensions panel, follow the instructions above
Basic usage: Make a selection, right click and select the refactoring you want to perform from the context menu.
Command Pallette: You can press F1 then simply type the name of the refactoring and press enter if you know the name of the refactoring you need.
Shortcuts: Finally, there are hotkey combinations for some of the most common refactorings you might want. Hotkeys are listed in the keybindings section below.
JS Refactor supports the following refactorings (explanations below):
Common Refactorings:
Other Utilities:
Rename variable (VS Code internal) - F2
Convert to Arrow Function
Select the code you wish to refactor and then press the F1 key to open the command pallette. Begin typing the name of the refactoring and select the correct refactoring from the list. You will be prompted for any necessary information.
Extract Method Creates new function with original selection as the body.
Extract Variable Creates new assigned variable declaration and replaces original selection.
Inline Variable Replaces all references to variable with variable initialization expression, deletes variable declaration.
Convert To Arrow Function Converts a function expression to an arrow function.
Convert To Function Declaration Converts a function expression, assigned to a variable, to a function declaration.
Convert To Function Expression Converts an arrow function to a function expression.
Convert To Template Literal Converts a string concatenation expression to a template literal.
Export Function creates new export declaration for selected function or function name
Introduce Function creates new function from existing function call or variable assignment
Lift and Name Function Expression Lifts function expression from current context, replacing it with provided name and adds name to expression
Shift Parameters Shifts function parameters to the left or right by the selected number of places
Wrap In Condition Wraps selected code in an if statement, adding indentation as necessary
Wrap in function takes your selected code, at line-level precision, and wraps all of the lines in a named function.
Wrap in IIFE wraps selected code in an immediately invoked function expression (IIFE).
JS Refactor supports several common code snippets:
Type the abbreviation, such as fn, in your code and hit enter. When the snippet is executed, the appropriate code will be inserted into your document. Any snippets which require extra information like names or arguments will have named tab-stops where you can fill in the information unique to your program.
anon Inserts a tab-stopped anonymous function snippet into your code
export Adds a module.exports single var assignment in your module
exportObj Adds a module.exports assignment with an object literal
fn Inserts a tab-stopped named function snippet into your code
lfn Inserts a tab-stopped lambda function snippet into your code
iife Inserts a new, tab-stopped IIFE into your code
mfn Inserts a new color-delimited member function to your prototype -- Protip be inside a prototype object when using this.
require Inserts a new require statement in your module
strict Inserts 'use strict' into your code
Visual Studio Code plugin that autocompletes npm modules in import statements.

![]() Eliminate context switching and costly distractions. Create and merge PRs and perform code reviews from inside your IDE while using jump-to-definition, your favorite keybindings, and other IDE tools.
Eliminate context switching and costly distractions. Create and merge PRs and perform code reviews from inside your IDE while using jump-to-definition, your favorite keybindings, and other IDE tools.
Learn more
In the command palette (cmd-shift-p) select Install Extension and choose npm Intellisense.

Something missing? Found a bug? - Create a pull request or an issue. Github

{
"npm-intellisense.importES6": true,
"npm-intellisense.importQuotes": "'",
"npm-intellisense.importLinebreak": ";\r\n",
"npm-intellisense.importDeclarationType": "const",
}

{
"npm-intellisense.importES6": false,
"npm-intellisense.importQuotes": "'",
"npm-intellisense.importLinebreak": ";\r\n",
"npm-intellisense.importDeclarationType": "const",
}
Npm intellisense scans only dependencies by default. Set scanDevDependencies to true to enable it for devDependencies too.
{
"npm-intellisense.scanDevDependencies": true,
}
Shows build in node modules like 'path' of 'fs'
{
"npm-intellisense.showBuildInLibs": true,
}
Look for package.json inside nearest directory instead of workspace root. It's enabled by default.
{
"npm-intellisense.recursivePackageJsonLookup": true,
}
Open subfolders of a module. This feature is work in progress and experimental.
{
"npm-intellisense.packageSubfoldersIntellisense": false,
}
This software is released under MIT License
VSCode extension to integrate JavaScript Standard Style into VSCode.
We support JavaScript Semi-Standard Style too, if you prefer keeping the semicolon.
JavaScript Standard Style with custom tweaks is also supported if you want to fine-tune your ESLint config while keeping the power of Standard.
This plugin also works with [TypeScript Standard Style][https://github.com/toddbluhm/ts-standard] which has additonal rules for TypeScript based projects.
Install the 'JavaScript Standard Style' extension
If you don't know how to install extensions in VSCode, take a look at the documentation.
You will need to reload VSCode before new extensions can be used.
Install standard, semistandard, standardx or ts-standard
This can be done globally or locally. We recommend that you install them locally (i.e. saved in your project's devDependencies), to ensure that other developers have it installed when working on the project.
Disable the built-in VSCode validator
To do this, set "javascript.validate.enable": false in your VSCode settings.json.
We give you some options to customize vscode-standardjs in your VSCode settings.json.
| Option | Description | Default |
|---|---|---|
standard.enable |
enable or disable JavaScript Standard Style | true |
standard.run |
run linter onSave or onType |
onType |
standard.autoFixOnSave |
enable or disable auto fix on save. It is only available when VSCode's files.autoSave is either off, onFocusChange or onWindowChange. It will not work with afterDelay. |
false |
standard.nodePath |
use this setting if an installed standard package can't be detected. |
null |
standard.validate |
an array of language identifiers specify the files to be validated | ["javascript", "javascriptreact", "typescript", "typescriptreact] |
standard.workingDirectories |
an array for working directories to be used. | [] |
standard.engine |
You can use semistandard, standardx or ts-standard instead of standard. Just make sure you've installed the semistandard, the standardx or the ts-standard package, instead of standard. |
standard |
standard.usePackageJson |
if set to true, JavaScript Standard Style will use project's package.json settings, otherwise globally installed standard module is used |
false |
You can still configure standard itself with the standard.options setting, for example:
"standard.options": {
"globals": ["$", "jQuery", "fetch"],
"ignore": [
"node_modules/**"
],
"plugins": ["html"],
"parser": "babel-eslint",
"envs": ["jest"]
}
It's recommended to change these options in your package.json file on a per-project basis, rather than setting them globally in settings.json. For example:
"standard": {
"plugins": ["html"],
"parser": "babel-eslint"
}
If you've got multiple projects within a workspace (e.g. you're inside a monorepo), VSCode prevents extensions from accessing multiple package.json files.
If you want this functionality, you should add each project folder to your workspace ( File -> Add folder to workspace...). If you can't see this option, download the VSCode Insiders Build to get the latest features.
When you open the Command Palette in VSCode (⇧⌘P or Ctrl+Shift+P), this plugin has the following options:
Fix all auto-fixable problems - applies JavaScript Standard Style auto-fix resolutions to all fixable problems.Disable JavaScript Standard Style for this Workspace - disable JavaScript Standard Style extension for this workspace.Enable JavaScript Standard Style for this Workspace - enable JavaScript Standard Style extension for this workspace.Show output channel - view the linter output for JavaScript Standard Style.How do I lint script tags in vue or html files?
You can lint them with eslint-plugin-html. Make sure it's installed, then enable linting for those file types in your settings.json:
"standard.validate": [
"javascript",
"javascriptreact",
"html"
],
"standard.options": {
"plugins": ["html"]
},
"files.associations": {
"*.vue": "html"
},
If you want to enable autoFix for the new languages, you should enable it yourself:
"standard.validate": [
"javascript",
"javascriptreact",
{
"language": "html",
"autoFix": true
}
],
"standard.options": {
"plugins": ["html"]
}
npm install right under project root.watch build task (⇧⌘B or Ctrl+Shift+B) to compile the client and server.Launch Extension launch configuration (from the VSCode debug panel).Attach to Server launch configuration.npm install,npm run compile,npm run package to build a .vsix file, then you can install it with code --install-extension vscode-standardjs.vsix.Extension for Visual Studio Code - Insert File Header Comment such as date, time
This extension allow you to insert timestamp, copyright or any information to your file like comment below
/*
* Created on Tue Feb 18 2020
*
* Copyright (c) 2020 - Your Company
*/
date, time, datetime, day, month, year, hour, minute, second, company, filename ext install fileheadercomment
By default you don't have to set anything. It will detect most programming language for appropriate comment syntax.
Execute it from Command Pallete (menu View - Command Pallete...) then type command below:
FileHeaderComment: Insert Default Template at CursorFileHeaderComment: Select from Available TemplatesThe second command will show your available templates defined in Settings
If you want to set your own parameter and template (set from menu Preferences - User Settings), you can read explanation below
This is default configuration
"fileHeaderComment.parameter":{
"*":{
"commentbegin": "/*",
"commentprefix": " *",
"commentend": " */",
"company": "Your Company"
}
},
"fileHeaderComment.template":{
"*":[
"${commentbegin}",
"${commentprefix} Created on ${date}",
"${commentprefix}",
"${commentprefix} Copyright (c) ${year} ${company}",
"${commentend}"
]
}
Define all custom variables/paramenters in asterisk * like
"fileHeaderComment.parameter":{
"*":{
"company": "Your Company"
"myvar1": "My Variable 1",
"myvar2": "My Variable 2"
}
}
Use your variable in template like (asterisk * will be default template)
"fileHeaderComment.template":{
"*":[
"${commentbegin}",
"${commentprefix} Created on ${date}",
"${commentprefix}",
"${commentprefix} Copyright (c) ${year} ${company}",
"${commentprefix} my variables are ${myvar1} and ${myvar2}",
"${commentend}"
]
}
You can define multiple templates, for instance template for MIT License
"fileHeaderComment.parameter":{
"*":{
"author": "Your Name",
"license_mit":[
"The MIT License (MIT)",
" Copyright (c) ${year} ${author}",
"",
" Permission is hereby granted, free of charge, to any person obtaining a copy of this software",
" and associated documentation files (the \"Software\"), to deal in the Software without restriction,",
" including without limitation the rights to use, copy, modify, merge, publish, distribute, sublicense,",
" and/or sell copies of the Software, and to permit persons to whom the Software is furnished to do so,",
" subject to the following conditions:",
"",
" The above copyright notice and this permission notice shall be included in all copies or substantial",
" portions of the Software.",
"",
" THE SOFTWARE IS PROVIDED \"AS IS\", WITHOUT WARRANTY OF ANY KIND, EXPRESS OR IMPLIED, INCLUDING BUT NOT LIMITED",
" TO THE WARRANTIES OF MERCHANTABILITY, FITNESS FOR A PARTICULAR PURPOSE AND NONINFRINGEMENT. IN NO EVENT SHALL",
" THE AUTHORS OR COPYRIGHT HOLDERS BE LIABLE FOR ANY CLAIM, DAMAGES OR OTHER LIABILITY, WHETHER IN AN ACTION OF CONTRACT,",
" TORT OR OTHERWISE, ARISING FROM, OUT OF OR IN CONNECTION WITH THE SOFTWARE OR THE USE OR OTHER DEALINGS IN THE SOFTWARE."
]
}
},
"fileHeaderComment.template":{
"mit":[
"${commentbegin}",
"${commentprefix} Created on ${date}",
"${commentprefix}",
"${commentprefix} ${license_mit}",
"${commentend}"
]
}
You can use your mit template above by calling it through Command Pallete and choose FileHeaderComment: Select from Available Templates.
You can use parameters below in your template
date : print current datetime : print current timetime24h : print current time in 24 hour formatdatetime: print current date + timedatetime24h : print current date + time in 24 hour formatcompany : print "Your Company"day: print day of the monthmonth: print current monthyear: print current yearhour: print current hour (24h)minute: print current minutesecond: print current secondfilename: print filename
![]()
It helps you to navigate in your code, moving between important positions easily and quickly. No more need to search for code. It also supports a set of selection commands, which allows you to select bookmarked lines and regions between bookmarked lines. It's really useful for log file analysis.
Here are some of the features that Bookmarks provides:
Bookmarks: Toggle Mark/unmark positions with bookmarksBookmarks: Toggle Labeled Mark labeled bookmarksBookmarks: Jump to Next Move the cursor forward, to the bookmark belowBookmarks: Jump to Previous Move the cursor backward, to the bookmark aboveBookmarks: List List all bookmarks in the current fileBookmarks: List from All Files List all bookmarks from all filesBookmarks: Clear remove all bookmarks in the current fileBookmarks: Clear from All Files remove all bookmarks from all filesBookmarks (Selection): Select Lines Select all lines that contains bookmarksBookmarks (Selection): Expand Selection to Next Expand the selected text to the next bookmarkBookmarks (Selection): Expand Selection to Previous Expand the selected text to the previous bookmarkBookmarks (Selection): Shrink Selection Shrink the select text to the Previous/Next bookmarkYou can easily Mark/Unmark bookmarks on any position. You can even define Labels for each bookmark.

Quicky move between bookmarks backward and forward, even if located outside the active file.
List all bookmarks from the current file/project and easily navigate to any of them. It shows a line preview and temporarily scroll to its position.

You can use Bookmarks to easily select lines or text blocks. Simply toggle bookmarks in any position of interest and use some of the Selection commands available.
Select all bookmarked lines. Specially useful while working with log files.

Manipulate the selection of lines between bookmarks, up and down.
false by default) "bookmarks.navigateThroughAllFiles": true
true by default) "bookmarks.wrapNavigation": true
false by default) "bookmarks.saveBookmarksInProject": true
"bookmarks.gutterIconPath": "c:\\temp\\othericon.png"
"bookmarks.backgroundLineColor"
Deprecated in 10.7: Use
workbench.colorCustomizationsinstead. More info in Available Colors
true by default) "bookmarks.showCommandsInContextMenu": true
false by default) "bookmarks.useWorkaroundForFormatters": true
This workaround should be temporary, until a proper research and suggested APIs are available
false by default) "bookmarks.sideBar.expanded": true
Choose how multi cursor handles already bookmarked lines ( allLinesAtOnce by default)
allLinesAtOnce: Creates bookmarks in all selected lines at once, if at least one of the lines don't have a bookmarkeachLineIndependently: Literally toggles a bookmark in each line, instead of making all lines equals "bookmarks.multicursor.toggleMode": "eachLineIndependently"
Choose how labels are suggested when creating bookmarks ( dontUse by default)
dontUse: Don't use the selection (original behavior)useWhenSelected: Use the selected text (if available) directly, no confirmation requiredsuggestWhenSelected: Suggests the selected text (if available). You still need to confirm.suggestWhenSelectedOrLineWhenNoSelected: Suggests the selected text (if available) or the entire line (when has no selection). You still need to confirm "bookmarks.label.suggestion": "useWhenSelected"
"workbench.colorCustomizations": {
"bookmarks.lineBackground": "#157EFB22"
}
"workbench.colorCustomizations": {
"bookmarks.lineBorder": "#FF0000"
}
"workbench.colorCustomizations": {
"bookmarks.overviewRuler": "#157EFB88"
}
The Bookmarks extension has its own Side Bar, giving you more free space in your Explorer view. You will have a few extra commands available:

The bookmarks are saved per session for the project that you are using. You don't have to worry about closing files in Working Files. When you reopen the file, the bookmarks are restored.
It also works even if you only preview a file (simple click in TreeView). You can put bookmarks in any file and when you preview it again, the bookmarks will be there.
MIT © Alessandro Fragnani
Markdown converter for Visual Studio Code. Contribute to yzane/vscode-markdown-pdf development by creating an account on GitHub.
:[alternate-text](relative-path-to-file.md).
Chromium download starts automatically when Markdown PDF is installed and Markdown file is first opened with Visual Studio Code.
However, it is time-consuming depending on the environment because of its large size (~ 170Mb Mac, ~ 282Mb Linux, ~ 280Mb Win).
During downloading, the message Installing Chromium is displayed in the status bar.
If you are behind a proxy, set the http.proxy option to settings.json and restart Visual Studio Code.
If the download is not successful or you want to avoid downloading every time you upgrade Markdown PDF, please specify the installed Chrome or 'Chromium' with markdown-pdf.executablePath option.
## Usage
### Command Palette
1. Open the Markdown file
2. Press F1 or Ctrl+Shift+P
3. Type export and select below
- markdown-pdf: Export (settings.json)
- markdown-pdf: Export (pdf)
- markdown-pdf: Export (html)
- markdown-pdf: Export (png)
- markdown-pdf: Export (jpeg)
- markdown-pdf: Export (all: pdf, html, png, jpeg)
 ### Menu
1. Open the Markdown file
2. Right click and select below
-
### Menu
1. Open the Markdown file
2. Right click and select below
- markdown-pdf: Export (settings.json)
- markdown-pdf: Export (pdf)
- markdown-pdf: Export (html)
- markdown-pdf: Export (png)
- markdown-pdf: Export (jpeg)
- markdown-pdf: Export (all: pdf, html, png, jpeg)
 ### Auto convert
1. Add
### Auto convert
1. Add "markdown-pdf.convertOnSave": true option to settings.json
2. Restart Visual Studio Code
3. Open the Markdown file
4. Auto convert on save
## Extension Settings
Visual Studio Code User and Workspace Settings
1. Select File > Preferences > UserSettings or Workspace Settings
2. Find markdown-pdf settings in the Default Settings
3. Copy markdown-pdf.* settings
4. Paste to the settings.json, and change the value
 ## Options
### List
| Category | Option name | Configuration scope |
| ----------------------------------------------------------- | -------------------------------------------------------------------------------------------- | --------------------------------------------------------------------------------------------------------------------- |
| Save options | markdown-pdf.type | |
| | markdown-pdf.convertOnSave | |
| | markdown-pdf.convertOnSaveExclude | |
| | markdown-pdf.outputDirectory | |
| | markdown-pdf.outputDirectoryRelativePathFile | |
| Styles options | markdown-pdf.styles | |
| | markdown-pdf.stylesRelativePathFile | |
| | markdown-pdf.includeDefaultStyles | |
| Syntax highlight options | markdown-pdf.highlight | |
| | markdown-pdf.highlightStyle | |
| Markdown options | markdown-pdf.breaks | |
| Emoji options | markdown-pdf.emoji | |
| Configuration options | markdown-pdf.executablePath | |
| Common Options | markdown-pdf.scale | |
| PDF options | markdown-pdf.displayHeaderFooter | resource |
| | markdown-pdf.headerTemplate | resource |
| | markdown-pdf.footerTemplate | resource |
| | markdown-pdf.printBackground | resource |
| | markdown-pdf.orientation | resource |
| | markdown-pdf.pageRanges | resource |
| | markdown-pdf.format | resource |
| | markdown-pdf.width | resource |
| | markdown-pdf.height | resource |
| | markdown-pdf.margin.top | resource |
| | markdown-pdf.margin.bottom | resource |
| | markdown-pdf.margin.right | resource |
| | markdown-pdf.margin.left | resource |
| PNG JPEG options | markdown-pdf.quality | |
| | markdown-pdf.clip.x | |
| | markdown-pdf.clip.y | |
| | markdown-pdf.clip.width | |
| | markdown-pdf.clip.height | |
| | markdown-pdf.omitBackground | |
| PlantUML options | markdown-pdf.plantumlOpenMarker | |
| | markdown-pdf.plantumlCloseMarker | |
| | markdown-pdf.plantumlServer | |
| markdown-it-include options | markdown-pdf.markdown-it-include.enable | |
| mermaid options | markdown-pdf.mermaidServer | |
### Save options
####
## Options
### List
| Category | Option name | Configuration scope |
| ----------------------------------------------------------- | -------------------------------------------------------------------------------------------- | --------------------------------------------------------------------------------------------------------------------- |
| Save options | markdown-pdf.type | |
| | markdown-pdf.convertOnSave | |
| | markdown-pdf.convertOnSaveExclude | |
| | markdown-pdf.outputDirectory | |
| | markdown-pdf.outputDirectoryRelativePathFile | |
| Styles options | markdown-pdf.styles | |
| | markdown-pdf.stylesRelativePathFile | |
| | markdown-pdf.includeDefaultStyles | |
| Syntax highlight options | markdown-pdf.highlight | |
| | markdown-pdf.highlightStyle | |
| Markdown options | markdown-pdf.breaks | |
| Emoji options | markdown-pdf.emoji | |
| Configuration options | markdown-pdf.executablePath | |
| Common Options | markdown-pdf.scale | |
| PDF options | markdown-pdf.displayHeaderFooter | resource |
| | markdown-pdf.headerTemplate | resource |
| | markdown-pdf.footerTemplate | resource |
| | markdown-pdf.printBackground | resource |
| | markdown-pdf.orientation | resource |
| | markdown-pdf.pageRanges | resource |
| | markdown-pdf.format | resource |
| | markdown-pdf.width | resource |
| | markdown-pdf.height | resource |
| | markdown-pdf.margin.top | resource |
| | markdown-pdf.margin.bottom | resource |
| | markdown-pdf.margin.right | resource |
| | markdown-pdf.margin.left | resource |
| PNG JPEG options | markdown-pdf.quality | |
| | markdown-pdf.clip.x | |
| | markdown-pdf.clip.y | |
| | markdown-pdf.clip.width | |
| | markdown-pdf.clip.height | |
| | markdown-pdf.omitBackground | |
| PlantUML options | markdown-pdf.plantumlOpenMarker | |
| | markdown-pdf.plantumlCloseMarker | |
| | markdown-pdf.plantumlServer | |
| markdown-it-include options | markdown-pdf.markdown-it-include.enable | |
| mermaid options | markdown-pdf.mermaidServer | |
### Save options
#### markdown-pdf.type
- Output format: pdf, html, png, jpeg
- Multiple output formats support
- Default: pdf
"markdown-pdf.type": [
"pdf",
"html",
"png",
"jpeg"
],
#### markdown-pdf.convertOnSave
- Enable Auto convert on save
- boolean. Default: false
- To apply the settings, you need to restart Visual Studio Code
#### markdown-pdf.convertOnSaveExclude
- Excluded file name of convertOnSave option
"markdown-pdf.convertOnSaveExclude": [
"^work",
"work.md\$",
"work|test",
"[0-9][0-9][0-9][0-9]-work",
"work\\test" // All '\' need to be written as '\\' (Windows)
],
#### markdown-pdf.outputDirectory
- Output Directory
- All \ need to be written as \\ (Windows)
"markdown-pdf.outputDirectory": "C:\\work\\output",
- Relative path
- If you open the Markdown file, it will be interpreted as a relative path from the file
- If you open a folder, it will be interpreted as a relative path from the root folder
- If you open the workspace, it will be interpreted as a relative path from the each root folder
- See Multi-root Workspaces
"markdown-pdf.outputDirectory": "output",
- Relative path (home directory)
- If path starts with ~, it will be interpreted as a relative path from the home directory
"markdown-pdf.outputDirectory": "~/output",
- If you set a directory with a relative path, it will be created if the directory does not exist
- If you set a directory with an absolute path, an error occurs if the directory does not exist
#### markdown-pdf.outputDirectoryRelativePathFile
- If markdown-pdf.outputDirectoryRelativePathFile option is set to true, the relative path set with markdown-pdf.outputDirectory is interpreted as relative from the file
- It can be used to avoid relative paths from folders and workspaces
- boolean. Default: false
### Styles options
#### markdown-pdf.styles
- A list of local paths to the stylesheets to use from the markdown-pdf
- If the file does not exist, it will be skipped
- All \ need to be written as \\ (Windows)
"markdown-pdf.styles": [
"C:\\Users\\Markdown file, it will be interpreted as a relative path from the file
- If you open a folder, it will be interpreted as a relative path from the root folder
- If you open the workspace, it will be interpreted as a relative path from the each root folder
- See Multi-root Workspaces
"markdown-pdf.styles": [
"markdown-pdf.css",
],
- Relative path (home directory)
- If path starts with ~, it will be interpreted as a relative path from the home directory
"markdown-pdf.styles": [
"~/.config/Code/User/markdown-pdf.css"
],
- Online CSS (https://xxx/xxx.css) is applied correctly for JPG and PNG, but problems occur with PDF #67
"markdown-pdf.styles": [
"https://xxx/markdown-pdf.css"
],
#### markdown-pdf.stylesRelativePathFile
- If markdown-pdf.stylesRelativePathFile option is set to true, the relative path set with markdown-pdf.styles is interpreted as relative from the file
- It can be used to avoid relative paths from folders and workspaces
- boolean. Default: false
#### markdown-pdf.includeDefaultStyles
- Enable the inclusion of default Markdown styles (VSCode, markdown-pdf)
- boolean. Default: true
### Syntax highlight options
#### markdown-pdf.highlight
- Enable Syntax highlighting
- boolean. Default: true
#### markdown-pdf.highlightStyle
- Set the style file name. for example: github.css, monokai.css ...
- file name list
- demo site : https://highlightjs.org/static/demo/
"markdown-pdf.highlightStyle": "github.css",
### Markdown options
#### markdown-pdf.breaks
- Enable line breaks
- boolean. Default: false
### Emoji options
#### markdown-pdf.emoji
- Enable emoji. EMOJI CHEAT SHEET
- boolean. Default: true
### Configuration options
#### markdown-pdf.executablePath
- Path to a Chromium or Chrome executable to run instead of the bundled Chromium
- All \ need to be written as \\ (Windows)
- To apply the settings, you need to restart Visual Studio Code
"markdown-pdf.executablePath": "C:\\Program Files (x86)\\Google\\Chrome\\Application\\chrome.exe"
### Common Options
#### markdown-pdf.scale
- Scale of the page rendering
- number. default: 1
### PDF options
- pdf only. puppeteer page.pdf options
#### markdown-pdf.displayHeaderFooter
- Enable display header and footer
- boolean. Default: true
#### markdown-pdf.headerTemplate
#### markdown-pdf.footerTemplate
- HTML template for the print header and footer
- <span class='date'></span> : formatted print date
- <span class='title'></span> : markdown file name
- <span class='url'></span> : markdown full path name
- <span class='pageNumber'></span> : current page number
- <span class='totalPages'></span> : total pages in the document
"markdown-pdf.headerTemplate": "markdown-pdf.printBackground
- Print background graphics
- boolean. Default: true
#### markdown-pdf.orientation
- Paper orientation
- portrait or landscape
- Default: portrait
#### markdown-pdf.pageRanges
- Paper ranges to print, e.g., '1-5, 8, 11-13'
- Default: all pages
"markdown-pdf.pageRanges": "1,4-",
#### markdown-pdf.format
- Paper format
- Letter, Legal, Tabloid, Ledger, A0, A1, A2, A3, A4, A5, A6
- Default: A4
"markdown-pdf.format": "A4",
#### markdown-pdf.width
#### markdown-pdf.height
- Paper width / height, accepts values labeled with units(mm, cm, in, px)
- If it is set, it overrides the markdown-pdf.format option
"markdown-pdf.width": "10cm",
"markdown-pdf.height": "20cm",
#### markdown-pdf.margin.top
#### markdown-pdf.margin.bottom
#### markdown-pdf.margin.right
#### markdown-pdf.margin.left
- Paper margins.units(mm, cm, in, px)
"markdown-pdf.margin.top": "1.5cm",
"markdown-pdf.margin.bottom": "1cm",
"markdown-pdf.margin.right": "1cm",
"markdown-pdf.margin.left": "1cm",
### PNG JPEG options
- png and jpeg only. puppeteer page.screenshot options
#### markdown-pdf.quality
- jpeg only. The quality of the image, between 0-100. Not applicable to png images
"markdown-pdf.quality": 100,
#### markdown-pdf.clip.x
#### markdown-pdf.clip.y
#### markdown-pdf.clip.width
#### markdown-pdf.clip.height
- An object which specifies clipping region of the page
- number
// x-coordinate of top-left corner of clip area
"markdown-pdf.clip.x": 0,
// y-coordinate of top-left corner of clip area
"markdown-pdf.clip.y": 0,
// width of clipping area
"markdown-pdf.clip.width": 1000,
// height of clipping area
"markdown-pdf.clip.height": 1000,
#### markdown-pdf.omitBackground
- Hides default white background and allows capturing screenshots with transparency
- boolean. Default: false
### PlantUML options
#### markdown-pdf.plantumlOpenMarker
- Oppening delimiter used for the plantuml parser.
- Default: @startuml
#### markdown-pdf.plantumlCloseMarker
- Closing delimiter used for the plantuml parser.
- Default: @enduml
#### markdown-pdf.plantumlServer
- Plantuml server. e.g. http://localhost:8080
- Default: http://www.plantuml.com/plantuml
- For example, to run Plantuml Server locally #139 :
docker run -d -p 8080:8080 plantuml/plantuml-server:jetty
plantuml/plantuml-server - Docker Hub
### markdown-it-include options
#### markdown-pdf.markdown-it-include.enable
- Enable markdown-it-include.
- boolean. Default: true
### mermaid options
#### markdown-pdf.mermaidServer
- mermaid server
- Default: https://unpkg.com/mermaid/dist/mermaid.min.js
## FAQ
### How can I change emoji size ?
1. Add the following to your stylesheet which was specified in the markdown-pdf.styles
### Auto guess encoding of files
Using files.autoGuessEncoding option of the Visual Studio Code is useful because it automatically guesses the character code. See files.autoGuessEncoding
"files.autoGuessEncoding": true,
### Output directory
If you always want to output to the relative path directory from the Markdown file.
For example, to output to the "output" directory in the same directory as the Markdown file, set it as follows.
"markdown-pdf.outputDirectory" : "output",
"markdown-pdf.outputDirectoryRelativePathFile": true,
### Page Break
Please use the following to insert a page break.
## Source
### <========()========>
---
# 194.WallabyJs.quokka-vscode
Quokka
- Install
- Docs
- Support
- Contact
PRO
# Rapid JavaScript Prototyping in your Editor
 ## Quokka.js is a developer productivity tool for rapid JavaScript / TypeScript prototyping. Runtime values are updated and displayed in your IDE next to your code, as you type.

 Live Execution and Results
Code runs immediately as you type, on unsaved changes; no need to do
anything manually or switch context. Error messages are displayed right
next to the code that caused them. Console logs and identifier
expression values are displayed inline as well.
Live Execution and Results
Code runs immediately as you type, on unsaved changes; no need to do
anything manually or switch context. Error messages are displayed right
next to the code that caused them. Console logs and identifier
expression values are displayed inline as well.
 Live Coverage
Indicators in the gutter of your code editor are constantly updated in
realtime to display code coverage so you can quickly see which lines of
code are the source of an error, which are fully covered, only partially
covered or not covered at all.
Live Coverage
Indicators in the gutter of your code editor are constantly updated in
realtime to display code coverage so you can quickly see which lines of
code are the source of an error, which are fully covered, only partially
covered or not covered at all.
 Value Explorer
 allows non-primitive runtime values to be viewed and
explored in an easy-to-navigate real-time treeview. This feature is
great for exploring larger objects and makes debugging easier and
faster. Opened paths / values can be copied directly to the clipboard.
Value Explorer
Value Explorer allows non-primitive runtime values to be viewed and
explored in an easy-to-navigate real-time treeview. This feature is
great for exploring larger objects and makes debugging easier and
faster. Opened paths / values can be copied directly to the clipboard.
 Live Comments and Values
Show and copy expression values by selecting them in your editor or with
editor commands, accessible using keyboard shortcuts. A special comment
format can also be used to evaluate any expressions and includes the
ability to measure code execution times.
Live Comments and Values
Show and copy expression values by selecting them in your editor or with
editor commands, accessible using keyboard shortcuts. A special comment
format can also be used to evaluate any expressions and includes the
ability to measure code execution times.
 Project Files Import
Pro
Import any files from your project into your Quokka file. Quokka will
watch project files for changes and automatically update when dependent
files change. Babel or TypeScript may be used for imported files
compilation.
Project Files Import
Pro
Import any files from your project into your Quokka file. Quokka will
watch project files for changes and automatically update when dependent
files change. Babel or TypeScript may be used for imported files
compilation.
 Quick Package Install
Pro
Quickly install any node package, without switching away from your
editor, and without having to type the package name. When you install,
choose whether to install just for the active Quokka session or for your
entire project.
Quick Package Install
Pro
Quickly install any node package, without switching away from your
editor, and without having to type the package name. When you install,
choose whether to install just for the active Quokka session or for your
entire project.
 ## Quick Start
To get started with Quokka.js in VS Code, install the
extension
first by clicking on the Extensions icon in the Activity Bar on the side
of VS Code and searching for
## Quick Start
To get started with Quokka.js in VS Code, install the
extension
first by clicking on the Extensions icon in the Activity Bar on the side
of VS Code and searching for Quokka{.highlighter-rouge
.language-plaintext}. Note that Quokka requires VS Code version 1.10.0
or higher.
## Live Feedback
---
You may create a new Quokka file, or start Quokka on an existing file.
The results of the execution are displayed right in the editor. To see
the full execution output, you may view the Quokka Console by invoking
the `Show Output` command or
clicking the bottom-right status bar indicator.
You may create a new Quokka file, or start Quokka on an existing file.
The results of the execution are displayed right in the editor. To see
the full execution output, you may view the Quokka Console by invoking
the `Show Output` command or
clicking the bottom-left output panel icon.
You may create a new Quokka file, or start Quokka on an existing file by
using the `Start Quokka` context
menu action in any opened file editor (you may also assign some shortcut
to the action). The results of the execution are displayed right in the
editor. To see the full execution output, you may view the Quokka
Console by clicking the bottom-right status bar indicator.
If you create a new Quokka scratch file and want to save it, then you
may press `F5` to do so. Later
on, you may open the file and run Quokka using the
`Start Quokka` context menu
action in the opened file editor.
It is recommended that you memorize a couple of Quokka keyboard
shortcuts (you may see them when using the editor's command palette).
This will make working with Quokka much faster.
To open a new Quokka file use `Cmd/Ctrl + K, J`{.highlighter-rouge
.language-plaintext} for JavaScript, or
`Cmd/Ctrl + K, T` for
TypeScript. To start/restart Quokka on an existing file, use
`Cmd/Ctrl + K, Q` .
Live Logging/Compare
You may **use `console.log` or
identifier expressions (i.e. just typing a variable name) to log any
values**.\
You may also **use sequence expressions to compare objects**:
Note that when using identifier expressions for logging (for example,
typing a to see the value of
the a variable), you may hit
some limits in terms of the number of displayed properties and the
logged object traversal depth.
In this case, you may use
`console.log(a)` to display
objects without the limitations.
Please also note that Boolean, Number and Function data types are not
supported when use sequence expressions to compare objects (e.g.
obj1, obj2 ).
## Live Code Coverage
Once Quokka.js is running, you can see the code coverage in the gutter
of your editor. The coverage is live, so you can start changing your
code and the coverage will automatically be updated, just as you type.
As you may see, there are various colored squares displayed for each
line of your source code.
- Gray squares mean that the source line has not been executed.
- Green squares mean that the source line has been executed.
- Yellow squares mean that the source line has only been partially
executed. Quokka supports branch code coverage level, so if a line
contains a logical expression or a ternary operator with both
covered and uncovered branches, it will be displayed with yellow
gutter indicator.
- Red squares mean that the source line is the source of an error, or
is in the stack of an error.
## Value Explorer
Value Explorer allows you to inspect everything that is logged in Quokka
with console.log , identifier
expressions, live comments, and the Show Value{.highlighter-rouge
.language-plaintext} command.
Results are displayed in an easy-to-navigate tree view that is updated
in realtime as you write your code.
Expression paths and values can be copied using the tree node's context
menu.
Note that while Value Explorer is available for both Community and Pro
editions, in Community edition only 2 levels of the explorer's tree can
be expanded.
### Auto-Expand Value Explorer Objects {#auto-expand-value-explorer-objects .vsc-doc .jb-doc style="display: block;"}
Identifier Expressions and Live Comments can be provided with an
additional hint to automatically expand objects when they are logged to
Value Explorer. Inserting the special comment
/*?+*/ after any expression
will expand your object and its properties within the Value Explorer
tree.
Use this feature with small- to medium-sized objects when you want to
expand all properties in Value Explorer. Having the properties expanded
also helps when using the 'Copy Data' action on the Value Explorer tree
node, because it only copies expanded properties' data.
 Note that automatically expanded objects have the following limitations:
- Cyclic Depedencies are not automatically expanded
- Functions are not automatically expanded
- Strings beyond 8192 characters are not automatically expanded
- Only the first 100 properties on a single object will be expanded
- Only the first 100 elements of an array will be expanded
- Only the first 10 levels of nested properties will be expanded
- Only the first 5000 properties across all objects will be expanded
## VS Code Live Share Integration {#live-share-integration .vsc-doc style="display: block;"}
When Microsoft's VS Code plugin for Live
Share
is installed alongside Quokka, Quokka provides software developers with
the ability to interactively collaborate on the same code at the same
time. This feature adds a new dimension to real-time instructor-led
training as well as interactive prototyping/debugging and works best
when guests and host use Live Share's
Note that automatically expanded objects have the following limitations:
- Cyclic Depedencies are not automatically expanded
- Functions are not automatically expanded
- Strings beyond 8192 characters are not automatically expanded
- Only the first 100 properties on a single object will be expanded
- Only the first 100 elements of an array will be expanded
- Only the first 10 levels of nested properties will be expanded
- Only the first 5000 properties across all objects will be expanded
## VS Code Live Share Integration {#live-share-integration .vsc-doc style="display: block;"}
When Microsoft's VS Code plugin for Live
Share
is installed alongside Quokka, Quokka provides software developers with
the ability to interactively collaborate on the same code at the same
time. This feature adds a new dimension to real-time instructor-led
training as well as interactive prototyping/debugging and works best
when guests and host use Live Share's
follow participant command.
### How does it work?
When the host and client both have Quokka plugin installed during a Live
Share collaboration, when code changes are made and Quokka is running,
Quokka will execute the code changes on the host and immediately
send the display values to all collaboration participants. Before
sharing the Quokka session with clients, the host will be prompted to
either Allow or
Deny sharing Quokka with the
Live Share collaboration.
Members of the Live Share collaboration see the same Quokka display
values when they are visible to the host. If the Live Share session is
configured to be read-only, only the host can edit code but
collaborators will see all of the Quokka execution results. If the Live
Share session is editable by other collaborators, as non-host code edits
are made, Quokka will evaluate the changes on the host and send the
execution results to all collaborators.
## Interactive Examples
The Wallaby.js team curates a set of interactive
examples that may be
launched from within VS Code using the
Create File (Ctrl + K, L)
command. These examples are useful for both experienced developers (as
references) and for new developers (to learn).
## Live Comments
PRO
While console.log may do a
great job for displaying values, sometimes you may need to see the value
right in the middle of an expression. For example, given a chain of
a.b().c().d() , you may want to
inspect the result of a.b().c(){.highlighter-rouge
.language-plaintext} before .d(){.highlighter-rouge
.language-plaintext} is called.
The most powerful way to log any expression is to use a special
comment right after the expression you want to log.
Inserting the special comment /*?*/{.highlighter-rouge
.language-plaintext} after an expression (or just
//? after a statement) will
log just the value of that expression.
For example,
{.highlight .language-javascript}
a.b()/*?*/.c().d()
Copy
will output the result of a.b(){.highlighter-rouge
.language-plaintext} expression, and
{.highlight .language-javascript}
a.b().c().d() /*?*/
// or just
a.b().c().d() //?
Copy
will output the result of the full a.b().c().d(){.highlighter-rouge
.language-plaintext} expression.
You may also write any JavaScript code right in the comment to shape
the output. The code has the access to the ${.highlighter-rouge
.language-plaintext} variable which is the expression that the comment
is appended to. The executed code is within a closure, so it also has
the access to any objects that you may access from within the current
lexical environment.
Note that there's no constraints in terms of what the comment code can
do. For example, the watch comment below is incrementing
d.e value, and returning
$ , which points to the
expression that the comment is appended to ( a.b{.highlighter-rouge
.language-plaintext}).
 Also, unlike console logging, the special comment logging has some
built-in smarts. For example, when you place the comment after an
expression that is a promise, the resolved value of the promise is
logged. Similarly, if an expression is an observable, then its values
are displayed. So you don't need to insert a
Also, unlike console logging, the special comment logging has some
built-in smarts. For example, when you place the comment after an
expression that is a promise, the resolved value of the promise is
logged. Similarly, if an expression is an observable, then its values
are displayed. So you don't need to insert a
.then function to just inspect
the resolved value of the promise or a forEach{.highlighter-rouge
.language-plaintext}/ subscribe
function to inspect the observable values.
#### Live comment snippet
To save some time on typing the comment when you need it, you may
create a code
snippet
with a custom keybinding.
To save some time on typing the comment when you need it, you may
create a live
template.
To save some time on typing the comment when you need it, you may
create a code
snippet
with a custom
keybinding.
To save some time on typing the comment when you need it, you may
create code
snippets.
## Live Value Display
PRO
While the Live Comments feature
provides an excellent way to log expression values and will keep
displaying values when you change your code, sometimes you may want to
display or capture expression values without modifying code. The
Show Value and
Copy Value features allow you
to do exactly that.
### Show Value
If you want to quickly display some expression value, but without
modifying your code, you may do it by simply selecting an expression
in an editor.
If you want to quickly display some expression value, but without
modifying your code, you may do it by simply selecting an expression
in an editor.
### Copy Value
If you want to copy an expression value to your clipboard without
modifying your code, Live Value Display allows you to do it with a
special command ( Show Value
command, or with the Cmd + K, X{.highlighter-rouge
.language-plaintext} keyboard shortcut).
If you want to copy an expression value to your clipboard without
modifying your code, Live Value Display allows you to do it with a
special intention action ( Alt+Enter{.highlighter-rouge
.language-plaintext} & select the Copy Value{.highlighter-rouge
.language-plaintext} action).
## Project Files Import
PRO
Quokka 'Community' edition allows you to import any locally installed
node modules to a Quokka file. In addition to that, Quokka 'Pro' edition
also allows to import any files from your project:
- with Babel or
TypeScript
compilation if required;
- Quokka will also watch project files for changes and automatically
update when dependent files change.
Quokka also resolves imported modules with non-relative names when using
tsconfig.json and
jsconfig.json files that
specify baseUrl and/or
paths settings.
## Quick Package Install
PRO
This feature allows you to quickly install any node package, via
npm or
yarn , without switching away
from your editor, and without even having to type the package name
(there is enough information in your code already). The package may be
installed just for the active Quokka session, so that when you are
just playing with things, your node_modules{.highlighter-rouge
.language-plaintext} folder is not trashed. Having said that, you may
also target the project's node_modules{.highlighter-rouge
.language-plaintext}, if you want to do it.
You may install missing packages via intention actions
( Alt+Enter ), or via the links
in the Quokka output.
You may install missing packages by using the hover message, or with the
Cmd + K, I keyboard shortcut
(whenever there's a missing package), via command palette
( Quokka.js: Install Missing Package ...{.highlighter-rouge
.language-plaintext} commands), or via the links in the Quokka output.
 By default Quokka uses the
npm install {packageName}
command. You may change it to
yarn add {packageName} by
setting the installPackageCommand{.highlighter-rouge
.language-plaintext} value in your Quokka
config:
{.highlight .language-json}
{
"installPackageCommand": "yarn add {packageName}"
}
Copy
## Live Performance Testing
PRO
The feature allows to quickly see how various parts of your code
perform. It can be very helpful for identifying possible bottlenecks
in your app and for doing the performance optimization, or just for
experimenting to see how different things perform.
Inserting the special comment /*?.*/{.highlighter-rouge
.language-plaintext} after any expression will report how much time it
took to execute the expression.
 Adding the comment to an expression that gets executed multiple times,
for example inside a loop, will make the tool to display total execution
time, average execution time (total execution time divided by number of
times the expression had been executed), minimum and maximum execution
time.
You may also use the execution time reporting comment and add to it any
expression that you may use in live comments to display both an
expression execution time and execution result.
For example,
Adding the comment to an expression that gets executed multiple times,
for example inside a loop, will make the tool to display total execution
time, average execution time (total execution time divided by number of
times the expression had been executed), minimum and maximum execution
time.
You may also use the execution time reporting comment and add to it any
expression that you may use in live comments to display both an
expression execution time and execution result.
For example,
{.highlight .language-bash}
a() //?. $
Copy
displays a() execution time
and result.
## Run on Save/Run Once
PRO
Choose how and when Quokka should run on your files. In addition to the
community edition's Automatic mode, you can start Quokka and only
Run on Save or tell Quokka to start and just Run Once. This
feature is helpful for using Quokka to run slow-running scripts, or
scripts with side-effects.
The Run on Save and Run Once actions are available along-side
other Quokka commands, in your IDE's list of commands. If you use these
commands often, you can improve your productivity by adding
key-bindings.
## Runtime
Quokka.js is using your system's node.js to run your code. You also may
configure Quokka to use any specific node.js
version,
if you are using nvm for
example.
By default Quokka uses esm
module for JavaScript files,
allowing ES imports and top level await to be used with zero
configuration.
## Browser-like Runtime
To simulate a browser environment, Quokka supports jsdom. The
jsdom{.highlighter-rouge
.language-plaintext} package must be
installed and available from your project as well adding as a few
simple Quokka configuration
settings.
## Configuration
Quokka.js does not need any configuration by default. It will run your
code using your system's node.js. It may also run your TypeScript code
without any configuration.
If you would like to use Babel/React JSX or override your
tsconfig.json settings, then
you may configure
Quokka.js.
If you are using VS Code, you can override our editor display settings
with VS Code User Setting overrides. You can view the overridable
settings in the VS Code Settings editor under Settings -> Extensions
-> Quokka. \
\
You may override the coverage indicator colors in VS Code's user
settings ( settings.json file).
The snippet below shows the config with Quokka's default colors.
{
...
"quokka.colors": {
"covered": "#62b455",
"errorPath": "#ffa0a0",
"errorSource": "#fe536a",
"notCovered": "#cccccc",
"partiallyCovered": "#d2a032"
}
}
 Copy
If you are using VS Code, you may change your Quokka console output to
Copy
If you are using VS Code, you may change your Quokka console output to
compact mode by updating your
VS Code setting quokka.compactMessageOutput{.highlighter-rouge
.language-plaintext} to true .
## Plugins
Quokka.js provides a plugin model that may be configured by using the
plugins
setting. Quokka's
plugin model allows you to specify a file or a node module with code to
execute at various stages of Quokka.js' code execution pipeline. You may
find more information about how to write a Quokka plugin in the
Extensibility docs
section.
## Examples
Because Quokka.js runs your code using node.js{.highlighter-rouge
.language-plaintext}, sometimes a little more configuration may be
required to match your project's runtime configuration. If the examples
below aren't relevant for your project, search our support
repository for an existing
configuration.
- Create-React-App
- Babel +
import
- TypeScript +
import
- React + Babel + jsdom
plugin
- Quokka
Alias
## Questions and issues
If you find an issue, please report it in our support
repository.
Configuration**
Please enable JavaScript to view the comments powered by
Disqus.
1. Getting started
2. Live Feedback
3. Live Logging/Compare
4. Live Code Coverage
5. Value Explorer
6. VS Code Live Share
Integration
7. Interactive
Examples
8. Live Comments
9. Live Value Display
10. Project Files Import
11. Quick Package Install
12. Live Performance Testing
13. Run on Save/Run Once
14. Runtime
15. Browser-like
Runtime
16. Configuration
17. Plugins
18. Examples
19. Questions and
issues
---
### <========(Browser Preview)========>
---
 Adds :emoji: syntax support to VS Code's built-in Markdown preview
 # Features
- Adds support for :emoji: syntax to VS Code's built-in markdown preview
---
### <========( Microsoft Edge Tools)========>
---
# Microsoft Edge Tools for VS Code - Visual Studio Marketplace
> Extension for Visual Studio Code - Use the Microsoft Edge Tools from within VS Code to see your site's runtime HTML structure, alter its layout, fix styling issues as well as see your site's network requests.
Show the browser's Elements and Network tool inside the Visual Studio Code editor and use it to fix CSS issues with your site and inspect network activity.
A Visual Studio Code extension that allows you to use the browser's Elements and Network tool from within the editor. The DevTools will connect to an instance of Microsoft Edge giving you the ability to see the runtime HTML structure, alter layout, fix styling issues, and view network requests. All without leaving Visual Studio Code.
Note: This extension only supports Microsoft Edge (version greater than 80.0.361.48)
# Features
- Adds support for :emoji: syntax to VS Code's built-in markdown preview
---
### <========( Microsoft Edge Tools)========>
---
# Microsoft Edge Tools for VS Code - Visual Studio Marketplace
> Extension for Visual Studio Code - Use the Microsoft Edge Tools from within VS Code to see your site's runtime HTML structure, alter its layout, fix styling issues as well as see your site's network requests.
Show the browser's Elements and Network tool inside the Visual Studio Code editor and use it to fix CSS issues with your site and inspect network activity.
A Visual Studio Code extension that allows you to use the browser's Elements and Network tool from within the editor. The DevTools will connect to an instance of Microsoft Edge giving you the ability to see the runtime HTML structure, alter layout, fix styling issues, and view network requests. All without leaving Visual Studio Code.
Note: This extension only supports Microsoft Edge (version greater than 80.0.361.48)
 ## Supported Features
- Debug configurations for launching Microsoft Edge browser in remote-debugging mode and auto attaching the tools.
- Side Bar view for listing all the debuggable targets, including tabs, extensions, service workers, etc.
- Fully featured Elements and Network tool with views for HTML, CSS, accessibility and more.
- Screen-casting feature to allow you to see your page without leaving Visual Studio Code.
- Go directly to the line/column for source files in your workspace when clicking on a link or CSS rule inside the Elements tool.
- Auto attach the Microsoft Edge Tools when you start debugging with the Debugger for Microsoft Edge extension.
- Debug using a windowed or headless version of the Microsoft Edge Browser
## Using the Extension
### Getting Started
For use inside Visual Studio Code:
1. Install any channel (Canary/Dev/etc.) of Microsoft Edge.
2. Install the extension Microsoft Edge Tools.
3. Open the folder containing the project you want to work on.
4. (Optional) Install the Debugger for Microsoft Edge extension.
### Changing Extension Settings
You can customize the extension to your needs. You can reach the settings by clicking the gear icon of the extension listing or via the settings menu.
## Supported Features
- Debug configurations for launching Microsoft Edge browser in remote-debugging mode and auto attaching the tools.
- Side Bar view for listing all the debuggable targets, including tabs, extensions, service workers, etc.
- Fully featured Elements and Network tool with views for HTML, CSS, accessibility and more.
- Screen-casting feature to allow you to see your page without leaving Visual Studio Code.
- Go directly to the line/column for source files in your workspace when clicking on a link or CSS rule inside the Elements tool.
- Auto attach the Microsoft Edge Tools when you start debugging with the Debugger for Microsoft Edge extension.
- Debug using a windowed or headless version of the Microsoft Edge Browser
## Using the Extension
### Getting Started
For use inside Visual Studio Code:
1. Install any channel (Canary/Dev/etc.) of Microsoft Edge.
2. Install the extension Microsoft Edge Tools.
3. Open the folder containing the project you want to work on.
4. (Optional) Install the Debugger for Microsoft Edge extension.
### Changing Extension Settings
You can customize the extension to your needs. You can reach the settings by clicking the gear icon of the extension listing or via the settings menu.
 #### Turning on Network Inspection
You can enable the Network Pane to inspect any network request of the attached browser. To do this, change the setting and restart the extension.
#### Turning on Network Inspection
You can enable the Network Pane to inspect any network request of the attached browser. To do this, change the setting and restart the extension.
 You can see an example of the change in the following screencast. After restart, you get an extra tab with network functionality.
 #### Turning on Headless Mode
By default, the extension will launch the browser in its own window. This means you get an extra browser icon in your task bar and you need to turn on casting to see the browser inside the editor. You can also choose "headless mode" to not have the browser open in an own window, but embed itself directly into Visual Studio Code.
Note: In the past we had issues on Macintosh computers where the Microsoft Edge instance reported itself as "inactive" when the window wasn't visible. Using headless mode fixes that problem.
#### Turning on Headless Mode
By default, the extension will launch the browser in its own window. This means you get an extra browser icon in your task bar and you need to turn on casting to see the browser inside the editor. You can also choose "headless mode" to not have the browser open in an own window, but embed itself directly into Visual Studio Code.
Note: In the past we had issues on Macintosh computers where the Microsoft Edge instance reported itself as "inactive" when the window wasn't visible. Using headless mode fixes that problem.
 You can see an example of the change in the following screencast:
 ### Using the tools
The extension operates in two modes - it can launch an instance of Microsoft Edge navigated to your app, or it can attach to a running instance of Microsoft Edge. Both modes requires you to be serving your web application from local web server, which is started from either a Visual Studio Code task or from your command-line. Using the
### Using the tools
The extension operates in two modes - it can launch an instance of Microsoft Edge navigated to your app, or it can attach to a running instance of Microsoft Edge. Both modes requires you to be serving your web application from local web server, which is started from either a Visual Studio Code task or from your command-line. Using the url parameter you tell Visual Studio Code which URL to either open or launch in the browser.
You can now use the high-fidelity tools to tweak your CSS and inspect network calls and go directly back to your code without leaving the editor.
#### Opening source files from the Elements tool
One of the features of the Elements tool is that it can show you what file applied the styles and event handlers for a given node.
 The source files for these applied styles and attached event handlers appear in the form of links to a url specified by the browser. Clicking on one will attempt to open that file inside the Visual Studio Code editor window. Correctly mapping these runtime locations to actual files on disk that are part of your current workspace, may require you to enable source maps as part of your build environment.
An example webpack configuration for sass and typescript is given below:
module.exports = {
devtool: "source-map",
module: {
rules: [
{
test: /.ts$/,
loader: "ts-loader"
},
{
test: /.(s)css$/,
use: [
{ loader: MiniCssExtractPlugin.loader },
{ loader: "css-loader", options: { sourceMap: true } },
{ loader: "sass-loader", options: { sourceMap: true } }
]
},
]
}
}
With source maps enabled, you may also need to configure the extension settings/launch.json config to add customized paths between your runtime urls and your workspace paths, see Sourcemaps for more information.
#### Debug Configuration
You can launch the Microsoft Edge Tools extension like you would a debugger, by using a
The source files for these applied styles and attached event handlers appear in the form of links to a url specified by the browser. Clicking on one will attempt to open that file inside the Visual Studio Code editor window. Correctly mapping these runtime locations to actual files on disk that are part of your current workspace, may require you to enable source maps as part of your build environment.
An example webpack configuration for sass and typescript is given below:
module.exports = {
devtool: "source-map",
module: {
rules: [
{
test: /.ts$/,
loader: "ts-loader"
},
{
test: /.(s)css$/,
use: [
{ loader: MiniCssExtractPlugin.loader },
{ loader: "css-loader", options: { sourceMap: true } },
{ loader: "sass-loader", options: { sourceMap: true } }
]
},
]
}
}
With source maps enabled, you may also need to configure the extension settings/launch.json config to add customized paths between your runtime urls and your workspace paths, see Sourcemaps for more information.
#### Debug Configuration
You can launch the Microsoft Edge Tools extension like you would a debugger, by using a launch.json config file.
Microsoft Edge Tools works great when paired with Debugger for Microsoft Edge, you can use the first one to design your frontend and the latter to debug your code and set breakpoints
To add a new debug configuration, in your launch.json add a new debug config with the following parameters:
- type - The name of the debugger which must be vscode-edge-devtools.debug. Required.
- request - launch to open a new browser tab or attach to connect to an existing tab. Required.
- name - A friendly name to show in the Visual Studio Code UI. Required.
- url - The url for the new tab or of the existing tab. Optional.
- file - The local file path for the new tab or of the existing tab. Optional.
- webRoot - The directory that files are served from. Used to resolve urls like http://localhost:8000/app.js to a file on disk like /out/app.js. Optional.
{
"version": "0.1.0",
"configurations": [
{
"type": "vscode-edge-devtools.debug",
"request": "launch",
"name": "Launch Microsoft Edge and open the Edge DevTools",
"file": "${workspaceFolder}/index.html"
},
{
"type": "vscode-edge-devtools.debug",
"request": "attach",
"name": "Attach to Microsoft Edge and open the Edge DevTools",
"url": "http://localhost:8000/",
"webRoot": "${workspaceFolder}/out"
}
]
}
#### Other optional launch config fields
- browserPath: The full path to the browser executable that will be launched. If not specified the most stable channel of Microsoft Edge will be launched from the default install location instead.
- hostname: By default the extension searches for debuggable instances using localhost. If you are hosting your web app on a remote machine you can specify the hostname using this setting.
- port: By default the extension will set the remote-debugging-port to 9222. Use this option to specify a different port on which to connect.
- userDataDir: Normally, if Microsoft Edge is already running when you start debugging with a launch config, then the new instance won't start in remote debugging mode. So by default, the extension launches Microsoft Edge with a separate user profile in a temp folder. Use this option to set a different path to use, or set to false to launch with your default user profile instead.
- useHttps: By default the extension will search for attachable instances using the http protocol. Set this to true if you are hosting your web app over https instead.
- sourceMaps: By default, the extension will use sourcemaps and your original sources whenever possible. You can disable this by setting sourceMaps to false.
- pathMapping: This property takes a mapping of URL paths to local paths, to give you more flexibility in how URLs are resolved to local files. "webRoot": "${workspaceFolder}" is just shorthand for a pathMapping like { "/": "${workspaceFolder}" }.
- sourceMapPathOverrides: A mapping of source paths from the sourcemap, to the locations of these sources on disk. See Sourcemaps for more information
- urlFilter: A string that can contain wildcards that will be used for finding a browser target, for example, "localhost:\/app" will match either "http://localhost:123/app" or "http://localhost:456/app", but not "https://stackoverflow.com". This property will only be used if url and file are not specified.
- timeout: The number of milliseconds that the Microsoft Edge Tools will keep trying to attach to the browser before timing out. Defaults to 10000ms.
#### Sourcemaps
The elements tool uses sourcemaps to correctly open original source files when you click links in the UI, but sometimes the sourcemaps aren't generated properly and overrides are needed. In the config we support sourceMapPathOverrides, a mapping of source paths from the sourcemap, to the locations of these sources on disk. Useful when the sourcemap isn't accurate or can't be fixed in the build process.
The left hand side of the mapping is a pattern that can contain a wildcard, and will be tested against the sourceRoot + sources entry in the source map. If it matches, the source file will be resolved to the path on the right hand side, which should be an absolute path to the source file on disk.
A few mappings are applied by default, corresponding to some common default configs for Webpack and Meteor: Note: These are the mappings that are included by default out of the box, with examples of how they could be resolved in different scenarios. These are not mappings that would make sense together in one project.
"sourceMapPathOverrides": {
"webpack:///./~/": "${webRoot}/node_modules/",
"webpack:///./": "${webRoot}/",
"webpack:///": "",
"webpack:///src/": "${webRoot}/",
"meteor://💻app/": "${webRoot}/"
}
If you set sourceMapPathOverrides in your launch config, that will override these defaults. ${workspaceFolder} and ${webRoot} can be used there.
See the following examples for each entry in the default mappings ( webRoot = /Users/me/project):
"webpack:///./~/": "${webRoot}/node_modules/"
Example:
"webpack:///./~/querystring/index.js"
-> "/Users/me/project/node_modules/querystring/index.js"
"webpack:///./": "${webRoot}/"
Example:
"webpack:///./src/app.js" -> "/Users/me/project/src/app.js"
"webpack:///": ""
Example:
"webpack:///project/app.ts" -> "/project/app.ts"
"webpack:///src/": "${webRoot}/"
Example:
"webpack:///src/app.js" -> "/Users/me/project/app.js"
"meteor://💻app/": "${webRoot}/"
Example:
"meteor://💻app/main.ts" ->"/Users/me/project/main.ts"
#### Ionic/gulp-sourcemaps note
Ionic and gulp-sourcemaps output a sourceRoot of "/source/" by default. If you can't fix this via your build config, try this setting:
"sourceMapPathOverrides": {
"/source/": "${workspaceFolder}/"
}
### Launching the browser via the side bar view
- Start Microsoft Edge via the side bar
- Click the Microsoft Edge Tools view in the side bar.
- Click the Open a new tab icon to launch the browser (if it isn't open yet) and open a new tab.
- Attach the Microsoft Edge Tools via the side bar view
- Click the Attach icon next to the tab to open the Microsoft Edge Tools.
### Launching the browser manually
- Start Microsoft Edge with remote-debugging enabled on port 9222:
- msedge.exe --remote-debugging-port=9222
- Navigate the browser to the desired URL.
- Attach the Microsoft Edge Tools via a command:
- Run the command Microsoft Edge Tools: Attach to a target
- Select a target from the drop down.
### Attaching automatically when launching the browser for debugging
- Install the Debugger for Microsoft Edge extension
- Setup your launch.json configuration to launch and debug Microsoft Edge.
- See Debugger for Microsoft Edge Readme.md.
- Start Microsoft Edge for debugging.
- Once debugging has started, the Microsoft Edge Tools will auto attach to the browser (it will keep retrying until the Debugger for Microsoft Edge launch.json config timeout value is reached).
- This auto attach functionality can be disabled via the vscode-edge-devtools.autoAttachViaDebuggerForEdge Visual Studio Code setting.
This project welcomes contributions and suggestions. Most contributions require you to agree to a Contributor License Agreement (CLA) declaring that you have the right to, and actually do, grant us the rights to use your contribution. For details, visit [https://cla.microsoft.com\].
See CONTRIBUTING.md for more information.
## Data/Telemetry
This project collects usage data and sends it to Microsoft to help improve our products and services. Read Microsoft's privacy statement to learn more.
## Source
### <========( Turbo Console Log)========>
---
# Turbo Console Log
> Extension for Visual Studio Code - Automating the process of writing meaningful log messages.
## Main Functionality
---
This extension make debugging much easier by automating the operation of writing meaningful log message.
## Features
---
I) Insert meaningful log message automatically
Two steps:
- Selecting the variable which is the subject of the debugging
- Pressing ctrl + alt + L
The log message will be inserted in the next line relative to the selected variable like this:
console.log("SelectedVariableEnclosingClassName -> SelectedVariableEnclosingFunctionName -> SelectedVariable", SelectedVariable)
 Multiple cursor support:
 Properties:
- turboConsoleLog.wrapLogMessage (boolean): Whether to wrap the log message or not.
- turboConsoleLog.logMessagePrefix (string): The prefix of the log message.
- turboConsoleLog.addSemicolonInTheEnd (boolean): Whether to put a semicolon in the end of the log message or not.
- turboConsoleLog.insertEnclosingClass (boolean): Whether to insert or not the enclosing class of the selected variable in the log message.
- turboConsoleLog.insertEnclosingFunction (boolean): Whether to insert or not the enclosing function of the selected variable in the log message.
- turboConsoleLog.quote (enum): Double quotes (""), single quotes ('') or backtick(``).
A wrapped log message :
Properties:
- turboConsoleLog.wrapLogMessage (boolean): Whether to wrap the log message or not.
- turboConsoleLog.logMessagePrefix (string): The prefix of the log message.
- turboConsoleLog.addSemicolonInTheEnd (boolean): Whether to put a semicolon in the end of the log message or not.
- turboConsoleLog.insertEnclosingClass (boolean): Whether to insert or not the enclosing class of the selected variable in the log message.
- turboConsoleLog.insertEnclosingFunction (boolean): Whether to insert or not the enclosing function of the selected variable in the log message.
- turboConsoleLog.quote (enum): Double quotes (""), single quotes ('') or backtick(``).
A wrapped log message :
 II) Comment all log messages, inserted by the extension, from the current document
All it takes to comment all log messages, inserted by the extension, from the current document is to press alt + shift + c
II) Comment all log messages, inserted by the extension, from the current document
All it takes to comment all log messages, inserted by the extension, from the current document is to press alt + shift + c
 III) Uncomment all log messages, inserted by the extension, from the current document
All it takes to uncomment all log messages, inserted by the extension, from the current document is to press alt + shift + u
III) Uncomment all log messages, inserted by the extension, from the current document
All it takes to uncomment all log messages, inserted by the extension, from the current document is to press alt + shift + u
 IV) Delete all log messages, inserted by the extension, from the current document
All it takes to delete all log messages, inserted by the extension, from the current document is to press alt + shift + d
IV) Delete all log messages, inserted by the extension, from the current document
All it takes to delete all log messages, inserted by the extension, from the current document is to press alt + shift + d
 ---
### <========(Regex Previewer - Visual Studio Marketplace)========>
---
# Regex Previewer - Visual Studio Marketplace
> Extension for Visual Studio Code - Regex matches previewer for JavaScript, TypeScript, PHP and Haxe in Visual Studio Code.
## Features
Shows the current regular expression's matches in a side-by-side document. This can be turned on/off with
---
### <========(Regex Previewer - Visual Studio Marketplace)========>
---
# Regex Previewer - Visual Studio Marketplace
> Extension for Visual Studio Code - Regex matches previewer for JavaScript, TypeScript, PHP and Haxe in Visual Studio Code.
## Features
Shows the current regular expression's matches in a side-by-side document. This can be turned on/off with Ctrl+Alt+M ( ⌥⌘M).
Global and multiline options can be added for evaluation with a side-by-side document through a status bar entry. This can be useful when the side-by-side document has multiple examples to match.
 ## Source
### <========(JavaScript Snippet Pack)========>
---
# JavaScript Snippet Pack - Visual Studio Marketplace
> Extension for Visual Studio Code - A snippet pack to make you more productive working with JavaScript
## JavaScript Snippet Pack for Visual Studio Code
## Usage
---
A snippet pack to make you more productive working with JavaScript. Based on Visual Studio extension by Mads Kristensen, which is based on Atom snippets.
This extension ships a bunch of useful code snippets for the JavaScript and TypeScript editors.
Here's the full list of all the snippets:
## Console
### [cd] console.dir
console.dir(${1});
### [ce] console.error
console.error(${1});
### [ci] console.info
console.info(${1});
### [cl] console.log
console.log(${1});
### [cw] console.warn
console.warn(${1});
### [de] debugger
debugger;
## DOM
### [ae] addEventListener
${1:document}.addEventListener('${2:load}', function(e) {
${3:// body}
});
### [ac] appendChild
${1:document}.appendChild(${2:elem});
### [rc] removeChild
${1:document}.removeChild(${2:elem});
### [cel] createElement
${1:document}.createElement(${2:elem});
### [cdf] createDocumentFragment
${1:document}.createDocumentFragment();
### [ca] classList.add
${1:document}.classList.add('${2:class}');
### [ct] classList.toggle
${1:document}.classList.toggle('${2:class}');
### [cr] classList.remove
${1:document}.classList.remove('${2:class}');
### [gi] getElementById
${1:document}.getElementById('${2:id}');
### [gc] getElementsByClassName
${1:document}.getElementsByClassName('${2:class}');
### [gt] getElementsByTagName
${1:document}.getElementsByTagName('${2:tag}');
### [ga] getAttribute
${1:document}.getAttribute('${2:attr}');
### [sa] setAttribute
${1:document}.setAttribute('${2:attr}', ${3:value});
### [ra] removeAttribute
${1:document}.removeAttribute('${2:attr}');
### [ih] innerHTML
${1:document}.innerHTML = '${2:elem}';
### [tc] textContent
${1:document}.textContent = '${2:content}';
### [qs] querySelector
${1:document}.querySelector('${2:selector}');
### [qsa] querySelectorAll
${1:document}.querySelectorAll('${2:selector}');
## Loop
### [fe] forEach
${1:array}.forEach(function(item) {
${2:// body}
});
## Function
### [fn] function
function ${1:methodName} (${2:arguments}) {
${3:// body}
}
### [afn] anonymous function
function(${1:arguments}) {
${2:// body}
}
### [pr] prototype
${1:object}.prototype.${2:method} = function(${3:arguments}) {
${4:// body}
}
### [iife] immediately-invoked function expression
(function(${1:window}, ${2:document}) {
${3:// body}
})(${1:window}, ${2:document});
### [call] function call
${1:method}.call(${2:context}, ${3:arguments})
### [apply] function apply
${1:method}.apply(${2:context}, [${3:arguments}])
### [ofn] function as a property of an object
${1:functionName}: function(${2:arguments}) {
${3:// body}
}
## JSON
### [jp] JSON.parse
JSON.parse(${1:obj});
### [js] JSON.stringify
JSON.stringify(${1:obj});
## Timer
### [si] setInterval
setInterval(function() {
${0:// body}
}, ${1:1000});
### [st] setTimeout
setTimeout(function() {
${0:// body}
}, ${1:1000});
## Misc
### [us] use strict
'use strict';
### [al] alert
alert('${1:msg}');
### [co] confirm
confirm('${1:msg}');
### [pm] prompt
prompt('${1:msg}');
---
### <========(Node.js Exec)========>
---
# Node.js Exec - Visual Studio Marketplace
> Extension for Visual Studio Code - Execute the current file or your selected code with node.js.
### Execute the current file or your selected code with node.js.
## Usage
- To execute the current file or the selection press
## Source
### <========(JavaScript Snippet Pack)========>
---
# JavaScript Snippet Pack - Visual Studio Marketplace
> Extension for Visual Studio Code - A snippet pack to make you more productive working with JavaScript
## JavaScript Snippet Pack for Visual Studio Code
## Usage
---
A snippet pack to make you more productive working with JavaScript. Based on Visual Studio extension by Mads Kristensen, which is based on Atom snippets.
This extension ships a bunch of useful code snippets for the JavaScript and TypeScript editors.
Here's the full list of all the snippets:
## Console
### [cd] console.dir
console.dir(${1});
### [ce] console.error
console.error(${1});
### [ci] console.info
console.info(${1});
### [cl] console.log
console.log(${1});
### [cw] console.warn
console.warn(${1});
### [de] debugger
debugger;
## DOM
### [ae] addEventListener
${1:document}.addEventListener('${2:load}', function(e) {
${3:// body}
});
### [ac] appendChild
${1:document}.appendChild(${2:elem});
### [rc] removeChild
${1:document}.removeChild(${2:elem});
### [cel] createElement
${1:document}.createElement(${2:elem});
### [cdf] createDocumentFragment
${1:document}.createDocumentFragment();
### [ca] classList.add
${1:document}.classList.add('${2:class}');
### [ct] classList.toggle
${1:document}.classList.toggle('${2:class}');
### [cr] classList.remove
${1:document}.classList.remove('${2:class}');
### [gi] getElementById
${1:document}.getElementById('${2:id}');
### [gc] getElementsByClassName
${1:document}.getElementsByClassName('${2:class}');
### [gt] getElementsByTagName
${1:document}.getElementsByTagName('${2:tag}');
### [ga] getAttribute
${1:document}.getAttribute('${2:attr}');
### [sa] setAttribute
${1:document}.setAttribute('${2:attr}', ${3:value});
### [ra] removeAttribute
${1:document}.removeAttribute('${2:attr}');
### [ih] innerHTML
${1:document}.innerHTML = '${2:elem}';
### [tc] textContent
${1:document}.textContent = '${2:content}';
### [qs] querySelector
${1:document}.querySelector('${2:selector}');
### [qsa] querySelectorAll
${1:document}.querySelectorAll('${2:selector}');
## Loop
### [fe] forEach
${1:array}.forEach(function(item) {
${2:// body}
});
## Function
### [fn] function
function ${1:methodName} (${2:arguments}) {
${3:// body}
}
### [afn] anonymous function
function(${1:arguments}) {
${2:// body}
}
### [pr] prototype
${1:object}.prototype.${2:method} = function(${3:arguments}) {
${4:// body}
}
### [iife] immediately-invoked function expression
(function(${1:window}, ${2:document}) {
${3:// body}
})(${1:window}, ${2:document});
### [call] function call
${1:method}.call(${2:context}, ${3:arguments})
### [apply] function apply
${1:method}.apply(${2:context}, [${3:arguments}])
### [ofn] function as a property of an object
${1:functionName}: function(${2:arguments}) {
${3:// body}
}
## JSON
### [jp] JSON.parse
JSON.parse(${1:obj});
### [js] JSON.stringify
JSON.stringify(${1:obj});
## Timer
### [si] setInterval
setInterval(function() {
${0:// body}
}, ${1:1000});
### [st] setTimeout
setTimeout(function() {
${0:// body}
}, ${1:1000});
## Misc
### [us] use strict
'use strict';
### [al] alert
alert('${1:msg}');
### [co] confirm
confirm('${1:msg}');
### [pm] prompt
prompt('${1:msg}');
---
### <========(Node.js Exec)========>
---
# Node.js Exec - Visual Studio Marketplace
> Extension for Visual Studio Code - Execute the current file or your selected code with node.js.
### Execute the current file or your selected code with node.js.
## Usage
- To execute the current file or the selection press F8 or use the command Execute Node.js
- To cancel a running process press F9
## Configuration
Clear output before execution
{
"miramac.node.clearOutput": true
}
Show start and end info
{
"miramac.node.showInfo": true
}
Show stdout and stderr
{
"miramac.node.showStdout": true,
"miramac.node.showStderr": true
}
If miramac.node.legacyMode is true (default) the extention will not use new features and options. Because of some strange problems I can't reproduce, the extension remains in legacy mode. To use the following options simply set this option to false
{
"miramac.node.legacyMode": false
}
### The folloing options need to set the legacyMode off
Set environment variables for execution:
{
"miramac.node.env": {
"NODEENV": "production"
}
}
Add arguments for execution:
{
"miramac.node.args": ["--port", "1337"]
}
Add options for execution:
{
"miramac.node.options": ["--require", "babel-register"]
}
Change the node binary for execution
{
"miramac.node.nodeBin": "/path/to/some/bin/node-7.0"
}
Some code that is executed with each run
{
"miramac.node.includeCode": "const DEBUG = true; const fs = require('fs'); "
}
## How it works
The selected code or if nothing is selected, the active file, is written in a temporarily file (something like `node). You don't have to save the file for execution. This file will be executed by your installed version of node.js. Thereforenode has to be in the PATH.
require('child_process').spawn('node', options,[tmpFile, args])
---
### <========(Search Editor)========>
---
# Search Editor: Apply Changes - Visual Studio Marketplace
> Extension for Visual Studio Code - Apply local Search Editor edits to your workspace
In the marketplace [here](https://marketplace.visualstudio.com/items?itemName=jakearl.search-editor-apply-changes).
Apply changes in a Search Editor to files in a workspace.
Steps:
- Run a search
- Edit results
- Run command "Apply Search Editor changes to worksapce"
> Warning: Ensure the workspace is in sync with the Search Editor before starting to make changes, otherwise data loss may occur. This can be done by simply rerunning the Editor's search.
Search editor changes will overwrite their target files at the lines specified in the editor - if the lines in the target document have been modified shifted around this will result in erroneous overwriting of existing data.
This is a very early expermient of what writing local search editor changes out to the workspace might look like, please file bugs and feature requests as you see fit!
## Known Limitations
- No way to apply edits that insert or delete lines.
## Keybindings
You may find the following keybinding helpful for making the default "save" behaviour write out to workspace rather than save a copy of the results:
{
"key": "cmd+s",
"command": "searchEditorApplyChanges.apply",
"when": "inS,earchEditor"
}
## [Source](https://marketplace.visualstudio.com/items?itemName=jakearl.search-editor-apply-changes)
### <========(Node TDD)========>
---
# Node TDD - Visual Studio Marketplace
> Extension for Visual Studio Code - Ease test-driven development in Node and JavaScript
> A [Visual Studio Code](http://code.visualstudio.com/) [extension](https://marketplace.visualstudio.com/items?itemName=prashaantt.node-tdd) to ease [test-driven development](https://en.wikipedia.org/wiki/Test-driven_development) in Node and JavaScript.
## Features

- Activates when a workspace containingpackage.json is opened.
- Triggers an automatic test build whenever source files are updated.
- Shows a colour-coded build summary.
- Shows the average test coverage (experimental).
- Optionally, if your test runner generates [TAP outputs](https://testanything.org/producers.html#javascript), use thenodeTdd.reporter setting to provide a more meaningful test summary:

- Finally, usenodeTdd.minimal to reclaim some status bar real estate:

## Settings
This extension contributes the following settings:
| Setting | Type | Default | Description |
| --------------------------- | ---------------- | --------------------------------- | ------------------------------------------------------------------- |
|nodeTdd.activateOnStartup | boolean |true | Activate TDD mode when workspace is opened |
|nodeTdd.testScript | string |test | The npm script to run tests |
|nodeTdd.glob | string |{src,test}//*.{js,ts,jsx,tsx} | The glob pattern for files to watch, relative to the workspace root |
|nodeTdd.verbose | boolean / object |false /{onlyOnFailure: true} | Show build status dialogs |
|nodeTdd.minimal | boolean |false | Minimise status bar clutter |
|nodeTdd.buildOnActivation | boolean |false | Run tests when TDD mode is activated |
|nodeTdd.buildOnCreate | boolean |false | Run tests when matching files are created |
|nodeTdd.buildOnDelete | boolean |false | Run tests when matching files are deleted |
|nodeTdd.showCoverage | boolean |false | Show the average test coverage if reported (experimental) |
|nodeTdd.coverageThreshold | number / null |null | The coverage threshold percentage, used to colour-code the coverage |
|nodeTdd.reporter | string / null |null | The test reporter used (currently only "tap" is supported) |
## Commands
The following commands are available from the commands menu as well as status bar buttons:
| Command | Action |
| -------------- | ------------------------------------ |
|activate | Activatenode-tdd in a workspace |
|deactivate | Deactivatenode-tdd in a workspace |
|toggleOutput | Toggle detailed test results output |
|stopBuild | Stop a running build |
## Limitations and known issues
- The extension doesn't get activated ifpackage.json was not initially present when the workspace was opened; a window restart will be required to detect a change.
- It doesn't work with watch mode/incremental test builds. The build process used for running tests must exit on each execution, otherwise it will never report the status.
-showCoverage is an experimental setting that currently only works with the text-summary reports from [Lab](https://github.com/hapijs/lab), [Istanbul](https://github.com/gotwarlost/istanbul) and [nyc](https://github.com/istanbuljs/nyc). Disable it if it doesn't work for you or its output looks funny.
- Despite recent fixes, it might still be [flaky](https://github.com/prashaantt/node-tdd/issues/5) on Windows. Please report any issues.
- Ironically for a TDD extension, it has very few tests of its own because I don't yet know how to test UI elements in VS Code. :/
---
### <=============(Power Tools)=============>
---
# - Visual Studio Marketplace
> Extension for Visual Studio Code - A set of useful and handy tools for Visual Studio Code.
## Install \[[↑](#table-of-contents)\]
Launch VS Code Quick Open (Ctrl + P ), paste the following command, and press enter:
ext install vscode-powertools
Or search for things likevscode-powertools` in your editor.
## How to use [↑]
### Apps [↑]
Apps are Node.js based scripts, which are running with a web view and can also interact with a Visual Studio Code instance.
 For more information, have a look at the wiki.
### Buttons [↑]
Buttons can be used to run tasks, like scripts or shell commands, by user's click.
For more information, have a look at the wiki.
### Buttons [↑]
Buttons can be used to run tasks, like scripts or shell commands, by user's click.
 For more information, have a look at the wiki.
### Commands [↑]
To enhance your editor, you can register custom commands, which can be used from anywhere in the editor, by using the API, e.g.
For more information, have a look at the wiki.
### Commands [↑]
To enhance your editor, you can register custom commands, which can be used from anywhere in the editor, by using the API, e.g.
 For more information, have a look at the wiki.
### Events [↑]
The extension makes it possible to run tasks, like scripts, on specific events.
For more information, have a look at the wiki.
### Events [↑]
The extension makes it possible to run tasks, like scripts, on specific events.
 For more information, have a look at the wiki.
### Jobs [↑]
Jobs can be used to run tasks, like scripts or shell commands, periodically.
For more information, have a look at the wiki.
### Jobs [↑]
Jobs can be used to run tasks, like scripts or shell commands, periodically.
 For more information, have a look at the wiki.
### Scripts [↑]
Scripts can be used to any kind of custom logic for a workspace.
For more information, have a look at the wiki.
### Scripts [↑]
Scripts can be used to any kind of custom logic for a workspace.
 For more information, have a look at the wiki.
### Startups [↑]
Startups are similar to Autostart in Windows.
For more information, have a look at the wiki.
### Tools [↑]
A set of useful sub commands.
For more information, have a look at the wiki.
### Startups [↑]
Startups are similar to Autostart in Windows.
For more information, have a look at the wiki.
### Tools [↑]
A set of useful sub commands.
 For more information, have a look at the wiki.
### Values [↑]
Values (or placeholders) can be used to define dynamic settings, e.g.
For more information, have a look at the wiki.
### Values [↑]
Values (or placeholders) can be used to define dynamic settings, e.g.
 For more information, have a look at the wiki.
## Documentation [↑]
The complete reference of classes, functions and interfaces, can be found here.
A repository with code samples, can be found at vscode-powertools-samples. If you would like to request for one or more examples, you can open an issue here.
---
### <========()========>
---
---
### <========()========>
---
---
### <========()========>
---
---
### <========()========>
---
---
### <========()========>
---
---
### <========()========>
---
---
### <========()========>
---
---
### <========()========>
---
---
### <========()========>
---
---
### <========()========>
---
---
### <========()========>
---
---
### <========()========>
---
---
### <========()========>
---
---
### <========()========>
---
---
### <========()========>
---
C:\Users\15512\Google Drive\a-A-September\misc\Extension Guides\Guides\00RUNNINGCOMPILATION.md
---
---
🦖🐒🧬🧑🤝🧑🧮📺💻🖧📚🖥️⌨️💾📀📁🔗🤖🧑🤝🧑🧬🐒🦖
<🧑💻👩🧑👨🏻💻👨🏿💻(🟥💊)-OR-(🟦💊)🚁⚔️👩💻🧑💻☮️>
---
- ### <========(Markdown PDF)========>
- Markdown PDF
- Table of Contents
- Features
- mermaid
- Install
- Usage
- Command Palette
- Menu
- Auto convert
- Extension Settings
- Options - List - Save options
- Styles options -
For more information, have a look at the wiki.
## Documentation [↑]
The complete reference of classes, functions and interfaces, can be found here.
A repository with code samples, can be found at vscode-powertools-samples. If you would like to request for one or more examples, you can open an issue here.
---
### <========()========>
---
---
### <========()========>
---
---
### <========()========>
---
---
### <========()========>
---
---
### <========()========>
---
---
### <========()========>
---
---
### <========()========>
---
---
### <========()========>
---
---
### <========()========>
---
---
### <========()========>
---
---
### <========()========>
---
---
### <========()========>
---
---
### <========()========>
---
---
### <========()========>
---
---
### <========()========>
---
C:\Users\15512\Google Drive\a-A-September\misc\Extension Guides\Guides\00RUNNINGCOMPILATION.md
---
---
🦖🐒🧬🧑🤝🧑🧮📺💻🖧📚🖥️⌨️💾📀📁🔗🤖🧑🤝🧑🧬🐒🦖
<🧑💻👩🧑👨🏻💻👨🏿💻(🟥💊)-OR-(🟦💊)🚁⚔️👩💻🧑💻☮️>
---
- ### <========(Markdown PDF)========>
- Markdown PDF
- Table of Contents
- Features
- mermaid
- Install
- Usage
- Command Palette
- Menu
- Auto convert
- Extension Settings
- Options - List - Save options
- Styles options - markdown-pdf.styles - markdown-pdf.stylesRelativePathFile - markdown-pdf.includeDefaultStyles - Syntax highlight options - markdown-pdf.highlight - markdown-pdf.highlightStyle - Markdown options - markdown-pdf.breaks - Emoji options - markdown-pdf.emoji - Configuration options - markdown-pdf.executablePath - Common Options - markdown-pdf.scale - PDF options - markdown-pdf.displayHeaderFooter - PNG JPEG options
- FAQ
- How can I change emoji size ?
- Auto guess encoding of files
- Output directory
- Page Break
- Known Issues
- markdown-pdf.styles option
- Release Notes
<---------------------------------------------------------------------->
- ### <========(Open in External App)========>
- Open in External App
- 💡 Motivation
- 🔌 Installation
- 🔧 Configuration
- :loudspeaker: Limits
- 1. Node package: open
- 2. VSCode extension API: vscode.env.openExternal(target: Uri)
<---------------------------------------------------------------------->
- ### <========(Change Case Extension for Visual Studio Code)========>
- Change Case Extension for Visual Studio Code
- Install
- Commands
- Support
<---------------------------------------------------------------------->
```
- [### <========( vscode-js-console-utils)========>](#markmarkmarkmarkmarkmarkmark-vscode-js-console-utilsmarkmarkmarkmarkmarkmarkmark)
- [vscode-js-console-utils](#vscode-js-console-utils)
- [Installing](#installing)
<---------------------------------------------------------------------->
- [### <========(Node.js Extension Pack)========>](#markmarkmarkmarkmarkmarkmarknodejs-extension-packmarkmarkmarkmarkmarkmarkmark)
- [Node.js Extension Pack](#nodejs-extension-pack)
- [Extensions Included](#extensions-included)
- [Want to see your extension added?](#want-to-see-your-extension-added)
<---------------------------------------------------------------------->
- [### <========(Refactor CSS)========>](#markmarkmarkmarkmarkmarkmarkrefactor-cssmarkmarkmarkmarkmarkmarkmark)
- [Refactor CSS](#refactor-css)
- [Features](#features-2)
- [Release Notes](#release-notes-1)
- [Roadmap](#roadmap)
<---------------------------------------------------------------------->
- [### <========(Treedbox Javascript)========>](#markmarkmarkmarkmarkmarkmarktreedbox-javascriptmarkmarkmarkmarkmarkmarkmark)
- [Treedbox JavaScript - Visual Studio Marketplace](#treedbox-javascript---visual-studio-marketplace)
- [VS Code Javascript extension](#vs-code-javascript-extension)
- [Screenshots:](#screenshots)
- [Install](#install-2)
- [Pages](#pages)
- [Features](#features-3) - [All Math properties and methods](#all-math-properties-and-methods)
- [How to use](#how-to-use)
- [Example:](#example)
<---------------------------------------------------------------------->
- [### <========(pdf)========>](#markmarkmarkmarkmarkmarkmarkpdfmarkmarkmarkmarkmarkmarkmark)
- [pdf](#pdf)
- [Contribute](#contribute)
- [Upgrade PDF.js](#upgrade-pdfjs)
- [Change log](#change-log)
- [License](#license)
<---------------------------------------------------------------------->
- [### <========(Superpowers)========>](#markmarkmarkmarkmarkmarkmarksuperpowersmarkmarkmarkmarkmarkmarkmark)
- [Superpowers](#superpowers)
- [Preview](#preview)
- [Features](#features-4)
- [Map/Sort operation usage](#mapsort-operation-usage)
- [Dynamic snippets / completion](#dynamic-snippets--completion)
- [Extension Settings](#extension-settings-1)
<---------------------------------------------------------------------->
- [### <========(Readme Pattern)========>](#markmarkmarkmarkmarkmarkmarkreadme-patternmarkmarkmarkmarkmarkmarkmark)
- [Readme Pattern](#readme-pattern)
- [Features](#features-5)
- [Logo](#logo)
<---------------------------------------------------------------------->
- [### <========(Markdown Paste)========>](#markmarkmarkmarkmarkmarkmarkmarkdown-pastemarkmarkmarkmarkmarkmarkmark)
- [Markdown Paste](#markdown-paste)
- [Requirements](#requirements)
- [Features](#features-6)
- [Config](#config)
- [Format](#format)
- [File name format](#file-name-format)
- [File link format](#file-link-format)
<---------------------------------------------------------------------->
- [### <========(Spelling Checker for Visual Studio Code)========>](#markmarkmarkmarkmarkmarkmarkspelling-checker-for-visual-studio-codemarkmarkmarkmarkmarkmarkmark)
- [Spelling Checker for Visual Studio Code](#spelling-checker-for-visual-studio-code)
- [Support Further Development](#support-further-development)
- [Functionality](#functionality)
- [Example](#example-1)
- [Suggestions](#suggestions)
- [Install](#install-3)
- [Special case will ALL CAPS words](#special-case-will-all-caps-words)
- [Things to note](#things-to-note)
- [In Document Settings](#in-document-settings)
- [Enable / Disable checking sections of code](#enable--disable-checking-sections-of-code)
- [Disable Checking](#disable-checking)
- [Enable Checking](#enable-checking)
- [Example](#example-2)
- [Ignore](#ignore)
- [Words](#words)
- [Enable / Disable compound words](#enable--disable-compound-words)
- [Excluding and Including Text to be checked.](#excluding-and-including-text-to-be-checked)
- [Exclude Example](#exclude-example)
- [Include Example](#include-example)
- [Predefined RegExp expressions](#predefined-regexp-expressions)
- [Exclude patterns](#exclude-patterns)
- [Include Patterns](#include-patterns)
- [Customization](#customization)
- [Adding words to the Workspace Dictionary](#adding-words-to-the-workspace-dictionary)
<---------------------------------------------------------------------->
- [### <========(Settings viewer)========>](#markmarkmarkmarkmarkmarkmarksettings-viewermarkmarkmarkmarkmarkmarkmark)
- [Settings viewer](#settings-viewer)
<---------------------------------------------------------------------->
- [### <========(Awesome plugin for Visual Studio Code)========>](#markmarkmarkmarkmarkmarkmarkawesome-plugin-for-visual-studio-codemarkmarkmarkmarkmarkmarkmark)
- [Awesome plugin for Visual Studio Code :sunglasses: [Beta]](#awesome-plugin-for-visual-studio-code--beta)
- [Quickly see docs from MDN in VS Code](#quickly-see-docs-from-mdn-in-vs-code)
- [Usage](#usage-1)
- [Is the semicolon necessary?](#is-the-semicolon-necessary)
- [Examples](#examples)
- [Supports](#supports)
<---------------------------------------------------------------------->
- [### <========(Live Server)========>](#markmarkmarkmarkmarkmarkmarklive-servermarkmarkmarkmarkmarkmarkmark)
- [Live Server](#live-server)
- [Shortcuts to Start/Stop Server](#shortcuts-to-startstop-server)
- [Features](#features-7)
- [Installation](#installation)
- [Settings](#settings)
<---------------------------------------------------------------------->
- [### <========(CSS PEAK)========>](#markmarkmarkmarkmarkmarkmarkcss-peakmarkmarkmarkmarkmarkmarkmark)
- [Functionality](#functionality-1)
- [Configuration](#configuration)
- [Contributing](#contributing)
<---------------------------------------------------------------------->
- [### <========(jsdoc-live-preview)========>](#markmarkmarkmarkmarkmarkmarkjsdoc-live-previewmarkmarkmarkmarkmarkmarkmark)
- [jsdoc-live-preview](#jsdoc-live-preview)
- [Installation](#installation-1)
- [Usage](#usage-2)
<---------------------------------------------------------------------->
- [### <========(Resource Monitor)========>](#markmarkmarkmarkmarkmarkmarkresource-monitormarkmarkmarkmarkmarkmarkmark)
- [Resource Monitor](#resource-monitor)
- [Features](#features-8)
- [Screenshots](#screenshots-1)
- [Requirements](#requirements-1)
- [Extension Settings](#extension-settings-2)
- [Known Issues](#known-issues-1)
<---------------------------------------------------------------------->
- [### <========(JS FLOWCHART)========>](#markmarkmarkmarkmarkmarkmarkjs-flowchartmarkmarkmarkmarkmarkmarkmark)
- [Features](#features-9)
- [Quick start](#quick-start)
- [Installation in development mode](#installation-in-development-mode)
<---------------------------------------------------------------------->
- [### <========(Visual Studio Code Remote Development)========>](#h1-idvisual-studio-code-remote-development-137markmarkmarkmarkmarkmarkmarkvisual-studio-code-remote-developmentmarkmarkmarkmarkmarkmarkmarkh1)
- [Visual Studio Code Remote Development](#visual-studio-code-remote-development)
- [Documentation](#documentation)
<---------------------------------------------------------------------->
- [### <========(Docker for Visual Studio Code )========>](#h1-iddocker-for-visual-studio-code--134markmarkmarkmarkmarkmarkmarkdocker-for-visual-studio-code-markmarkmarkmarkmarkmarkmarkh1)
- [Overview of the extension features](#overview-of-the-extension-features)
- [Editing Docker files](#editing-docker-files)
- [Generating Docker files](#generating-docker-files)
- [Docker view](#docker-view)
- [Docker commands](#docker-commands)
- [Docker Compose](#docker-compose)
- [Using image registries](#using-image-registries)
- [Debugging services running inside a container](#debugging-services-running-inside-a-container)
- [Azure CLI integration](#azure-cli-integration)
<---------------------------------------------------------------------->
- [### <========(vscode-htmlhint)========>](#h1-idvscode-htmlhint-137markmarkmarkmarkmarkmarkmarkvscode-htmlhintmarkmarkmarkmarkmarkmarkmarkh1)
- [vscode-htmlhint](#vscode-htmlhint)
- [Configuration](#configuration-1)
- [Usage](#usage-3)
- [Rules](#rules)
- [.htmlhintrc](#htmlhintrc)
- [Additional file types](#additional-file-types)
- [Option 1: Treating your file like any other html file](#option-1-treating-your-file-like-any-other-html-file)
- [Option 2: Associating HTMLHint extension with your file type](#option-2-associating-htmlhint-extension-with-your-file-type)
- [Settings](#settings-1)
<---------------------------------------------------------------------->
- [### <========(Git Graph extension for Visual Studio Code)========>](#h1-idgit-graph-extension-for-visual-studio-code-137markmarkmarkmarkmarkmarkmarkgit-graph-extension-for-visual-studio-codemarkmarkmarkmarkmarkmarkmarkh1)
- [Git Graph extension for Visual Studio Code](#git-graph-extension-for-visual-studio-code)
- [Features](#features-10)
- [Extension Settings](#extension-settings-3)
- [Extension Commands](#extension-commands)
- [Release Notes](#release-notes-2)
- [Visual Studio Marketplace](#visual-studio-marketplace)
- [Acknowledgements](#acknowledgements)
<---------------------------------------------------------------------->
- [### <========(MARKDOWN SHORTCUTS)========>](#h1-idmarkdown-shortcuts-134markmarkmarkmarkmarkmarkmarkmarkdown-shortcutsmarkmarkmarkmarkmarkmarkmarkh1)
- [Exposed Commands](#exposed-commands)
<---------------------------------------------------------------------->
- [### <========(MarkdownConverter)========>](#h1-idmarkdownconverter-137markmarkmarkmarkmarkmarkmarkmarkdownconvertermarkmarkmarkmarkmarkmarkmarkh1)
- [MarkdownConverter](#markdownconverter)
- [What's `MarkdownConverter`?](#whats-markdownconverter)
- [Usage](#usage-4)
- [[VSCode]: https://code.visualstudio.com/](#)
<---------------------------------------------------------------------->
- [### <========(vscode-opn)========>](#h1-idvscode-opn-137markmarkmarkmarkmarkmarkmarkvscode-opnmarkmarkmarkmarkmarkmarkmarkh1)
- [vscode-opn](#vscode-opn)
- [Install](#install-4)
- [Easiest from the Extension Gallery](#easiest-from-the-extension-gallery)
- [Alternatively, with the Packaged Extension (.vsix) file](#alternatively-with-the-packaged-extension-vsix-file)
- [Usage](#usage-5)
- [Customise behaviour per language (optional)](#customise-behaviour-per-language-optional)
- [forLang](#forlang)
- [openInApp](#openinapp)
- [openInAppArgs](#openinappargs)
- [isUseWebServer](#isusewebserver)
- [isUseFsPath](#isusefspath)
- [isWaitForAppExit](#iswaitforappexit)
- [Web server settings (applies to all languages)](#web-server-settings-applies-to-all-languages)
- [vscode-opn.webServerProtocol](#vscode-opnwebserverprotocol)
- [vscode-opn.webServerHostname](#vscode-opnwebserverhostname)
- [vscode-opn.webServerPort](#vscode-opnwebserverport)
- [Tested](#tested)
- [Release notes](#release-notes-3)
- [Contributions](#contributions)
- [Dependencies](#dependencies)
- [License](#license-1)
<---------------------------------------------------------------------->
- [### <========( Node.js Modules Intellisense)========>](#h1-id-nodejs-modules-intellisense-134markmarkmarkmarkmarkmarkmark-nodejs-modules-intellisensemarkmarkmarkmarkmarkmarkmarkh1)
- [Node.js Modules Intellisense](#nodejs-modules-intellisense)
- [Installation](#installation-3)
- [Issues & Contribution](#issues--contribution)
- [Configuration](#configuration-2)
<---------------------------------------------------------------------->
- [### <========(VSCode format in context menus)========>](#h1-idvscode-format-in-context-menus-137markmarkmarkmarkmarkmarkmarkvscode-format-in-context-menusmarkmarkmarkmarkmarkmarkmarkh1)
- [VSCode format in context menus](#vscode-format-in-context-menus)
- [Features](#features-11)
- [Extension Settings](#extension-settings-4)
<---------------------------------------------------------------------->
- [### <========(vscode-github README)========>](#h1-idvscode-github-readme-137markmarkmarkmarkmarkmarkmarkvscode-github-readmemarkmarkmarkmarkmarkmarkmarkh1)
- [vscode-github README](#vscode-github-readme)
- [Features](#features-12)
- [Setup Personal Access Token](#setup-personal-access-token)
- [Usage](#usage-6)
- [Create a new pull request](#create-a-new-pull-request)
- [Create a new pull request from a forked repository](#create-a-new-pull-request-from-a-forked-repository)
- [Checkout pull request](#checkout-pull-request)
- [Browser pull request](#browser-pull-request)
- [Merge pull request](#merge-pull-request)
- [Telemetry data (extension usage)](#telemetry-data-extension-usage)
- [### <===========(Kite Autocomplete Plugin for Visual Studio Code)===========>](#h1-idkite-autocomplete-plugin-for-visual-studio-code-137markmarkmarkmarkmarkkite-autocomplete-plugin-for-visual-studio-codemarkmarkmarkmarkmarkh1)
- [Kite Autocomplete Plugin for Visual Studio Code](#kite-autocomplete-plugin-for-visual-studio-code)
- [Requirements](#requirements-2)
- [Installation](#installation-4)
- [Installing the Kite Engine](#installing-the-kite-engine)
- [Installing the Kite Plugin for Visual Studio Code](#installing-the-kite-plugin-for-visual-studio-code)
- [Usage](#usage-7)
- [Autocompletions](#autocompletions)
- [Hover (Python only)](#hover-python-only)
- [Documentation (Python only)](#documentation-python-only)
- [Definitions (Python only)](#definitions-python-only)
- [Function Signatures (Python only)](#function-signatures-python-only)
- [Commands](#commands-1)
- [Troubleshooting](#troubleshooting)
- [About Kite](#about-kite)
<---------------------------------------------------------------------->
- [### <========(Code Metrics - Visual Studio Code Extension)========>](#h1-idcode-metrics---visual-studio-code-extension-137markmarkmarkmarkmarkmarkmarkcode-metrics---visual-studio-code-extensionmarkmarkmarkmarkmarkmarkmarkh1)
- [Code Metrics - Visual Studio Code Extension](#code-metrics---visual-studio-code-extension)
- [Complexity calculation](#complexity-calculation)
- [It looks like this](#it-looks-like-this)
- [Install](#install-5)
- [Customization](#customization-1)
- [Commands](#commands-2)
- [License](#license-2)
<---------------------------------------------------------------------->
- [### <========(Peacock for Visual Studio Code)========>](#h1-idpeacock-for-visual-studio-code-137markmarkmarkmarkmarkmarkmarkpeacock-for-visual-studio-codemarkmarkmarkmarkmarkmarkmarkh1)
- [We can even add meta tags to the page! This sets the keywords meta tag.](#we-can-even-add-meta-tags-to-the-page-this-sets-the-keywords-meta-tag)
- [<meta name="keywords" content="my SEO keywords"/>](#meta-namekeywords-contentmy-seo-keywords)
- [- content: vscode "visual studio code" peacock theme extension documentation docs guide help "get started"](#ullicontent-vscode-visual-studio-code-peacock-theme-extension-documentation-docs-guide-help-get-startedliul)
- [Peacock for Visual Studio Code](#peacock-for-visual-studio-code)
- [Overview](#overview)
- [Install](#install-6)
- [Quick Usage](#quick-usage)
- [Features](#features-13)
- [Settings](#settings-2)
- [Favorite Colors](#favorite-colors)
- [Commands](#commands-3)
- [Keyboard Shortcuts](#keyboard-shortcuts-2)
- [Integrations](#integrations)
- [VS Live Share Integration](#vs-live-share-integration)
- [Remote Development Integration](#remote-development-integration)
- [Input Formats](#input-formats)
- [Example 1](#example-1)
- [How does title bar coloring work](#how-does-title-bar-coloring-work)
- [How are foreground colors calculated](#how-are-foreground-colors-calculated)
- [Why is the foreground hard to see with my transparent color](#why-is-the-foreground-hard-to-see-with-my-transparent-color)
- [Why are my affected elements not transparent](#why-are-my-affected-elements-not-transparent)
- [What are recommended favorites](#what-are-recommended-favorites)
- [What are mementos](#what-are-mementos)
- [Migration](#migration)
- [To Version 3+](#to-version-3)
- [Try the Code](#try-the-code)
- [Badges](#badges)
- [Resources](#resources)
<---------------------------------------------------------------------->
- [### <========(Markdown Extended Readme)========>](#h1-idmarkdown-extended-readme-131markmarkmarkmarkmarkmarkmarkmarkdown-extended-readmemarkmarkmarkmarkmarkmarkmarkh1)
- [Markdown Extended Readme](#markdown-extended-readme)
- [Features](#features-14)
- [Q: Why You Don't Integrate Some Plugin?](#q-why-you-dont-integrate-some-plugin)
- [Exporter](#exporter)
- [Export Configurations](#export-configurations)
- [Helpers](#helpers)
- [Extended Syntaxes](#extended-syntaxes)
<---------------------------------------------------------------------->
- [### <========(Search node_modules)========>](#h1-idsearch-node_modules-131markmarkmarkmarkmarkmarkmarksearch-node_modulesmarkmarkmarkmarkmarkmarkmarkh1)
- [Search node_modules](#search-node_modules)
- [Features](#features-15)
- [Settings](#settings-3)
- [Extension Packs](#extension-packs)
- [Links](#links)
<---------------------------------------------------------------------->
- [### <========(Browser Sync)========>](#h1-idbrowser-sync-131markmarkmarkmarkmarkmarkmarkbrowser-syncmarkmarkmarkmarkmarkmarkmarkh1)
- [Objective](#objective)
- [Requirement](#requirement)
- [Features](#features-16)
- [Behaviour](#behaviour)
- [Server Mode](#server-mode)
- [Proxy Mode](#proxy-mode)
- [Configuration](#configuration-3)
- [Example setting (different browser)](#example-setting-different-browser)
- [Example setting (relative path)](#example-setting-relative-path)
- [How it works](#how-it-works)
- [Static HTML file](#static-html-file)
- [Proxy for dynamic site](#proxy-for-dynamic-site)
- [Enhancement Planning](#enhancement-planning)
- [3. Better error handling](#3-better-error-handling)
<---------------------------------------------------------------------->
- [### <========(VSCode Essentials (Extension Pack))========>](#h1-idvscode-essentials-extension-pack-131markmarkmarkmarkmarkmarkmarkvscode-essentials-extension-packmarkmarkmarkmarkmarkmarkmarkh1)
- [VSCode Essentials (Extension Pack)](#vscode-essentials-extension-pack)
- [Introduction](#introduction)
- [Features](#features-17)
- [Recommended Settings](#recommended-settings)
- [All Autocomplete](#all-autocomplete)
- [CodeStream](#codestream)
- [Customize UI](#customize-ui)
- [GitLens](#gitlens)
- [Macros](#macros)
- [MetaGo](#metago)
- [Project Manager](#project-manager)
- [Rewrap](#rewrap)
- [Settings Cycler](#settings-cycler)
- [Settings Sync](#settings-sync)
- [Todo Tree](#todo-tree)
- [Bug Reports](#bug-reports)
- [Known Issues](#known-issues-2)
- [Included Extensions](#included-extensions)
<---------------------------------------------------------------------->
- [### <========( VS Code JavaScript Unit Test snippets )========>](#h1-id-vs-code-javascript-unit-test-snippets--131markmarkmarkmarkmarkmarkmark-vs-code-javascript-unit-test-snippets-markmarkmarkmarkmarkmarkmarkh1)
- [JavaScript](#javascript)
- [## VS Code JavaScript Unit Test snippets](#h2-idvs-code-javascript-unit-test-snippets-131vs-code-javascript-unit-test-snippetsh2)
- [Installation](#installation-5)
- [Snippets](#snippets)
- [Import and export](#import-and-export)
<---------------------------------------------------------------------->
- [### <========(Path Autocomplete for Visual Studio Code)========>](#h1-idpath-autocomplete-for-visual-studio-code-131markmarkmarkmarkmarkmarkmarkpath-autocomplete-for-visual-studio-codemarkmarkmarkmarkmarkmarkmarkh1)
- [Path Autocomplete for Visual Studio Code](#path-autocomplete-for-visual-studio-code)
- [Features](#features-18)
- [Installation](#installation-6)
- [Options](#options-1)
- [Configure VSCode to recognize path aliases](#configure-vscode-to-recognize-path-aliases)
- [Tips](#tips)
<---------------------------------------------------------------------->
- [### <========(easy-snippet)========>](#h1-ideasy-snippet-131markmarkmarkmarkmarkmarkmarkeasy-snippetmarkmarkmarkmarkmarkmarkmarkh1)
- [easy-snippet](#easy-snippet)
- [Features](#features-19)
<---------------------------------------------------------------------->
- [### <========(VSCode Log Output Colorizer)========>](#h1-idvscode-log-output-colorizer-131markmarkmarkmarkmarkmarkmarkvscode-log-output-colorizermarkmarkmarkmarkmarkmarkmarkh1)
- [VSCode Log Output Colorizer](#vscode-log-output-colorizer)
- [In action](#in-action)
- [VSCode Git Output](#vscode-git-output)
- [Default Dark Theme](#default-dark-theme)
- [Default Light Theme](#default-light-theme)
- [Night Blue Theme](#night-blue-theme)
- [Helpful References:](#helpful-references)
<---------------------------------------------------------------------->
- [### <========(REST Client)========>](#h1-idrest-client-131markmarkmarkmarkmarkmarkmarkrest-clientmarkmarkmarkmarkmarkmarkmarkh1)
- [REST Client](#rest-client)
- [Main Features](#main-features)
- [Usage](#usage-8)
- [Select Request Text](#select-request-text)
- [Install](#install-7)
- [Making Request](#making-request)
- [Request Line](#request-line)
- [Query Strings](#query-strings)
- [Request Headers](#request-headers)
- [Request Body](#request-body)
- [Making GraphQL Request](#making-graphql-request)
- [Making cURL Request](#making-curl-request)
- [Copy Request As cURL](#copy-request-as-curl)
- [Cancel Request](#cancel-request)
- [Rerun Last Request](#rerun-last-request)
- [Request History](#request-history)
- [Save Full Response](#save-full-response)
- [Save Response Body](#save-response-body)
- [Fold and Unfold Response Body](#fold-and-unfold-response-body)
<---------------------------------------------------------------------->
- [### <========((vscode-favorites))========>](#h1-idvscode-favorites-131markmarkmarkmarkmarkmarkmarkvscode-favoritesmarkmarkmarkmarkmarkmarkmarkh1)
- [vscode-favorites](#vscode-favorites)
- [Install](#install-8)
- [Usage](#usage-9)
<---------------------------------------------------------------------->
- [### <========(js-beautify for VS Code)========>](#h1-idjs-beautify-for-vs-code-131markmarkmarkmarkmarkmarkmarkjs-beautify-for-vs-codemarkmarkmarkmarkmarkmarkmarkh1)
- [js-beautify for VS Code](#js-beautify-for-vs-code)
- [How we determine what settings to use](#how-we-determine-what-settings-to-use)
- [VS Code | .jsbeautifyrc settings map](#vs-code--jsbeautifyrc-settings-map)
- [Keyboard Shortcut](#keyboard-shortcut)
<---------------------------------------------------------------------->
- [### <========(Todo Tree)========>](#h1-idtodo-tree-131markmarkmarkmarkmarkmarkmarktodo-treemarkmarkmarkmarkmarkmarkmarkh1)
- [Todo Tree](#todo-tree-1)
- [Highlighting](#highlighting)
- [Installing](#installing-1)
- [Source Code](#source-code)
- [Controls](#controls)
- [Folder Filter Context Menu](#folder-filter-context-menu)
- [Commands](#commands-4)
- [Tags](#tags)
- [Export](#export)
- [Configuration](#configuration-5)
- [Multiline TODOs](#multiline-todos)
- [Excluding files and folders](#excluding-files-and-folders
<---------------------------------------------------------------------->
- [### <========(Open file)========>](#h1-idopen-file-131markmarkmarkmarkmarkmarkmarkopen-filemarkmarkmarkmarkmarkmarkmarkh1)
- [Open file](#open-file)
- [Example](#example-3)
- [Main Features](#main-features-1)
- [Path Lookup Detail](#path-lookup-detail)
<---------------------------------------------------------------------->
- [### <========(Code Runner)========>](#h1-idcode-runner-131markmarkmarkmarkmarkmarkmarkcode-runnermarkmarkmarkmarkmarkmarkmarkh1)
- [Code Runner](#code-runner)
- [Features](#features-20)
- [Usages](#usages)
- [Configuration](#configuration-6)
- [About CWD Setting (current working directory)](#about-cwd-setting-current-working-directory)
- [Note](#note)
- [Telemetry data](#telemetry-data)
- [Change Log](#change-log-2)
- [Issues](#issues)
- [Contribution](#contribution)
<---------------------------------------------------------------------->
- [### <========(Git Project Manager)========>](#h1-idgit-project-manager-131markmarkmarkmarkmarkmarkmarkgit-project-managermarkmarkmarkmarkmarkmarkmarkh1)
- [Git Project Manager](#git-project-manager)
- [Available commands](#available-commands-1)
- [GPM: Open Git Project _(Defaults to: Ctrl+Alt+P)_](#gpm-open-git-project-defaults-to-ctrlaltp)
- [GPM: Refresh Projects](#gpm-refresh-projects)
- [GPM: Refresh specific project folder](#gpm-refresh-specific-project-folder)
- [GPM: Open Recent Git Project _(Defaults to Ctrl+Shift+Q)_](#gpm-open-recent-git-project-defaults-to-ctrlshiftq)
- [Available settings](#available-settings)
- [Participate](#participate)
<---------------------------------------------------------------------->
- [### <========(Open in Code)========>](#h1-idopen-in-code-131markmarkmarkmarkmarkmarkmarkopen-in-codemarkmarkmarkmarkmarkmarkmarkh1)
- [Open in Code](#open-in-code)
- [Install](#install-9)
- [Usage](#usage-10)
- [Contributing](#contributing-1)
- [License](#license-6)
<---------------------------------------------------------------------->
- [### <========(Reactjs)========>](#h1-idreactjs-131markmarkmarkmarkmarkmarkmarkreactjsmarkmarkmarkmarkmarkmarkmarkh1)
- [Reactjs](#reactjs)
- [VS Code Reactjs snippets](#vs-code-reactjs-snippets)
- [Installation](#installation-7)
- [Supported languages (file extensions)](#supported-languages-file-extensions)
- [Breaking change in version 2.0.0](#breaking-change-in-version-200)
- [Breaking change in version 1.0.0](#breaking-change-in-version-100)
- [Usage](#usage-11)
- [Snippets](#snippets-1)
<---------------------------------------------------------------------------------->
- [### <========(jQuery Code Snippets)========>](#h1-idjquery-code-snippets-131markmarkmarkmarkmarkmarkmarkjquery-code-snippetsmarkmarkmarkmarkmarkmarkmarkh1)
- [jQuery Code Snippets](#jquery-code-snippets)
- [Snippets](#snippets-2)
- [column0](#column0)
- [Source](#source)
- [License](#license-7)
<---------------------------------------------------------------------->
- [### <========( Markdown table prettifier extension for Visual Studio Code)========>](#h1-id-markdown-table-prettifier-extension-for-visual-studio-code-131markmarkmarkmarkmarkmarkmark-markdown-table-prettifier-extension-for-visual-studio-codemarkmarkmarkmarkmarkmarkmarkh1)
- [Markdown table prettifier extension for Visual Studio Code](#markdown-table-prettifier-extension-for-visual-studio-code)
- [Features](#features-21)
- [CLI formatting](#cli-formatting)
- [Formatting with docker](#formatting-with-docker)
- [Extension Settings](#extension-settings-5)
- [Known Issues](#known-issues-3)
- [- Tables with mixed character widths (eg: CJK) are not always properly formatted (issue #4).](#ullitables-with-mixed-character-widths-eg-cjk-are-not-always-properly-formatted-issue-4liul)
<------------------------------------------------------------------------------------------>
- [### <========(vscode-goto-documentation)========>](#h1-idvscode-goto-documentation-131markmarkmarkmarkmarkmarkmarkvscode-goto-documentationmarkmarkmarkmarkmarkmarkmarkh1)
- [vscode-goto-documentation](#vscode-goto-documentation)
- [Supports](#supports-1)
- [Installation](#installation-8)
- [How to use](#how-to-use-1)
- [Edit the urls](#edit-the-urls)
- [The available settings are:](#the-available-settings-are)
<---------------------------------------------------------------------->
- [### <========(VSCode DevTools for Chrome)========>](#h1-idvscode-devtools-for-chrome-131markmarkmarkmarkmarkmarkmarkvscode-devtools-for-chromemarkmarkmarkmarkmarkmarkmarkh1)
- [VSCode DevTools for Chrome](#vscode-devtools-for-chrome)
- [Attaching to a running chrome instance:](#attaching-to-a-running-chrome-instance)
- [Launching a 'debugger for chrome' project and using screencast:](#launching-a-debugger-for-chrome-project-and-using-screencast)
- [Using the extension](#using-the-extension)
- [Launching as a Debugger](#launching-as-a-debugger)
- [Launching Chrome manually](#launching-chrome-manually)
- [Launching Chrome via the extension](#launching-chrome-via-the-extension)
- [Known Issues](#known-issues-4)
- [Developing the extension itself](#developing-the-extension-itself)
<---------------------------------------------------------------------->
- [### <========(JS Refactor)========>](#h1-idjs-refactor-131markmarkmarkmarkmarkmarkmarkjs-refactormarkmarkmarkmarkmarkmarkmarkh1)
- [JS Refactor](#js-refactor)
- [Supported Language Files](#supported-language-files)
- [Installation](#installation-9)
- [Extensions Panel:](#extensions-panel)
- [Command Pallette](#command-pallette)
- [Automated Refactorings](#automated-refactorings)
- [Keybindings](#keybindings)
- [Usage](#usage-12)
- [Explanations](#explanations)
- [Core Refactorings](#core-refactorings)
- [Other Utilities](#other-utilities)
- [Snippets](#snippets-3)
- [Usage](#usage-13)
- [Explanations](#explanations-1)
<---------------------------------------------------------------------->
- [### <========(Npm Intellisense)========>](#h1-idnpm-intellisense-131markmarkmarkmarkmarkmarkmarknpm-intellisensemarkmarkmarkmarkmarkmarkmarkh1)
- [Npm Intellisense](#npm-intellisense)
- [Sponsors](#sponsors)
- [Installation](#installation-10)
- [Contributing](#contributing-2)
- [Features](#features-22)
- [Import command](#import-command)
- [Import command (ES5)](#import-command-es5)
- [Scan devDependencies](#scan-devdependencies)
- [Show build in (local) libs](#show-build-in-local-libs)
- [Lookup package.json recursive](#lookup-packagejson-recursive)
- [Experimental: Package Subfolder Intellisense](#experimental-package-subfolder-intellisense)
- [License](#license-8)
<------------------------------------------------------------------------------------------>
- [### <========(vscode-standardjs)========>](#h1-idvscode-standardjs-131markmarkmarkmarkmarkmarkmarkvscode-standardjsmarkmarkmarkmarkmarkmarkmarkh1)
- [vscode-standardjs](#vscode-standardjs)
- [How to use](#how-to-use-2)
- [Plugin options](#plugin-options)
- [Configuring Standard](#configuring-standard)
- [Commands](#commands-5)
- [FAQ](#faq-3)
- [How to develop](#how-to-develop)
- [How to package](#how-to-package)
- [TODO](#todo)
<---------------------------------------------------------------------->
- [### <========(COMMENT HEADERS)========>](#h1-idcomment-headers-131markmarkmarkmarkmarkmarkmarkcomment-headersmarkmarkmarkmarkmarkmarkmarkh1)
- [File Header Comment - Visual Studio Marketplace](#file-header-comment---visual-studio-marketplace)
- [Features](#features-23)
- [Install](#install-10)
- [Extension Settings](#extension-settings-6)
<---------------------------------------------------------------------->
- [### <========(Bookmarks)========>](#h1-idbookmarks-131markmarkmarkmarkmarkmarkmarkbookmarksmarkmarkmarkmarkmarkmarkmarkh1)
- [Bookmarks](#bookmarks)
- [Features](#features-24)
- [Available commands](#available-commands-2)
- [Manage your bookmarks](#manage-your-bookmarks)
- [Toggle / Toggle Labeled](#toggle--toggle-labeled)
- [Navigation](#navigation)
- [Jump to Next / Previous](#jump-to-next--previous)
- [List / List from All Files](#list--list-from-all-files)
- [Selection](#selection)
- [Select Lines](#select-lines)
- [Expand Selection to the Next/Previous Bookmark or Shrink the Selection](#expand-selection-to-the-nextprevious-bookmark-or-shrink-the-selection)
- [Available Settings](#available-settings-1)
- [Available Colors](#available-colors)
- [Side Bar](#side-bar)
- [Project and Session Based](#project-and-session-based)
- [License](#license-9)
<------------------------------------------------------------------------------------------
- [### <========(vscode-markdown-pdf)========>](#h1-idvscode-markdown-pdf-131markmarkmarkmarkmarkmarkmarkvscode-markdown-pdfmarkmarkmarkmarkmarkmarkmarkh1)
- [yzane/vscode-markdown-pdf](#yzanevscode-markdown-pdf)
- [Usage](#usage-14)
- [Command Palette](#command-palette-1)
- [Menu](#menu-1)
- [Auto convert](#auto-convert-1)
- [Extension Settings](#extension-settings-7)
- [Options](#options-2)
- [List](#list-1)
- [Save options](#save-options-1)
(#markdown-pdfconvertonsaveexclude-1)
(#markdown-pdfoutputdirectoryrelativepathfile-1)
- [Styles options](#styles-options-1)
(#markdown-pdfstylesrelativepathfile-1)
- [`markdown-pdf.includeDefaultStyles`](#markdown-pdfincludedefaultstyles-1)
- [Syntax highlight options](#syntax-highlight-options-1)
- [Markdown options](#markdown-options-1)
- [Emoji options](#emoji-options-1)
- [Configuration options](#configuration-options-1)
- [Common Options](#common-options-1)
- [PDF options](#pdf-options-1)
(#markdown-pdfdisplayheaderfooter-1)
- [PNG JPEG options](#png-jpeg-options-1)
- [FAQ](#faq-4)
- [How can I change emoji size ?](#how-can-i-change-emoji-size--1)
- [Auto guess encoding of files](#auto-guess-encoding-of-files-1)
- [Output directory](#output-directory-1)
- [Page Break](#page-break-1)
- [Source](#source-1)
<---------------------------------------------------------------------->
- [### <========()========>](#h1-id-2349markmarkmarkmarkmarkmarkmarkmarkmarkmarkmarkmarkmarkmarkh1)
- [194.WallabyJs.quokka-vscode](#194wallabyjsquokka-vscode)
- [Rapid JavaScript Prototyping in your Editor](#rapid-javascript-prototyping-in-your-editor)
- [Quokka.js is a developer productivity tool for rapid JavaScript / TypeScript prototyping. Runtime values are updated and displayed in your IDE next to your code, as you type.](#quokkajs-is-a-developer-productivity-tool-for-rapid-javascript--typescript-prototyping-runtime-values-are-updated-and-displayed-in-your-ide-next-to-your-code-as-you-type)
- [Quick Start](#quick-start-1)
- [## Live Feedback](#h2-idlive-feedback-131live-feedbackh2)
- [Live Code Coverage](#live-code-coverage)
- [Value Explorer](#value-explorer)
- [Auto-Expand Value Explorer Objects {#auto-expand-value-explorer-objects .vsc-doc .jb-doc style="display: block;"}](#auto-expand-value-explorer-objects)
- [VS Code Live Share Integration {#live-share-integration .vsc-doc style="display: block;"}](#vs-code-live-share-integration)
- [How does it work?](#how-does-it-work)
- [Interactive Examples](#interactive-examples)
- [Live Comments](#live-comments)
- [Live comment snippet](#live-comment-snippet)
- [Live Value Display](#live-value-display)
- [Show Value](#show-value)
- [Copy Value](#copy-value)
- [Project Files Import](#project-files-import)
- [Quick Package Install](#quick-package-install)
- [Live Performance Testing](#live-performance-testing)
- [Run on Save/Run Once](#run-on-saverun-once)
- [Runtime](#runtime)
- [Browser-like Runtime](#browser-like-runtime)
- [Configuration](#configuration-7)
- [Plugins](#plugins)
- [Examples](#examples-1)
- [Questions and issues](#questions-and-issues)
<---------------------------------------------------------------------->
- [### <========(Browser Preview)========>](#h1-idbrowser-preview-131markmarkmarkmarkmarkmarkmarkbrowser-previewmarkmarkmarkmarkmarkmarkmarkh1)
- [Features](#features-25)
<---------------------------------------------------------------------->
- [### <========( Microsoft Edge Tools)========>](#h1-id-microsoft-edge-tools-131markmarkmarkmarkmarkmarkmark-microsoft-edge-toolsmarkmarkmarkmarkmarkmarkmarkh1)
- [Microsoft Edge Tools for VS Code - Visual Studio Marketplace](#microsoft-edge-tools-for-vs-code---visual-studio-marketplace)
- [Supported Features](#supported-features)
- [Using the Extension](#using-the-extension-1)
- [Getting Started](#getting-started)
- [Changing Extension Settings](#changing-extension-settings)
- [Turning on Network Inspection](#turning-on-network-inspection)
- [Turning on Headless Mode](#turning-on-headless-mode)
- [Using the tools](#using-the-tools)
- [Opening source files from the Elements tool](#opening-source-files-from-the-elements-tool)
- [Debug Configuration](#debug-configuration)
- [Other optional launch config fields](#other-optional-launch-config-fields)
- [Sourcemaps](#sourcemaps)
- [Ionic/gulp-sourcemaps note](#ionicgulp-sourcemaps-note)
- [Launching the browser via the side bar view](#launching-the-browser-via-the-side-bar-view)
- [Launching the browser manually](#launching-the-browser-manually)
- [Attaching automatically when launching the browser for debugging](#attaching-automatically-when-launching-the-browser-for-debugging)
- [Data/Telemetry](#datatelemetry)
- [Source](#source-2)
<---------------------------------------------------------------------->
- [### <========( Turbo Console Log)========>](#h1-id-turbo-console-log-131markmarkmarkmarkmarkmarkmark-turbo-console-logmarkmarkmarkmarkmarkmarkmarkh1)
- [Turbo Console Log](#turbo-console-log)
- [Main Functionality](#main-functionality)
- [Features](#features-26)
<---------------------------------------------------------------------->
- [### <========(Regex Previewer - Visual Studio Marketplace)========>](#h1-idregex-previewer---visual-studio-marketplace-131markmarkmarkmarkmarkmarkmarkregex-previewer---visual-studio-marketplacemarkmarkmarkmarkmarkmarkmarkh1)
- [Regex Previewer - Visual Studio Marketplace](#regex-previewer---visual-studio-marketplace)
- [Features](#features-27)
- [Source](#source-3)
<---------------------------------------------------------------------->
- [### <========(JavaScript Snippet Pack)========>](#h1-idjavascript-snippet-pack-118markmarkmarkmarkmarkmarkmarkjavascript-snippet-packmarkmarkmarkmarkmarkmarkmarkh1)
- [JavaScript Snippet Pack - Visual Studio Marketplace](#javascript-snippet-pack---visual-studio-marketplace)
- [JavaScript Snippet Pack for Visual Studio Code](#javascript-snippet-pack-for-visual-studio-code)
- [Usage](#usage-15)
- [Console](#console)
- [DOM](#dom)
- [Loop](#loop)
- [\[fe\] forEach](#fe-foreach)
- [Function](#function)
(#iife-immediately-invoked-function-expression)
(#ofn-function-as-a-property-of-an-object)
- [JSON](#json)
- [Timer](#timer)
- [Misc](#misc)
<---------------------------------------------------------------------->
- [### <========(Node.js Exec)========>](#h1-idnodejs-exec-104markmarkmarkmarkmarkmarkmarknodejs-execmarkmarkmarkmarkmarkmarkmarkh1)
- [Node.js Exec - Visual Studio Marketplace](#nodejs-exec---visual-studio-marketplace)
- [Execute the current file or your selected code with node.js.](#execute-the-current-file-or-your-selected-code-with-nodejs)
- [Usage](#usage-16)
- [Configuration](#configuration-8)
- [The folloing options need to set the legacyMode off](#the-folloing-options-need-to-set-the-legacymode-off)
- [How it works](#how-it-works-1)
<---------------------------------------------------------------------->
- [### <========(Search Editor)========>](#h1-idsearch-editor-97markmarkmarkmarkmarkmarkmarksearch-editormarkmarkmarkmarkmarkmarkmarkh1)
- [Search Editor: Apply Changes - Visual Studio Marketplace](#search-editor-apply-changes---visual-studio-marketplace)
- [Known Limitations](#known-limitations)
- [Keybindings](#keybindings-1)
- [Source](#source-4)
<---------------------------------------------------------------------->
- [### <========(Node TDD)========>](#h1-idnode-tdd-87markmarkmarkmarkmarkmarkmarknode-tddmarkmarkmarkmarkmarkmarkmarkh1)
- [Node TDD - Visual Studio Marketplace](#node-tdd---visual-studio-marketplace)
- [Features](#features-28)
- [Settings](#settings-5)
- [Commands](#commands-6)
- [Limitations and known issues](#limitations-and-known-issues)
<---------------------------------------------------------------------->
- [### <=============(Power Tools)=============>](#h1-idpower-tools-55markmarkmarkmarkmarkmarkpower-toolsmarkmarkmarkmarkmarkmarkh1)
- [- Visual Studio Marketplace](#ullivisual-studio-marketplaceliul)
- [Install \[↑\]](#install-)
- [How to use \[↑\]](#how-to-use-)
- [Apps \[↑\]](#apps-)
- [Buttons \[↑\]](#buttons-)
- [Commands \[↑\]](#commands-)
- [Events \[↑\]](#events-)
- [Jobs \[↑\]](#jobs-)
- [Scripts \[↑\]](#scripts-)
- [Startups \[↑\]](#startups-)
- [Tools \[↑\]](#tools-)
- [Values \[↑\]](#values-)
- [Documentation \[↑\]](#documentation-)
<🦖🐒🧬🧑🤝🧑🧮📺💻🖧📚🖥️⌨️💾📀📁🔗🤖🧑🤝🧑🧬🐒🦖🧑💻👩🧑👨🏻💻👨🏿💻(🟥💊)-OR-(🟦💊)🚁⚔️👩💻🧑💻☮️>
---
---
### <========(Markdown Support)========>
<!-- TOC -->autoauto- [<========(Markdown Support)========>](#markdown-support)auto- [Markdown Support for Visual Studio Code <!-- omit in toc -->](#markdown-support-for-visual-studio-code----omit-in-toc---)auto - [Features](#features)auto - [Keyboard shortcuts](#keyboard-shortcuts)auto - [Table of contents](#table-of-contents)auto - [List editing](#list-editing)auto - [Print Markdown to HTML](#print-markdown-to-html)auto - [GitHub Flavored Markdown](#github-flavored-markdown)auto - [Math](#math)auto - [Auto completions](#auto-completions)auto - [Others](#others)auto - [Available Commands](#available-commands)auto - [Keyboard Shortcuts](#keyboard-shortcuts)auto - [Supported Settings](#supported-settings)auto - [FAQ](#faq)auto - [Q: Error "command 'markdown.extension.onXXXKey' not found"](#q-error-command-markdownextensiononxxxkey-not-found)auto - [Q: Which Markdown syntax is supported?](#q-which-markdown-syntax-is-supported)auto - [Related](#related)auto- [<========(Markdown PDF)========>](#markdown-pdf)auto- [Markdown PDF](#markdown-pdf)auto - [Table of Contents](#table-of-contents)auto - [Features](#features-1)auto - [markdown-it-container](#markdown-it-container)auto - [markdown-it-plantuml](#markdown-it-plantuml)auto - [markdown-it-include](#markdown-it-include)auto - [mermaid](#mermaid)auto - [Install](#install)auto - [Usage](#usage)auto - [Command Palette](#command-palette)auto - [Menu](#menu)auto - [Auto convert](#auto-convert)auto - [Extension Settings](#extension-settings)auto - [Options](#options)auto - [List](#list)auto - [Save options](#save-options)auto - [`markdown-pdf.type`](#markdown-pdftype)auto - [`markdown-pdf.convertOnSave`](#markdown-pdfconvertonsave)auto - [`markdown-pdf.convertOnSaveExclude`](#markdown-pdfconvertonsaveexclude)auto - [`markdown-pdf.outputDirectory`](#markdown-pdfoutputdirectory)auto - [`markdown-pdf.outputDirectoryRelativePathFile`](#markdown-pdfoutputdirectoryrelativepathfile)auto - [Styles options](#styles-options)auto - [`markdown-pdf.styles`](#markdown-pdfstyles)auto - [`markdown-pdf.stylesRelativePathFile`](#markdown-pdfstylesrelativepathfile)auto - [`markdown-pdf.includeDefaultStyles`](#markdown-pdfincludedefaultstyles)auto - [Syntax highlight options](#syntax-highlight-options)auto - [`markdown-pdf.highlight`](#markdown-pdfhighlight)auto - [`markdown-pdf.highlightStyle`](#markdown-pdfhighlightstyle)auto - [Markdown options](#markdown-options)auto - [`markdown-pdf.breaks`](#markdown-pdfbreaks)auto - [Emoji options](#emoji-options)auto - [`markdown-pdf.emoji`](#markdown-pdfemoji)auto - [Configuration options](#configuration-options)auto - [`markdown-pdf.executablePath`](#markdown-pdfexecutablepath)auto - [Common Options](#common-options)auto - [`markdown-pdf.scale`](#markdown-pdfscale)auto - [PDF options](#pdf-options)auto - [`markdown-pdf.displayHeaderFooter`](#markdown-pdfdisplayheaderfooter)auto - [`markdown-pdf.headerTemplate`](#markdown-pdfheadertemplate)auto - [`markdown-pdf.footerTemplate`](#markdown-pdffootertemplate)auto - [`markdown-pdf.printBackground`](#markdown-pdfprintbackground)auto - [`markdown-pdf.orientation`](#markdown-pdforientation)auto - [`markdown-pdf.pageRanges`](#markdown-pdfpageranges)auto - [`markdown-pdf.format`](#markdown-pdfformat)auto - [`markdown-pdf.width`](#markdown-pdfwidth)auto - [`markdown-pdf.height`](#markdown-pdfheight)auto - [`markdown-pdf.margin.top`](#markdown-pdfmargintop)auto - [`markdown-pdf.margin.bottom`](#markdown-pdfmarginbottom)auto - [`markdown-pdf.margin.right`](#markdown-pdfmarginright)auto - [`markdown-pdf.margin.left`](#markdown-pdfmarginleft)auto - [PNG JPEG options](#png-jpeg-options)auto - [`markdown-pdf.quality`](#markdown-pdfquality)auto - [`markdown-pdf.clip.x`](#markdown-pdfclipx)auto - [`markdown-pdf.clip.y`](#markdown-pdfclipy)auto - [`markdown-pdf.clip.width`](#markdown-pdfclipwidth)auto - [`markdown-pdf.clip.height`](#markdown-pdfclipheight)auto - [`markdown-pdf.omitBackground`](#markdown-pdfomitbackground)auto - [PlantUML options](#plantuml-options)auto - [`markdown-pdf.plantumlOpenMarker`](#markdown-pdfplantumlopenmarker)auto - [`markdown-pdf.plantumlCloseMarker`](#markdown-pdfplantumlclosemarker)auto - [`markdown-pdf.plantumlServer`](#markdown-pdfplantumlserver)auto - [markdown-it-include options](#markdown-it-include-options)auto - [`markdown-pdf.markdown-it-include.enable`](#markdown-pdfmarkdown-it-includeenable)auto - [mermaid options](#mermaid-options)auto - [`markdown-pdf.mermaidServer`](#markdown-pdfmermaidserver)auto - [FAQ](#faq-1)auto - [How can I change emoji size ?](#how-can-i-change-emoji-size-)auto - [Auto guess encoding of files](#auto-guess-encoding-of-files)auto - [Output directory](#output-directory)auto - [Page Break](#page-break)auto - [Known Issues](#known-issues)auto - [`markdown-pdf.styles` option](#markdown-pdfstyles-option)auto - [[Release Notes](CHANGELOG.md)](#release-noteschangelogmd)auto- [<========(Open in External App)========>](#open-in-external-app)auto- [Open in External App](#open-in-external-app)auto - [💡 Motivation](#💡-motivation)auto - [🔌 Installation](#🔌-installation)auto - [🔧 Configuration](#🔧-configuration)auto - [:loudspeaker: Limits](#loudspeaker-limits)auto - [1. Node package: [open](https://github.com/sindresorhus/open)](#1-node-package-openhttpsgithubcomsindresorhusopen)auto - [2. VSCode extension API: `vscode.env.openExternal(target: Uri)`](#2-vscode-extension-api-vscodeenvopenexternaltarget-uri)auto- [<========(Change Case Extension for Visual Studio Code)========>](#change-case-extension-for-visual-studio-code)auto- [Change Case Extension for Visual Studio Code](#change-case-extension-for-visual-studio-code)auto - [Install](#install-1)auto - [Commands](#commands)auto - [Support](#support)auto- [<========( vscode-js-console-utils)========>](#-vscode-js-console-utils)auto - [vscode-js-console-utils](#vscode-js-console-utils)auto - [Installing](#installing)auto- [<========(Node.js Extension Pack)========>](#nodejs-extension-pack)auto- [Node.js Extension Pack](#nodejs-extension-pack)auto - [Extensions Included](#extensions-included)auto - [Want to see your extension added?](#want-to-see-your-extension-added)auto- [<========(Refactor CSS)========>](#refactor-css)auto- [Refactor CSS](#refactor-css)auto - [Features](#features-2)auto - [Release Notes](#release-notes)auto - [Roadmap](#roadmap)auto- [<========(Treedbox Javascript)========>](#treedbox-javascript)auto- [Treedbox JavaScript - Visual Studio Marketplace](#treedbox-javascript---visual-studio-marketplace)auto - [VS Code Javascript extension](#vs-code-javascript-extension)auto - [Screenshots:](#screenshots)auto - [Install](#install-2)auto - [Pages](#pages)auto - [Features](#features-3)auto - [All Math properties and methods](#all-math-properties-and-methods)auto - [How to use](#how-to-use)auto - [Example:](#example)auto- [<========(pdf)========>](#pdf)auto- [pdf](#pdf)auto - [Contribute](#contribute)auto - [Upgrade PDF.js](#upgrade-pdfjs)auto - [Change log](#change-log)auto - [License](#license)auto- [<========(Superpowers)========>](#superpowers)auto- [Superpowers](#superpowers)auto - [Preview](#preview)auto - [Features](#features-4)auto - [Map/Sort operation usage](#mapsort-operation-usage)auto - [Dynamic snippets / completion](#dynamic-snippets--completion)auto - [Extension Settings](#extension-settings-1)auto- [<========(Readme Pattern)========>](#readme-pattern)auto- [Readme Pattern](#readme-pattern)auto - [Features](#features-5)auto - [Logo](#logo)auto- [<========(Markdown Paste)========>](#markdown-paste)auto- [Markdown Paste](#markdown-paste)auto - [Requirements](#requirements)auto - [Features](#features-6)auto - [Config](#config)auto - [Format](#format)auto - [File name format](#file-name-format)auto - [File link format](#file-link-format)auto- [<========(Spelling Checker for Visual Studio Code)========>](#spelling-checker-for-visual-studio-code)auto- [Spelling Checker for Visual Studio Code](#spelling-checker-for-visual-studio-code)auto - [Functionality](#functionality)auto - [Example](#example)auto - [Suggestions](#suggestions)auto - [Install](#install-3)auto - [Supported Languages](#supported-languages)auto - [Add-On Specialized Dictionaries](#add-on-specialized-dictionaries)auto - [Enabled File Types](#enabled-file-types)auto - [Enable / Disable File Types](#enable--disable-file-types)auto - [How it works with camelCase](#how-it-works-with-camelcase)auto - [Special case will ALL CAPS words](#special-case-will-all-caps-words)auto - [Things to note](#things-to-note)auto - [In Document Settings](#in-document-settings)auto - [Enable / Disable checking sections of code](#enable--disable-checking-sections-of-code)auto - [Disable Checking](#disable-checking)auto - [Enable Checking](#enable-checking)auto - [Example](#example-1)auto - [Ignore](#ignore)auto - [Words](#words)auto - [Enable / Disable compound words](#enable--disable-compound-words)auto - [Excluding and Including Text to be checked.](#excluding-and-including-text-to-be-checked)auto - [Exclude Example](#exclude-example)auto - [Include Example](#include-example)auto - [Predefined RegExp expressions](#predefined-regexp-expressions)auto - [Exclude patterns](#exclude-patterns)auto - [Include Patterns](#include-patterns)auto - [Customization](#customization)auto - [Adding words to the Workspace Dictionary](#adding-words-to-the-workspace-dictionary)auto - [cspell.json](#cspelljson)auto - [Example _cspell.json_ file](#example-_cspelljson_-file)auto - [VS Code Configuration Settings](#vs-code-configuration-settings)auto - [Dictionaries](#dictionaries)auto - [General Dictionaries](#general-dictionaries)auto - [Programming Language Dictionaries](#programming-language-dictionaries)auto - [Miscellaneous Dictionaries](#miscellaneous-dictionaries)auto - [How to add your own Dictionaries](#how-to-add-your-own-dictionaries)auto - [Global Dictionary](#global-dictionary)auto - [Define the Dictionary](#define-the-dictionary)auto - [Project / Workspace Dictionary](#project--workspace-dictionary)auto - [FAQ](#faq-2)auto- [<========(Settings viewer)========>](#settings-viewer)auto- [Settings viewer](#settings-viewer)auto- [<========(Awesome plugin for Visual Studio Code)========>](#awesome-plugin-for-visual-studio-code)auto- [Awesome plugin for Visual Studio Code :sunglasses: [Beta]](#awesome-plugin-for-visual-studio-code-sunglasses-beta)auto - [Quickly see docs from MDN in VS Code](#quickly-see-docs-from-mdn-in-vs-code)auto - [Usage](#usage-1)auto - [Is the semicolon necessary?](#is-the-semicolon-necessary)auto - [Examples](#examples)auto - [Supports](#supports)auto- [<========(Live Server)========>](#live-server)auto- [Live Server](#live-server)auto - [Shortcuts to Start/Stop Server](#shortcuts-to-startstop-server)auto - [Features](#features-7)auto - [Installation](#installation)auto - [Settings](#settings)auto- [<========(CSS PEAK)========>](#css-peak)auto- [Functionality](#functionality-1)auto - [Configuration](#configuration)auto- [Contributing](#contributing)auto- [<========(jsdoc-live-preview)========>](#jsdoc-live-preview)auto- [jsdoc-live-preview](#jsdoc-live-preview)auto - [Installation](#installation-1)auto - [Usage](#usage-2)auto- [<========(Resource Monitor)========>](#resource-monitor)auto- [Resource Monitor](#resource-monitor)auto - [Features](#features-8)auto - [Screenshots](#screenshots)auto - [Requirements](#requirements-1)auto - [Extension Settings](#extension-settings-2)auto - [Known Issues](#known-issues-1)auto- [<========(JS FLOWCHART)========>](#js-flowchart)auto - [Features](#features-9)auto - [Quick start](#quick-start)auto - [Installation in development mode](#installation-in-development-mode)auto- [<========(Visual Studio Code Remote Development)========>](#visual-studio-code-remote-development)auto- [Visual Studio Code Remote Development](#visual-studio-code-remote-development)auto - [Documentation](#documentation)auto- [<========(Docker for Visual Studio Code )========>](#docker-for-visual-studio-code-)auto- [Docker - Visual Studio Marketplace](#docker---visual-studio-marketplace)auto - [Docker for Visual Studio Code [](https://marketplace.visualstudio.com/items?itemName=ms-azuretools.vscode-docker) [](https://marketplace.visualstudio.com/items?itemName=ms-azuretools.vscode-docker) [](https://dev.azure.com/ms-azuretools/AzCode/_build/latest?definitionId=22&branchName=master)](#docker-for-visual-studio-code-versionhttpsvsmarketplacebadgeapphbcomversionms-azuretoolsvscode-dockersvghttpsmarketplacevisualstudiocomitemsitemnamems-azuretoolsvscode-docker-installshttpsvsmarketplacebadgeapphbcominstalls-shortms-azuretoolsvscode-dockersvghttpsmarketplacevisualstudiocomitemsitemnamems-azuretoolsvscode-docker-build-statushttpsdevazurecomms-azuretoolsazcode_apisbuildstatusnightlyvscode-docker-nightly-2branchnamemasterhttpsdevazurecomms-azuretoolsazcode_buildlatestdefinitionid22branchnamemaster)auto - [Installation](#installation-2)auto - [Overview of the extension features](#overview-of-the-extension-features)auto - [Editing Docker files](#editing-docker-files)auto - [Generating Docker files](#generating-docker-files)auto - [Docker view](#docker-view)auto - [Docker commands](#docker-commands)auto - [Docker Compose](#docker-compose)auto - [Using image registries](#using-image-registries)auto - [Debugging services running inside a container](#debugging-services-running-inside-a-container)auto - [Azure CLI integration](#azure-cli-integration)auto- [<========(vscode-htmlhint)========>](#vscode-htmlhint)auto- [vscode-htmlhint](#vscode-htmlhint)auto - [Configuration](#configuration-1)auto - [Usage](#usage-3)auto - [Rules](#rules)auto - [.htmlhintrc](#htmlhintrc)auto - [Additional file types](#additional-file-types)auto - [Option 1: Treating your file like any other html file](#option-1-treating-your-file-like-any-other-html-file)auto - [Option 2: Associating HTMLHint extension with your file type](#option-2-associating-htmlhint-extension-with-your-file-type)auto - [Settings](#settings-1)auto- [<========(Git Graph extension for Visual Studio Code)========>](#git-graph-extension-for-visual-studio-code)auto- [Git Graph extension for Visual Studio Code](#git-graph-extension-for-visual-studio-code)auto - [Features](#features-10)auto - [Extension Settings](#extension-settings-3)auto - [Extension Commands](#extension-commands)auto - [Release Notes](#release-notes-1)auto - [Visual Studio Marketplace](#visual-studio-marketplace)auto - [Acknowledgements](#acknowledgements)auto- [<========(MARKDOWN SHORTCUTS)========>](#markdown-shortcuts)auto - [Exposed Commands](#exposed-commands)auto- [<========(MarkdownConverter)========>](#markdownconverter)auto- [MarkdownConverter](#markdownconverter)auto - [What's `MarkdownConverter`?](#whats-markdownconverter)auto - [Usage](#usage-4)auto - [[VSCode]: https://code.visualstudio.com/](#vscode-httpscodevisualstudiocom)auto- [<========(vscode-opn)========>](#vscode-opn)auto- [vscode-opn](#vscode-opn)auto - [Install](#install-4)auto - [Easiest from the Extension Gallery](#easiest-from-the-extension-gallery)auto - [Alternatively, with the Packaged Extension (.vsix) file](#alternatively-with-the-packaged-extension-vsix-file)auto - [Usage](#usage-5)auto - [Customise behaviour per language (optional)](#customise-behaviour-per-language-optional)auto - [forLang](#forlang)auto - [openInApp](#openinapp)auto - [openInAppArgs](#openinappargs)auto - [isUseWebServer](#isusewebserver)auto - [isUseFsPath](#isusefspath)auto - [isWaitForAppExit](#iswaitforappexit)auto - [Web server settings (applies to all languages)](#web-server-settings-applies-to-all-languages)auto - [vscode-opn.webServerProtocol](#vscode-opnwebserverprotocol)auto - [vscode-opn.webServerHostname](#vscode-opnwebserverhostname)auto - [vscode-opn.webServerPort](#vscode-opnwebserverport)auto - [Tested](#tested)auto - [Release notes](#release-notes)auto - [Contributions](#contributions)auto - [Dependencies](#dependencies)auto - [License](#license-1)auto- [<========( Node.js Modules Intellisense)========>](#-nodejs-modules-intellisense)auto- [Node.js Modules Intellisense](#nodejs-modules-intellisense)auto - [Installation](#installation-3)auto - [Issues & Contribution](#issues--contribution)auto - [Configuration](#configuration-2)auto- [<========(VSCode format in context menus)========>](#vscode-format-in-context-menus)auto- [VSCode format in context menus](#vscode-format-in-context-menus)auto - [Features](#features-11)auto - [Extension Settings](#extension-settings-4)auto- [<========(vscode-github README)========>](#vscode-github-readme)auto- [vscode-github README](#vscode-github-readme)auto - [Features](#features-12)auto - [Setup Personal Access Token](#setup-personal-access-token)auto - [Usage](#usage-6)auto - [Create a new pull request](#create-a-new-pull-request)auto - [Create a new pull request from a forked repository](#create-a-new-pull-request-from-a-forked-repository)auto - [Checkout pull request](#checkout-pull-request)auto - [Browser pull request](#browser-pull-request)auto - [Merge pull request](#merge-pull-request)auto - [Telemetry data (extension usage)](#telemetry-data-extension-usage)auto- [<===========(Kite Autocomplete Plugin for Visual Studio Code)===========>](#kite-autocomplete-plugin-for-visual-studio-code)auto- [Kite Autocomplete Plugin for Visual Studio Code](#kite-autocomplete-plugin-for-visual-studio-code)auto - [Requirements](#requirements-2)auto - [Installation](#installation-4)auto - [Installing the Kite Engine](#installing-the-kite-engine)auto - [Installing the Kite Plugin for Visual Studio Code](#installing-the-kite-plugin-for-visual-studio-code)auto - [Usage](#usage-7)auto - [Autocompletions](#autocompletions)auto - [Hover (Python only)](#hover-python-only)auto - [Documentation (Python only)](#documentation-python-only)auto - [Definitions (Python only)](#definitions-python-only)auto - [Function Signatures (Python only)](#function-signatures-python-only)auto - [Commands](#commands-1)auto - [Troubleshooting](#troubleshooting)auto - [About Kite](#about-kite)auto- [<========(Code Metrics - Visual Studio Code Extension)========>](#code-metrics---visual-studio-code-extension)auto- [Code Metrics - Visual Studio Code Extension](#code-metrics---visual-studio-code-extension)auto- [Complexity calculation](#complexity-calculation)auto - [It looks like this](#it-looks-like-this)auto - [Install](#install-5)auto - [Customization](#customization-1)auto - [Commands](#commands-2)auto - [License](#license-2)auto- [<========(Peacock for Visual Studio Code)========>](#peacock-for-visual-studio-code)auto- [We can even add meta tags to the page! This sets the keywords meta tag.](#we-can-even-add-meta-tags-to-the-page-this-sets-the-keywords-meta-tag)auto- [<meta name="keywords" content="my SEO keywords"/>](#meta-namekeywords-contentmy-seo-keywords)auto- [Peacock for Visual Studio Code](#peacock-for-visual-studio-code)auto - [Overview](#overview)auto - [Install](#install-6)auto - [Quick Usage](#quick-usage)auto - [Features](#features-13)auto - [Settings](#settings-2)auto - [Favorite Colors](#favorite-colors)auto - [Preview Your Favorite](#preview-your-favorite)auto - [Save Favorite Color](#save-favorite-color)auto - [Affected Elements](#affected-elements)auto - [Element Adjustments](#element-adjustments)auto - [Keep Foreground Color](#keep-foreground-color)auto - [Surprise Me On Startup](#surprise-me-on-startup)auto - [Lighten and Darken](#lighten-and-darken)auto - [Commands](#commands-3)auto - [Keyboard Shortcuts](#keyboard-shortcuts-1)auto - [Integrations](#integrations)auto - [VS Live Share Integration](#vs-live-share-integration)auto - [Remote Development Integration](#remote-development-integration)auto - [Input Formats](#input-formats)auto - [Example 1](#example-1)auto - [Example 2](#example-2)auto - [Example 3](#example-3)auto - [How does title bar coloring work](#how-does-title-bar-coloring-work)auto - [How are foreground colors calculated](#how-are-foreground-colors-calculated)auto - [Why is the foreground hard to see with my transparent color](#why-is-the-foreground-hard-to-see-with-my-transparent-color)auto - [Why are my affected elements not transparent](#why-are-my-affected-elements-not-transparent)auto - [What are recommended favorites](#what-are-recommended-favorites)auto - [What are mementos](#what-are-mementos)auto - [Migration](#migration)auto - [To Version 3+](#to-version-3)auto - [Try the Code](#try-the-code)auto - [Badges](#badges)auto - [Resources](#resources)auto- [<========(Markdown Extended Readme)========>](#markdown-extended-readme)auto- [Markdown Extended Readme](#markdown-extended-readme)auto - [Features](#features-14)auto - [Disable Plugins](#disable-plugins)auto - [Q: Why You Don't Integrate Some Plugin?](#q-why-you-dont-integrate-some-plugin)auto - [Exporter](#exporter)auto - [Export Configurations](#export-configurations)auto - [Helpers](#helpers)auto - [Editing Helpers and Keys](#editing-helpers-and-keys)auto - [Table Editing](#table-editing)auto - [Paste as Markdown Table](#paste-as-markdown-table)auto - [Export & Copy](#export--copy)auto - [Extended Syntaxes](#extended-syntaxes)auto - [Admonition](#admonition)auto - [Removing Admonition Title](#removing-admonition-title)auto - [Supported Qualifiers](#supported-qualifiers)auto - [Enhanced Anchor Link](#enhanced-anchor-link)auto - [markdown-it-table-of-contents](#markdown-it-table-of-contents)auto - [markdown-it-footnote](#markdown-it-footnote)auto - [markdown-it-abbr](#markdown-it-abbr)auto - [markdown-it-deflist](#markdown-it-deflist)auto - [markdown-it-sup markdown-it-sub](#markdown-it-sup-markdown-it-sub)auto - [markdown-it-checkbox](#markdown-it-checkbox)auto - [markdown-it-attrs](#markdown-it-attrs)auto - [markdown-it-kbd](#markdown-it-kbd)auto - [markdown-it-underline](#markdown-it-underline)auto - [markdown-it-container](#markdown-it-container-1)auto- [<========(Search node_modules)========>](#search-node_modules)auto- [Search node_modules](#search-node_modules)auto - [Features](#features-15)auto - [Settings](#settings-3)auto - [Extension Packs](#extension-packs)auto - [Links](#links)auto- [<========(Browser Sync)========>](#browser-sync)auto- [Objective](#objective)auto- [Requirement](#requirement)auto- [Features](#features-16)auto - [Behaviour](#behaviour)auto - [Server Mode](#server-mode)auto - [Proxy Mode](#proxy-mode)auto- [Configuration](#configuration-3)auto - [Example setting (different browser)](#example-setting-different-browser)auto - [Example setting (relative path)](#example-setting-relative-path)auto- [How it works](#how-it-works)auto - [Static HTML file](#static-html-file)auto - [Proxy for dynamic site](#proxy-for-dynamic-site)auto- [Enhancement Planning](#enhancement-planning)auto- [<========(VSCode Essentials (Extension Pack))========>](#vscode-essentials-extension-pack)auto- [VSCode Essentials (Extension Pack)](#vscode-essentials-extension-pack)auto - [Introduction](#introduction)auto - [Features](#features-17)auto - [Recommended Settings](#recommended-settings)auto - [All Autocomplete](#all-autocomplete)auto - [CodeStream](#codestream)auto - [Customize UI](#customize-ui)auto - [GitLens](#gitlens)auto - [Macros](#macros)auto - [MetaGo](#metago)auto - [Project Manager](#project-manager)auto - [Rewrap](#rewrap)auto - [Settings Cycler](#settings-cycler)auto - [Settings Sync](#settings-sync)auto - [Todo Tree](#todo-tree)auto - [Bug Reports](#bug-reports)auto - [Known Issues](#known-issues-2)auto - [Included Extensions](#included-extensions)auto- [<========( VS Code JavaScript Unit Test snippets )========>](#-vs-code-javascript-unit-test-snippets-)auto- [JavaScript](#javascript)auto - [VS Code JavaScript Unit Test snippets](#vs-code-javascript-unit-test-snippets)auto - [Installation](#installation-5)auto - [Snippets](#snippets)auto - [Import and export](#import-and-export)auto- [<========(Path Autocomplete for Visual Studio Code)========>](#path-autocomplete-for-visual-studio-code)auto- [Path Autocomplete for Visual Studio Code](#path-autocomplete-for-visual-studio-code)auto - [Features](#features-18)auto - [Installation](#installation-6)auto - [Options](#options-1)auto - [Configure VSCode to recognize path aliases](#configure-vscode-to-recognize-path-aliases)auto - [Tips](#tips)auto- [<========(easy-snippet)========>](#easy-snippet)auto- [easy-snippet](#easy-snippet)auto - [Features](#features-19)auto - [Release Notes](#release-notes-2)auto - [0.1.6](#016)auto - [0.1.5](#015)auto - [0.0.1](#001)auto- [<========(VSCode Log Output Colorizer)========>](#vscode-log-output-colorizer)auto- [VSCode Log Output Colorizer](#vscode-log-output-colorizer)auto - [In action](#in-action)auto - [VSCode Git Output](#vscode-git-output)auto - [Default Dark Theme](#default-dark-theme)auto - [Default Light Theme](#default-light-theme)auto - [Night Blue Theme](#night-blue-theme)auto - [Helpful References:](#helpful-references)auto - [Support](#support-1)auto - [License](#license-3)auto - [Attribution](#attribution)auto- [<========(REST Client)========>](#rest-client)auto- [REST Client](#rest-client)auto - [Main Features](#main-features)auto - [Usage](#usage-8)auto - [Select Request Text](#select-request-text)auto - [Install](#install-7)auto - [Making Request](#making-request)auto - [Request Line](#request-line)auto - [Query Strings](#query-strings)auto - [Request Headers](#request-headers)auto - [Request Body](#request-body)auto - [Making GraphQL Request](#making-graphql-request)auto - [Making cURL Request](#making-curl-request)auto - [Copy Request As cURL](#copy-request-as-curl)auto - [Cancel Request](#cancel-request)auto - [Rerun Last Request](#rerun-last-request)auto - [Request History](#request-history)auto - [Save Full Response](#save-full-response)auto - [Save Response Body](#save-response-body)auto - [Fold and Unfold Response Body](#fold-and-unfold-response-body)auto - [Authentication](#authentication)auto - [Basic Auth](#basic-auth)auto - [Digest Auth](#digest-auth)auto - [SSL Client Certificates](#ssl-client-certificates)auto - [Azure Active Directory(Azure AD)](#azure-active-directoryazure-ad)auto - [Microsoft Identity Platform(Azure AD V2)](#microsoft-identity-platformazure-ad-v2)auto - [AWS Signature v4](#aws-signature-v4)auto - [Generate Code Snippet](#generate-code-snippet)auto - [HTTP Language](#http-language)auto - [Auto Completion](#auto-completion)auto - [Navigate to Symbols in Request File](#navigate-to-symbols-in-request-file)auto - [Environments](#environments)auto - [Variables](#variables)auto - [Custom Variables](#custom-variables)auto - [Environment Variables](#environment-variables)auto - [File Variables](#file-variables)auto - [Request Variables](#request-variables)auto - [System Variables](#system-variables)auto - [Customize Response Preview](#customize-response-preview)auto - [Settings](#settings-4)auto - [Per-request Settings](#per-request-settings)auto - [License](#license-4)auto - [Change Log](#change-log)auto - [Special Thanks](#special-thanks)auto - [Feedback](#feedback)auto- [<========((vscode-favorites))========>](#vscode-favorites)auto- [vscode-favorites](#vscode-favorites)auto - [Install](#install-8)auto - [Usage](#usage-9)auto - [Configuration](#configuration-4)auto - [Changelog](#changelog)auto - [LICENSE](#license)auto- [<========(js-beautify for VS Code)========>](#js-beautify-for-vs-code)auto- [js-beautify for VS Code](#js-beautify-for-vs-code)auto - [How we determine what settings to use](#how-we-determine-what-settings-to-use)auto - [VS Code | .jsbeautifyrc settings map](#vs-code--jsbeautifyrc-settings-map)auto - [Keyboard Shortcut](#keyboard-shortcut)auto- [<========(Todo Tree)========>](#todo-tree)auto- [Todo Tree](#todo-tree-1)auto - [Highlighting](#highlighting)auto - [Installing](#installing-1)auto - [Source Code](#source-code)auto - [Controls](#controls)auto - [Folder Filter Context Menu](#folder-filter-context-menu)auto - [Commands](#commands-4)auto - [Tags](#tags)auto - [Export](#export)auto - [Configuration](#configuration-5)auto - [Multiline TODOs](#multiline-todos)auto - [Excluding files and folders](#excluding-files-and-folders)auto- [<========(Open file)========>](#open-file)auto- [Open file](#open-file)auto - [Example](#example-2)auto - [Main Features](#main-features-1)auto - [Path Lookup Detail](#path-lookup-detail)auto- [<========(Code Runner)========>](#code-runner)auto- [Code Runner](#code-runner)auto - [Features](#features-20)auto - [Usages](#usages)auto - [Configuration](#configuration-6)auto - [About CWD Setting (current working directory)](#about-cwd-setting-current-working-directory)auto - [Note](#note)auto - [Telemetry data](#telemetry-data)auto - [Change Log](#change-log-1)auto - [Issues](#issues)auto - [Contribution](#contribution)auto- [<========(Git Project Manager)========>](#git-project-manager)auto- [Git Project Manager](#git-project-manager)auto - [Available commands](#available-commands)auto - [GPM: Open Git Project _(Defaults to: Ctrl+Alt+P)_](#gpm-open-git-project-_defaults-to-ctrlaltp_)auto - [GPM: Refresh Projects](#gpm-refresh-projects)auto - [GPM: Refresh specific project folder](#gpm-refresh-specific-project-folder)auto - [GPM: Open Recent Git Project _(Defaults to Ctrl+Shift+Q)_](#gpm-open-recent-git-project-_defaults-to-ctrlshiftq_)auto - [Available settings](#available-settings)auto - [Participate](#participate)auto- [<========(Open in Code)========>](#open-in-code)auto- [Open in Code](#open-in-code)auto - [Install](#install-9)auto - [Usage](#usage-10)auto - [Contributing](#contributing-1)auto - [License](#license-5)auto- [<========(Reactjs)========>](#reactjs)auto- [Reactjs](#reactjs)auto - [VS Code Reactjs snippets](#vs-code-reactjs-snippets)auto - [Installation](#installation-7)auto - [Supported languages (file extensions)](#supported-languages-file-extensions)auto - [Breaking change in version 2.0.0](#breaking-change-in-version-200)auto - [Breaking change in version 1.0.0](#breaking-change-in-version-100)auto - [Usage](#usage-11)auto - [Snippets](#snippets-1)auto- [<========(jQuery Code Snippets)========>](#jquery-code-snippets)auto- [jQuery Code Snippets](#jquery-code-snippets)auto- [Snippets](#snippets-2)auto - [column0](#column0)auto - [Source](#source)auto - [License](#license-6)auto- [<========( Markdown table prettifier extension for Visual Studio Code)========>](#-markdown-table-prettifier-extension-for-visual-studio-code)auto- [Markdown table prettifier extension for Visual Studio Code](#markdown-table-prettifier-extension-for-visual-studio-code)auto - [Features](#features-21)auto - [CLI formatting](#cli-formatting)auto - [Formatting with docker](#formatting-with-docker)auto - [Extension Settings](#extension-settings-5)auto - [Known Issues](#known-issues-3)auto- [<========(vscode-goto-documentation)========>](#vscode-goto-documentation)auto- [vscode-goto-documentation](#vscode-goto-documentation)auto - [Supports](#supports-1)auto - [Installation](#installation-8)auto - [How to use](#how-to-use-1)auto - [Edit the urls](#edit-the-urls)auto - [The available settings are:](#the-available-settings-are)auto- [<========(VSCode DevTools for Chrome)========>](#vscode-devtools-for-chrome)auto- [VSCode DevTools for Chrome](#vscode-devtools-for-chrome)auto - [Attaching to a running chrome instance:](#attaching-to-a-running-chrome-instance)auto - [Launching a 'debugger for chrome' project and using screencast:](#launching-a-debugger-for-chrome-project-and-using-screencast)auto- [Using the extension](#using-the-extension)auto - [Launching as a Debugger](#launching-as-a-debugger)auto - [Launching Chrome manually](#launching-chrome-manually)auto - [Launching Chrome via the extension](#launching-chrome-via-the-extension)auto- [Known Issues](#known-issues-4)auto- [Developing the extension itself](#developing-the-extension-itself)auto- [<========(JS Refactor)========>](#js-refactor)auto- [JS Refactor](#js-refactor)auto - [Supported Language Files](#supported-language-files)auto - [Installation](#installation-9)auto - [Extensions Panel:](#extensions-panel)auto - [Command Pallette](#command-pallette)auto - [Automated Refactorings](#automated-refactorings)auto - [Keybindings](#keybindings)auto - [Usage](#usage-12)auto - [Explanations](#explanations)auto - [Core Refactorings](#core-refactorings)auto - [Other Utilities](#other-utilities)auto - [Snippets](#snippets-3)auto - [Usage](#usage-13)auto - [Explanations](#explanations-1)auto- [<========(Npm Intellisense)========>](#npm-intellisense)auto- [Npm Intellisense](#npm-intellisense)auto - [Sponsors](#sponsors)auto - [Installation](#installation-10)auto - [Contributing](#contributing-2)auto - [Features](#features-22)auto - [Import command](#import-command)auto - [Import command (ES5)](#import-command-es5)auto - [Scan devDependencies](#scan-devdependencies)auto - [Show build in (local) libs](#show-build-in-local-libs)auto - [Lookup package.json recursive](#lookup-packagejson-recursive)auto - [Experimental: Package Subfolder Intellisense](#experimental-package-subfolder-intellisense)auto - [License](#license-7)auto- [<========(vscode-standardjs)========>](#vscode-standardjs)auto- [vscode-standardjs](#vscode-standardjs)auto - [How to use](#how-to-use-2)auto - [Plugin options](#plugin-options)auto - [Configuring Standard](#configuring-standard)auto - [Commands](#commands-5)auto - [FAQ](#faq-3)auto - [How to develop](#how-to-develop)auto - [How to package](#how-to-package)auto - [TODO](#todo)auto- [<========(COMMENT HEADERS)========>](#comment-headers)auto- [File Header Comment - Visual Studio Marketplace](#file-header-comment---visual-studio-marketplace)auto - [Features](#features-23)auto - [Install](#install-10)auto - [Extension Settings](#extension-settings-6)auto- [<========(Bookmarks)========>](#bookmarks)auto- [Bookmarks](#bookmarks)auto- [Features](#features-24)auto - [Available commands](#available-commands-1)auto - [Manage your bookmarks](#manage-your-bookmarks)auto - [Toggle / Toggle Labeled](#toggle--toggle-labeled)auto - [Navigation](#navigation)auto - [Jump to Next / Previous](#jump-to-next--previous)auto - [List / List from All Files](#list--list-from-all-files)auto - [Selection](#selection)auto - [Select Lines](#select-lines)auto - [Expand Selection to the Next/Previous Bookmark or Shrink the Selection](#expand-selection-to-the-nextprevious-bookmark-or-shrink-the-selection)auto - [Available Settings](#available-settings)auto - [Available Colors](#available-colors)auto - [Side Bar](#side-bar)auto - [Project and Session Based](#project-and-session-based)auto- [License](#license-8)auto- [<========(vscode-markdown-pdf)========>](#vscode-markdown-pdf)auto- [yzane/vscode-markdown-pdf](#yzanevscode-markdown-pdf)auto - [Usage](#usage-14)auto - [Command Palette](#command-palette-1)auto - [Menu](#menu-1)auto - [Auto convert](#auto-convert-1)auto - [Extension Settings](#extension-settings-7)auto - [Options](#options-2)auto - [List](#list-1)auto - [Save options](#save-options-1)auto - [`markdown-pdf.type`](#markdown-pdftype-1)auto - [`markdown-pdf.convertOnSave`](#markdown-pdfconvertonsave-1)auto - [`markdown-pdf.convertOnSaveExclude`](#markdown-pdfconvertonsaveexclude-1)auto - [`markdown-pdf.outputDirectory`](#markdown-pdfoutputdirectory-1)auto - [`markdown-pdf.outputDirectoryRelativePathFile`](#markdown-pdfoutputdirectoryrelativepathfile-1)auto - [Styles options](#styles-options-1)auto - [`markdown-pdf.styles`](#markdown-pdfstyles-1)auto - [`markdown-pdf.stylesRelativePathFile`](#markdown-pdfstylesrelativepathfile-1)auto - [`markdown-pdf.includeDefaultStyles`](#markdown-pdfincludedefaultstyles-1)auto - [Syntax highlight options](#syntax-highlight-options-1)auto - [`markdown-pdf.highlight`](#markdown-pdfhighlight-1)auto - [`markdown-pdf.highlightStyle`](#markdown-pdfhighlightstyle-1)auto - [Markdown options](#markdown-options-1)auto - [`markdown-pdf.breaks`](#markdown-pdfbreaks-1)auto - [Emoji options](#emoji-options-1)auto - [`markdown-pdf.emoji`](#markdown-pdfemoji-1)auto - [Configuration options](#configuration-options-1)auto - [`markdown-pdf.executablePath`](#markdown-pdfexecutablepath-1)auto - [Common Options](#common-options-1)auto - [`markdown-pdf.scale`](#markdown-pdfscale-1)auto - [PDF options](#pdf-options-1)auto - [`markdown-pdf.displayHeaderFooter`](#markdown-pdfdisplayheaderfooter-1)auto - [`markdown-pdf.headerTemplate`](#markdown-pdfheadertemplate-1)auto - [`markdown-pdf.footerTemplate`](#markdown-pdffootertemplate-1)auto - [`markdown-pdf.printBackground`](#markdown-pdfprintbackground-1)auto - [`markdown-pdf.orientation`](#markdown-pdforientation-1)auto - [`markdown-pdf.pageRanges`](#markdown-pdfpageranges-1)auto - [`markdown-pdf.format`](#markdown-pdfformat-1)auto - [`markdown-pdf.width`](#markdown-pdfwidth-1)auto - [`markdown-pdf.height`](#markdown-pdfheight-1)auto - [`markdown-pdf.margin.top`](#markdown-pdfmargintop-1)auto - [`markdown-pdf.margin.bottom`](#markdown-pdfmarginbottom-1)auto - [`markdown-pdf.margin.right`](#markdown-pdfmarginright-1)auto - [`markdown-pdf.margin.left`](#markdown-pdfmarginleft-1)auto - [PNG JPEG options](#png-jpeg-options-1)auto - [`markdown-pdf.quality`](#markdown-pdfquality-1)auto - [`markdown-pdf.clip.x`](#markdown-pdfclipx-1)auto - [`markdown-pdf.clip.y`](#markdown-pdfclipy-1)auto - [`markdown-pdf.clip.width`](#markdown-pdfclipwidth-1)auto - [`markdown-pdf.clip.height`](#markdown-pdfclipheight-1)auto - [`markdown-pdf.omitBackground`](#markdown-pdfomitbackground-1)auto - [PlantUML options](#plantuml-options-1)auto - [`markdown-pdf.plantumlOpenMarker`](#markdown-pdfplantumlopenmarker-1)auto - [`markdown-pdf.plantumlCloseMarker`](#markdown-pdfplantumlclosemarker-1)auto - [`markdown-pdf.plantumlServer`](#markdown-pdfplantumlserver-1)auto - [markdown-it-include options](#markdown-it-include-options-1)auto - [`markdown-pdf.markdown-it-include.enable`](#markdown-pdfmarkdown-it-includeenable-1)auto - [mermaid options](#mermaid-options-1)auto - [`markdown-pdf.mermaidServer`](#markdown-pdfmermaidserver-1)auto - [FAQ](#faq-4)auto - [How can I change emoji size ?](#how-can-i-change-emoji-size--1)auto - [Auto guess encoding of files](#auto-guess-encoding-of-files-1)auto - [Output directory](#output-directory-1)auto - [Page Break](#page-break-1)auto - [[Source](https://github.com/yzane/vscode-markdown-pdf)](#sourcehttpsgithubcomyzanevscode-markdown-pdf)auto- [<========()========>](#)auto- [194.WallabyJs.quokka-vscode](#194wallabyjsquokka-vscode)auto- [Rapid JavaScript Prototyping in your Editor](#rapid-javascript-prototyping-in-your-editor)auto - [Quokka.js is a developer productivity tool for rapid JavaScript / TypeScript prototyping. Runtime values are updated and displayed in your IDE next to your code, as you type.](#quokkajs-is-a-developer-productivity-tool-for-rapid-javascript--typescript-prototyping-runtime-values-are-updated-and-displayed-in-your-ide-next-to-your-code-as-you-type)auto - [Quick Start](#quick-start)auto - [Live Feedback](#live-feedback)auto - [Live Code Coverage](#live-code-coverage)auto - [Value Explorer](#value-explorer)auto - [Auto-Expand Value Explorer Objects {#auto-expand-value-explorer-objects .vsc-doc .jb-doc style="display: block;"}](#auto-expand-value-explorer-objects-auto-expand-value-explorer-objects-vsc-doc-jb-doc-styledisplay-block)auto - [VS Code Live Share Integration {#live-share-integration .vsc-doc style="display: block;"}](#vs-code-live-share-integration-live-share-integration-vsc-doc-styledisplay-block)auto - [How does it work?](#how-does-it-work)auto - [Interactive Examples](#interactive-examples)auto - [Live Comments](#live-comments)auto - [Live comment snippet](#live-comment-snippet)auto - [Live Value Display](#live-value-display)auto - [Show Value](#show-value)auto - [Copy Value](#copy-value)auto - [Project Files Import](#project-files-import)auto - [Quick Package Install](#quick-package-install)auto - [Live Performance Testing](#live-performance-testing)auto - [Run on Save/Run Once](#run-on-saverun-once)auto - [Runtime](#runtime)auto - [Browser-like Runtime](#browser-like-runtime)auto - [Configuration](#configuration-7)auto - [Plugins](#plugins)auto - [Examples](#examples-1)auto - [Questions and issues](#questions-and-issues)auto- [<========(Browser Preview)========>](#browser-preview)auto- [Features](#features-25)auto- [<========( Microsoft Edge Tools)========>](#-microsoft-edge-tools)auto- [Microsoft Edge Tools for VS Code - Visual Studio Marketplace](#microsoft-edge-tools-for-vs-code---visual-studio-marketplace)auto - [Supported Features](#supported-features)auto - [Using the Extension](#using-the-extension)auto - [Getting Started](#getting-started)auto - [Changing Extension Settings](#changing-extension-settings)auto - [Turning on Network Inspection](#turning-on-network-inspection)auto - [Turning on Headless Mode](#turning-on-headless-mode)auto - [Using the tools](#using-the-tools)auto - [Opening source files from the Elements tool](#opening-source-files-from-the-elements-tool)auto - [Debug Configuration](#debug-configuration)auto - [Other optional launch config fields](#other-optional-launch-config-fields)auto - [Sourcemaps](#sourcemaps)auto - [Ionic/gulp-sourcemaps note](#ionicgulp-sourcemaps-note)auto - [Launching the browser via the side bar view](#launching-the-browser-via-the-side-bar-view)auto - [Launching the browser manually](#launching-the-browser-manually)auto - [Attaching automatically when launching the browser for debugging](#attaching-automatically-when-launching-the-browser-for-debugging)auto - [Data/Telemetry](#datatelemetry)auto - [[Source](https://marketplace.visualstudio.com/items?itemName=ms-edgedevtools.vscode-edge-devtools)](#sourcehttpsmarketplacevisualstudiocomitemsitemnamems-edgedevtoolsvscode-edge-devtools)auto- [<========( Turbo Console Log)========>](#-turbo-console-log)auto- [Turbo Console Log](#turbo-console-log)auto - [Main Functionality](#main-functionality)auto - [Features](#features-26)auto- [<========(Regex Previewer - Visual Studio Marketplace)========>](#regex-previewer---visual-studio-marketplace)auto- [Regex Previewer - Visual Studio Marketplace](#regex-previewer---visual-studio-marketplace)auto - [Features](#features-27)auto - [[Source](https://marketplace.visualstudio.com/items?itemName=chrmarti.regex)](#sourcehttpsmarketplacevisualstudiocomitemsitemnamechrmartiregex)auto- [<========(JavaScript Snippet Pack)========>](#javascript-snippet-pack)auto- [JavaScript Snippet Pack - Visual Studio Marketplace](#javascript-snippet-pack---visual-studio-marketplace)auto - [JavaScript Snippet Pack for Visual Studio Code](#javascript-snippet-pack-for-visual-studio-code)auto - [Usage](#usage-15)auto - [Console](#console)auto - [\[cd\] console.dir](#\cd\-consoledir)auto - [\[ce\] console.error](#\ce\-consoleerror)auto - [\[ci\] console.info](#\ci\-consoleinfo)auto - [\[cl\] console.log](#\cl\-consolelog)auto - [\[cw\] console.warn](#\cw\-consolewarn)auto - [\[de\] debugger](#\de\-debugger)auto - [DOM](#dom)auto - [\[ae\] addEventListener](#\ae\-addeventlistener)auto - [\[ac\] appendChild](#\ac\-appendchild)auto - [\[rc\] removeChild](#\rc\-removechild)auto - [\[cel\] createElement](#\cel\-createelement)auto - [\[cdf\] createDocumentFragment](#\cdf\-createdocumentfragment)auto - [\[ca\] classList.add](#\ca\-classlistadd)auto - [\[ct\] classList.toggle](#\ct\-classlisttoggle)auto - [\[cr\] classList.remove](#\cr\-classlistremove)auto - [\[gi\] getElementById](#\gi\-getelementbyid)auto - [\[gc\] getElementsByClassName](#\gc\-getelementsbyclassname)auto - [\[gt\] getElementsByTagName](#\gt\-getelementsbytagname)auto - [\[ga\] getAttribute](#\ga\-getattribute)auto - [\[sa\] setAttribute](#\sa\-setattribute)auto - [\[ra\] removeAttribute](#\ra\-removeattribute)auto - [\[ih\] innerHTML](#\ih\-innerhtml)auto - [\[tc\] textContent](#\tc\-textcontent)auto - [\[qs\] querySelector](#\qs\-queryselector)auto - [\[qsa\] querySelectorAll](#\qsa\-queryselectorall)auto - [Loop](#loop)auto - [\[fe\] forEach](#\fe\-foreach)auto - [Function](#function)auto - [\[fn\] function](#\fn\-function)auto - [\[afn\] anonymous function](#\afn\-anonymous-function)auto - [\[pr\] prototype](#\pr\-prototype)auto - [\[iife\] immediately-invoked function expression](#\iife\-immediately-invoked-function-expression)auto - [\[call\] function call](#\call\-function-call)auto - [\[apply\] function apply](#\apply\-function-apply)auto - [\[ofn\] function as a property of an object](#\ofn\-function-as-a-property-of-an-object)auto - [JSON](#json)auto - [\[jp\] JSON.parse](#\jp\-jsonparse)auto - [\[js\] JSON.stringify](#\js\-jsonstringify)auto - [Timer](#timer)auto - [\[si\] setInterval](#\si\-setinterval)auto - [\[st\] setTimeout](#\st\-settimeout)auto - [Misc](#misc)auto - [\[us\] use strict](#\us\-use-strict)auto - [\[al\] alert](#\al\-alert)auto - [\[co\] confirm](#\co\-confirm)auto - [\[pm\] prompt](#\pm\-prompt)auto- [<========(Node.js Exec)========>](#nodejs-exec)auto- [Node.js Exec - Visual Studio Marketplace](#nodejs-exec---visual-studio-marketplace)auto - [Execute the current file or your selected code with node.js.](#execute-the-current-file-or-your-selected-code-with-nodejs)auto - [Usage](#usage-16)auto - [Configuration](#configuration-8)auto - [The folloing options need to set the legacyMode off](#the-folloing-options-need-to-set-the-legacymode-off)auto - [How it works](#how-it-works-1)auto- [<========(Search Editor)========>](#search-editor)auto- [Search Editor: Apply Changes - Visual Studio Marketplace](#search-editor-apply-changes---visual-studio-marketplace)auto - [Known Limitations](#known-limitations)auto - [Keybindings](#keybindings-1)auto - [[Source](https://marketplace.visualstudio.com/items?itemName=jakearl.search-editor-apply-changes)](#sourcehttpsmarketplacevisualstudiocomitemsitemnamejakearlsearch-editor-apply-changes)auto- [<========(Node TDD)========>](#node-tdd)auto- [Node TDD - Visual Studio Marketplace](#node-tdd---visual-studio-marketplace)auto - [Features](#features-28)auto - [Settings](#settings-5)auto - [Commands](#commands-6)auto - [Limitations and known issues](#limitations-and-known-issues)auto- [<=============(Power Tools)=============>](#power-tools)auto- [- Visual Studio Marketplace](#--visual-studio-marketplace)auto - [Install \[[↑](#table-of-contents)\]](#install-\↑table-of-contents\)auto - [How to use \[[↑](#table-of-contents)\]](#how-to-use-\↑table-of-contents\)auto - [Apps \[[↑](#how-to-use-)\]](#apps-\↑how-to-use-\)auto - [Buttons \[[↑](#how-to-use-)\]](#buttons-\↑how-to-use-\)auto - [Commands \[[↑](#how-to-use-)\]](#commands-\↑how-to-use-\)auto - [Events \[[↑](#how-to-use-)\]](#events-\↑how-to-use-\)auto - [Jobs \[[↑](#how-to-use-)\]](#jobs-\↑how-to-use-\)auto - [Scripts \[[↑](#how-to-use-)\]](#scripts-\↑how-to-use-\)auto - [Startups \[[↑](#how-to-use-)\]](#startups-\↑how-to-use-\)auto - [Tools \[[↑](#how-to-use-)\]](#tools-\↑how-to-use-\)auto - [Values \[[↑](#how-to-use-)\]](#values-\↑how-to-use-\)auto - [Documentation \[[↑](#table-of-contents)\]](#documentation-\↑table-of-contents\)auto- [<========()========>](#-1)auto- [<========()========>](#-2)auto- [<========()========>](#-3)auto- [<========()========>](#-4)auto- [<========()========>](#-5)auto- [<========()========>](#-6)auto- [<========()========>](#-7)auto- [<========()========>](#-8)auto- [<========()========>](#-9)auto- [<========()========>](#-10)auto- [<========()========>](#-11)auto- [<========()========>](#-12)auto- [<========()========>](#-13)auto- [<========()========>](#-14)auto- [<========()========>](#-15)autoauto<!-- /TOC -->
<div class="page"/>
## Features
Supports the following features
- [Syntax highlighting](https://highlightjs.org/static/demo/)
- [emoji](https://www.webfx.com/tools/emoji-cheat-sheet/)
- [markdown-it-checkbox](https://github.com/mcecot/markdown-it-checkbox)
- [markdown-it-container](https://github.com/markdown-it/markdown-it-container)
- [markdown-it-include](https://github.com/camelaissani/markdown-it-include)
- [PlantUML](https://plantuml.com/)
- [markdown-it-plantuml](https://github.com/gmunguia/markdown-it-plantuml)
- [mermaid](https://mermaid-js.github.io/mermaid/)
Sample files
- [pdf](sample/README.pdf)
- [html](sample/README.html)
- [png](sample/README.png)
- [jpeg](sample/README.jpeg)
### markdown-it-container
INPUT
::: warning
here be dragons
:::
OUTPUThtml
here be dragons
### markdown-it-plantuml
INPUT
@startuml
Bob -[#red]> Alice : hello
Alice -[#0000FF]->Bob : ok
@enduml
OUTPUT

### markdown-it-include
Include markdown fragment files: `:
.
├── [plugins]
│ └── README.md
├── CHANGELOG.md
└── README.md
INPUT
README Content
:Plugins
:Changelog
OUTPUT
Content of README.md
Content of plugins/README.md
Content of CHANGELOG.md
### mermaid
INPUT
<pre>mermaid
stateDiagram
[] --> First
state First {
[] --> second
second --> [*]
}
``
</pre>
OUTPUT

## Install
Chromium download starts automatically when Markdown PDF is installed and Markdown file is first opened with Visual Studio Code.
However, it is time-consuming depending on the environment because of its large size (~ 170Mb Mac, ~ 282Mb Linux, ~ 280Mb Win).
During downloading, the messageInstalling Chromium is displayed in the status bar.
If you are behind a proxy, set thehttp.proxy option to settings.json and restart Visual Studio Code.
If the download is not successful or you want to avoid downloading every time you upgrade Markdown PDF, please specify the installed [Chrome](https://www.google.co.jp/chrome/) or 'Chromium' with [markdown-pdf.executablePath](#markdown-pdfexecutablepath) option.
<div class="page"/>
## Usage
### Command Palette
1. Open the Markdown file
1. PressF1 orCtrl+Shift+P 1. Typeexport and select below
-markdown-pdf: Export (settings.json) -markdown-pdf: Export (pdf) -markdown-pdf: Export (html) -markdown-pdf: Export (png) -markdown-pdf: Export (jpeg) -markdown-pdf: Export (all: pdf, html, png, jpeg) 
### Menu
1. Open the Markdown file
1. Right click and select below
-markdown-pdf: Export (settings.json) -markdown-pdf: Export (pdf) -markdown-pdf: Export (html) -markdown-pdf: Export (png) -markdown-pdf: Export (jpeg) -markdown-pdf: Export (all: pdf, html, png, jpeg) 
### Auto convert
1. Add"markdown-pdf.convertOnSave": true` option to settings.json
1. Restart Visual Studio Code
1. Open the Markdown file
1. Auto convert on save
## Extension Settings
Visual Studio Code User and Workspace Settings
1. Select File > Preferences > UserSettings or Workspace Settings
1. Find markdown-pdf settings in the Default Settings
1. Copy markdown-pdf.* settings
1. Paste to the settings.json**, and change the value
## Options
### List
| Category | Option name | Configuration scope |
| ----------------------------------------------------------- | -------------------------------------------------------------------------------------------- | --------------------------------------------------------------------------------------------------------------------- |
| Save options | markdown-pdf.type | |
| | markdown-pdf.convertOnSave | |
| | markdown-pdf.convertOnSaveExclude | |
| | markdown-pdf.outputDirectory | |
| | markdown-pdf.outputDirectoryRelativePathFile | |
| Styles options | markdown-pdf.styles | |
| | markdown-pdf.stylesRelativePathFile | |
| | markdown-pdf.includeDefaultStyles | |
| Syntax highlight options | markdown-pdf.highlight | |
| | markdown-pdf.highlightStyle | |
| Markdown options | markdown-pdf.breaks | |
| Emoji options | markdown-pdf.emoji | |
| Configuration options | markdown-pdf.executablePath | |
| Common Options | markdown-pdf.scale | |
| PDF options | markdown-pdf.displayHeaderFooter | resource |
| | markdown-pdf.headerTemplate | resource |
| | markdown-pdf.footerTemplate | resource |
| | markdown-pdf.printBackground | resource |
| | markdown-pdf.orientation | resource |
| | markdown-pdf.pageRanges | resource |
| | markdown-pdf.format | resource |
| | markdown-pdf.width | resource |
| | markdown-pdf.height | resource |
| | markdown-pdf.margin.top | resource |
| | markdown-pdf.margin.bottom | resource |
| | markdown-pdf.margin.right | resource |
| | markdown-pdf.margin.left | resource |
| PNG JPEG options | markdown-pdf.quality | |
| | markdown-pdf.clip.x | |
| | markdown-pdf.clip.y | |
| | markdown-pdf.clip.width | |
| | markdown-pdf.clip.height | |
| | markdown-pdf.omitBackground | |
| PlantUML options | markdown-pdf.plantumlOpenMarker | |
| | markdown-pdf.plantumlCloseMarker | |
| | markdown-pdf.plantumlServer | |
| markdown-it-include options | markdown-pdf.markdown-it-include.enable | |
| mermaid options | markdown-pdf.mermaidServer | |
### Save options
#### markdown-pdf.type
- Output format: pdf, html, png, jpeg
- Multiple output formats support
- Default: pdf
javascript
"markdown-pdf.type": [
"pdf",
"html",
"png",
"jpeg"
],
#### markdown-pdf.convertOnSave
- Enable Auto convert on save
- boolean. Default: false
- To apply the settings, you need to restart Visual Studio Code
#### markdown-pdf.convertOnSaveExclude
- Excluded file name of convertOnSave option
javascript
"markdown-pdf.convertOnSaveExclude": [
"^work",
"work.md$",
"work|test",
"[0-9][0-9][0-9][0-9]-work",
"work\\test" // All '\' need to be written as '\\' (Windows)
],
#### markdown-pdf.outputDirectory
- Output Directory
- All \ need to be written as \\ (Windows)
javascript
"markdown-pdf.outputDirectory": "C:\\work\\output",
- Relative path
- If you open the Markdown file, it will be interpreted as a relative path from the file
- If you open a folder, it will be interpreted as a relative path from the root folder
- If you open the workspace, it will be interpreted as a relative path from the each root folder
- See Multi-root Workspaces
javascript
"markdown-pdf.outputDirectory": "output",
- Relative path (home directory)
- If path starts with ~, it will be interpreted as a relative path from the home directory
javascript
"markdown-pdf.outputDirectory": "~/output",
- If you set a directory with a relative path, it will be created if the directory does not exist
- If you set a directory with an absolute path, an error occurs if the directory does not exist
#### markdown-pdf.outputDirectoryRelativePathFile
- If markdown-pdf.outputDirectoryRelativePathFile option is set to true, the relative path set with markdown-pdf.outputDirectory is interpreted as relative from the file
- It can be used to avoid relative paths from folders and workspaces
- boolean. Default: false
### Styles options
#### markdown-pdf.styles
- A list of local paths to the stylesheets to use from the markdown-pdf
- If the file does not exist, it will be skipped
- All \ need to be written as \\ (Windows)
javascript
"markdown-pdf.styles": [
"C:\\Users\\<USERNAME>\\Documents\\markdown-pdf.css",
"/home/<USERNAME>/settings/markdown-pdf.css",
],
- Relative path
- If you open the Markdown file, it will be interpreted as a relative path from the file
- If you open a folder, it will be interpreted as a relative path from the root folder
- If you open the workspace, it will be interpreted as a relative path from the each root folder
- See Multi-root Workspaces
javascript
"markdown-pdf.styles": [
"markdown-pdf.css",
],
- Relative path (home directory)
- If path starts with ~, it will be interpreted as a relative path from the home directory
javascript
"markdown-pdf.styles": [
"~/.config/Code/User/markdown-pdf.css"
],
- Online CSS (https://xxx/xxx.css) is applied correctly for JPG and PNG, but problems occur with PDF #67
javascript
"markdown-pdf.styles": [
"https://xxx/markdown-pdf.css"
],
#### markdown-pdf.stylesRelativePathFile
- If markdown-pdf.stylesRelativePathFile option is set to true, the relative path set with markdown-pdf.styles is interpreted as relative from the file
- It can be used to avoid relative paths from folders and workspaces
- boolean. Default: false
#### markdown-pdf.includeDefaultStyles
- Enable the inclusion of default Markdown styles (VSCode, markdown-pdf)
- boolean. Default: true
### Syntax highlight options
#### markdown-pdf.highlight
- Enable Syntax highlighting
- boolean. Default: true
#### markdown-pdf.highlightStyle
- Set the style file name. for example: github.css, monokai.css ...
- file name list
- demo site : https://highlightjs.org/static/demo/
javascript
"markdown-pdf.highlightStyle": "github.css",
### Markdown options
#### markdown-pdf.breaks
- Enable line breaks
- boolean. Default: false
### Emoji options
#### markdown-pdf.emoji
- Enable emoji. EMOJI CHEAT SHEET
- boolean. Default: true
### Configuration options
#### markdown-pdf.executablePath
- Path to a Chromium or Chrome executable to run instead of the bundled Chromium
- All \ need to be written as \\ (Windows)
- To apply the settings, you need to restart Visual Studio Code
javascript
"markdown-pdf.executablePath": "C:\\Program Files (x86)\\Google\\Chrome\\Application\\chrome.exe"
### Common Options
#### markdown-pdf.scale
- Scale of the page rendering
- number. default: 1
javascript
"markdown-pdf.scale": 1
### PDF options
- pdf only. puppeteer page.pdf options
#### markdown-pdf.displayHeaderFooter
- Enable display header and footer
- boolean. Default: true
#### markdown-pdf.headerTemplate
#### markdown-pdf.footerTemplate
- HTML template for the print header and footer
- <span class='date'></span> : formatted print date
- <span class='title'></span> : markdown file name
- <span class='url'></span> : markdown full path name
- <span class='pageNumber'></span> : current page number
- <span class='totalPages'></span> : total pages in the document
javascript
"markdown-pdf.headerTemplate": "<div style=\"font-size: 9px; margin-left: 1cm;\"> <span class='title'></span></div> <div style=\"font-size: 9px; margin-left: auto; margin-right: 1cm; \"> <span class='date'></span></div>",
javascript
"markdown-pdf.footerTemplate": "<div style=\"font-size: 9px; margin: 0 auto;\"> <span class='pageNumber'></span> / <span class='totalPages'></span></div>",
#### markdown-pdf.printBackground
- Print background graphics
- boolean. Default: true
#### markdown-pdf.orientation
- Paper orientation
- portrait or landscape
- Default: portrait
#### markdown-pdf.pageRanges
- Paper ranges to print, e.g., '1-5, 8, 11-13'
- Default: all pages
javascript
"markdown-pdf.pageRanges": "1,4-",
#### markdown-pdf.format
- Paper format
- Letter, Legal, Tabloid, Ledger, A0, A1, A2, A3, A4, A5, A6
- Default: A4
javascript
"markdown-pdf.format": "A4",
#### markdown-pdf.width
#### markdown-pdf.height
- Paper width / height, accepts values labeled with units(mm, cm, in, px)
- If it is set, it overrides the markdown-pdf.format option
javascript
"markdown-pdf.width": "10cm",
"markdown-pdf.height": "20cm",
#### markdown-pdf.margin.top
#### markdown-pdf.margin.bottom
#### markdown-pdf.margin.right
#### markdown-pdf.margin.left
- Paper margins.units(mm, cm, in, px)
javascript
"markdown-pdf.margin.top": "1.5cm",
"markdown-pdf.margin.bottom": "1cm",
"markdown-pdf.margin.right": "1cm",
"markdown-pdf.margin.left": "1cm",
### PNG JPEG options
- png and jpeg only. puppeteer page.screenshot options
#### markdown-pdf.quality
- jpeg only. The quality of the image, between 0-100. Not applicable to png images
javascript
"markdown-pdf.quality": 100,
#### markdown-pdf.clip.x
#### markdown-pdf.clip.y
#### markdown-pdf.clip.width
#### markdown-pdf.clip.height
- An object which specifies clipping region of the page
- number
javascript
// x-coordinate of top-left corner of clip area
"markdown-pdf.clip.x": 0,
// y-coordinate of top-left corner of clip area
"markdown-pdf.clip.y": 0,
// width of clipping area
"markdown-pdf.clip.width": 1000,
// height of clipping area
"markdown-pdf.clip.height": 1000,
#### markdown-pdf.omitBackground
- Hides default white background and allows capturing screenshots with transparency
- boolean. Default: false
### PlantUML options
#### markdown-pdf.plantumlOpenMarker
- Oppening delimiter used for the plantuml parser.
- Default: @startuml
#### markdown-pdf.plantumlCloseMarker
- Closing delimiter used for the plantuml parser.
- Default: @enduml
#### markdown-pdf.plantumlServer
- Plantuml server. e.g. http://localhost:8080
- Default: http://www.plantuml.com/plantuml
- For example, to run Plantuml Server locally #139 :
docker run -d -p 8080:8080 plantuml/plantuml-server:jetty
plantuml/plantuml-server - Docker Hub
### markdown-it-include options
#### markdown-pdf.markdown-it-include.enable
- Enable markdown-it-include.
- boolean. Default: true
### mermaid options
#### markdown-pdf.mermaidServer
- mermaid server
- Default: https://unpkg.com/mermaid/dist/mermaid.min.js
## FAQ
### How can I change emoji size ?
1. Add the following to your stylesheet which was specified in the markdown-pdf.styles
css
.emoji {
height: 2em;
}
### Auto guess encoding of files
Using files.autoGuessEncoding option of the Visual Studio Code is useful because it automatically guesses the character code. See files.autoGuessEncoding
javascript
"files.autoGuessEncoding": true,
### Output directory
If you always want to output to the relative path directory from the Markdown file.
For example, to output to the "output" directory in the same directory as the Markdown file, set it as follows.
javascript
"markdown-pdf.outputDirectory" : "output",
"markdown-pdf.outputDirectoryRelativePathFile": true,
### Page Break
Please use the following to insert a page break.
html
<div class="page" />
## Known Issues
### markdown-pdf.styles option
- Online CSS (https://xxx/xxx.css) is applied correctly for JPG and PNG, but problems occur with PDF. #67
## Release Notes
### <========(Open in External App)========>
VSCode is a very excellent editor, but sometime I prefer to use external application to work with some files. For example, I like to use typora to edit the markdown files. Usually, I will right click to the file, and select Reveal in File Explorer , then open the file using external application.
But, with this extension, you can do it more simply. Just right click to the file, and select Open in External App, that file would be opened by system default application. You can also use this way to open .psd files with photoshop, .html files with browser, and so on...
Extensions: Install Extensions command from Command Palette.YuTengjing.open-in-external-app into the search form and install.Read the extension installation guide for more details.
Via custom configuration, you can make extensions more powerful. For example, to see the rendering differences, You can open one HTML in chrome and Firefox at the same time.
Example configuration:
{
"openInExternalApp.openMapper": [
{
// represent file extension name
"extensionName": "html",
// the external applications to open the file which extension name is html
"apps": [
// openCommand can be shell command or the complete executable application path
// title will be shown in the drop list if there are several apps
{
"title": "chrome",
"openCommand": "C:\\Program Files (x86)\\Google\\Chrome\\Application\\chrome.exe"
},
{
"title": "firefox",
"openCommand": "C:\\Program Files\\Firefox Developer Edition\\firefox.exe",
// open in firefox under private mode
"args": ["-private-window"]
}
]
},
{
"extensionName": "tsx",
// apps can be Object array or just is openCommand
// the code is command you can access from shell
"apps": "code"
},
{
"extensionName": "psd",
"apps": "/path/to/photoshop.exe"
}
]
}
In VSCode, Right-clicking is different from right-clicking while holding alt key. If you just right click the file, you will see the command Open in External App, but if you right click file while holding alt key, you will see the command Open in Multiple External Apps.
This extension use two ways to open file in external applications.
This package has one limit that can't open a file which is also made by electron. For example, you can't open md file in typora using this package. The openCommand, args configuration item is also supported by this package. When isElectronApp: false(by default), extension will use this way.
vscode.env.openExternal(target: Uri)This API has one limit that can't open file path which includes Non-ascii characters, but support open file in application which is made by electron. This API can only pass one argument target, so openCommand and args configuration item is not work.
If you want to open file in application which is made by electron, you can choose one of two ways:
don not config it in VSCode settings, and set the default application of your operation system to open that file format.
using isElectronApp option:
{
"extensionName": "md",
"isElectronApp": true,
}
multiple apps example:
{
"extensionName": "md",
"apps": [
{
"title": "typora",
"isElectronApp": true,
// following config item is not work
// "openCommand": "/path/to/typora.exe",
// "args": ["--slient"]
},
{
"title": "idea",
"extensionName": "md",
"openCommand": "/path/to/idea.exe",
"args": ["--slient"],
}
]
}
A wrapper around node-change-case for Visual Studio Code. Quickly change the case of the current selection or current word.
If only one word is selected, the extension.changeCase.commands command gives you a preview of each option:
change-case also works with multiple cursors:
Note: Please read the documentation on how to use multiple cursors in Visual Studio Code.
Launch VS Code Quick Open (Ctrl/Cmd+P), paste the following command, and press enter.
ext install change-case
extension.changeCase.commands: List all Change Case commands, with preview if only one word is selectedextension.changeCase.camel: Change Case 'camel': Convert to a string with the separators denoted by having the next letter capitalisedextension.changeCase.constant: Change Case 'constant': Convert to an upper case, underscore separated stringextension.changeCase.dot: Change Case 'dot': Convert to a lower case, period separated stringextension.changeCase.kebab: Change Case 'kebab': Convert to a lower case, dash separated string (alias for param case)extension.changeCase.lower: Change Case 'lower': Convert to a string in lower caseextension.changeCase.lowerFirst: Change Case 'lowerFirst': Convert to a string with the first character lower casedextension.changeCase.no: Convert the string without any casing (lower case, space separated)extension.changeCase.param: Change Case 'param': Convert to a lower case, dash separated stringextension.changeCase.pascal: Change Case 'pascal': Convert to a string denoted in the same fashion as camelCase, but with the first letter also capitalisedextension.changeCase.path: Change Case 'path': Convert to a lower case, slash separated stringextension.changeCase.sentence: Change Case 'sentence': Convert to a lower case, space separated stringextension.changeCase.snake: Change Case 'snake': Convert to a lower case, underscore separated stringextension.changeCase.swap: Change Case 'swap': Convert to a string with every character case reversedextension.changeCase.title: Change Case 'title': Convert to a space separated string with the first character of every word upper casedextension.changeCase.upper: Change Case 'upper': Convert to a string in upper caseextension.changeCase.upperFirst: Change Case 'upperFirst': Convert to a string with the first character upper casedCreate an issue, or ping @waynemaurer on Twitter.
Easily insert and remove console.log statements, by @whtouche
This extension is available for free in the Visual Studio Code Marketplace
VS Code comes with a ton of features for Node.js development out of the box. This extension pack adds more!
These are some of my favorite extensions to make Node.js development easier and fun.
package.json.Open a PR and I'd be happy to take a look.
Enjoy!
Install via VS Code Marketplace
Helps you identify reoccurring CSS class name combinations in your markup. This is especially useful if you are working with an utility-first CSS framework like TailwindCSS, Tachyons,…
Class names are highlighted if they have more than 3 unique classes and this combination of classes appears more than 3 times in the current document. These numbers can be changed in the settings.
Hovering over classes highlights all other elements with the same combination of classes.
The order of the class names does not matter.
See CHANGELOG.
Extension for Visual Studio Code - JavaScript Snippets for fast development
How fast do you want to be to transform an idea into code?
It's not an extension that forces you to remember some "custom prefix" to call the snippets. Treedbox Javascript was designed to serve snippets in the most logical way, delivering the most commons code structures and combinations to make your combo's code speedy and powerful.
Javascript snippets Visual Studio Code Extension for fast development.
By: Jonimar Marques Policarpo at Treedbox
Screenshot 1: Using snippet for fetch DELETE:
Screenshot 2: Accessing all fetch snippets:
Launch VS Code Quick Open (Ctrl+P), paste the following command, and press enter
ext install treedbox.treedboxjavascript
Or search for treedbox in the VS Code Extensions tab.
![]()
GitHub: https://github.com/treedbox/treedboxjavascript
VS Code extension: https://marketplace.visualstudio.com/items?itemName=treedbox.treedboxjavascript
Version 1.0.0: 501 javascript snippets!
fetchGET, fetchPOST, fetchPUT, fetchDELETE;URLcreateObjectURL, URLrevokeObjectURL;parseInt.Including an extra complete functions as MathRandomCompleteFunc or randomCompleteFunc:
const random = (min,max) => Math.floor(Math.random() * (max - min + 1)) + min
and many others Extras that you will find out when you need it :)
in a .js file or in a .html file, between the HTML tag <script></script>, type: fetchblob and press "Tab/Enter" to generate:
fetch(url)
.then(response => response.blob())
.then(data =>{
console.log('data:',data)
}).catch(error => console.log('ERROR:',error))
Like fetchblob, you have a lot of snippets to help you with import, forEach, map, generator and so on.
https://github.com/treedbox/treedboxjavascript/
Display pdf in VSCode.
To not use sample pdf.
Remove sample pdf called compressed.tracemonkey-pldi-09.pdf.
defaultUrl: {
value: "", // "compressed.tracemonkey-pldi-09.pdf"
kind: OptionKind.VIEWER
},
See CHANGELOG.md.
Please see LICENSE
This VSCode extension gives you superpowers in the form of JavaScript expressions, that can be used to map or sort multi-selections.
Cmd to select multiple regions.Cmd + Shift + P to open the command palette.Type "super" to show a list of available commands;
Custom map function
Type a JavaScript map callback function and press enter. Your function will get applied to each selection.
Map Presets
Pick a preset to use as the map function.
Custom sort function
Type a JavaScript sort comparison function and press enter to sort the selections.
Sort Presets
Pick a preset to use as the sort function.
Custom reduce function
Type a JavaScript reduce function and press enter to output the result after the selections.
Currently, only plaintext and markdown documents are supported, and only two snippets are available;
RT - Inserts the current time, rounded to 15 minutesTD - Calculates the time delta between two timesType a snippet, and the autocompletion menu should appear.
This extension contributes the following settings:
superpowers.mapPresets: List of map presets as an array of objects.
Example:
{
"name": "replace with index",
"function": "(_, i) => i + 1"
}
superpowers.sortPresets: List of sort presets as an array of objects.
Example:
{
"name": "sort by codepoint",
"function": "(a, b) => a.charCodeAt(0) - b.charCodeAt(0)"
}
A VSCode extension that generates README.md files
Created my free logo at LogoMakr.com
Smartly paste for Markdown.
Support Mac/Windows/Linux!.
Paste smart
Smartly paste in markdown by pressing 'Ctrl+Alt+V' ('Cmd+Alt+V' on Mac)
Download file
Use Markdown Download command (Linux or Windows: Ctrl+Alt+D, Mac: Cmd+Alt+D) to download file and insert link code into Markdown.
Ruby tag
Also if you want to write article for learning asian language like Chinese or Japanese, ruby tag(for example:聪明) may be useful. Now a ruby tag snippet are prepare for you, select some text and press 'Ctrl+Alt+T'.
<ruby>聪明<rp>(</rp><rt>pronunciation</rt><rp>)</rp></ruby>
This extension will not get the pronunciation for you in this version. You have to replace 'pronunciation' by yourself.
Insert latex math symbol and emoji
You can insert latex math symbol and emoji to any text file, such as Julia source file.
press 'Ctrl+Alt+\' or input "Insert latex math symbol" in vscode command panel, then input latex symbol name and choose symbol you want.
MarkdownPaste.path
The folder path that image will be saved. Support absolute path and relative path and the following predefined variables
Default value is ./, mean save image in the folder contains current file.
MarkdownPaste.silence
enable/disable showing confirm box while paste image. Set this config option to true, filename confirm box will not be shown while paste image.
Default value is false
MarkdownPaste.enableImgTag
enable/disable using HTML img tag with width and height for pasting image. If this option be enabled, you can input width and height by using <filepath>[,width,height] in filename confirm input box. for example input \abc\filename.png,200,100, then <img src='\abc\filename.png' width='200' height='100' /> will be inserted. Note that if MarkdownPaste.silence be enabled, this option will be not work.
Default value is true
MarkdownPaste.rules
If you want to define your own regex to parse and replace content for pasting text. You can fill the following JSON, and set it to this option.
[{
// rule 1
"regex": "(https?:\/\/.*)", // your javascript style regex
"options": "ig", // regex option
"replace": "[]($1)" // replace string
},
{
// rule 2
"regex": "(https?:\/\/.*)", // your javascript style regex
"options": "ig", // regex option
"replace": "[]($1)" // replace string
},
...
]
The extension will try to test text content by regex defined in this option, if matched it whill replace content by using the TypeScript function string.replace().
Default value is
[{
"regex": "^(?:https?:\/\/)?(?:(?:(?:www\\.?)?youtube\\.com(?:\/(?:(?:watch\\?.*?v=([^&\\s]+).*)|))?))",
"options": "g",
"replace": "[](https://www.youtube.com/watch?v=$1)"
},
{
"regex": "^(https?:\/\/.*)",
"options": "ig",
"replace": "[]($1)"
}]
If you selected some text in editor, then extension will use it as the image file name. If not the image will be saved in this format: "Y-MM-DD-HH-mm-ss.png".
When you editing a markdown, it will pasted as markdown image link format , the imagePath will be resolve to relative path of current markdown file. In other file, it just paste the image's path.
A basic spell checker that works well with camelCase code.
The goal of this spell checker is to help catch common spelling errors while keeping the number of false positives low.
Load a TypeScript, JavaScript, Text, etc. file. Words not in the dictionary files will have a squiggly underline.
To see the list of suggestions:
After positioning the cursor in the word, any of the following should display the list of suggestions:
Quick Fix Editor action command:⌘+ . or Cmd+ .Ctrl+ .Open up VS Code and hit F1 and type ext select install and type code-spell-checker hit enter and reload window to enable.
"cSpell.language": "en" to "cSpell.language": "en-GB"To Enable or Disable spell checking for a file type:
Click on the Spell Checker status in the status bar:
On the Info screen, click the Enable link.
The concept is simple, split camelCase words before checking them against a list of known English words.
I is associated with Input and not HTMLThere are a few special cases to help will common spelling practices for ALL CAPS words.
Trailing s, ing, ies, es, ed are kept with the previous word.
sedIt is possible to add spell check settings into your source code. This is to help with file specific issues that may not be applicable to the entire project.
All settings are prefixed with cSpell: or spell-checker:.
disable -- turn off the spell checker for a section of code.enable -- turn the spell checker back on after it has been turned off.ignore -- specify a list of words to be ignored.words -- specify a list of words to be considered correct and will appear in the suggestions list.ignoreRegExp -- Any text matching the regular expression will NOT be checked for spelling.includeRegExp -- Only text matching the collection of includeRegExp will be checked.enableCompoundWords / disableCompoundWords -- Allow / disallow words like: "stringlength".It is possible to disable / enable the spell checker by adding comments to your code.
/* cSpell:disable *//* spell-checker: disable *//* spellchecker: disable *//* cspell: disable-line *//* cspell: disable-next-line */
/* cSpell:enable *//* spell-checker: enable *//* spellchecker: enable */// cSpell:disable
const wackyWord = ["zaallano", "wooorrdd", "zzooommmmmmmm"];
/* cSpell:enable */
// Nest disable / enable is not Supported
// spell-checker:disable
// It is now disabled.
var liep = 1;
/* cspell:disable */
// It is still disabled
// cSpell:enable
// It is now enabled
const str = "goededag"; // <- will be flagged as an error.
// spell-checker:enable <- doesn't do anything
// cSPELL:DISABLE <-- also works.
// if there isn't an enable, spelling is disabled till the end of the file.
const str = "goedemorgen"; // <- will NOT be flagged as an error.
Ignore allows you the specify a list of words you want to ignore within the document.
// cSpell:ignore zaallano, wooorrdd
// cSpell:ignore zzooommmmmmmm
const wackyWord = ["zaallano", "wooorrdd", "zzooommmmmmmm"];
Note: words defined with ignore will be ignored for the entire file.
The words list allows you to add words that will be considered correct and will be used as suggestions.
// cSpell:words woorxs sweeetbeat
const companyName = "woorxs sweeetbeat";
Note: words defined with words will be used for the entire file.
In some programing language it is common to glue words together.
// cSpell:enableCompoundWords
char * errormessage; // Is ok with cSpell:enableCompoundWords
int errornumber; // Is also ok.
Note: Compound word checking cannot be turned on / off in the same file. The last setting in the file determines the value for the entire file.
By default, the entire document is checked for spelling.
cSpell:disable/ cSpell:enable above allows you to block off sections of the document.
ignoreRegExp and includeRegExp give you the ability to ignore or include patterns of text.
By default the flags gim are added if no flags are given.
The spell checker works in the following way:
includeRegExpexcludeRegExp// cSpell:ignoreRegExp 0x[0-9a-f]+ -- will ignore c style hex numbers
// cSpell:ignoreRegExp /0x[0-9A-F]+/g -- will ignore upper case c style hex numbers.
// cSpell:ignoreRegExp g{5} h{5} -- will only match ggggg, but not hhhhh or 'ggggg hhhhh'
// cSpell:ignoreRegExp g{5}|h{5} -- will match both ggggg and hhhhh
// cSpell:ignoreRegExp /g{5} h{5}/ -- will match 'ggggg hhhhh'
/* cSpell:ignoreRegExp /n{5}/ -- will NOT work as expected because of the ending comment -> */
/*
cSpell:ignoreRegExp /q{5}/ -- will match qqqqq just fine but NOT QQQQQ
*/
// cSpell:ignoreRegExp /[^\s]{40,}/ -- will ignore long strings with no spaces.
// cSpell:ignoreRegExp Email -- this will ignore email like patterns -- see Predefined RegExp expressions
var encodedImage =
"HR+cPzr7XGAOJNurPL0G8I2kU0UhKcqFssoKvFTR7z0T3VJfK37vS025uKroHfJ9nA6WWbHZ/ASn...";
var email1 = "emailaddress@myfancynewcompany.com";
var email2 = "<emailaddress@myfancynewcompany.com>";
Note: ignoreRegExp and includeRegExp are applied to the entire file. They do not start and stop.
In general you should not need to use includeRegExp. But if you are mixing languages then it could come in helpful.
# cSpell:includeRegExp #.*
# cSpell:includeRegExp ("""|''')[^\1]*\1
# only comments and block strings will be checked for spelling.
def sum_it(self, seq):
"""This is checked for spelling"""
variabele = 0
alinea = 'this is not checked'
for num in seq:
# The local state of 'value' will be retained between iterations
variabele += num
yield variabele
Urls1 -- Matches urlsHexDigits -- Matches hex digits: /^x?[0-1a-f]+$/iHexValues -- Matches common hex format like #aaa, 0xfeef, \u0134EscapeCharacters1 -- matches special characters: '\n', '\t' etc.Base641 -- matches base64 blocks of text longer than 40 characters.Email -- matches most email addresses.Everything1 -- By default we match an entire document and remove the excludes.string -- This matches common string formats like '...', "...", and `...`CStyleComment -- These are C Style comments /* */ and //PhpHereDoc -- This matches PHPHereDoc strings.1. These patterns are part of the default include/exclude list for every file.
The spell checker configuration can be controlled via VS Code preferences or cspell.json configuration file.
Order of precedence:
cspell.json.vscode/cspell.jsoncSpell section.You have the option to add you own words to the workspace dictionary. The easiest, is to put your cursor
on the word you wish to add, when you lightbulb shows up, hit Ctrl+. (windows) / Cmd+. (Mac). You will get a list
of suggestions and the option to add the word.
You can also type in a word you want to add to the dictionary: F1 add word -- select Add Word to Dictionary and type in the word you wish to add.
Words added to the dictionary are placed in the cspell.json file in the workspace folder.
Note, the settings in cspell.json will override the equivalent cSpell settings in VS Code's settings.json.
// cSpell Settings
{
// Version of the setting file. Always 0.1
"version": "0.1",
// language - current active spelling language
"language": "en",
// words - list of words to be always considered correct
"words": [
"mkdirp",
"tsmerge",
"githubusercontent",
"streetsidesoftware",
"vsmarketplacebadge",
"visualstudio"
],
// flagWords - list of words to be always considered incorrect
// This is useful for offensive words and common spelling errors.
// For example "hte" should be "the"
"flagWords": [
"hte"
]
}
//-------- Code Spell Checker Configuration --------
// The Language local to use when spell checking. "en", "en-US" and "en-GB" are currently supported by default.
"cSpell.language": "en",
// Controls the maximum number of spelling errors per document.
"cSpell.maxNumberOfProblems": 100,
// Controls the number of suggestions shown.
"cSpell.numSuggestions": 8,
// The minimum length of a word before checking it against a dictionary.
"cSpell.minWordLength": 4,
// Specify file types to spell check.
"cSpell.enabledLanguageIds": [
"csharp",
"go",
"javascript",
"javascriptreact",
"markdown",
"php",
"plaintext",
"typescript",
"typescriptreact",
"yml"
],
// Enable / Disable the spell checker.
"cSpell.enabled": true,
// Display the spell checker status on the status bar.
"cSpell.showStatus": true,
// Words to add to dictionary for a workspace.
"cSpell.words": [],
// Enable / Disable compound words like 'errormessage'
"cSpell.allowCompoundWords": false,
// Words to be ignored and not suggested.
"cSpell.ignoreWords": ["behaviour"],
// User words to add to dictionary. Should only be in the user settings.
"cSpell.userWords": [],
// Specify paths/files to ignore.
"cSpell.ignorePaths": [
"node_modules", // this will ignore anything the node_modules directory
"**/node_modules", // the same for this one
"**/node_modules/**", // the same for this one
"node_modules/**", // Doesn't currently work due to how the current working directory is determined.
"vscode-extension", //
".git", // Ignore the .git directory
"*.dll", // Ignore all .dll files.
"**/*.dll" // Ignore all .dll files
],
// flagWords - list of words to be always considered incorrect
// This is useful for offensive words and common spelling errors.
// For example "hte" should be "the"`
"cSpell.flagWords": ["hte"],
// Set the delay before spell checking the document. Default is 50.
"cSpell.spellCheckDelayMs": 50,
The spell checker includes a set of default dictionaries.
Based upon the programming language, different dictionaries will be loaded.
Here are the default rules: "*" matches any language.
"local" is used to filter based upon the "cSpell.language" setting.
{
"cSpell.languageSettings": [
{ "languageId": '*', "local": 'en', "dictionaries": ['wordsEn'] },
{ "languageId": '*', "local": 'en-US', "dictionaries": ['wordsEn'] },
{ "languageId": '*', "local": 'en-GB', "dictionaries": ['wordsEnGb'] },
{ "languageId": '*', "dictionaries": ['companies', 'softwareTerms', 'misc'] },
{ "languageId": "python", "allowCompoundWords": true, "dictionaries": ["python"]},
{ "languageId": "go", "allowCompoundWords": true, "dictionaries": ["go"] },
{ "languageId": "javascript", "dictionaries": ["typescript", "node"] },
{ "languageId": "javascriptreact", "dictionaries": ["typescript", "node"] },
{ "languageId": "typescript", "dictionaries": ["typescript", "node"] },
{ "languageId": "typescriptreact", "dictionaries": ["typescript", "node"] },
{ "languageId": "html", "dictionaries": ["html", "fonts", "typescript", "css"] },
{ "languageId": "php", "dictionaries": ["php", "html", "fonts", "css", "typescript"] },
{ "languageId": "css", "dictionaries": ["fonts", "css"] },
{ "languageId": "less", "dictionaries": ["fonts", "css"] },
{ "languageId": "scss", "dictionaries": ["fonts", "css"] },
];
}
To add a global dictionary, you will need change your user settings.
In your user settings, you will need to tell the spell checker where to find your word list.
Example adding medical terms, so words like acanthopterygious can be found.
// A List of Dictionary Definitions.
"cSpell.dictionaryDefinitions": [
{ "name": "medicalTerms", "path": "/Users/guest/projects/cSpell-WordLists/dictionaries/medicalterms-en.txt"},
// To specify a path relative to the workspace folder use ${workspaceFolder} or ${workspaceFolder:Name}
{ "name": "companyTerms", "path": "${workspaceFolder}/../company/terms.txt"}
],
// List of dictionaries to use when checking files.
"cSpell.dictionaries": [
"medicalTerms",
"companyTerms"
]
Explained: In this example, we have told the spell checker where to find the word list file. Since it is in the user settings, we have to use absolute paths.
Once the dictionary is defined. We need to tell the spell checker when to use it.
Adding it to cSpell.dictionaries advises the spell checker to always include the medical terms when spell checking.
Note: Adding large dictionary files to be always used will slow down the generation of suggestions.
To add a dictionary at the project level, it needs to be in the cspell.json file.
This file can be either at the project root or in the .vscode directory.
Example adding medical terms, where the terms are checked into the project and we only want to use it for .md files.
{
"dictionaryDefinitions": [
{ "name": "medicalTerms", "path": "./dictionaries/medicalterms-en.txt"},
{ "name": "cities", "path": "./dictionaries/cities.txt"}
],
"dictionaries": [
"cities"
],
"languageSettings": [
{ "languageId": "markdown", "dictionaries": ["medicalTerms"] },
{ "languageId": "plaintext", "dictionaries": ["medicalTerms"] }
]
}
Explained: In this example, two dictionaries were defined: cities and medicalTerms. The paths are relative to the location of the cSpell.json file. This allows for dictionaries to be checked into the project.
The cities dictionary is used for every file type, because it was added to the list to dictionaries. The medicalTerms dictionary is only used when editing markdown or plaintext files.
See: FAQ
The settings viewer is a single-page webapp using MobX, React and TypeScript with TSX.
To speed up development of the settings viewer, it is possible to run the viewer in the browser without needing to debug the extension.
Getting started
from the _settingsViewer directory do the following:
npm installnpm run buildnpm test -- just to make sure everything is working as expectednpm run start:dev -- Re-build and launch dev server.Launching the viewer in a browser:
Open two tabs:
test.html simulates the webview of the extension. It sends and responds to messages from the settings viewer.
localhost:3000 is the interactive viewer.
This extension lets you quickly bring up helpful MDN documentation in the editor by typing //mdn [api];. For example, to see documentation for Object, type //mdn Object;, and to view a method or property, such as Object.assign, type //mdn Object.assign;. Don't forget the semicolon!
Load documentation of top level or global objects:
//mdn [api]; example: //mdn Array;
Load documentation of a method or property:
//mdn [api].[method];
example: //mdn Array.from;
[api] and [method] are case-insensitive, so //mdn array.from; is also fine.
Yes! A search won't happen without it.
//mdn document;
//mdn Object.keys;
//mdn object.values;
//mdn Array.slice;
//mdn array.splice;
js, vue, jsx, ts, tsx
Launch a local development server with live reload feature for static & dynamic pages.
[NOTE: In case if you don't have any .html or .htm file in your workspace then you have to follow method no 4 & 5 to start server.]
Open a project and click to Go Live from the status bar to turn the server on/off.
Right click on a HTML file from Explorer Window and click on Open with Live Server.
.
Open a HTML file and right-click on the editor and click on Open with Live Server.
Hit (alt+L, alt+O) to Open the Server and (alt+L, alt+C) to Stop the server (You can change the shortcut form keybinding). [On MAC, cmd+L, cmd+O and cmd+L, cmd+C]
Open the Command Pallete by pressing F1 or ctrl+shift+P and type Live Server: Open With Live Server to start a server or type Live Server: Stop Live Server to stop a server.
Body or head)https Support.Open VSCode and type ctrl+P, type ext install ritwickdey.liveserver.
All settings are now listed here Settings Docs.
![]()
This extension extends HTML and ejs code editing with Go To Definition and Go To Symbol in Workspace support for css/scss/less (classes and IDs) found in strings within the source code.
This was heavily inspired by a similar feature in Brackets called CSS Inline Editors.
The extension supports all the normal capabilities of symbol definition tracking, but does it for css selectors (classes, IDs and HTML tags). This includes:
Ctrl+Shift+F12)F12)Ctrl+hover)In addition, it supports the Symbol Provider so you can quickly jump to the right CSS/SCSS/LESS code if you already know the class or ID name
cssPeek.supportTags - Enable Peeking from HTML tags in addition to classnames and IDs. React components are ignored, but it's a good idea to disable this feature when using Angular.cssPeek.peekFromLanguages - A list of vscode language names where the extension should be used.cssPeek.peekToExclude - A list of file globs that filters out style files to not look for. By default, node_modules and bower_componentsSee editor docs for more details
Contributions are greatly appreciated. Please fork the repository and submit a pull request.
/i/Perkovec.jsdoc-live-preview?label=Installs&logo=Visual%20Studio%20Code&style=flat-square)
A simple extension for preview jsdoc using markdown
Run ext install jsdoc-live-preview in the command palette.
Open .js file
Open command palette with shift + command/ctrl + p
type > select JSDoc: Show Preview
Run JSDoc: Show Preview in the command palette by hitting enter
Display CPU frequency, usage, memory consumption, and battery percentage remaining within the VSCode status bar.
.
Just the system information node module.
resmon.show.cpuusage: Show CPU Usage. In Windows, this percentage is calculated with processor time, which doesn't quite match the task manager figure.resmon.show.cpufreq: Show CPU Frequency. This may just display a static frequency on Windows.resmon.show.mem: Show consumed and total memory as a fraction.resmon.show.battery: Show battery percentage remaining.resmon.show.disk: Show disk space information.resmon.show.cputemp: Show CPU temperature. May not work without the lm-sensors module on Linux. May require running VS Code as admin on Windows.resmon.disk.format: Configures how the disk space is displayed (percentage remaining/used, absolute remaining, used out of totel).resmon.disk.drives: Drives to show. For example, 'C:' on Windows, and '/dev/sda1' on Linux.resmon.updatefrequencyms: How frequently to query systeminformation. The minimum is 200 ms as to prevent accidentally updating so fast as to freeze up your machine.resmon.freq.unit: Unit used for the CPU frequency (GHz-Hz).resmon.mem.unit: Unit used for the RAM consumption (GB-B).resmon.alignLeft: Toggles the alignment of the status bar.resmon.color: Color of the status bar text in hex code (for example, #FFFFFF is white). The color must be in the format #RRGGBB, using hex digits.A better solution for Windows CPU Usage would be great. I investigated alternatives to counting Processor Time, but none of them seemed to match the Task Manager percentage.
Show flowchart of selected Javascript code.
Flowchart is synchronized with the selected code in real-time.
After install jsflowchart extension from Marketplace,
-Right click the selected js code, then click "Show Flowchart".
Clone the source locally:
\$ git clone https://github.com/MULU-github/jsflowchart
\$ cd jsflowchart
\$ npm install
\$ npm run watch
-Hit F5.
-Open js file.
-Right click the selected js code in debug window, then click "Show Flowchart".
|
Visual Studio Code Remote Development Open any folder in a container, on a remote machine, or in WSL and take advantage of VS Code's full feature set. Learn more! |
This repository is for providing feedback on the Visual Studio Remote Development extension pack and its related extensions. You can use the repository to report issues or submit feature requests on any of these extensions:
If you are running into an issue with another extension you'd like to use with the Remote Development extensions, please raise an issue in the extension's repository. You can reference our summary of tips for remote related issues and our extension guide to help the extension author get started. Issues related to dev container definitions can also be reported in the vscode-dev-containers repository.
Running into trouble? Wondering what you can do? These articles can help.
Extension for Visual Studio Code - Makes it easy to create, manage, and debug containerized applications.
The Docker extension makes it easy to build, manage, and deploy containerized applications from Visual Studio Code. It also provides one-click debugging of Node.js, Python, and .NET Core inside a container.
Check out the Working with containers topic on the Visual Studio Code documentation site to get started.
The Docker extension wiki has troubleshooting tips and additional technical information.
Install Docker on your machine and add it to the system path.
On Linux, you should also enable Docker CLI for the non-root user account that will be used to run VS Code.
To install the extension, open the Extensions view, search for docker to filter results and select Docker extension authored by Microsoft.
You can get IntelliSense when editing your Dockerfile and docker-compose.yml files, with completions and syntax help for common commands.
In addition, you can use the Problems panel (Ctrl+Shift+M on Windows/Linux, Shift+Command+M on Mac) to view common errors for Dockerfile and docker-compose.yml files.
You can add Docker files to your workspace by opening the Command Palette (F1) and using Docker: Add Docker Files to Workspace command. The command will generate Dockerfile and .dockerignore files and add them to your workspace. The command will also query you if you want the Docker Compose files added as well; this is optional.
The extension recognizes workspaces that use most popular development languages (C#, Node.js, Python, Ruby, Go, and Java) and customizes generated Docker files accordingly.
The Docker extension contributes a Docker view to VS Code. The Docker view lets you examine and manage Docker assets: containers, images, volumes, networks, and container registries. If the Azure Account extension is installed, you can browse your Azure Container Registries as well.
The right-click menu provides access to commonly used commands for each type of asset.
You can rearrange the Docker view panes by dragging them up or down with a mouse and use the context menu to hide or show them.
Many of the most common Docker commands are built right into the Command Palette:
You can run Docker commands to manage images, networks, volumes, image registries, and Docker Compose. In addition, the Docker: Prune System command will remove stopped containers, dangling images, and unused networks and volumes.
Docker Compose lets you define and run multi-container applications with Docker. Visual Studio Code's experience for authoring docker-compose.yml is very rich, providing IntelliSense for valid Docker compose directives:
For the image directive, you can press ctrl+space and VS Code will query the Docker Hub index for public images:
VS Code will first show a list of popular images along with metadata such as the number of stars and description. If you continue typing, VS Code will query the Docker Hub index for matching images, including searching public profiles. For example, searching for 'Microsoft' will show you all the public Microsoft images.
You can display the content and push/pull/delete images from Docker Hub and Azure Container Registry:
An image in an Azure Container Registry can be deployed to Azure App Service directly from VS Code; see Deploy images to Azure App Service page. For more information about how to authenticate to and work with registries see Using container registries page.
You can debug services built using Node.js, Python, or .NET (C#) that are running inside a container. The extension offers custom tasks that help with launching a service under the debugger and with attaching the debugger to a running service instance. For more information see Debug container application and Extension Properties and Tasks pages.
You can start Azure CLI (command-line interface) in a standalone, Linux-based container with Docker Images: Run Azure CLI command. This allows access to full Azure CLI command set in an isolated environment. See Get started with Azure CLI page for more information on available commands.
Integrates the HTMLHint static analysis tool into Visual Studio Code.
The HTMLHint extension will attempt to use the locally installed HTMLHint module (the project-specific module if present, or a globally installed HTMLHint module). If a locally installed HTMLHint isn't available, the extension will use the embedded version (current version 0.11.0).
To install a version to the local project folder, run npm install --save-dev htmlhint. To install a global version on the current machine, run npm install --global htmlhint.
The HTMLHint extension will run HTMLHint on your open HTML files and report the number of errors on the Status Bar with details in the Problems panel (View > Problems).
Errors in HTML files are highlighted with squiggles and you can hover over the squiggles to see the error message.
Note: HTMLHint will only analyze open HTML files and does not search for HTML files in your project folder.
The HTMLHint extension uses the default rules provided by HTMLHint.
{
"tagname-lowercase": true,
"attr-lowercase": true,
"attr-value-double-quotes": true,
"doctype-first": true,
"tag-pair": true,
"spec-char-escape": true,
"id-unique": true,
"src-not-empty": true,
"attr-no-duplication": true,
"title-require": true
}
If you'd like to modify the rules, you can provide a .htmlhintrc file in the root of your project folder with a reduced ruleset or modified values.
You can learn more about rule configuration at the HTMLHint Usage page.
By default, HTMLHint will run on any files associated with the "html" language service (i.e., ".html" and ".htm" files). If you'd like to use the HTMLHint extension with additional file types, you have two options:
If you would like the file type to be treated as any other html file (including syntax highlighting, as well as HTMLHint linting), you'll need to associate the extension with the html language service. Add the following to your VS Code settings, replacing "*.ext" with your file extension.
{
"files.associations": {
"*.ext": "html"
}
}
If your file type already has an associated language service other than "html", and you'd like HTMLHint to process those file types, you will need to associate the HTMLHint extension with that language service. Add the following to your VS Code settings, replacing "mylang" with your language service. For example, if you want HTMLHint to process .twig files, you would use "twig". Note that with this configuration, you need to open an html file first to activate the HTMLHint extension. Otherwise, you won't see any linter errors, (the extension is hard-coded to activate when the html language service activates).
{
"htmlhint.documentSelector": ["html", "mylang"]
}
The HTMLHint extension provides these settings:
htmlhint.enable - disable the HTMLHint extension globally or per workspace.htmlhint.documentSelector - specify additional language services to be lintedhtmlhint.options - provide a rule set to override on disk .htmlhintrc or HTMLHint defaults.htmlhint.configFile - specify a custom HTMLHint configuration file. Please specify either 'htmlhint.configFile' or 'htmlhint.options', but not both.You can change settings globally (File > Preferences > User Settings) or per workspace (File > Preferences > Workspace Settings). The Preferences menu is under Code on macOS.
Here's an example using the htmlhint.documentSelector and htmlhint.options settings:
"htmlhint.documentSelector: [
"html",
"htm",
"twig"
],
"htmlhint.options": {
"tagname-lowercase": false,
"attr-lowercase": true,
"attr-value-double-quotes": true,
"doctype-first": true
}
Note that in order to have the linter apply to addi
View a Git Graph of your repository, and easily perform Git actions from the graph. Configurable to look the way you want!
git-graph.customBranchGlobPatterns)git-graph.customPullRequestProviders (e.g. for use with privately hosted Pull Request providers). Information on how to configure custom providers is available here.CTRL/CMD + F: Open the Find Widget.CTRL/CMD + H: Scrolls the Git Graph View to be centered on the commit referenced by HEAD.CTRL/CMD + R: Refresh the Git Graph View.CTRL/CMD + S: Scrolls the Git Graph View to the first (or next) stash in the loaded commits.CTRL/CMD + SHIFT + S: Scrolls the Git Graph View to the last (or previous) stash in the loaded commits.Up / Down: The Commit Details View will be opened on the commit directly above or below it on the Git Graph View.CTRL/CMD + Up / CTRL/CMD + Down: The Commit Details View will be opened on its child or parent commit on the same branch.Enter: If a dialog is open, pressing enter submits the dialog, taking the primary (left) action.Escape: Closes the active dialog, context menu or the Commit Details View.git-graph.customEmojiShortcodeMappings.Detailed information of all Git Graph settings is available here, including: descriptions, screenshots, default values and types.
A summary of the Git Graph extension settings are:
[{"name":"Feature Requests", "glob":"heads/feature/*"}][{"shortcode": ":sparkles:", "emoji":"✨"}]{"Date": true, "Author": true, "Commit": true}This extension consumes the following settings:
git.path: Specifies the path and filename of a portable Git installation.This extension contributes the following commands:
git-graph.view: Git Graph: View Git Graphgit-graph.addGitRepository: Git Graph: Add Git Repository... (used to add sub-repos to Git Graph)git-graph.clearAvatarCache: Git Graph: Clear Avatar Cachegit-graph.endAllWorkspaceCodeReviews: Git Graph: End All Code Reviews in Workspacegit-graph.endSpecificWorkspaceCodeReview: Git Graph: End a specific Code Review in Workspace... (used to end a specific Code Review without having to first open it in the Git Graph View)git-graph.removeGitRepository: Git Graph: Remove Git Repository... (used to remove repositories from Git Graph)git-graph.resumeWorkspaceCodeReview: Git Graph: Resume a specific Code Review in Workspace... (used to open the Git Graph View to a Code Review that is already in progress)Detailed Release Notes are available here.
This extension is available on the Visual Studio Marketplace for Visual Studio Code.
Thank you to all of the contributors that help with the development of Git Graph!
Some of the icons used in Git Graph are from the following sources, please support them for their excellent work!
Handy shortcuts for editing Markdown ( .md, .markdown) files. You can also use markdown formats in any other file (see configuration settings)
Quickly toggle bullet points
Easily generate URLs
Convert tabular data to tables
Context and title menu integration
You can show and hide icons in the title bar with the markdownShortcuts.icons.* config settings.
| Name | Description | Default key binding |
|---|---|---|
| md-shortcut.showCommandPalette | Display all commands | ctrl+M ctrl+M |
| md-shortcut.toggleBold | Make **bold** | ctrl+B |
| md-shortcut.toggleItalic | Make _italic_ | ctrl+I |
| md-shortcut.toggleStrikethrough | Make ~~strikethrough~~ | |
| md-shortcut.toggleLink | Make [a hyperlink](www.example.org) | ctrl+L |
| md-shortcut.toggleImage | Make an image  | ctrl+shift+L |
| md-shortcut.toggleCodeBlock | Make ```a code block``` | ctrl+M ctrl+C |
| md-shortcut.toggleInlineCode | Make `inline code` | ctrl+M ctrl+I |
| md-shortcut.toggleBullets | Make * bullet point | ctrl+M ctrl+B |
| md-shortcut.toggleNumbers | Make 1. numbered list | ctrl+M ctrl+1 |
| md-shortcut.toggleCheckboxes | Make - [ ] check list (Github flavored markdown) | ctrl+M ctrl+X |
| md-shortcut.toggleTitleH1 | Toggle # H1 title | |
| md-shortcut.toggleTitleH2 | Toggle ## H2 title | |
| md-shortcut.toggleTitleH3 | Toggle ### H3 title | |
| md-shortcut.toggleTitleH4 | Toggle #### H4 title | |
| md-shortcut.toggleTitleH5 | Toggle ##### H5 title | |
| md-shortcut.toggleTitleH6 | Toggle ###### H6 title | |
| md-shortcut.addTable | Add Tabular values | |
| md-shortcut.addTableWithHeader | Add Tabular values with header |
A markdown-converter for [Visual Studio Code][vscode]
MarkdownConverter?MarkdownConverter is a Visual Studio Code-extension which allows you to export your Markdown-file as PDF-, HTML or Image-files.
It provides many features, such as DateTime-Formatting, configuring your own CSS-styles, setting Headers and Footers, FrontMatter and much more.
PDF:markdownConverter.ConversionType to an array of types:{
"markdownConverter.ConversionType": ["HTML", "PDF"]
}
{
"markdownConverter.DestinationPattern": "${workspaceFolder}/output/${dirname}/${basename}.${extension}"
}
Markdown: Convert Document ( Markdown: Dokument Konvertieren in German) or mco ( mk in German) for shortMarkdown: Convert all Documents ( Markdown: Alle Dokumente konvertieren) or mcd ( madk in German) for shortMarkdown: Chain all Documents ( Markdown: Alle Dokumente verketten) or mcad ( madv in German) for short![]()
Microsoft Visual Studio Code extension integrating node.js module: opn
Opens files directly by default, or on your local web server using the default app set by the OS, or an app set by you.
Great for rapid prototyping!
Start VS Code.
From within VS Code press F1, then type ext install.
Select Extensions: Install Extension and click or press Enter.
Wait a few seconds for the list to populate and type Open File in App.
Click the install icon next to the Open File in App extension.
Restart VS Code to complete installing the extension.
Download the latest vscode-opn.vsix from GitHub Releases.
You can manually install the VS Code extension packaged in a .vsix file.
Option 1)
Execute the VS Code command line below providing the path to the .vsix file;
code myExtensionFolder\vscode-opn.vsix
Depending on your platform replace myExtensionFolder\ with;
%USERPROFILE%\.vscode\extensions\$HOME/.vscode/extensions/$HOME/.vscode/extensions/Option 2)
Start VS Code.
From within VS Code open the 'File' menu, select 'Open File...' or press Ctrl+O, navigate to the .vsix file location and select it to open.
The extension will be installed under your user .vscode/extensions folder.
Execute the extension with the keyboard shortcut;
Command + Alt + OCtrl + Alt + OBy default plain text based files will open directly in the app set by your OS.
To change this default behaviour you will need to edit 'Workspace Settings' or 'User Settings'.
From within VS Code open the 'File' menu, select 'Preferences', and then select either 'Workspace Settings' or 'User Settings'.
Options are set per 'language', not per file type, so for example setting options for the language 'plaintext', will change the behaviour of several file types including '.txt' and '.log'.
The minimum JSON to change the behaviour of a single language, e.g. html is;
"vscode-opn.perLang": {
"opnOptions": [
{
"forLang": "html",
"openInApp": "chrome"
}
]
}
Required
Type: string
Examples include;
Required
Type: string
Examples include;
Notes: The app name examples above are platform dependent and valid for an MS Windows environment. For Google's Chrome web browser for example, you would use google chrome on OS X, google-chrome on Linux and chrome on Windows.
The following example sets all available options for html and plaintext languages;
"vscode-opn.perLang": {
"opnOptions": [
{
"forLang": "html",
"openInApp": "chrome",
"openInAppArgs": ["--incognito"],
"isUseWebServer": true,
"isUseFsPath": false,
"isWaitForAppExit": true
},
{
"forLang": "plaintext",
"openInApp": "notepad++",
"openInAppArgs": [],
"isUseWebServer": false,
"isUseFsPath": true,
"isWaitForAppExit": true
}
]
},
"vscode-opn.webServerProtocol": "http",
"vscode-opn.webServerHostname": "localhost",
"vscode-opn.webServerPort": 8080
Optional
Type: array
Examples include: ["--incognito", "-private-window"]
Notes: A string array of arguments to pass to the app. For example, --incognito will tell Google Chrome to open a new window in "Private Browsing Mode", whereas -private-window will do something similar in Mozilla Firefox.
Optional
Type: boolean
Default: false
Notes: If you set up a site on your local web server such as MS Windows IIS and your VS Code project folder is within the site root, you can open file URLs instead of URIs. This is useful for code that requires a server environment to run, such as AJAX. You will first need to update the vscode-opn default web server settings with your own.
Optional
Type: boolean
Default: false
Notes: During testing in an MS Win 10 environment both Notepad++ and MS WordPad did not support file URIs. This option will use the local file system path instead. This issue may affect other apps and other platforms too.
Optional
Type: boolean
Default: true
Notes: See node.js module opn option: wait for more info.
Required by the per language option: isUseWebServer.
Optional
Type: string
Default: "http"
Notes: Enter a protocol, e.g. "http" or "https".
Optional
Type: string
Default: "localhost"
Notes: Enter the hostname or IP of your local web server.
Optional
Type: number
Default: 8080
Notes: Enter the port of your local web server.
Tested in MS Win 10 environment.
Works with plain text based file types including;
.html.htm.xml.json.log .txt
Does not work with other file types including;
.png.gif.jpg.docx.xlsx.pdfVersion 1.1.2
Date: 25 Feb 2016
Version 1.0.2
Date: 17 Feb 2016
![]()
Visual Studio Code plugin that autocompletes JavaScript / TypeScript modules in import statements.
This plugin was inspired by Npm Intellisense and AutoFileName.
Launch VS Code Quick Open (⌘+P), paste the following command, and press enter.
ext install node-module-intellisense
View detail on Visual Studio Code Marketplace
If there is any bug, create a pull request or an issue please. Github
Node.js Module Intellisense scans builtin modules, dependencies, devDependencies and file modules by default. Set scanBuiltinModules, scanDevDependencies and scanFileModules to false to disable it.
{
// Scans builtin modules as well
"node-module-intellisense.scanBuiltinModules": true,
// Scans devDependencies as well
"node-module-intellisense.scanDevDependencies": true,
// Scans file modules as well
"node-module-intellisense.scanFileModules": true,
/**
* Scans alternative module paths (eg. Search on ${workspaceFolder}/lib).
* Useful when using packages like (https://www.npmjs.com/package/app-module-path) to manage require paths folder.
**/
"node-module-intellisense.modulePaths": [],
// Auto strip module extensions
"node-module-intellisense.autoStripExtensions": [
".js",
".jsx",
".ts",
".d.ts",
".tsx"
],
}
This VSCode extension allows the user to format one or multiple files with right-click context menu.
This extension contributes the following settings:
formatContextMenu.saveAfterFormat: enable/disable saving after formatting (default: true).formatContextMenu.closeAfterSave: enable/disable closing closing after saving (default: false). This does nothing unless you have enabled saving after formatting.
![]()
This vscode extension integrates with GitHub.
Note: I recommend to use GitHub Pull Requests instead of this, because most usecases are supported and there is a team at Microsoft/GitHub supporting development
Currently it is possible to do the following:
github.statusBarCommand configuration value.
To use this extension one needs to create a new GitHub Personal Access Token and registers it in the extension. The 'GitHub: Set Personal Access Token' should be executed for that. To execute the 'GitHub: Set Personal Access Token' type Ctrl+Shift+p in VSCode to open the command palette and type 'GitHub: Set Personal Access Token'. You will then be prompted to enter the token generated from GitHub.
Additionally, by default this extension assumes your remote for a checked out repo is named "origin". If
you wish to use a remote with a different name, you can control this by the github.remoteName setting.
There are additional settings for this extension as well, enter github. in the User Settings pane of
VS Code to see them all.
Create pull request from current branch in current repository (quick)Create pull request...Checkout open pull request...Browse open pull request...Merge pull request (current branch)...This extension collects telemetry data to track and improve usage. The collection of data could be disabled as described here https://code.visualstudio.com/docs/supporting/faq#_how-to-disable-telemetry-reporting.
Kite is an AI-powered programming assistant that helps you write Python & JavaScript code inside Visual Studio Code. Kite helps you write code faster by saving you keystokes and showing you the right information at the right time. Learn more about how Kite heightens VS Code's capabilities at https://kite.com/integrations/vs-code/.
At a high level, Kite provides you with:
Use another editor? Check out Kite's other editor integrations.
The Kite Engine needs to be installed in order for the package to work properly. The package itself provides the frontend that interfaces with the Kite Engine, which performs all the code analysis and machine learning 100% locally on your computer (no code is sent to a cloud server).
macOS Instructions
.dmg file.Applications folder.Kite.app to start the Kite Engine.Windows Instructions
.exe file.Linux Instructions
When running the Kite Engine for the first time, you'll be guided through a setup process which will allow you to install the VS Code extension. You can also install or uninstall the VS Code extension at any time using the Kite Engine's plugin manager.
Alternatively, you have 2 options to manually install the package:
code --install-extension kiteco.kite in your terminal.Learn about the capabilities Kite adds to VS Code.
The following is a brief guide to using Kite in its default configuration.
Simply start typing in a saved Python or JavaScript file and Kite will automatically suggest completions for what you're typing. Kite's autocompletions are all labeled with the ⟠ symbol.
Hover your mouse cursor over a symbol to view a short summary of what the symbol represents.
Click on the Docs link in the hover popup to open the documentation for the symbol inside the Copilot, Kite's standalone
reference tool.
If a Def link is available in the hover popup, clicking on it will jump to the definition of the symbol.
When you call a function, Kite will show you the arguments required to call it. Kite's function signatures are also all
labeled with the ⟠ symbol.
Note: If you have the Microsoft Python extension installed, Kite will not be able to show you information on function signatures.
Kite comes with sevaral commands that you can run from VS Code's command palette.
| Command | Description |
|---|---|
kite.open-copilot |
Open the Copilot |
kite.docs-at-cursor |
Show documentation of the symbol underneath your cursor in the Copilot |
kite.engine-settings |
Open the settings for the Kite Engine |
kite.python-tutorial |
Open the Kite Python tutorial file |
kite.javascript-tutorial |
Open the Kite JavaScript tutorial file |
kite.go-tutorial |
Open the Kite Go tutorial file |
kite.help |
Open Kite's help website in the browser |
Visit our help docs for FAQs and troubleshooting support.
Happy coding!
Kite is built by a team in San Francisco devoted to making programming easier and more enjoyable for all. Follow Kite on Twitter and get the latest news and programming tips on the Kite Blog. Kite has been featured in Wired, VentureBeat, The Next Web, and TechCrunch.
Computes complexity in TypeScript / JavaScript / Lua files.
The steps of the calculation:
Please note that it is not a standard metric, but it is a close approximation of Cyclomatic complexity.
Please also note that it is possible to balance the complexity calculation for the project / team / personal taste by adjusting the relevant configuration entries (content assist is provided for all of them for easier configuration).
For example if one prefers guard clauses, and is ok with all the branches in switch statements then the following could be applied:
"codemetrics.nodeconfiguration.ReturnStatement": 0,
"codemetrics.nodeconfiguration.CaseClause": 0,
"codemetrics.nodeconfiguration.DefaultClause": 0
If You want to know the causes You can click on the code lens to list all the entries for a given method or class. (This also allows You to quickly navigate to the corresponding code)
How to install Visual Studio Code extensions
Direct link to Visual Studio Code Marketplace
In the workspace settings one can override the defaults.
For a complete list please check the configuration section in the package.json.
For the most commonly used ones, one should do a search for codemetrics.basics
in the settings ui.
{
// highest complexity level will be set when it exceeds 15
"codemetrics.basics.ComplexityLevelExtreme" : 15,
// Hides code lenses with complexity lesser than the given value
"codemetrics.basics.CodeLensHiddenUnder" : 5,
// Description for the highest complexity level
"codemetrics.basics.ComplexityLevelExtremeDescription" : "OMG split this up!",
// someone uses 'any', it must be punished
"codemetrics.nodeconfiguration.AnyKeyword": 100
}
They can be bound in the keybindings.json (File -> Preferences -> Keyboard Shortcuts)
{ "key": "f4", "command": "codemetrics.toggleCodeMetricsForArrowFunctions",
"when": "editorTextFocus" },
{ "key": "f5", "command": "codemetrics.toggleCodeMetricsDisplayed",
"when": "editorTextFocus" }
Licensed under MIT
title: Guide
description: Documentation guide for the Visual Studio Code Peacock extension meta:
Subtly change the color of your Visual Studio Code workspace. Ideal when you have multiple VS Code instances, use VS Live Share, or use VS Code's Remote features, and you want to quickly identify your editor.
Peacock docs are hosted on Azure -> Get a Free Azure Trial
View → ExtensionsYou can also install Peacock from the marketplace here
Let's see Peacock in action!
F1 to open the command palettePeacockPeacock: Change to a favorite colorNow enjoy exploring the rest of the features explained in the docs, here!
Commands can be found in the command palette. Look for commands beginning with "Peacock:"
peacock.affect* in the Settings section) to.vscode/settings.json file| Property | Description |
|---|---|
| peacock.affectActivityBar | Specifies whether Peacock should affect the activity bar |
| peacock.affectStatusBar | Specifies whether Peacock should affect the status bar |
| peacock.affectTitleBar | Specifies whether Peacock should affect the title bar (see title bar coloring) |
| peacock.affectAccentBorders | Specifies whether Peacock should affect accent borders (panel, sideBar, editorGroup) Defaults to false. |
| peacock.affectStatusAndTitleBorders | Specifies whether Peacock should affect the status or title borders. Defaults to false. |
| peacock.affectTabActiveBorder | Specifies whether Peacock should affect the active tab's border. Defaults to false |
| peacock.elementAdjustments | fine tune coloring of affected elements |
| peacock.favoriteColors | array of objects for color names and hex values |
| peacock.keepForegroundColor | Specifies whether Peacock should change affect colors |
| peacock.surpriseMeOnStartup | Specifies whether Peacock apply a random color on startup |
| peacock.darkForeground | override for the dark foreground |
| peacock.lightForeground | override for the light foreground |
| peacock.darkenLightenPercentage | the percentage to darken or lighten the color |
| peacock.surpriseMeFromFavoritesOnly | Specifies whether Peacock should choose a random color from the favorites list or a purely random color |
| peacock.showColorInStatusBar | Show the Peacock color in the status bar |
| peacock.remoteColor | The Peacock color that will be applied to remote workspaces |
| peacock.color | The Peacock color that will be applied to workspaces |
| peacock.vslsShareColor | Peacock color for Live Share Color when acting as a Guest |
| peacock.vslsJoinColor | Peacock color for Live Share color when acting as the Host |
After setting 1 or more colors (hex or named) in the user setting for peacock.favoriteColors, you can select Peacock: Change to a Favorite Color and you will be prompted with the list from peacock.favoriteColors from user settings.
Gatsby Purple -> #123456
Auth0 Orange -> #eb5424
Azure Blue -> #007fff
Favorite colors require a user-defined name ( name) and a value ( value ), as shown in the example below.
"peacock.favoriteColors": [
{ "name": "Gatsby Purple", "value": "#639" },
{ "name": "Auth0 Orange", "value": "#eb5424" },
{ "name": "Azure Blue", "value": "#007fff" }
]
You can find brand color hex codes from https://brandcolors.net
When opening the Favorites command in the command palette, Peacock now previews (applies) the color as you cycle through them. If you cancel (press ESC), your colors revert to what you had prior to trying the Favorites command
When you apply a color you enjoy, you can go to the workspace settings.json and copy the color's hex code, then create your own favorite color in your user settings.json. This involves a few manual steps and arguably is not obvious at first.
The Peacock: Save Current Color as Favorite Color feature allows you to save the currently set color as a favorite color, and prompts you to name it.
You can tell peacock which parts of VS Code will be affected by when you select a color. You can do this by checking the appropriate setting that applies to the elements you want to be colored. The choices are:
You can fine tune the coloring of affected elements by making them slightly darker or lighter to provide a subtle visual contrast between them. Options for adjusting elements are:
"darken": reduces the value of the selected color to make it slightly darker"lighten": increases the value of the selected color to make it slightly lighter"none": no adjustment will be made to the selected colorAn example of using this might be to make the Activity Bar slightly lighter than the Status Bar and Title Bar to better visually distinguish it as present in several popular themes. This can be achieved with the setting in the example below.
"peacock.affectActivityBar": true,
"peacock.affectStatusBar": true,
"peacock.affectTitleBar": true,
"peacock.elementAdjustments": {
"activityBar": "lighten"
}
This results in the Activity Bar being slightly lighter than the Status Bar and Title Bar (see below).
Recommended to remain false (the default value).
When set to true Peacock will not colorize the foreground of any of the affected elements and will only alter the background. Some users may desire this if their theme's foreground is their preference over Peacock. In this case, when set to true, the foreground will not be affected.
Recommended to remain false (the default value).
When set to true Peacock will automatically apply a random color when opening a workspace that does not define color customizations. This can be useful if you frequently open many instances of VS Code and you are interested in identifying them, but are not overly committed to the specific color applied.
If this setting is true and there is no peacock color set, then Peacock will choose a new color. If there is already a color set, Peacock will not choose a random color as this would prevent users from choosing a specific color for some workspaces and surprise in others.
You may like a color but want to lighten or darken it. You can do this through the corresponding commands. When you choose one of these commands the current color will be lightened or darkened by the percentage that is in the darkenLightenPercentage setting. You may change this setting to be a value between 1 and 10 percent.
There are key bindings for the lighten command alt+cmd+= and for darken command alt+cmd+-, to make it easier to adjust the colors.
| Command | Description |
|---|---|
| Peacock: Reset Workspace Colors | Removes any of the color settings from the .vscode/settings.json file. If colors exist in the user settings, they may be applied |
| Peacock: Remove All Global and Workspace Colors | Removes all of the color settings from both the Workspace .vscode/settings.json file and the Global user settings.json file. |
| Peacock: Enter a Color | Prompts you to enter a color (see input formats) |
| Peacock: Color to Peacock Green | Sets the color to Peacock main color, #42b883 |
| Peacock: Surprise me with a Random Color | Sets the color to a random color |
| Peacock: Change to a Favorite Color | Prompts user to select from their Favorites |
| Peacock: Save Current Color to Favorites | Save Current Color to their Favorites |
| Peacock: Add Recommended Favorites | Add the recommended favorites to user settings (override same names) |
| Peacock: Darken | Darkens the current color by darkenLightenPercentage |
| Peacock: Lighten | Lightens the current color by darkenLightenPercentage |
| Peacock: Show and Copy Current Color | Shows the current color and copies it to the clipboard |
| Peacock: Show the Documentation | Opens the Peacock documentation web site in a browser |
| description | key binding | command |
|---|---|---|
| Darken the colors | alt+cmd+- | peacock.darken |
| Lighten the colors | alt+cmd+= | peacock.lighten |
| Surprise Me with a Random Color | cmd+shift+k | peacock.changeColorToRandom |
Peacock integrates with other extensions, as described in this section.
Peacock detects when the Live Share extension is installed and automatically adds two commands that allow the user to change color of their Live Share sessions as a Host or a Guest, depending on their role.
| Command | Description |
|---|---|
| Peacock: Change Live Share Color (Host) | Prompts user to select a color for Live Share Host session from the Favorites |
| Peacock: Change Live Share Color (Guest) | Prompts user to select a color for Live Share Guest session from the Favorites |
When a Live Share session is started, the selected workspace color will be applied. When the session is finished, the workspace color is reverted back to the previous one (if set).
Peacock integrates with the Remote Development features of VS Code.
Peacock detects when the VS Code Remote extension is installed and adds commands that allow the user to change color when in a remote context. All remote contexts share the same color (wsl, ssh, containers).
When a workspace is opened in a remote context, if a peacock.remoteColor is set, it will be applied. Otherwise, the regular peacock.color is applied.
VS Code distinguishes two classes of extensions: UI Extensions and Workspace Extensions. Peacock is classified as a UI extension as it makes contributions to the VS Code user interface and is always run on the user's local machine. UI Extensions cannot directly access files in the workspace, or run scripts/tools installed in that workspace or on the machine. Example UI Extensions include: themes, snippets, language grammars, and keymaps.
In version 2.1.2 Peacock enabled integration with the Remote Development by adding "extensionKind": "ui" in the extension's package.json.
When entering a color in Peacock several formats are acceptable. These include
| Format | Examples |
|---|---|
| Named HTML colors | purple, blanchedalmond |
| Short Hex | #8b2, f00 |
| Short Hex8 (RGBA) | #8b2c, f00c |
| Hex | #88bb22, ff0000 |
| Hex8 (RGBA) | #88bb22cc, ff0000cc |
| RGB | rgb (136, 187, 34), rgb 255 0 0 |
| RGBA | rgba (136, 187, 34, .8), rgba 255 0 0 .8 |
| HSL | hsl (80, 69%, 43%), hsl (0 1 .5) |
| HSLA | hsla (80, 69%, 43%, 0.8), hsla (0 1 .5 .8) |
| HSV | hsv (80, 82%, 73%), hsv (0 1 1) |
| HSVA | hsva (80, 82%, 73%, 0.8), hsva (0,100%,100%,0.8) |
All formats offer flexible data validation:
# is optional.User selects a color, then later changes which elements are affected.
User opens VS Code, already has colors in their workspace, and immediately changes which elements are affected.
User opens VS Code, has no colors in workspace, and immediately changes which elements are affected.
The VS Code Title Bar style can be configured to be custom or native with the window.titleBarStyle setting. When operating in native mode, Peacock is unable to colorize the Title Bar because VS Code defers Title Bar management to the OS. In order to leverage the Affect Title Bar setting to colorize the Title Bar, the window.titleBarStyle must be set to custom.
On macOS there are additional settings that can impact the Title Bar style and force it into native mode regardless of the window.titleBarStyle setting. These include:
window.nativeTabs should be set to false. If using native tabs, the rendering of the title bar is deferred to the OS and native mode is forced.window.nativeFullScreen should be set to true. If not using native full screen mode, the custom title bar rendering presents issues in the OS and native mode is forced.A successful and recommended settings configuration to colorize the Title Bar is:
Peacock is using tinycolor which provides some basic color theory mechanisms to determine whether or not to show a light or dark foreground color based on the perceived brightness of the background. More or less, if it thinks the background is darker than 50% then Peacock uses the light foreground. If it thinks the background is greater than 50% then Peacock uses the dark foreground.
Brightness is measured on a scale of 0-255 where a value of 127.5 is perfectly 50%.
Example:
const lightForeground = "#e7e7e7";
const darkForegound = "#15202b";
const background = "#498aff";
const perceivedBrightness = tinycolor(background).getBrightness(); // 131.903, so 51.7%
const isDark = tinycolor(background).isDark(); // false, since brightness is above 50%
const textColor = isDark ? lightForeground : darkForeground; // We end up using dark text
This particular color ( #498aff) is very near 50% on the perceived brightness, but the determination is binary so the color is either light or dark based on which side of 50% it is (exactly 50% is considered as light by the library). For the particular color #498aff, all of the theory aspects that tinycolor provides show that using the dark foreground is the right approach.
const readability = tinycolor.readability(darkForeground, background); // 4.996713
const isReadable = tinycolor.isReadable(darkForeground, background); // true
The readability calculations and metrics are based on Web Content Accessibility Guidelines (Version 2.0) and, in general, a ratio close to 5 is considered good based on that information. If we run the lightForeground through the same algorithm you can see that readability actually suffers with a reduced contrast ratio:
const readability = tinycolor.readability(lightForeground, background); // 2.669008
const isReadable = tinycolor.isReadable(lightForeground, background); // false
The readability calculations that Peacock uses to determine an appropriate foreground color are based only on the color information of the entered background color. The alpha component is currently ignored in these calculations because of complications with VS Code that make it difficult to determine the actual background color of the affected elements. See Alpha Support for more information.
Peacock allows you to enter colors that can be transparent, but the VS Code window itself is not transparent. If the entered color has some level of transparency, the resulting color of the affected elements will be based on the transparent color overlaying the default color of the VS Code workbench. In light themes the VS Code workbench color will be a very light gray and in dark themes a very dark gray.
Recommended favorites are a list of constants found in favorites.ts. These are alphabetized.
Recommended favorites are a starting point for favorites. They will be installed whenever a new version is installed. They will extend your existing favorites, so feel free to continue to add to your local favorites! However be careful not to change the color of the recommended favorites as they will be overridden when a new version is installed.
This list may change from version to version depending on the Peacock authoring team.
Peacock takes advantage of a memento (a value stored between sessions and not in settings).
| Name | Type | Description |
|---|---|---|
| peacockMementos.favoritesVersion | Global | The version of Peacock. Helps identify when the list of favorites should be written to the user's settings |
Migration notes between versions are documented here.
Note: If at any time Peacock is writing colors unexpectedly, it may be due to a migration (see migration notes below). However, as always, you can run the command
Peacock: Reset Workspace Colorsand all color settings will be removed from the.vscode/settings.jsonfile.
Version 3+ of Peacock stores the color in the settings peacock.color. When migrating from version 2.5, the peacock color was in a memento. When migrating from version < 2.5, the color was not stored, but can often be derived through a calculation by grabbing the color from one of the workbench.colorCustomizations that Peacock uses.
Once the color is determined, peacock removes the memento, and writes the color to the settings peacock.color. Fixes #230 and addresses #258
This is an aggressive approach, as it is possible to have a color customization that peacock uses, and if it sees this, it will set Peacock up to use it.
This logic is marked as deprecated but will not be removed until version 4.0 is released and enough time has passed reasonably for people to migrate.
Examples:
#ff0, then the peacock.color will bet set to match it.// .vscode/settings.json
{
"workbench.colorCustomizations": {
"activityBar.background": "#ff0"
}
}
peacock.color will set set to match the memento color.// .vscode/settings.json
{}
// .vscode/settings.json
{}
peacock.color, no migration will occur.// .vscode/settings.json
{}
If you want to try the extension out start by cloning this repo, cd into the folder, and then run npm install.
Then you can run the debugger for the launch configuration Run Extension. Set breakpoints, step through the code, and enjoy!
Markdown Extended is an extension extends syntaxes and abilities to VSCode built-in markdown function.
Markdown Extended includes lots of editing helpers and a what you see is what you get exporter, which means export files are consistent to what you see in markdown preview, even it contains syntaxes and styles contributed by other plugins.
Exporter (View Detail)
Editing Helpers (View Detail):
Extended Language Features (View Detail):
Post an issue on [GitHub][issues] if you want other plugins.
To disable integrated plugins, put their names separated with ,:
"markdownExtended.disabledPlugins": "underline, toc"
Available names: toc, container, admonition, footnote, abbr, sup, sub, checkbox, attrs, kbd, underline, mark, deflist, emoji, multimd-table, html5-embed
The extension works with other markdown plugin extensions (those who contribute to built-in Markdown engine) well, Both Preview and Export. Like:
The extension does not tend to do all the work, so just use them, those plugins could be deeper developed, with better experience.
Find in command palette, or right click on an editor / workspace folder, and execute:
Markdown: Export to FileMarkdown: Export Markdown to FileThe export files are organized in out directory in the root of workspace folder by default.
You can configure exporting for multiple documents with user settings.
Further, you can add per-file settings inside markdown to override user settings, it has the highest priority:
---
puppeteer:
pdf:
format: A4
displayHeaderFooter: true
margin:
top: 1cm
right: 1cm
bottom: 1cm
left: 1cm
image:
quality: 90
fullPage: true
---
contents goes here...
See all available settings for puppeteer.pdf, and puppeteer.image
Inspired by joshbax.mdhelper, but totally new implements.
| Command | Keyboard Shortcut |
|---|---|
| Format: Toggle Bold | Ctrl+B |
| Format: Toggle Italics | Ctrl+I |
| Format: Toggle Underline | Ctrl+U |
| Format: Toggle Mark | Ctrl+M |
| Format: Toggle Strikethrough | Alt+S |
| Format: Toggle Code Inline | Alt+` |
| Format: Toggle Code Block | Alt+Shift+` |
| Format: Toggle Block Quote | Ctrl+Shift+Q |
| Format: Toggle Superscript | Ctrl+Shift+U |
| Format: Toggle Subscript | Ctrl+Shift+L |
| Format: Toggle Unordered List | Ctrl+L, Ctrl+U |
| Format: Toggle Ordered List | Ctrl+L, Ctrl+O |
| Table: Paste as Table | Ctrl+Shift+T, Ctrl+Shift+P |
| Table: Format Table | Ctrl+Shift+T, Ctrl+Shift+F |
| Table: Add Columns to Left | Ctrl+Shift+T, Ctrl+Shift+L |
| Table: Add Columns to Right | Ctrl+Shift+T, Ctrl+Shift+R |
| Table: Add Rows Above | Ctrl+Shift+T, Ctrl+Shift+A |
| Table: Add Row Below | Ctrl+Shift+T, Ctrl+Shift+B |
| Table: Move Columns Left | Ctrl+Shift+T Ctrl+Shift+Left |
| Table: Move Columns Right | Ctrl+Shift+T Ctrl+Shift+Right |
| Table: Delete Rows | Ctrl+Shift+D, Ctrl+Shift+R |
| Table: Delete Columns | Ctrl+Shift+D, Ctrl+Shift+C |
Looking for
Move Rows Up / Down?
You can use vscode built-inMove Line Up / Down, shortcuts arealt+↑andalt+↓
Move columns key bindings has been changed to
ctrl+shift+t ctrl+shift+left/right, due to #57, #68
Copy a table from Excel, Web and other applications which support the format of Comma-Separated Values (CSV), then run the command Paste as Markdown Table, you will get the markdown table.
Inspired by MkDocs
Nesting supported (by indent) admonition, the following shows a danger admonition nested by a note admonition.
!!! note
This is the **note** admonition body
!!! danger Danger Title
This is the **danger** admonition body
!!! danger ""
This is the danger admonition body
note | summary, abstract, tldr | info, todo | tip, hint | success, check, done | question, help, faq | warning, attention, caution | failure, fail, missing | danger, error, bug | example, snippet | quote, cite
Now, you're able to write anchor links consistent to heading texts.
Go to
[简体中文](#简体中文),
[Español Título](#Español-Título).
## 简体中文
Lorem ipsum dolor sit amet, consectetur adipiscing elit.
Aenean euismod bibendum laoreet.
## Español Título
Lorem ipsum dolor sit amet, consectetur adipiscing elit.
Aenean euismod bibendum laoreet.
[[TOC]]
Here is a footnote reference,[^1] and another.[^longnote]
[^1]: Here is the footnote.
[^longnote]: Here's one with multiple blocks.
Here is a footnote reference,[1] and another.[2]
*[HTML]: Hyper Text Markup Language
*[W3C]: World Wide Web Consortium
The HTML specification
is maintained by the W3C.
The HTML specification is maintained by the W3C.
Apple
: Pomaceous fruit of plants of the genus Malus in the family Rosaceae.
29^th^, H~2~O
29th, H2O
[ ] unchecked
[x] checked
item **bold red**{style="color:red"}
item bold red
[[Ctrl+Esc]]
Ctrl+Esc
_underline_
underline
::::: container
:::: row
::: col-xs-6 alert alert-success
success text
:::
::: col-xs-6 alert alert-warning
warning text
:::
::::
:::::
(Rendered with style bootstrap, to see the same result, you need the follow config)
"markdown.styles": [
"https://maxcdn.bootstrapcdn.com/bootstrap/4.0.0/css/bootstrap.min.css"
]
Simple plugin for VS Code that allows you to quickly navigate the file inside your project's node_modules directory.
Chances are you have the node_modules folder excluded from the built-in search in VS Code, which means if you want to open and/or edit a file inside node_modules, you can have to find it manually, which can be annoying when your node_modules folder is large.
node_modules by traversing the folder tree.search-node-modules.useLastFolder: Default to folder of last opened file when searching (defaults to false).search-node-modules.path: Relative path to node_modules folder (defaults to node_modules).Some of my friends ask me for similar requrest so I create this extension. It aims to integrate browser sync with VSCode to provide live preview of website.
It can run without installing browser-sync and Node.js runtime becasues the extension containing the codes of browser-sync is running on a separated extension host node process.
Although many enhancements can be done, the basic functions are finished. For any issue, you can leave a comment below or leave a issue at github.
The preview can be opened at the right panel and in the default browser in different command, and there are two modes: Server mode and Proxy mode.
html filephp, jsp, asp etc ...With opening or Without opening folder
Without opening a folder
html file: Browser Sync: Server mode at side panelYou can also try the browser mode by command: Browser Sync: Server mode in browser
With opening a folder
html file: Browser Sync: Server mode at side panelWithout opening a folder
The image below is a Laravel web application hosted on a docker machine, the guideline don't just applies for Laravel, this also applied for other web application.
Browser Sync: Proxy mode at side panelhttp://localhost:8080, or 8080With opening a folder
Browser Sync: Proxy mode at side panelhttp://localhost:8080, or 8080Refresh Side Panel
Run command Browser Sync: Refresh Side Panel which acts like F5 in browser to refresh the side panel
Sometimes the page may crash and no <body> tag is returned, then the script of the browser sync cannot be injected and the codeSync will stop. In this situation,
Add setting as JSON format into user setting or workspace setting to override default behaviour. The setting options come from here, please use the option for Browser Sync version 2.18.13
Note from issue: Use "google chrome" under window, "chrome" under Mac
{
"browserSync.config": {
"browser": ["chrome", "firefox"],
"codeSync": false
}
}
{
"browserSync.config": {
"files": ["*.html", "*.log", "C:\\Users\\jason\\Desktop\\db.txt"]
}
}
Node.js server will be started, it handle request of the HTML file, and listen to the changes of files.src pointing to the URL of the HTML file.Node.js proxy will be started, it forward your request to the target URL with injecting the script in the returned HTML.src pointing to the URL of the proxy server.VSCode Essentials is a collection of many individual extensions that includes all of the functionality needed to turn VSCode into a ⚡ supercharged ⚡ integrated development environment (IDE).
This extension pack is language-agnostic, and does not include functionality for specific programming languages or frameworks. Instead, this extension's objective is to remain relatively lean while delivering powerful features that all developers can benefit from.
{
// // TODO: Add files that you want to be included in IntelliSense at all times.
// // Enable to get autocomplete for the entire project (as opposed to just open files). It's a
// // good idea to read the All Autocomplete extension's documentation to understand the performance
// // impact of specific settings.
// "AllAutocomplete.wordListFiles": ["/src/"],
}
{
"codestream.autoSignIn": false
}
{
"customizeUI.stylesheet": {
// NOTE: Only hide icons if you're already familiar with their functionality and shortcuts
// Hides specific editor action icons
".editor-actions a[title^=\"Toggle File Blame Annotations\"]": "display: none !important;",
".editor-actions a[title^=\"Open Changes\"]": "display: none !important;",
".editor-actions a[title^=\"More Actions...\"]": "display: none !important;",
".editor-actions a[title^=\"Split Editor Right (⌘\\\\)\"]": "display: none !important;",
".editor-actions a[title^=\"Run Code (⌃⌥N)\"]": "display: none !important;",
// Adds a border below the sidebar title.
// TODO: Update `19252B` in the setting below with the hex color of your choice.
".sidebar .composite.title": "border-bottom: 1px solid #19252B;",
// Leaves only the bottom border on matching bracket border.
".monaco-editor .bracket-match": "border-top: none; border-right: none; border-left: none;",
// Changes color of the circle that appears in a dirty file's editor tab.
// TODO: Update `00bcd480` in the setting below with the hex color of your choice.
".monaco-workbench .part.editor>.content .editor-group-container.active>.title .tabs-container>.tab.dirty>.tab-close .action-label:not(:hover):before, .monaco-workbench .part.editor>.content .editor-group-container>.title .tabs-container>.tab.dirty>.tab-close .action-label:not(:hover):before": "color: #00bcd480;"
}
}
{
// Toggle from command palette as needed.
"gitlens.codeLens.enabled": false,
"gitlens.currentLine.enabled": false,
// Keep source control tools in same view.
"gitlens.views.compare.location": "scm",
"gitlens.views.fileHistory.location": "scm",
"gitlens.views.lineHistory.location": "scm",
"gitlens.views.repositories.location": "scm",
"gitlens.views.search.location": "scm"
}
{
// TODO: Add your own macros. Below are some examples to get you started. Execute these commands with the command palette, or assign them to keyboard shortcuts.
// NOTE: Use in combination with the Settings Cycler settings listed further down this page.
"macros.list": {
// Toggle zoom setting and panel position when moving from laptop to external monitor and vice versa.
"toggleDesktop": [
"workbench.action.togglePanelPosition",
"settings.cycle.desktopZoom"
],
// Copy line and paste it below, comment out the original line, and move cursor down to the pasted line. Great for debugging/experimenting with code while keeping the original intact.
"commentDown": [
"editor.action.copyLinesDownAction",
"cursorUp",
"editor.action.addCommentLine",
"cursorDown"
]
}
}
{
// TODO: Update styling to fit your theme. The following works well with Material Theme.
"metaGo.decoration.borderColor": "#253036",
"metaGo.decoration.backgroundColor": "red, blue",
"metaGo.decoration.backgroundOpacity": "1",
"metaGo.decoration.color": "white",
// TODO: Update font settings to fit your preference.
"metaGo.decoration.fontFamily": "'Operator Mono SSm Lig', 'Fira Code', Menlo, Monaco, 'Courier New', monospace",
"metaGo.decoration.fontWeight": "normal",
"metaGo.jumper.timeout": 60
}
{
// TODO: Add the folders where you keep your code projects at.
"projectManager.any.baseFolders": ["$home/Code"],
"projectManager.any.maxDepthRecursion": 1,
"projectManager.sortList": "Recent",
"projectManager.removeCurrentProjectFromList": false
}
{
"rewrap.autoWrap.enabled": true,
"rewrap.reformat": true,
"rewrap.wrappingColumn": 100
}
{
// Use in combination with the Macro settings listed further up this page.
"settings.cycle": [
{
"id": "desktopZoom",
"values": [
{
"window.zoomLevel": 1
},
{
"window.zoomLevel": 1.4
}
]
}
]
}
{
"sync.quietSync": true,
// TODO: Add your gist ID
"sync.gist": "00000000000000000000000000000000"
}
{
"todo-tree.highlights.customHighlight": {
"TODO": {
"foreground": "#FFEB95"
},
"NOTE": {
"foreground": "#FFEB95",
"icon": "note"
},
"FIXME": {
"foreground": "#FFEB95",
"icon": "alert"
},
// Clearly mark comments that belong to disabled (commented-out) code.
"// //": {
"foreground": "#5d7783",
"textDecoration": "line-through",
"type": "text",
"hideFromTree": true
}
},
"todo-tree.tree.grouped": true,
"todo-tree.tree.hideIconsWhenGroupedByTag": true,
"todo-tree.tree.labelFormat": "∙ ${after}",
"todo-tree.tree.showCountsInTree": true,
"todo-tree.tree.showInExplorer": false,
"todo-tree.tree.showScanOpenFilesOrWorkspaceButton": true,
"todo-tree.tree.tagsOnly": true,
"todo-tree.highlights.highlightDelay": 0,
"todo-tree.general.tags": ["TODO", "FIXME", "NOTE", "// //"],
// Allow for matches inside of VSCode files (e.g. `settings.json`).
"todo-tree.highlights.schemes": ["file", "untitled", "vscode-userdata"],
// Allows for matches inside of JSDoc comments.
"todo-tree.regex.regex": "((\\*|//|#|<!--|;|/\\*|^)\\s*($TAGS)|^\\s*- \\[ \\])"
}
Bug reports should be filed at the repository belonging to the individual extension that is causing the issue (click on the extension's marketplace link below and then look for the repo link in the sidebar, under "Project Details").
Some extensions will prevent the Output Colorizer extension from adding syntax highlighting in the output/debug panels. This is a VSCode limitation waiting for a fix. The current workaround is to disable extensions (when not needed) that conflict with the Output Colorizer extension. Code Runner is one of the known, conflicting extensions (which itself is also included in this extension pack).
| Extension | Link |
|---|---|
| All Autocomplete | |
| Bookmarks | |
| Checkpoints | |
| Code Runner | |
| Code Spell Checker | |
| CodeStream | |
| Control Snippets | |
| Customize UI | |
| DotENV | |
| Easy Snippet | |
| Explorer Exclude | |
| Format All | |
| GistPad | |
| Git Graph | |
| GitHub Pull Requests | |
| Gitignore | |
| GitLens | |
| Gremlins | |
| Hungry Delete | |
| IntelliCode | |
| Live Share | |
| Live Share Audio | |
| Live Share Chat | |
| Live Share Whiteboard | |
| Local History | |
| Macros | |
| MetaGo | |
| Monkey Patch | |
| Multiple Clipboards | |
| Output Colorizer | |
|
|
| Peacock | |
| Polacode | |
| Project Manager | |
| Rewrap | |
| Search Editor: Apply Changes | |
| Settings Cycler | |
| Settings Sync | |
| Text Pastry | |
| Todo Tree | |
This extension contains code snippets for Unit Test use describe in JavaScript for Vs Code editor (supports both JavaScript and TypeScript).
In order to install an extension you need to launch the Command Pallete (Ctrl + Shift + P or Cmd + Shift + P) and type Extensions. There you have either the option to show the already installed snippets or install new ones.
Below is a list of all available snippets and the triggers of each one. The ⇥ means the TAB key.
| Trigger | Content |
|---|---|
det→ |
add describe with it describe('{description}',() => { it('{1}', () => {}) }); |
deb→ |
add describe describe('{description}',() => {}); |
dit→ |
add it it('{1}',() => {}); |
ete→ |
add expect expect({object}).toExist(); |
ene→ |
add expect expect({object}).toNotExist() |
etb→ |
add expect expect({object}).toBe({value}) |
enb→ |
add expect expect({object}).toNotBe({value}) |
etq→ |
add expect expect({object}).toEqual({value}) |
enq→ |
add expect expect({object}).toNotEqual({value}) |
Provides path completion for visual studio code.
path-autocomplete.excludedItems optionpath-autocomplete.pathMappings optionpath-autocomplete.transformationspath-autocomplete.useBackslashYou can install it from the marketplace.
ext install path-autocomplete
path-autocomplete.extensionOnImport - boolean If true it will append the extension as well when inserting the file name on import or require statements.path-autocomplete.includeExtension - boolean If true it will append the extension as well when inserting the file name. path-autocomplete.excludedItems
This option allows you to exclude certain files from the suggestions.
"path-autocomplete.excludedItems": {
"**/*.js": { "when": "**/*.ts" }, // ignore js files if i'm inside a ts file
"**/*.map": { "when": "**" }, // always ignore *.map files
"**/{.git,node_modules}": { "when": "**" }, // always ignore .git and node_modules folders
"**": { "when": "**", "isDir": true }, // always ignore `folder` suggestions
"**/*.ts": { "when": "**", "context": "import.*" }, // ignore .ts file suggestions in all files when the current line matches the regex from the `context`
}
minimatch is used to check if the files match the pattern.
path-autocomplete.pathMappings
Useful for defining aliases for absolute or relative paths.
"path-autocomplete.pathMappings": {
"/test": "${folder}/src/Actions/test", // alias for /test
"/": "${folder}/src", // the absolute root folder is now /src,
"$root": ${folder}/src // the relative root folder is now /src
// or multiple folders for one mapping
"$root": ["${folder}/p1/src", "${folder}/p2/src"] // the root is now relative to both p1/src and p2/src
}
path-autocomplete.pathSeparators - string Lists the separators used for extracting the inserted path when used outside strings.
The default value is: \t({[
path-autocomplete.transformations
List of custom transformation applied to the inserted text.
Example: replace _ with an empty string when selecting a SCSS partial file.
"path-autocomplete.transformations": [{
"type": "replace",
"parameters": ["^_", ""],
"when": {
"fileName": "\\.scss$"
}
}],
Supported transformation:
replace - Performs a string replace on the selected item text.
Parameters:regex - a regex patternreplaceString - the replacement string path-autocomplete.triggerOutsideStrings boolean - if true it will trigger the autocomplete outside of quotes
path-autocomplete.enableFolderTrailingSlash boolean - if true it will add a slash after the insertion of a folder path that will trigger the autocompletion.path-autocomplete.useBackslash boolean - if true it will use \\ when iserting the paths.path-autocomplete.ignoredFilesPattern - string - Glob patterns for disabling the path completion in the specified file types. Example: "*/.{css,scss}"path-autocomplete.ignoredPrefixes array - list of ignored prefixes to disable suggestions
on certain preceeding words/characters.
Example: "path-autocomplete.ignoredPrefixes": [
"//" // type double slash and no suggesstions will be displayed
]
VSCode doesn't automatically recognize path aliases so you cannot alt+click to open files. To fix this you need to create jsconfig.json or tsconfig.json to the root of your project and define your alises. An example configuration:
{
"compilerOptions": {
"target": "esnext", // define to your liking
"baseUrl": "./",
"paths": {
"test/*": ["src/actions/test"],
"assets/*": ["src/assets"]
}
},
"exclude": ["node_modules"] // Optional
}
if you want to use this in markdown or simple text files you need to enable path-autocomplete.triggerOutsideStrings
./ for relative paths
If
./doesn't work properly, add this tokeybindings.json:{ "key": ".", "command": "" }. Refer to https://github.com/ChristianKohler/PathIntellisense/issues/9
When I use aliases I can't jump to imported file on Ctrl + Click
This is controlled by the compiler options in jsconfig.json. You can create the JSON file in your project root and add paths for your aliases. jsconfig.json Reference https://code.visualstudio.com/docs/languages/jsconfig#_using-webpack-aliases
path-autocomplete.ignoredFilesPattern option to disable the path autocomplete in certain file typespath-autocomplete.excludedItems option as follows: // disable all suggestions in HTML files, when the current line contains the href or src attributes
"path-autocomplete.excludedItems": {
"**": {
"when": "**/*.html",
"context": "(src|href)=.*"
}
},
// for js and typescript you can disable the vscode suggestions using the following options
"javascript.suggest.paths": false,
"typescript.suggest.paths": false
another easy way to manage snippet
default keymaps cmd+k shift+cmd+s
change default keymaps cmd+. cmd+s to cmd+k shift+cmd+s, issue#5
support insiders version, improve the marketplace listing
first release
![]()
Language extension for VSCode/Bluemix Code that adds syntax colorization for both the output/debug/extensions panel and *.log files.
Note: If you are using other extensions that colorize the output panel, it could override and disable this extension.
Colorization should work with most themes because it uses common theme token style names. It also works with most instances of the output panel. Initially attempts to match common literals (strings, dates, numbers, guids) and warning|info|error|server|local messages.
You can open an issue on the GitHub repo
Portions of the language grammar are based off of a StackOverflow question, asked by user emilast and answered by user Wosi, availble under Creative Commons at: http://stackoverflow.com/questions/33403324/how-to-create-a-simple-custom-language-colorization-to-vs-code
![]()
REST Client allows you to send HTTP request and view the response in Visual Studio Code directly.
cURL command### delimiter){{$guid}}{{$randomInt min max}}{{$timestamp [offset option]}}{{$datetime rfc1123|iso8601 [offset option]}}{{$localDatetime rfc1123|iso8601 [offset option]}}{{$processEnv [%]envVarName}}{{$dotenv [%]variableName}}{{$aadToken [new] [public|cn|de|us|ppe] [<domain|tenantId>] [aud:<domain|tenantId>]}}Python, JavaScript and more!HTTP language support.http and .rest file extensions support# or //) supportjson and xml body indentation, comment shortcut and auto closing bracketsGET and POSThttp fileIn editor, type an HTTP request as simple as below:
https://example.com/comments/1
Or, you can follow the standard RFC 2616 that including request method, headers, and body.
POST https://example.com/comments HTTP/1.1
content-type: application/json
{
"name": "sample",
"time": "Wed, 21 Oct 2015 18:27:50 GMT"
}
Once you prepared a request, click the Send Request link above the request (this will appear if the file's language mode is HTTP, by default .http files are like this), or use shortcut Ctrl+Alt+R( Cmd+Alt+R for macOS), or right-click in the editor and then select Send Request in the menu, or press F1 and then select/type Rest Client: Send Request, the response will be previewed in a separate webview panel of Visual Studio Code. If you'd like to use the full power of searching, selecting or manipulating in Visual Studio Code, you can also preview response in an untitled document by setting rest-client.previewResponseInUntitledDocument to true. Once a request is issued, the waiting spin icon will be displayed in the status bar until the response is received. You can click the spin icon to cancel the request. After that, the icon will be replaced with the total duration and response size.
You can view the breakdown of the response time when hovering over the total duration in status bar, you could view the duration details of Socket, DNS, TCP, First Byte and Download.
When hovering over the response size in status bar, you could view the breakdown response size details of headers and body.
All the shortcuts in REST Client Extension are ONLY available for file language mode
httpandplaintext.Send Request link above each request will only be visible when the request file is in
httpmode, more details can be found in http language section.
You may even want to save numerous requests in the same file and execute any of them as you wish easily. REST Client extension could recognize requests separated by lines begin with three or more consecutive # as a delimiter. Place the cursor anywhere between the delimiters, issuing the request as above, and the underlying request will be sent out.
GET https://example.com/comments/1 HTTP/1.1
###
GET https://example.com/topics/1 HTTP/1.1
###
POST https://example.com/comments HTTP/1.1
content-type: application/json
{
"name": "sample",
"time": "Wed, 21 Oct 2015 18:27:50 GMT"
}
REST Client extension also provides the flexibility that you can send the request with your selected text in editor.
Press F1, type ext install then search for rest-client.
The first non-empty line of the selection (or document if nothing is selected) is the Request Line. Below are some examples of Request Line:
GET https://example.com/comments/1 HTTP/1.1
GET https://example.com/comments/1
https://example.com/comments/1
If request method is omitted, request will be treated as GET, so above requests are the same after parsing.
You can always write query strings in the request line, like:
GET https://example.com/comments?page=2&pageSize=10
Sometimes there may be several query parameters in a single request, putting all the query parameters in Request Line is difficult to read and modify. So we allow you to spread query parameters into multiple lines(one line one query parameter), we will parse the lines in immediately after the Request Line which starts with ? and &, like
GET https://example.com/comments
?page=2
&pageSize=10
The lines immediately after the request line to first empty line are parsed as Request Headers. Please provide headers with the standard field-name: field-value format, each line represents one header. By default REST Client Extension will add a User-Agent header with value vscode-restclient in your request if you don't explicitly specify. You can also change the default value in setting rest-client.defaultHeaders.
Below are examples of Request Headers:
User-Agent: rest-client
Accept-Language: en-GB,en-US;q=0.8,en;q=0.6,zh-CN;q=0.4
Content-Type: application/json
If you want to provide the request body, please add a blank line after the request headers like the POST example in usage, and all content after it will be treated as Request Body. Below are examples of Request Body:
POST https://example.com/comments HTTP/1.1
Content-Type: application/xml
Authorization: token xxx
<request>
<name>sample</name>
<time>Wed, 21 Oct 2015 18:27:50 GMT</time>
</request>
You can also specify file path to use as a body, which starts with <, the file path(whitespaces should be preserved) can be either in absolute or relative(relative to workspace root or current http file) formats:
POST https://example.com/comments HTTP/1.1
Content-Type: application/xml
Authorization: token xxx
< C:\Users\Default\Desktop\demo.xml
POST https://example.com/comments HTTP/1.1
Content-Type: application/xml
Authorization: token xxx
< ./demo.xml
If you want to use variables in that file, you'll have to use an @ to ensure variables are processed when referencing a file (UTF-8 is assumed as the default encoding)
POST https://example.com/comments HTTP/1.1
Content-Type: application/xml
Authorization: token xxx
<@ ./demo.xml
to override the default encoding, simply type it next to the @ like the below example
POST https://example.com/comments HTTP/1.1
Content-Type: application/xml
Authorization: token xxx
<@latin1 ./demo.xml
When content type of request body is multipart/form-data, you may have the mixed format of the request body as follows:
POST https://api.example.com/user/upload
Content-Type: multipart/form-data; boundary=----WebKitFormBoundary7MA4YWxkTrZu0gW
------WebKitFormBoundary7MA4YWxkTrZu0gW
Content-Disposition: form-data; name="text"
title
------WebKitFormBoundary7MA4YWxkTrZu0gW
Content-Disposition: form-data; name="image"; filename="1.png"
Content-Type: image/png
< ./1.png
------WebKitFormBoundary7MA4YWxkTrZu0gW--
When content type of request body is application/x-www-form-urlencoded, you may even divide the request body into multiple lines. And each key and value pair should occupy a single line which starts with &:
POST https://api.example.com/login HTTP/1.1
Content-Type: application/x-www-form-urlencoded
name=foo
&password=bar
When your mouse is over the document link, you can
Ctrl+Click(Cmd+Clickfor macOS) to open the file in a new tab.
With GraphQL support in REST Client extension, you can author and send GraphQL query using the request body. Besides that you can also author GraphQL variables in the request body. GraphQL variables part in request body is optional, you also need to add a blank line between GraphQL query and variables if you need it.
You can specify a request as GraphQL Request by adding a custom request header X-Request-Type: GraphQL in your headers. The following code illustrates this:
POST https://api.github.com/graphql
Content-Type: application/json
Authorization: Bearer xxx
X-REQUEST-TYPE: GraphQL
query ($name: String!, $owner: String!) {
repository(name: $name, owner: $owner) {
name
fullName: nameWithOwner
description
diskUsage
forkCount
stargazers(first: 5) {
totalCount
nodes {
login
name
}
}
watchers {
totalCount
}
}
}
{
"name": "vscode-restclient",
"owner": "Huachao"
}
We add the capability to directly run curl request in REST Client extension. The issuing request command is the same as raw HTTP one. REST Client will automatically parse the request with specified parser.
REST Client doesn't fully support all the options of cURL, since underneath we use request library to send request which doesn't accept all the cURL options. Supported options are listed below:
Sometimes you may want to get the curl format of an http request quickly and save it to clipboard, just pressing F1 and then selecting/typing Rest Client: Copy Request As cURL or simply right-click in the editor, and select Copy Request As cURL.
Once you want to cancel a processing request, click the waiting spin icon or use shortcut Ctrl+Alt+K( Cmd+Alt+K for macOS), or press F1 and then select/type Rest Client: Cancel Request.
Sometimes you may want to refresh the API response, now you could do it simply using shortcut Ctrl+Alt+L( Cmd+Alt+L for macOS), or press F1 and then select/type Rest Client: Rerun Last Request to rerun the last request.
Each time we sent an http request, the request details(method, url, headers, and body) would be persisted into file. By using shortcut Ctrl+Alt+H( Cmd+Alt+H for macOS), or press F1 and then select/type Rest Client: Request History, you can view the last 50 request items(method, url and request time) in the time reversing order, you can select any request you wish to trigger again. After specified request history item is selected, the request details would be displayed in a temp file, you can view the request details or follow previous step to trigger the request again.
You can also clear request history by pressing F1 and then selecting/typing Rest Client: Clear Request History.
In the upper right corner of the response preview tab, we add a new icon to save the latest response to local file system. After you click the Save Full Response icon, it will prompt the window with the saved response file path. You can click the Open button to open the saved response file in current workspace or click Copy Path to copy the saved response path to clipboard.
Another icon in the upper right corner of the response preview tab is the Save Response Body button, it will only save the response body ONLY to local file system. The extension of saved file is set according to the response MIME type, like if the Content-Type value in response header is application/json, the saved file will have extension .json. You can also overwrite the MIME type and extension mapping according to your requirement with the rest-client.mimeAndFileExtensionMapping setting.
"rest-client.mimeAndFileExtensionMapping": {
"application/atom+xml": "xml"
}
In the response webview panel, there are two options Fold Response and Unfold Response after clicking the More Actions... button. Sometimes you may want to fold or unfold the whole response body, these options provide a straightforward way to achieve this.
We have supported some most common authentication schemes like Basic Auth, Digest Auth, SSL Client Certificates, Azure Active Directory(Azure AD) and AWS Signature v4.
HTTP Basic Auth is a widely used protocol for simple username/password authentication. We support three formats of Authorization header to use Basic Auth.
username:password.username:password.username and password, which is separated by space. REST Client extension will do the base64 encoding automatically.The corresponding examples are as follows, they are equivalent:
GET https://httpbin.org/basic-auth/user/passwd HTTP/1.1
Authorization: Basic user:passwd
and
GET https://httpbin.org/basic-auth/user/passwd HTTP/1.1
Authorization: Basic dXNlcjpwYXNzd2Q=
and
GET https://httpbin.org/basic-auth/user/passwd HTTP/1.1
Authorization: Basic user passwd
HTTP Digest Auth is also a username/password authentication protocol that aims to be slightly safer than Basic Auth. The format of Authorization header for Digest Auth is similar to Basic Auth. You just need to set the scheme to Digest, as well as the raw user name and password.
GET https://httpbin.org/digest-auth/auth/user/passwd
Authorization: Digest user passwd
We support PFX, PKCS12, and PEM certificates. Before using your certificates, you need to set the certificates paths(absolute/relative to workspace/relative to current http file) in the setting file for expected host name(port is optional). For each host, you can specify the key cert, key, pfx and passphrase.
cert: Path of public x509 certificatekey: Path of private keypfx: Path of PKCS #12 or PFX certificatepassphrase: Optional passphrase for the certificate if required
You can add following piece of code in your setting file if your certificate is in PEM format:"rest-client.certificates": {
"localhost:8081": {
"cert": "/Users/demo/Certificates/client.crt",
"key": "/Users/demo/Keys/client.key"
},
"example.com": {
"cert": "/Users/demo/Certificates/client.crt",
"key": "/Users/demo/Keys/client.key"
}
}
Or if you have certificate in PFX or PKCS12 format, setting code can be like this:
"rest-client.certificates": {
"localhost:8081": {
"pfx": "/Users/demo/Certificates/clientcert.p12",
"passphrase": "123456"
}
}
Azure AD is Microsoft's multi-tenant, cloud-based directory and identity management service, you can refer to the System Variables section for more details.
Microsoft identity platform is an evolution of the Azure Active Directory (Azure AD) developer platform. It allows developers to build applications that sign in all Microsoft identities and get tokens to call Microsoft APIs such as Microsoft Graph or APIs that developers have built. Microsoft Identity platform supports OAuth2 scopes, incremental consent and advanced features like multi-factor authentication and conditional access.
AWS Signature version 4 authenticates requests to AWS services. To use it you need to set the Authorization header schema to AWS and provide your AWS credentials separated by spaces:
<accessId>: AWS Access Key Id<accessKey>: AWS Secret Access Keytoken:<sessionToken>: AWS Session Token - required only for temporary credentialsregion:<regionName>: AWS Region - required only if region can't be deduced from URLservice:<serviceName>: AWS Service - required only if service can't be deduced from URLGET https://httpbin.org/aws-auth HTTP/1.1
Authorization: AWS <accessId> <accessKey> [token:<sessionToken>] [region:<regionName>] [service:<serviceName>]
Once you've finalized your request in REST Client extension, you might want to make the same request from your source code. We allow you to generate snippets of code in various languages and libraries that will help you achieve this. Once you prepared a request as previously, use shortcut Ctrl+Alt+C( Cmd+Alt+C for macOS), or right-click in the editor and then select Generate Code Snippet in the menu, or press F1 and then select/type Rest Client: Generate Code Snippet, it will pop up the language pick list, as well as library list. After you selected the code snippet language/library you want, the generated code snippet will be previewed in a separate panel of Visual Studio Code, you can click the Copy Code Snippet icon in the tab title to copy it to clipboard.
Add language support for HTTP request, with features like syntax highlight, auto completion, code lens and comment support, when writing HTTP request in Visual Studio Code. By default, the language association will be automatically activated in two cases:
.http or .restMethod SP Request-URI SP HTTP-Version formatIf you want to enable language association in other cases, just change the language mode in the right bottom of Visual Studio Code to HTTP.
Currently, auto completion will be enabled for following seven categories:
Accept and Content-Type headersBasic and DigestA single http file may define lots of requests and file level custom variables, it will be difficult to find the request/variable you want. We leverage from the Goto Symbol Feature of Visual Studio Code to support to navigate(goto) to request/variable with shortcut Ctrl+Shift+O( Cmd+Shift+O for macOS), or simply press F1, type @.
Environments give you the ability to customize requests using variables, and you can easily switch environment without changing requests in http file. A common usage is having different configurations for different web service environments, like devbox, sandbox, and production. We also support the shared environment(identified by special environment name \$shared) to provide a set of variables that are available in all environments. And you can define the same name variable in your specified environment to overwrite the value in shared environment. Currently, active environment's name is displayed at the right bottom of Visual Studio Code, when you click it, you can switch environment in the pop-up list. And you can also switch environment using shortcut Ctrl+Alt+E( Cmd+Alt+E for macOS), or press F1 and then select/type Rest Client: Switch Environment.
Environments and including variables are defined directly in Visual Studio Code setting file, so you can create/update/delete environments and variables at any time you wish. If you DO NOT want to use any environment, you can choose No Environment in the environment list. Notice that if you select No Environment, variables defined in shared environment are still available. See Environment Variables for more details about environment variables.
We support two types of variables, one is Custom Variables which is defined by user and can be further divided into Environment Variables, File Variables and Request Variables, the other is System Variables which is a predefined set of variables out-of-box.
The reference syntax of system and custom variables types has a subtle difference, for the former the syntax is {{$SystemVariableName}}, while for the latter the syntax is {{CustomVariableName}}, without preceding $ before variable name. The definition syntax and location for different types of custom variables are different. Notice that when the same name used for custom variables, request variables takes higher resolving precedence over file variables, file variables takes higher precedence over environment variables.
Custom variables can cover different user scenarios with the benefit of environment variables, file variables, and request variables. Environment variables are mainly used for storing values that may vary in different environments. Since environment variables are directly defined in Visual Studio Code setting file, they can be referenced across different http files. File variables are mainly used for representing values that are constant throughout the http file. Request variables are used for the chaining requests scenarios which means a request needs to reference some part(header or body) of another request/response in the same http file, imagine we need to retrieve the auth token dynamically from the login response, request variable fits the case well. Both file and request variables are defined in the http file and only have File Scope.
For environment variables, each environment comprises a set of key value pairs defined in setting file, key and value are variable name and value respectively. Only variables defined in selected environment and shared environment are available to you. You can also reference the variables in shared environment with {{$shared variableName}} syntax in your active environment. Below is a sample piece of setting file for custom environments and environment level variables:
"rest-client.environmentVariables": {
"$shared": {
"version": "v1",
"prodToken": "foo",
"nonProdToken": "bar"
},
"local": {
"version": "v2",
"host": "localhost",
"token": "{{$shared nonProdToken}}",
"secretKey": "devSecret"
},
"production": {
"host": "example.com",
"token": "{{$shared prodToken}}",
"secretKey" : "prodSecret"
}
}
A sample usage in http file for above environment variables is listed below, note that if you switch to local environment, the version would be v2, if you change to production environment, the version would be v1 which is inherited from the \$shared environment:
GET https://{{host}}/api/{{version}}comments/1 HTTP/1.1
Authorization: {{token}}
For file variables, the definition follows syntax @variableName = variableValue which occupies a complete line. And variable name MUST NOT contain any spaces. As for variable value, it can consist of any characters, even whitespaces are allowed for them (leading and trailing whitespaces will be trimmed). If you want to preserve some special characters like line break, you can use the backslash \ to escape, like \n. File variable value can even contain references to all of other kinds of variables. For instance, you can create a file variable with value of other request variables like @token = {{loginAPI.response.body.token}}.
File variables can be defined in a separate request block only filled with variable definitions, as well as define request variables before any request url, which needs an extra blank line between variable definitions and request url. However, no matter where you define the file variables in the http file, they can be referenced in any requests of whole file. For file variables, you can also benefit from some Visual Studio Code features like Go To Definition and Find All References. Below is a sample of file variable definitions and references in an http file.
@hostname = api.example.com
@port = 8080
@host = {{hostname}}:{{port}}
@contentType = application/json
@createdAt = {{$datetime iso8601}}
@modifiedBy = {{$processEnv USERNAME}}
###
@name = hello
GET https://{{host}}/authors/{{name}} HTTP/1.1
###
PATCH https://{{host}}/authors/{{name}} HTTP/1.1
Content-Type: {{contentType}}
{
"content": "foo bar",
"created_at": "{{createdAt}}",
"modified_by": "{{modifiedBy}}"
}
Request variables are similar to file variables in some aspects like scope and definition location. However, they have some obvious differences. The definition syntax of request variables is just like a single-line comment, and follows // @name requestName or # @name requestName just before the desired request url. You can think of request variable as attaching a name metadata to the underlying request, and this kind of requests can be called with Named Request, while normal requests can be called with Anonymous Request. Other requests can use requestName as an identifier to reference the expected part of the named request or its latest response. Notice that if you want to refer the response of a named request, you need to manually trigger the named request to retrieve its response first, otherwise the plain text of variable reference like {{requestName.response.body.$.id}} will be sent instead.
The reference syntax of a request variable is a bit more complex than other kinds of custom variables. The request variable reference syntax follows {{requestName.(response|request).(body|headers).(*|JSONPath|XPath|Header Name)}}. You have two reference part choices of the response or request: body and headers. For body part, you can use * to reference the full response body, and for JSON and XML responses, you can use JSONPath and XPath to extract specific property or attribute. For example, if a JSON response returns body {"id": "mock"}, you can set the JSONPath part to $.id to reference the id. For headers part, you can specify the header name to extract the header value. Additionally, the header name is case-insensitive.
If the JSONPath or XPath of body, or Header Name of headers can't be resolved, the plain text of variable reference will be sent instead. And in this case, diagnostic information will be displayed to help you to inspect this. And you can also hover over the request variables to view the actual resolved value.
Below is a sample of request variable definitions and references in an http file.
@baseUrl = https://example.com/api
# @name login
POST {{baseUrl}}/api/login HTTP/1.1
Content-Type: application/x-www-form-urlencoded
name=foo&password=bar
###
@authToken = {{login.response.headers.X-AuthToken}}
# @name createComment
POST {{baseUrl}}/comments HTTP/1.1
Authorization: {{authToken}}
Content-Type: application/json
{
"content": "fake content"
}
###
@commentId = {{createComment.response.body.$.id}}
# @name getCreatedComment
GET {{baseUrl}}/comments/{{commentId}} HTTP/1.1
Authorization: {{authToken}}
###
# @name getReplies
GET {{baseUrl}}/comments/{{commentId}}/replies HTTP/1.1
Accept: application/xml
###
# @name getFirstReply
GET {{baseUrl}}/comments/{{commentId}}/replies/{{getReplies.response.body.//reply[1]/@id}}
System variables provide a pre-defined set of variables that can be used in any part of the request(Url/Headers/Body) in the format {{$variableName}}. Currently, we provide a few dynamic variables which you can use in your requests. The variable names are case-sensitive.
{{$aadToken [new] [public|cn|de|us|ppe] [<domain|tenantId>] [aud:<domain|tenantId>]}}: Add an Azure Active Directory token based on the following options (must be specified in order):
new: Optional. Specify new to force re-authentication and get a new token for the specified directory. Default: Reuse previous token for the specified directory from an in-memory cache. Expired tokens are refreshed automatically. (Use F1 > Rest Client: Clear Azure AD Token Cache or restart Visual Studio Code to clear the cache.)
public|cn|de|us|ppe: Optional. Specify top-level domain (TLD) to get a token for the specified government cloud, public for the public cloud, or ppe for internal testing. Default: TLD of the REST endpoint; public if not valid.
<domain|tenantId>: Optional. Domain or tenant id for the directory to sign in to. Default: Pick a directory from a drop-down or press Esc to use the home directory ( common for Microsoft Account).
aud:<domain|tenantId>: Optional. Target Azure AD app id (aka client id) or domain the token should be created for (aka audience or resource). Default: Domain of the REST endpoint.
{{$aadV2Token [new] [appOnly ][scopes:<scope[,]>] [tenantid:<domain|tenantId>] [clientid:<clientId>]}}: Add an Azure Active Directory token based on the following options (must be specified in order):
new: Optional. Specify new to force re-authentication and get a new token for the specified directory. Default: Reuse previous token for the specified tenantId and clientId from an in-memory cache. Expired tokens are refreshed automatically. (Restart Visual Studio Code to clear the cache.)
appOnly: Optional. Specify appOnly to use make to use a client credentials flow to obtain a token. aadV2ClientSecret and aadV2AppUrimust be provided as REST Client environment variables. aadV2ClientId and aadV2TenantId may also be optionally provided via the environment. aadV2ClientId in environment will only be used for appOnly calls.
scopes:<scope[,]>: Optional. Comma delimited list of scopes that must have consent to allow the call to be successful. Not applicable for appOnly calls.
tenantId:<domain|tenantId>: Optional. Domain or tenant id for the tenant to sign in to. ( common to determine tenant from sign in).
clientId:<clientid>: Optional. Identifier of the application registration to use to obtain the token. Default uses an application registration created specifically for this plugin.
{{$guid}}: Add a RFC 4122 v4 UUID
{{$processEnv [%]envVarName}}: Allows the resolution of a local machine environment variable to a string value. A typical use case is for secret keys that you don't want to commit to source control.
For example: Define a shell environment variable in .bashrc or similar on windows
export DEVSECRET="XlII3JUaEZldVg="
export PRODSECRET="qMTkleUgjclRoRmV1WA=="
export USERNAME="sameUsernameInDevAndProd"
and with extension setting environment variables.
"rest-client.environmentVariables": {
"$shared": {
"version": "v1"
},
"local": {
"version": "v2",
"host": "localhost",
"secretKey": "DEVSECRET"
},
"production": {
"host": "example.com",
"secretKey" : "PRODSECRET"
}
}
You can refer directly to the key (e.g. PRODSECRET) in the script, for example if running in the production environment
# Lookup PRODSECRET from local machine environment
GET https://{{host}}/{{version}}/values/item1?user={{$processEnv USERNAME}}
Authorization: {{$processEnv PRODSECRET}}
or, it can be rewritten to indirectly refer to the key using an extension environment setting (e.g. %secretKey) to be environment independent using the optional % modifier.
# Use secretKey from extension environment settings to determine which local machine environment variable to use
GET https://{{host}}/{{version}}/values/item1?user={{$processEnv USERNAME}}
Authorization: {{$processEnv %secretKey}}
envVarName: Mandatory. Specifies the local machine environment variable
%: Optional. If specified, treats envVarName as an extension setting environment variable, and uses the value of that for the lookup.
{{$dotenv [%]variableName}}: Returns the environment value stored in the .env file which exists in the same directory of your .http file.
{{$randomInt min max}}: Returns a random integer between min (included) and max (excluded){{$timestamp [offset option]}}: Add UTC timestamp of now. You can even specify any date time based on current time in the format {{$timestamp number option}}, e.g., to represent 3 hours ago, simply {{$timestamp -3 h}}; to represent the day after tomorrow, simply {{$timestamp 2 d}}.{{$datetime rfc1123|iso8601|"custom format"|'custom format' [offset option]}}: Add a datetime string in either ISO8601, RFC1123 or a custom display format. You can even specify a date time relative to the current date similar to timestamp like: {{$datetime iso8601 1 y}} to represent a year later in ISO8601 format. If specifying a custom format, wrap it in single or double quotes like: {{$datetime "DD-MM-YYYY" 1 y}}. The date is formatted using Day.js, read here for information on format strings.{{$localDatetime rfc1123|iso8601|"custom format"|'custom format' [offset option]}}: Similar to $datetime except that $localDatetime returns a time string in your local time zone.The offset options you can specify in timestamp and datetime are:
| Option | Description |
|---|---|
| y | Year |
| M | Month |
| w | Week |
| d | Day |
| h | Hour |
| m | Minute |
| s | Second |
| ms | Millisecond |
Below is a example using system variables:
POST https://api.example.com/comments HTTP/1.1
Content-Type: application/xml
Date: {{$datetime rfc1123}}
{
"user_name": "{{$dotenv USERNAME}}",
"request_id": "{{$guid}}",
"updated_at": "{{$timestamp}}",
"created_at": "{{$timestamp -1 d}}",
"review_count": "{{$randomInt 5 200}}",
"custom_date": "{{$datetime 'YYYY-MM-DD'}}",
"local_custom_date": "{{$localDatetime 'YYYY-MM-DD'}}"
}
More details about
aadToken(Azure Active Directory Token) can be found on Wiki
REST Client Extension adds the ability to control the font family, size and weight used in the response preview.
By default, REST Client Extension only previews the full response in preview panel(status line, headers and body). You can control which part should be previewed via the rest-client.previewOption setting:
| Option | Description |
|---|---|
| full | Default. Full response is previewed |
| headers | Only the response headers(including status line) are previewed |
| body | Only the response body is previewed |
| exchange | Preview the whole HTTP exchange(request and response) |
rest-client.followredirect: Follow HTTP 3xx responses as redirects. (Default is true)rest-client.defaultHeaders: If particular headers are omitted in request header, these will be added as headers for each request. (Default is { "User-Agent": "vscode-restclient", "Accept-Encoding": "gzip" })rest-client.timeoutinmilliseconds: Timeout in milliseconds. 0 for infinity. (Default is 0)rest-client.showResponseInDifferentTab: Show response in different tab. (Default is false)rest-client.requestNameAsResponseTabTitle: Show request name as the response tab title. Only valid when using html view, if no request name is specified defaults to "Response". (Default is false)rest-client.rememberCookiesForSubsequentRequests: Save cookies from Set-Cookie header in response and use for subsequent requests. (Default is true)rest-client.enableTelemetry: Send out anonymous usage data. (Default is true)rest-client.excludeHostsForProxy: Excluded hosts when using proxy settings. (Default is [])rest-client.fontSize: Controls the font size in pixels used in the response preview. (Default is 13)rest-client.fontFamily: Controls the font family used in the response preview. (Default is Menlo, Monaco, Consolas, "Droid Sans Mono", "Courier New", monospace, "Droid Sans Fallback")rest-client.fontWeight: Controls the font weight used in the response preview. (Default is normal)rest-client.environmentVariables: Sets the environments and custom variables belongs to it (e.g., {"production": {"host": "api.example.com"}, "sandbox":{"host":"sandbox.api.example.com"}}). (Default is {})rest-client.mimeAndFileExtensionMapping: Sets the custom mapping of mime type and file extension of saved response body. (Default is {})rest-client.previewResponseInUntitledDocument: Preview response in untitled document if set to true, otherwise displayed in html view. (Default is false)rest-client.certificates: Certificate paths for different hosts. The path can be absolute path or relative path(relative to workspace or current http file). (Default is {})rest-client.suppressResponseBodyContentTypeValidationWarning: Suppress response body content type validation. (Default is false)rest-client.previewOption: Response preview output option. Option details is described above. (Default is full)rest-client.disableHighlightResonseBodyForLargeResponse: Controls whether to highlight response body for response whose size is larger than limit specified by rest-client.largeResponseSizeLimitInMB. (Default is true)rest-client.disableAddingHrefLinkForLargeResponse: Controls whether to add href link in previewed response for response whose size is larger than limit specified by rest-client.largeResponseSizeLimitInMB. (Default is true)rest-client.largeResponseBodySizeLimitInMB: Set the response body size threshold of MB to identify whether a response is a so-called 'large response', only used when rest-client.disableHighlightResonseBodyForLargeResponse and/or rest-client.disableAddingHrefLinkForLargeResponse is set to true. (Default is 5)rest-client.previewColumn: Response preview column option. 'current' for previewing in the column of current request file. 'beside' for previewing at the side of the current active column and the side direction depends on workbench.editor.openSideBySideDirection setting, either right or below the current editor column. (Default is beside)rest-client.previewResponsePanelTakeFocus: Preview response panel will take focus after receiving response. (Default is True)rest-client.formParamEncodingStrategy: Form param encoding strategy for request body of x-www-form-urlencoded. automatic for detecting encoding or not automatically and do the encoding job if necessary. never for treating provided request body as is, no encoding job will be applied. always for only use for the scenario that automatic option not working properly, e.g., some special characters( +) are not encoded correctly. (Default is automatic)rest-client.addRequestBodyLineIndentationAroundBrackets: Add line indentation around brackets( {}, <>, []) in request body when pressing enter. (Default is true)rest-client.decodeEscapedUnicodeCharacters: Decode escaped unicode characters in response body. (Default is false)rest-client.logLevel: The verbosity of logging in the REST output panel. (Default is error)rest-client.enableSendRequestCodeLens: Enable/disable sending request CodeLens in request file. (Default is true)rest-client.enableCustomVariableReferencesCodeLens: Enable/disable custom variable references CodeLens in request file. (Default is true)Rest Client extension respects the proxy settings made for Visual Studio Code ( http.proxy and http.proxyStrictSSL). Only HTTP and HTTPS proxies are supported.
REST Client Extension also supports request-level settings for each independent request. The syntax is similar with the request name definition, # @settingName [settingValue], a required setting name as well as the optional setting value. Available settings are listed as following:
| Name | Syntax | Description |
|---|---|---|
| note | # @note |
Use for request confirmation, especially for critical request |
All the above leading
#can be replaced with//
See CHANGELOG here
All the amazing contributors❤️
Please provide feedback through the GitHub Issue system, or fork the repository and submit PR.
An extension that lets the developer mark resources (files or folders) as favorites, so they can be easily accessed.
Launch VS Code Quick Open ( cmd/ ctrl + p), paste the following command, and press Enter.
ext install howardzuo.vscode-favorites
An Add to Favorites command in Explorer's context menu saves links to your favorite files or folders into your XYZ .code-workspace file if you are using one, else into the .vscode/settings.json file of your root folder.
Your favorites are listed in a separate view and can be quickly accessed from there.
{
"favorites.resources": [], // resources path you prefer to mark
"favorites.sortOrder": "ASC", // DESC, MANUAL
"favorites.saveSeparated": false // whether to use an extra config file
}
You normally don't need to modify this config manually. Use context menus instead.
![]()
Beautify javascript, JSON, CSS, Sass, and HTML in Visual Studio Code.
VS Code uses js-beautify internally, but it lacks the ability to modify the style you wish to use. This extension enables running js-beautify in VS Code, AND honouring any .jsbeautifyrc file in the open file's path tree to load your code styling. Run with F1 Beautify (to beautify a selection) or F1 Beautify file.
For help on the settings in the .jsbeautifyrc see Settings.md
When not using a multi-root workspace:
.jsbeautifyrc in the file's path tree, up to project root, these will be the only settings used."beautify.config" : "string|Object.<string,string|number|boolean>", these will be the only settings used. The file path is interpreted relative to the workspace's root folder..jsbeautifyrc in the file's path tree, above project root, these will be the only settings used..jsbeautifyrc in your home directory, these will be the only settings used.When using a multi-root workspace: Same as above, but the search ends at the nearest parent workspace root to the open file.
otherwise...
| .jsbeautifyrc setting | VS Code setting |
|---|---|
| eol | files.eol |
| tab_size | editor.tabSize |
| indentwith_tabs (inverted)_ | editor.insertSpaces |
| wrap_line_length | html.format.wrapLineLength |
| wrap_attributes | html.format.wrapAttributes |
| unformatted | html.format.unformatted |
| indent_inner_html | html.format.indentInnerHtml |
| preserve_newlines | html.format.preserveNewLines |
| max_preserve_newlines | html.format.maxPreserveNewLines |
| indent_handlebars | html.format.indentHandlebars |
| end_with_newline | html.format.endWithNewline (html) |
| end_with_newline | file.insertFinalNewLine (css, js) |
| extra_liners | html.format.extraLiners |
| space_after_anon_function | javascript.format .insertSpaceAfterFunctionKeywordForAnonymousFunctions |
| space_in_paren | javascript.format .insertSpaceAfterOpeningAndBeforeClosingNonemptyParenthesis |
Note that the html.format settings will ONLY be used when the document is html. javascript.format settings are included always.
Also runs html and css beautify from the same package, as determined by the file extension. The schema indicates which beautifier each of the settings pertains to.
The .jsbeautifyrc config parser accepts sub elements of html, js and css so that different settings can be used for each of the beautifiers (like sublime allows). Note that this will cause the config file to be incorrectly structured for running js-beautify from the command line.
Settings are inherited from the base of the file. Thus:
{
"indent_size": 4,
"indent_char": " ",
"css": {
"indent_size": 2
}
}
Will result in the indent_size being set to 4 for JavaScript and HTML, but set to 2 for CSS. All will get the same indent_char setting.
If the file is unsaved, or the type is undetermined, you'll be prompted for which beautifier to use.
You can control which file types, extensions, or specific file names should be beautified with the beautify.language setting.
{
"beautify.language": {
"js": {
"type": ["javascript", "json"],
"filename": [".jshintrc", ".jsbeautifyrc"]
// "ext": ["js", "json"]
// ^^ to set extensions to be beautified using the javascript beautifier
},
"css": ["css", "scss"],
"html": ["htm", "html"]
// ^^ providing just an array sets the VS Code file type
}
}
Beautify on save will be enabled when "editor.formatOnSave" is true.
Beautification on particular files using the built in Format Document (which includes formatting on save) can be skipped with the beautify.ignore option. Using the Beautify file and Beautify selection will still work. For files opened from within the workspace directory, the glob patterns will match from the workspace folder root. For files opened from elsewhere, or when no workspace is open, the patterns will match from the system root.
Examples:
/* ignore all files named 'test.js' not in the root folder,
all files directly in any 'spec' directory, and
all files in any 'test' directory at any depth
*/
"beautify.ignore": ["*/test.js", "**/spec/*", "**/test/**/*"]
/* ignore all files ending in '_test.js' anywhere */
"beautify.ignore": "**/*_test.js"
Note that the glob patterns are not used to test against the containing folder. You must match the filename as well.
Embedded version of js-beautify is v1.8.4
Use the following to embed a beautify shortcut in keybindings.json. Replace with your preferred key bindings.
{
"key": "cmd+b",
"command": "HookyQR.beautify",
"when": "editorFocus"
}
This extension quickly searches (using ripgrep your workspace for comment tags like TODO and FIXME, and displays them in a tree view in the explorer pane. Clicking a TODO within the tree will open the file and put the cursor on the line containing the TODO.
Found TODOs can also be highlighted in open files.
Please see the wiki for configuration examples.
Notes:
todo-tree.tree.hideTreeWhenEmpty is set to false.rg.conf files are ignored.Highlighting tags is configurable. Use defaultHighlight to set up highlights for all tags. If you need to configure individual tags differently, use customHighlight. If settings are not specified in customHighlight, the value from defaultHighlight is used. If a setting is not specified in defaultHighlight then the older, deprecated icon, iconColour and iconColours settings are used.
Both defaultHighlight and customHighlight allow for the following settings:
foreground - used to set the foreground colour of the highlight in the editor and the marker in the ruler.
background - used to set the background colour of the highlight in the editor.
_Note: Foreground and background colours can be specified using HTML/CSS colour names (e.g. "Salmon"), RGB hex values (e.g. "#80FF00"), RGB CSS style values (e.g. "rgb(255,128,0)" or colours from the current theme, e.g. peekViewResult.background. Hex and RGB values can also have an alpha specified, e.g. "#ff800080" or "rgba(255,128,0,0.5)"._
opacity - percentage value used with the background colour. 100% will produce an opaque background which will obscure selection and other decorations. Note: opacity can only be specified when hex or rgb colours are used.
fontWeight, fontStyle, textDecoration - can be used to style the highlight with standard CSS values.
borderRadius - used to set the border radius of the background of the highlight.
icon - used to set a different icon in the tree view. Must be a valid octicon (see https://octicons.github.com) or codicon (see https://microsoft.github.io/vscode-codicons/dist/codicon.html). If using codicons, specify them in the format "\$(icon)". The icon defaults to a tick if it's not valid. You can also use "todo-tree", or "todo-tree-filled" if you want to use the icon from the activity view.
iconColour - used to set the colour of the icon in the tree. If not specified, it will try to use the foreground colour or the background colour. Colour can be specified as per foreground and background colours, except that theme colours are not available.
gutterIcon - set to true to show the icon in the editor gutter.
rulerColour - used to set the colour of the marker in the overview ruler. If not specified, it will default to use the foreground colour. Colour can be specified as per foreground and background colours.
rulerLane - used to set the lane for the marker in the overview ruler. If not specified, it will default to the right hand lane. Use one of "left", "center", "right", or "full". You can also use "none" to disable the ruler markers.
type - used to control how much is highlighted in the editor. Valid values are:
tag - highlights just the tagtext - highlights the tag and any text after the tagtag-and-comment - highlights the comment characters (or the start of the match) and the tagtext-and-comment - highlights the comment characters (or the start of the match), the tag and the text after the tagline - highlights the entire line containing the tagwhole-line - highlights the entire line containing the tag to the full width of the editor hideFromTree - used to hide tags from the tree, but still highlight in files
hideFromStatusBar - prevents the tag from being included in the status bar counts
Example:
"todo-tree.highlights.defaultHighlight": {
"icon": "alert",
"type": "text",
"foreground": "red",
"background": "white",
"opacity": 50,
"iconColour": "blue"
},
"todo-tree.highlights.customHighlight": {
"TODO": {
"icon": "check",
"type": "line"
},
"FIXME": {
"foreground": "black",
"iconColour": "yellow",
"gutterIcon": true
}
}
Note: The highlight configuration is separate from the settings for the search. Adding settings in customHighlight does not automatically add the tags into todo-tree.general.tags.
You can install the latest version of the extension via the Visual Studio Marketplace here.
Alternatively, open Visual Studio code, press Ctrl+P or Cmd+P and type:
> ext install Gruntfuggly.todo-tree
Note: Don't forget to reload the window to activate the extension!
The source code is available on GitHub here.
The tree view header can contain the following buttons:
![]() - Collapse all tree nodes
- Collapse all tree nodes
![]() - Expand all tree nodes
- Expand all tree nodes
![]() - Show the tree view as a flat list, with the full filename for each TODO
- Show the tree view as a flat list, with the full filename for each TODO
![]() - Show the view as a list of tags
- Show the view as a list of tags
![]() - Show the tree view as a tree with expandable nodes for each folder (default)
- Show the tree view as a tree with expandable nodes for each folder (default)
![]() - Group the TODOs in the tree by the tag
- Group the TODOs in the tree by the tag
![]() - Organise the TODOs by file (default)
- Organise the TODOs by file (default)
![]() - Only show items in the tree which match the entered filter text
- Only show items in the tree which match the entered filter text
![]() - Remove any active filter
- Remove any active filter
![]() - Rebuild the tree
- Rebuild the tree
![]() - Show tags from open files only
- Show tags from open files only
![]() - Show tags from workspace
- Show tags from workspace
![]() - Show the current file in the tree
- Show the current file in the tree
Right clicking on a folder in the tree will bring up a context menu with the following options:
Hide This Folder - removes the folder from the tree
Only Show This Folder - remove all other folders and subfolders from the tree
Only Show This Folder And Subfolders - remove other folders from the tree, but keep subfolders
Reset Folder Filter - reset any folders previously filtered using the above
Note: The current filters are shown in the debug log. Also, the filter can always be reset by right clicking the Nothing Found item in the tree. If your tree becomes invisible because everything is filtered and hideTreeWhenEmpty is set to true, you can reset the filter by pressing F1 and selecting the Todo Tree: Reset Folder Filter command.
To make it easier to configure the tags, there are two commands available:
Todo Tree: Add Tag - allows entry of a new tag for searching
Todo Tree: Remove Tag - shows a list of current tags which can be selected for removing
Note: The Remove Tag command can be used to show current tags - just press Escape or Enter with out selecting any to close it.
The contents of the tree can be exported using Todo Tree: Export Tree. A read-only file will be created using the path specified with todo-tree.general.exportPath. The file can be saved using File: Save As.... Note: Currently File: Save does not work which seems to be a VSCode bug (see https://github.com/microsoft/vscode/issues/101952).
The extension can be customised as follows (default values in brackets):
todo-tree.general.debug ( false)
Show a debug channel in the output view.
todo-tree.general.enableFileWatcher ( false)
Set this to true to turn on automatic updates when files in the workspace are created, changed or deleted.
todo-tree.general.exportPath ( ~/todo-tree-%Y%m%d-%H%M.txt)
Path to use when exporting the tree. Environment variables will be expanded, e.g ${HOME} and the path is passed through strftime (see https://github.com/samsonjs/strftime). Set the extension to .json to export as a JSON record.
todo-tree.general.rootFolder ( "")
By default, any open workspaces will have a tree in the view. Use this to force another folder to be the root of the tree. You can include environment variables and also use \${workspaceFolder}. e.g.
"todo-tree.general.rootFolder": "${workspaceFolder}/test"
or
"todo-tree.general.rootFolder": "${HOME}/project".
Note: Other open files (outside of the rootFolder) will be shown (as they are opened) with their full path in brackets.
todo-tree.general.tags ( ["TODO","FIXME","BUG"])
This defines the tags which are recognised as TODOs. This list is automatically inserted into the regex.
todo-tree.general.tagGroups ( {})
This setting allows multiple tags to be treated as a single group. Example:
"todo-tree.general.tagGroups": {
"FIXME": [
"FIXME",
"FIXIT",
"FIX",
]
},
This treats any of FIXME, FIXIT or FIX as FIXME. When the tree is grouped by tag, all of these will appear under the FIXME node. This also means that custom highlights are applied to the group, not each tag type. Note: all tags in the group should also appear in todo-tree.general.tags.
todo-tree.general.revealBehaviour ( start of todo)
Change the cursor behaviour when selecting a todo from the explorer. Yo.u can choose from: start of todo (moves the cursor to the beginning of the todo), end of todo (moves the cursor to the end of the todo) highlight todo (selects the todo text), start of line (moves the cursor to the start of the line) and highlight line (selected the whole line)
todo-tree.general.statusBar ( none)
What to show in the status bar - nothing ( none), total count ( total), counts per tag ( tags), counts for the top three tags ( top three) or counts for the current file only ( current file).
todo-tree.general.statusBarClickBehaviour ( cycle)
Set the behaviour of clicking the status bar to either cycle display formats, or reveal the tree.
todo-tree.filtering.includeGlobs ( [])
Globs for use in limiting search results by inclusion, e.g. [\"**/unit-tests/*.js\"] to only show .js files in unit-tests subfolders. Globs help. Note: globs paths are absolute - not relative to the current workspace.
todo-tree.filtering.excludeGlobs ( [])
Globs for use in limiting search results by exclusion (applied after includeGlobs), e.g. [\"**/*.txt\"] to ignore all .txt files
todo-tree.filtering.includedWorkspaces ( [])
A list of workspace names to include as roots in the tree (wildcards can be used). An empty array includes all workspace folders.
todo-tree.filtering.excludedWorkspaces ( [])
A list of workspace names to exclude as roots in the tree (wildcards can be used).
todo-tree.filtering.passGlobsToRipgrep ( true)
Set this to false to apply the globs after the search (legacy behaviour).
todo-tree.filtering.useBuiltInExcludes ( none)
Set this to use VSCode's built in files or search excludes. Can be one of none, file excludes (uses Files:Exclude), search excludes (Uses Search:Exclude) or file and search excludes (uses both).
todo-tree.filtering.ignoreGitSubmodules ( false)
If true, any subfolders containing a .git file will be ignored when searching.
todo-tree.filtering.includeHiddenFiles ( false)
If true, files starting with a period (.) will be included.
todo-tree.highlights.enabled ( true)
Set this to false to turn off highlighting.
todo-tree.highlights.highlightDelay ( 500)
The delay before highlighting (milliseconds).
todo-tree.highlights.defaultHighlight ( {})
Set default highlights. Example:
{
"foreground": "white",
"background": "red",
"icon": "check",
"type": "text"
}
todo-tree.highlights.customHighlight ( {})
Set highlights per tag (or tag group). Example:
{
"TODO": {
"foreground": "white",
"type": "text"
},
"FIXME": {
"icon": "beaker"
}
}
todo-tree.highlights.schemes ( ['file','untitled'])
Editor schemes to show highlights in. To show highlights in settings files, for instance, add vscode-userdata or for output windows, add output.
todo-tree.regex.regex ("((//|#|<!--|;|/\\*)\\s*(\$TAGS)|^\\s*- \\[ \\])")
This defines the regex used to locate TODOs. By default, it searches for tags in comments starting with //, #, ;, <!-- or /. This should cover most languages. However if you want to refine it, make sure that the (\$TAGS) is kept. The second part of the expression allows matching of Github markdown task lists. Note: This is a Rust regular expression, not javascript.*
todo-tree.regex.regexCaseSensitive ( true)
Set to false to allow tags to be matched regardless of case.
todo-tree.ripgrep.ripgrep ( "")
Normally, the extension will locate ripgrep itself as and when required. If you want to use an alternate version of ripgrep, set this to point to wherever it is installed.
todo-tree.ripgrep.ripgrepArgs ( "--max-columns=1000")
Use this to pass additional arguments to ripgrep. e.g. "-i" to make the search case insensitive. Use with caution!
todo-tree.ripgrep.ripgrepMaxBuffer ( 200)
By default, the ripgrep process will have a buffer of 200KB. However, this is sometimes not enough for all the tags you might want to see. This setting can be used to increase the buffer size accordingly.
todo-tree.tree.showInExplorer ( true)
The tree is shown in the explorer view and also has it's own view in the activity bar. If you no longer want to see it in the explorer view, set this to false.
todo-tree.tree.hideTreeWhenEmpty ( true)
Normally, the tree is removed from the explorer view if nothing is found. Set this to false to keep the view present.
todo-tree.tree.filterCaseSensitive ( false)
Use this if you need the filtering to be case sensitive. Note: this does not the apply to the search.
todo-tree.tree.trackFile ( true)
Set to false if you want to prevent tracking the open file in the tree view.
todo-tree.tree.showBadges ( true)
Set to false to disable SCM status and badges in the tree. Note: This also unfortunately turns off themed icons.
todo-tree.tree.expanded* ( false)
Set to true if you want new views to be expanded by default.
todo-tree.tree.flat* ( false)
Set to true if you want new views to be flat by default.
todo-tree.tree.grouped* ( false)
Set to true if you want new views to be grouped by default.
todo-tree.tree.tagsOnly* ( false)
Set to true if you want new views with tags only by default.
todo-tree.tree.sortTagsOnlyViewAlphabetically ( false)
Sort items in the tags only view alphabetically instead of by file and line number.
todo-tree.tree.showCountsInTree ( false)
Set to true to show counts of TODOs in the tree.
todo-tree.tree.labelFormat ( ${tag} ${after})
Format of the TODO item labels. Available placeholders are ${line}, ${column}, ${tag}, ${before} (text from before the tag), ${after} (text from after the tag), ${filename}, ${filepath} and ${afterOrBefore} (use "after" text or "before" text if after is empty).
todo-tree.tree.scanMode ( workspace)
By default the extension scans the whole workspace ( workspace). Use this to limit the search to only open files ( open files) or only the current file ( current file).
todo-tree.tree.showScanModeButton ( false)
Show a button on the tree view header to switch the scanMode (see above).
todo-tree.tree.hideIconsWhenGroupedByTag ( false)
Hide item icons when grouping by tag.
todo-tree.tree.disableCompactFolders ( false)
The tree will normally respect the VSCode's explorer.compactFolders setting. Set this to true if you want to disable compact folders in the todo tree.
todo-tree.tree.tooltipFormat ( ${filepath}, ${line})
Format of the tree item tooltips. Uses the same placeholders as todo-tree.tree.labelFormat (see above).
todo-tree.tree.buttons.reveal ( true)
Show a button in the tree view title bar to reveal the current item (only when track file is not enabled).
todo-tree.tree.buttons.scanMode ( false)
Show a button in the tree view title bar to change the Scan Mode setting.
todo-tree.tree.buttons.viewStyle ( true)
Show a button in the tree view title bar to change the view style (tree, flat or tags only).
todo-tree.tree.buttons.groupByTag ( true)
Show a button in the tree view title bar to enable grouping items by tag.
todo-tree.tree.buttons.filter ( true)
Show a button in the tree view title bar allowing the tree to be filtered by entering some text.
todo-tree.tree.buttons.refresh ( true)
Show a refresh button in the tree view title bar.
todo-tree.tree.buttons.expand ( true)
Show a button in the tree view title bar to expand or collapse the whole tree.
todo-tree.tree.buttons.export ( false)
Show a button in the tree view title bar to create a text file showing the tree content.
Only applies to new workspaces. Once the view has been changed in the workspace, the current state is stored.*
If the regex contains \n, then multiline TODOs will be enabled. In this mode, the search results are processed slightly differently. If results are found which do not contain any tags from todo-tree.general.tags it will be assumed that they belong to the previous result that did have a tag. For example, if you set the regex to something like:
"todo-tree.regex.regex": "(//)\\s*($TAGS).*(\\n\\s*//\\s{2,}.*)*"
This will now match multiline TODOs where the extra lines have at least two spaces between the comment characters and the TODO item. e.g.
// TODO multiline example
// second line
// third line
If you want to match multiline TODOs in C++ style multiline comment blocks, you'll need something like:
"todo-tree.regex.regex": "(/\\*)\\s*($TAGS).*(\\n\\s*(//|/\\*|\\*\\*)\\s{2,}.*)*"
which should match:
/* TODO multiline example
** second line
** third line
*/
Note: If you are modifying settings using the settings GUI, you don't need to escape each backslash.
Warning: Multiline TODOs will not work with markdown TODOs and may have other unexpected results. There may also be a reduction in performance.
To restrict the set of folders which is searched, you can define todo-tree.filtering.includeGlobs. This is an array of globs which the search results are matched against. If the results match any of the globs, they will be shown. By default the array is empty, which matches everything. See here for more information on globs. Note: globs paths are absolute - not relative to the current workspace.
To exclude folders/files from your search you can define todo-tree.filtering.excludeGlobs. If the search results match any of these globs, then the results will be ignored.
You can also include and exclude folders from the tree using the context menu. This folder filter is applied separately to the include/exclude globs.
Note: By default, ripgrep ignores files and folders from your .gitignore or .ignore files. If you want to include these files, set todo-tree.ripgrep.ripgrepArgs to --no-ignore.
This extension enables the user to open a file under the current cursor position. Just right-click on a pathname within a open document and select the open file under cursor option (or just press Alt + P without right-click).
If the file is found by vscode then it will open a new tab with this file.
If the string is has an tailing number separated by a colon (i.e. :23) it will open the file at the specified line number. :23:45 means line 23 column 45.
It is also possible to select one or more text segments in the document and open them.
You have a document, containing some text, that exists in a folder, say c:\Users\guest\Documents\myfile.txt.
In that file the path strings could look like as follows:
[...]
c:\Users\guest\Documents\Temp\stuff.txt
[...]
"..\..\administrator\readme.txt"
[...]
"..\user\readme.txt:33"
[...]
With this extension you can right-click on such a path and choose open file under cursor and VSCode will open a new tab with that file.
'file-path'.src, defined search paths, etc.file:line:column.[src/]class/SomeClass.php from just someClass. (Use case insensitive file system to support the different in letter case.)/path/to/sth to be lookup as both absolute and relative path. Useful for code like projectFolder + '/path/to/sth'.grep output with line number, which has the line pattern file:line[:column]:content (content is discarded).Relative paths are relative to the these folders (in listed order):
Currently opened document's folder, and
(if it is within a workspace folder) the document's parent folders (up to the workspace folder).
All workspace folders, and their sub-folders listed in the option seito-openfile.searchSubFoldersOfWorkspaceFolders.
All search paths in the option seito-openfile.searchPaths.
Remarks:
/... ( / or \), if not found, are searched like relative paths too.~/... paths not found from user's home, the step 2 of "Relative paths" is searched if option seito-openfile.lookupTildePathAlsoFromWorkspace is true.
Run code snippet or code file for multiple languages: C, C++, Java, JavaScript, PHP, Python, Perl, Perl 6, Ruby, Go, Lua, Groovy, PowerShell, BAT/CMD, BASH/SH, F# Script, F# (.NET Core), C# Script, C# (.NET Core), VBScript, TypeScript, CoffeeScript, Scala, Swift, Julia, Crystal, OCaml Script, R, AppleScript, Elixir, Visual Basic .NET, Clojure, Haxe, Objective-C, Rust, Racket, Scheme, AutoHotkey, AutoIt, Kotlin, Dart, Free Pascal, Haskell, Nim, D, Lisp, Kit, V, SCSS, Sass, CUDA, Less, and custom command
Ctrl+Alt+NF1 and then select/type Run Code,Run Code in editor context menuRun Code button in editor title menuRun Code button in context menu of file explorerCtrl+Alt+MF1 and then select/type Stop Code RunStop Code Run in context menu
Ctrl+Alt+J, or press F1 and then select/type Run By Language, then type or select the language to run: e.g php, javascript, bat, shellscript...
Ctrl+Alt+K, or press F1 and then select/type Run Custom CommandMake sure the executor PATH of each language is set in the environment variable.
You could also add entry into code-runner.executorMap to set the executor PATH.
e.g. To set the executor PATH for ruby, php and html:
{
"code-runner.executorMap": {
"javascript": "node",
"php": "C:\\php\\php.exe",
"python": "python",
"perl": "perl",
"ruby": "C:\\Ruby23-x64\\bin\\ruby.exe",
"go": "go run",
"html": "\"C:\\Program Files (x86)\\Google\\Chrome\\Application\\chrome.exe\"",
"java": "cd $dir && javac $fileName && java $fileNameWithoutExt",
"c": "cd $dir && gcc $fileName -o $fileNameWithoutExt && $dir$fileNameWithoutExt"
}
}
Supported customized parameters
Python: Select Interpreter command)Please take care of the back slash and the space in file path of the executor
\\\" to surround your file pathYou could set the executor per filename glob>):
{
"code-runner.executorMapByGlob": {
"pom.xml": "cd $dir && mvn clean package",
"*.test.js": "tap",
"*.js": "node"
}
}
Besides, you could set the default language to run:
{
"code-runner.defaultLanguage": "javascript"
}
For the default language: It should be set with language id defined in VS Code. The languages you could set are java, c, cpp, javascript, php, python, perl, ruby, go, lua, groovy, powershell, bat, shellscript, fsharp, csharp, vbscript, typescript, coffeescript, swift, r, clojure, haxe, objective-c, rust, racket, ahk, autoit, kotlin, dart, pascal, haskell, nim, d, lisp
Also, you could set the executor per file extension:
{
"code-runner.executorMapByFileExtension": {
".vbs": "cscript //Nologo"
}
}
To set the custom command to run:
{
"code-runner.customCommand": "echo Hello"
}
To set the the working directory:
{
"code-runner.cwd": "path/to/working/directory"
}
To set whether to clear previous output before each run (default is false):
{
"code-runner.clearPreviousOutput": false
}
To set whether to save all files before running (default is false):
{
"code-runner.saveAllFilesBeforeRun": false
}
To set whether to save the current file before running (default is false):
{
"code-runner.saveFileBeforeRun": false
}
To set whether to show extra execution message like [Running] ... and [Done] ... (default is true):
{
"code-runner.showExecutionMessage": true
}
[REPL support] To set whether to run code in Integrated Terminal (only support to run whole file in Integrated Terminal, neither untitled file nor code snippet) (default is false):
{
"code-runner.runInTerminal": false
}
To set whether to preserve focus on code editor after code run is triggered (default is true, the code editor will keep focus; when it is false, Terminal or Output Channel will take focus):
{
"code-runner.preserveFocus": true
}
code-runner.ignoreSelection: Whether to ignore selection to always run entire file. (Default is false)
code-runner.showRunIconInEditorTitleMenu: Whether to show 'Run Code' icon in editor title menu. (Default is true)
code-runner.showRunCommandInEditorContextMenu: Whether to show 'Run Code' command in editor context menu. (Default is true)
code-runner.showRunCommandInExplorerContextMenu: Whether to show 'Run Code' command in explorer context menu. (Default is true)
code-runner.terminalRoot: For Windows system, replaces the Windows style drive letter in the command with a Unix style root when using a custom shell as the terminal, like Bash or Cgywin. Example: Setting this to /mnt/ will replace C:\path with /mnt/c/path (Default is "")
code-runner.temporaryFileName: Temporary file name used in running selected code snippet. When it is set as empty, the file name will be random. (Default is "tempCodeRunnerFile")
code-runner.respectShebang: Whether to respect Shebang to run code. (Default is true)
code-runner.cwd settingcode-runner.cwd is not set and code-runner.fileDirectoryAsCwd is true, use the directory of the file to be executedcode-runner.cwd is not set and code-runner.fileDirectoryAsCwd is false, use the path of root folder that is open in VS CodeBy default, telemetry data collection is turned on to understand user behavior to improve this extension. To disable it, update the settings.json as below:
{
"code-runner.enableAppInsights": false
}
See Change Log here
Submit the issues if you find any bug or have any suggestion.
Fork the repo and submit pull requests.
Git Project Manager (GPM) is a Microsoft VSCode extension that allows you to open a new window targeting a git repository directly from VSCode window.
Currently there are 3 avaliable commands, all of them can be accessed via Ctrl+Shift+P (Cmd+Alt+P on Mac) typing GPM
Show a list of the available git repositories in all folders configured in gitProjectManager.baseProjectsFolders. The first time it searchs all folders, after that it uses a cached repository info.
This commands refresh the cached repositories info for all configured folders.
This commands allows you to select a specific folder to refresh its repositories, without refreshing all folders.
This command will bring a list of your most recent git projects, leting you swap even faster between them.
The size of the list if configured in gitProjectManager.recentProjectsListSize
Before start using GPM you need to configure the base folders that the extension will search for git repositories. Edit settings.json from the File -> Preferences -> Settings and add the following config
{
"gitProjectManager.baseProjectsFolders": [
"/home/user/nodeProjects",
"/home/user/personal/pocs"
]
}
Another available configuration is gitProjectManager.storeRepositoriesBetweenSessions that allows git repositories information to be stored between sessions, avoiding the waiting time in the first time you load the repositories list. It's false by default.
{
"gitProjectManager.storeRepositoriesBetweenSessions": true
}
If nothing happens when trying to open a found project it could be due to the Code command being used. To work around this issue set gitProjectManager.codePath to the full path of the Code command to use when launching new instances. This configuration can be defined in 3 formats (this was done to solve issue #7):
First: Define it as a simple string, with the path to code app
//Windows
{
"gitProjectManager.codePath": "C:\\Program Files (x86)\\Microsoft VS Code\\bin\\code.cmd"
}
//Linux
{
"gitProjectManager.codePath": "/usr/local/bin/code"
}
Second: Use a object notation to define the path to code path on each platform
{
"gitProjectManager.codePath" : {
"windows": "C:\\Program Files (x86)\\Microsoft VS Code\\bin\\code.cmd",
"linux": "/usr/local/bin/code"
}
}
Third: An array of file paths, where at least one is a valid path
{
"gitProjectManager.codePath" : [
"C:\\Program Files (x86)\\Microsoft VS Code\\bin\\code.cmd",
"/usr/local/bin/code"
]
}
To improve performance there are 2 new and important configurations that are: ignoredFolders: an array of folder names that will be ignored (_nodemodules for example)
{
"gitProjectManager.ignoredFolders": ["node_modules"]
}
maxDepthRecursion: indicates the maximum recursion depth that will be searched starting in the configured folder (default: 2)
{
"gitProjectManager.maxDepthRecursion": 4
}
In version 0.1.10 we also added the "gitProjectManager.checkRemoteOrigin" configuration that allows users to not check remote repository origin to improve performance
{
"gitProjectManager.checkRemoteOrigin": false
}
Added in version 0.1.12, you can configure the behavior when opening a project if it'll be opened in the same window or in a new window. (this option is ignored if there aren't any opened folders in current window)):
{
"gitProjectManager.openInNewWindow": false
}
If you have any idea, feel free to create issues and pull requests.
![]()
Switch between Code and Code Insiders with ease.
Follow the instructions in the Marketplace, or run the following in the command palette:
ext install fabiospampinato.vscode-open-in-code
It adds 2 commands to the command palette:
"Open in Code"; // Open the current project and file in Code
"Open in Code Insiders"; // Open the current project and file in Code Insiders
If you found a problem, or have a feature request, please open an issue about it.
If you want to make a pull request you can debug the extension using Debug Launcher.
MIT © Fabio Spampinato
This extension contains code snippets for Reactjs and is based on the awesome babel-sublime-snippets package.
In order to install an extension you need to launch the Command Palette (Ctrl + Shift + P or Cmd + Shift + P) and type Extensions. There you have either the option to show the already installed snippets or install new ones.
Removed support for jsx language as it was giving errors in developer tools #39
Up until verion 1.0.0 all the JavaScript snippets where part of the extension. In order to avoid duplication the snippets are now included only to this extension and if you want to use them you have to install it explicitly.
When installing the extension React development could be really fun
As VS Code from version 0.10.10 supports React components syntax inside js files the snippets are available for JavaScript language as well.
In the following example you can see the usage of a React stateless component with prop types snippets inside a js and not jsx file.
Below is a list of all available snippets and the triggers of each one. The ⇥ means the TAB key.
| Trigger | Content |
|---|---|
rcc→ |
class component skeleton |
rrc→ |
class component skeleton with react-redux connect |
rrdc→ |
class component skeleton with react-redux connect and dispatch |
rccp→ |
class component skeleton with prop types after the class |
rcjc→ |
class component skeleton without import and default export lines |
rcfc→ |
class component skeleton that contains all the lifecycle methods |
rwwd→ |
class component without import statements |
rpc→ |
class pure component skeleton with prop types after the class |
rsc→ |
stateless component skeleton |
rscp→ |
stateless component with prop types skeleton |
rscm→ |
memoize stateless component skeleton |
rscpm→ |
memoize stateless component with prop types skeleton |
rsf→ |
stateless named function skeleton |
rsfp→ |
stateless named function with prop types skeleton |
rsi→ |
stateless component with prop types and implicit return |
fcc→ |
class component with flow types skeleton |
fsf→ |
stateless named function skeleton with flow types skeleton |
fsc→ |
stateless component with flow types skeleton |
rpt→ |
empty propTypes declaration |
rdp→ |
empty defaultProps declaration |
con→ |
class default constructor with props |
conc→ |
class default constructor with props and context |
est→ |
empty state object |
cwm→ |
componentWillMount method |
cdm→ |
componentDidMount method |
cwr→ |
componentWillReceiveProps method |
scu→ |
shouldComponentUpdate method |
cwup→ |
componentWillUpdate method |
cdup→ |
componentDidUpdate method |
cwun→ |
componentWillUnmount method |
gsbu→ |
getSnapshotBeforeUpdate method |
gdsfp→ |
static getDerivedStateFromProps method |
cdc→ |
componentDidCatch method |
ren→ |
render method |
sst→ |
this.setState with object as parameter |
ssf→ |
this.setState with function as parameter |
props→ |
this.props |
state→ |
this.state |
bnd→ |
binds the this of method inside the constructor |
disp→ |
MapDispatchToProps redux function |
The following table lists all the snippets that can be used for prop types.
Every snippet regarding prop types begins with pt so it's easy to group it all together and explore all the available options.
On top of that each prop type snippets has one equivalent when we need to declare that this property is also required.
For example pta creates the PropTypes.array and ptar creates the PropTypes.array.isRequired
| Trigger | Content |
|---|---|
pta→ |
PropTypes.array, |
ptar→ |
PropTypes.array.isRequired, |
ptb→ |
PropTypes.bool, |
ptbr→ |
PropTypes.bool.isRequired, |
ptf→ |
PropTypes.func, |
ptfr→ |
PropTypes.func.isRequired, |
ptn→ |
PropTypes.number, |
ptnr→ |
PropTypes.number.isRequired, |
pto→ |
PropTypes.object, |
ptor→ |
PropTypes.object.isRequired, |
pts→ |
PropTypes.string, |
ptsr→ |
PropTypes.string.isRequired, |
ptsm→ |
PropTypes.symbol, |
ptsmr→ |
PropTypes.symbol.isRequired, |
ptan→ |
PropTypes.any, |
ptanr→ |
PropTypes.any.isRequired, |
ptnd→ |
PropTypes.node, |
ptndr→ |
PropTypes.node.isRequired, |
ptel→ |
PropTypes.element, |
ptelr→ |
PropTypes.element.isRequired, |
pti→ |
PropTypes.instanceOf(ClassName), |
ptir→ |
PropTypes.instanceOf(ClassName).isRequired, |
pte→ |
PropTypes.oneOf(['News', 'Photos']), |
pter→ |
PropTypes.oneOf(['News', 'Photos']).isRequired, |
ptet→ |
PropTypes.oneOfType([PropTypes.string, PropTypes.number]), |
ptetr→ |
PropTypes.oneOfType([PropTypes.string, PropTypes.number]).isRequired, |
ptao→ |
PropTypes.arrayOf(PropTypes.number), |
ptaor→ |
PropTypes.arrayOf(PropTypes.number).isRequired, |
ptoo→ |
PropTypes.objectOf(PropTypes.number), |
ptoor→ |
PropTypes.objectOf(PropTypes.number).isRequired, |
ptoos→ |
PropTypes.objectOf(PropTypes.shape()), |
ptoosr→ |
PropTypes.objectOf(PropTypes.shape()).isRequired, |
ptsh→ |
PropTypes.shape({color: PropTypes.string, fontSize: PropTypes.number}), |
ptshr→ |
PropTypes.shape({color: PropTypes.string, fontSize: PropTypes.number}).isRequired, |
Over 130 jQuery Code Snippets for JavaScript code.
Just type the letters 'jq' to get a list of all available jQuery Code Snippets.
| Trigger | Description | |||
|---|---|---|---|---|
| func | An anonymous function. | |||
| jqAfter | Insert content, specified by the parameter, after each element in the set of matched elements. | |||
| jqAjax | Perform an asynchronous HTTP (Ajax) request. | |||
| jqAjaxAspNetWebService | Perform an asynchronous HTTP (Ajax) request to a ASP.NET web service. | |||
| jqAppend | Insert content, specified by the parameter, to the end of each element in the set of matched elements. | |||
| jqAppendTo | Insert every element in the set of matched elements to the end of the target. | |||
| jqAttrGet | Get the value of an attribute for the first element in the set of matched elements. | |||
| jqAttrRemove | Remove an attribute from each element in the set of matched elements. | |||
| jqAttrSet | Set one or more attributes for the set of matched elements. | |||
| jqAttrSetFn | Set one or more attributes for the set of matched elements. | |||
| jqAttrSetObj | Set one or more attributes for the set of matched elements. | |||
| jqBefore | Insert content, specified by the parameter, before each element in the set of matched elements. | |||
| jqBind | Attach a handler to an event for the elements. | |||
| jqBindWithData | Attach a handler to an event for the elements. | |||
| jqBlur | Bind an event handler to the "blur" JavaScript event, or trigger that event on an element. | |||
| jqChange | Bind an event handler to the "change" JavaScript event, or trigger that event on an element. | |||
| jqClassAdd | Adds the specified class(es) to each of the set of matched elements. | |||
| jqClassRemove | Remove a single class, multiple classes, or all classes from each element in the set of matched elements. | |||
| jqClassToggle | Add or remove one or more classes from each element in the set of matched elements, depending on either the class's presence. | |||
| jqClassToggleSwitch | Add or remove one or more classes from each element in the set of matched elements, depending on either the class's presence or the value of the switch argument. | |||
| jqClick | Bind an event handler to the "click" JavaScript event, or trigger that event on an element. | |||
| jqClone | Create a deep copy of the set of matched elements. | |||
| jqCloneWithEvents | Create a deep copy of the set of matched elements. | |||
| jqCssGet | Get the computed style properties for the first element in the set of matched elements. | |||
| jqCssSet | Set one or more CSS properties for the set of matched elements. | |||
| jqCssSetObj | Set one or more CSS properties for the set of matched elements. | |||
| jqDataGet | Return the value at the named data store for the first element in the jQuery collection, as set by data(name, value) or by an HTML5 data-* attribute. | |||
| jqDataRemove | Remove a previously-stored piece of data. | |||
| jqDataSet | Store arbitrary data associated with the matched elements. | |||
| jqDataSetObj | Store arbitrary data associated with the matched elements. | |||
| jqDie | Remove event handlers previously attached using .live() from the elements. | |||
| jqDieAll | Remove event handlers previously attached using .live() from the elements. | |||
| jqDieFn | Remove event handlers previously attached using .live() from the elements. | |||
| jqDocReady | Function to execute when the DOM is fully loaded. | |||
| jqDocReadyShort | Function to execute when the DOM is fully loaded. | |||
| jqEach | A generic iterator function, which can be used to seamlessly iterate over both objects and arrays. Arrays and array-like objects with a length property (such as a function's arguments object) are iterated by numeric index, from 0 to length-1. Other objects are iterated via their named properties. | |||
| jqEachElement | Iterate over a jQuery object, executing a function for each matched element. | |||
| jqEmpty | Remove all child nodes of the set of matched elements from the DOM. | |||
| jqFadeIn | Display the matched elements by fading them to opaque. | |||
| jqFadeInFull | Display the matched elements by fading them to opaque. | |||
| jqFadeOut | Hide the matched elements by fading them to transparent. | |||
| jqFadeOutFull | Hide the matched elements by fading them to transparent. | |||
| jqFadeTo | Adjust the opacity of the matched elements. | |||
| jqFadeToFull | Adjust the opacity of the matched elements. | |||
| jqFind | Get the descendants of each element in the current set of matched elements, filtered by a selector, jQuery object, or element. | |||
| jqFocus | Bind an event handler to the "focus" JavaScript event, or trigger that event on an element. | |||
| jqGet | Load data from the server using a HTTP GET request. | |||
| jqGetJson | Load JSON-encoded data from the server using a GET HTTP request. | |||
| jqGetScript | Load a JavaScript file from the server using a GET HTTP request, then execute it. | |||
| jqHasClass | Determine whether any of the matched elements are assigned the given class. | |||
| jqHeightGet | Get the current computed height for the first element in the set of matched elements. | |||
| jqHeightSet | Set the CSS height of every matched element. | |||
| jqHide | Hide the matched elements. | |||
| jqHideFull | Hide the matched elements. | |||
| jqHover | Bind two handlers to the matched elements, to be executed when the mouse pointer enters and leaves the elements. | |||
| jqHtmlGet | Get the HTML contents of the first element in the set of matched elements. | |||
| jqHtmlSet | Set the HTML contents of each element in the set of matched elements. | |||
| jqInnerHeight | Get the current computed height for the first element in the set of matched elements, including padding but not border. | |||
| jqInnerWidth | Get the current computed inner width for the first element in the set of matched elements, including padding but not border. | |||
| jqInsertAfter | Insert every element in the set of matched elements after the target. | |||
| jqInsertBefore | Insert every element in the set of matched elements before the target. | |||
| jqKeyDown | Bind an event handler to the "keydown" JavaScript event, or trigger that event on an element. | |||
| jqKeyPress | Bind an event handler to the "keypress" JavaScript event, or trigger that event on an element. | |||
| jqKeyUp | Bind an event handler to the "keyup" JavaScript event, or trigger that event on an element. | |||
| jqLoadGet | Load data from the server and place the returned HTML into the matched element. | |||
| jqLoadPost | Load data from the server and place the returned HTML into the matched element. | |||
| jqMap | Translate all items in an array or object to new array of items. | |||
| jqMouseDown | Bind an event handler to the "mousedown" JavaScript event, or trigger that event on an element. | |||
| jqMouseEnter | Bind an event handler to be fired when the mouse enters an element, or trigger that handler on an element. | |||
| jqMouseLeave | Bind an event handler to be fired when the mouse leaves an element, or trigger that handler on an element. | |||
| jqMouseMove | Bind an event handler to the "mousemove" JavaScript event, or trigger that event on an element. | |||
| jqMouseOut | Bind an event handler to the "mouseout" JavaScript event, or trigger that event on an element. | |||
| jqMouseOver | Bind an event handler to the "mouseover" JavaScript event, or trigger that event on an element. | |||
| jqMouseUp | Bind an event handler to the "mouseup" JavaScript event, or trigger that event on an element. | |||
| jqNamespace | A namespace template. ref: http://enterprisejquery.com/2010/10/how-good-c-habits-can-encourage-bad-javascript-habits-part-1/ | |||
| jqOffsetGet | Get the current coordinates of the first element, or set the coordinates of every element, in the set of matched elements, relative to the document. | |||
| jqOffsetParent | Get the closest ancestor element that is positioned. | |||
| jqOn | Attach an event handler function for one or more events to the selected elements. | |||
| jqOne | Attach a handler to an event for the elements. The handler is executed at most once per element per event type. | |||
| jqOneWithData | Attach a handler to an event for the elements. The handler is executed at most once per element per event type. | |||
| jqOuterHeight | Get the current computed height for the first element in the set of matched elements, including padding, border, and optionally margin. Returns a number (without "px") representation of the value or null if called on an empty set of elements. | |||
| jqOuterWidth | Get the current computed width for the first element in the set of matched elements, including padding and border. | |||
| jqPlugin | Plugin template. | |||
| jqPosition | Get the current coordinates of the first element in the set of matched elements, relative to the offset parent. | |||
| jqPost | Load data from the server using a HTTP POST request. | |||
| jqPrepend | Insert content, specified by the parameter, to the beginning of each element in the set of matched elements. | |||
| jqPrependTo | Insert every element in the set of matched elements to the beginning of the target. | |||
| jqRemove | Remove the set of matched elements from the DOM. | |||
| jqRemoveExp | Remove the set of matched elements from the DOM. | |||
| jqReplaceAll | Replace each target element with the set of matched elements. | |||
| jqReplaceWith | Replace each element in the set of matched elements with the provided new content and return the set of elements that was removed. | |||
| jqResize | Bind an event handler to the "resize" JavaScript event, or trigger that event on an element. | |||
| jqScroll | Bind an event handler to the "scroll" JavaScript event, or trigger that event on an element. | |||
| jqScrollLeftGet | Get the current horizontal position of the scroll bar for the first element in the set of matched elements. | |||
| jqScrollLeftSet | Set the current horizontal position of the scroll bar for each of the set of matched elements. | |||
| jqScrollTopGet | Get the current vertical position of the scroll bar for the first element in the set of matched elements or set the vertical position of the scroll bar for every matched element. | |||
| jqScrollTopSet | Set the current vertical position of the scroll bar for each of the set of matched elements. | |||
| jqSelect | Bind an event handler to the "select" JavaScript event, or trigger that event on an element. | |||
| jqSelectTrigger | Bind an event handler to the "select" JavaScript event, or trigger that event on an element. | |||
| jqShow | Display the matched elements. | |||
| jqShowFull | Display the matched elements. | |||
| jqSlideDown | Display the matched elements with a sliding motion. | |||
| jqSlideDownFull | Display the matched elements with a sliding motion. | |||
| jqSlideToggle | Display or hide the matched elements with a sliding motion. | |||
| jqSlideToggleFull | Display or hide the matched elements with a sliding motion. | |||
| jqSlideUp | Display the matched elements with a sliding motion. | |||
| jqSlideUpFull | Display the matched elements with a sliding motion. | |||
| jqSubmit | Bind an event handler to the "submit" JavaScript event, or trigger that event on an element. | |||
| jqSubmitTrigger | Bind an event handler to the "submit" JavaScript event, or trigger that event on an element. | |||
| jqTextGet | Get the combined text contents of each element in the set of matched elements, including their descendants. | |||
| jqTextSet | Set the content of each element in the set of matched elements to the specified text. | |||
| jqToggle | Display or hide the matched elements. | |||
| jqToggleFull | Display or hide the matched elements. | |||
| jqToggleSwitch | Display or hide the matched elements. | |||
| jqTrigger | Execute all handlers and behaviors attached to the matched elements for the given event type. | |||
| jqTriggerHandler | Execute all handlers attached to an element for an event. | |||
| jqTriggerHandlerWithData | Execute all handlers attached to an element for an event. | |||
| jqTriggerWithData | Execute all handlers and behaviors attached to the matched elements for the given event type. | |||
| jqUnbind | Remove a previously-attached event handler from the elements. | |||
| jqUnbindAll | Remove a previously-attached event handler from the elements. | |||
| jqUnload | Bind an event handler to the "unload" JavaScript event. | |||
| jqValGet | Get the current value of the first element in the set of matched elements. | |||
| jqValSet | Set the value of each element in the set of matched elements. | |||
| jqWidthGet | Get the current computed width for the first element in the set of matched elements. | |||
| jqWidthSet | Set the CSS width of each element in the set of matched elements. | |||
| jqWrap | Wrap an HTML structure around each element in the set of matched elements. | |||
| jqWrapAll | Wrap an HTML structure around all elements in the set of matched elements. | |||
| jqWrapInner | Wrap an HTML structure around the content of each element in the set of matched elements. |
All snippets have been taken from the Visual Studio 2015 jQuery Code Snippets Extension. Credit given where due.
Makes tables more readable for humans. Compatible with the Markdown writer plugin's table formatter feature in Atom.
Formatting files or checking if they're already formatted is possible from the command line. This requires node and npm.
The extension has to be downloaded and compiled:
npm install.npm run compile.The typical location of the installed extension (your actual version might differ):
Available features from the command line:
npm run --silent prettify-md < input.md.npm run --silent prettify-md < input.md > output.md.npm run --silent check-md < input.md. This will fail with an exception and return code 1 if the file is not prettyfied.Note: the
--silentswitch sets the npm log level to silent, which is useful to hide the executed file name and concentrate on the actual output.
Available features from docker:
docker container run -i darkriszty/prettify-md < input.md.docker container run -i darkriszty/prettify-md < input.md > output.md.docker container run -i darkriszty/prettify-md --check < input.md. This will fail with an exception and return code 1 if the file is not prettyfied.The extension is available for markdown language mode. It can either prettify a selected table ( Format Selection) or the entire document ( Format Document).
A VSCode command called Prettify markdown tables is also available to format format the currently opened document.
Configurable settings:
A Visual Studio Code extension to jump to documentation for the current keyword, ported from sublime-text-2-goto-documentation
Search for goto documentation
Move the cursor inside the word you want the docs for and:
Super+Shift+H orGotoDocumentation allows you to edit the url that opens by editing the settings.
"goto-documentation.customDocs": {
// the key value pair represent scope -> doc url
// supported placeholders:
// - ${query} the selected text/word
"css": "http://devdocs.io/#q=${query}",
}
A VSCode extension to host the chrome devtools inside of a webview.
If you are looking for a more streamlined and officially supported devtools extension, you should try VS Code - Elements for Microsoft Edge (Chromium)
You can launch the Chrome DevTools hosted in VS Code like you would a debugger, by using a launch.json config file. However, the Chrome DevTools aren't a debugger and any breakpoints set in VS Code won't be hit, you can of course use the script debugger in Chrome DevTools.
To do this in your launch.json add a new debug config with two parameters.
type - The name of the debugger which must be devtools-for-chrome. Required.url - The url to launch Chrome at. Optional.file - The local file path to launch Chrome at. Optional.request - Whether a new tab in Chrome should be opened launch or to use an exsisting tab attach matched on URL. Optional.name - A friendly name to show in the VS Code UI. Required. {
"version": "0.1.0",
"configurations": [
{
"type": "devtools-for-chrome",
"request": "launch",
"name": "Launch Chrome DevTools",
"file": "${workspaceFolder}/index.html"
},
{
"type": "devtools-for-chrome",
"request": "attach",
"name": "Attach Chrome DevTools",
"url": "http://localhost:8000/"
}
]
}
chrome.exe --disable-extensions --remote-debugging-port=9222DevTools for Chrome: Attach to a targetDevTools for Chrome: Launch Chrome and then attach to a targetchrome.exe --disable-extensions --remote-debugging-port=9222npm installnpm run watch or npm run buildF5 to start debuggingDevTools for Chrome: Attach to a targetJS Refactor is the Javascript automated refactoring tool for Visual Studio Code, built to smooth and streamline your development experience. It provides an extensive list of automated actions including the commonly needed: Extract Method, Extract Variable, Inline Variable, and an alias for the built-in VS Code rename. JS Refactor also supports many common snippets and associated actions for wrapping existing code in common block expressions.
Experimental Support
Click on the extensions icon on the left-hand side of your editor. In the search bar type "JS Refactor." Find the extension in the list and click the install button.
Open VS Code, press F1 and enter ext install to open the extensions panel, follow the instructions above
Basic usage: Make a selection, right click and select the refactoring you want to perform from the context menu.
Command Pallette: You can press F1 then simply type the name of the refactoring and press enter if you know the name of the refactoring you need.
Shortcuts: Finally, there are hotkey combinations for some of the most common refactorings you might want. Hotkeys are listed in the keybindings section below.
JS Refactor supports the following refactorings (explanations below):
Common Refactorings:
Other Utilities:
Rename variable (VS Code internal) - F2
Convert to Arrow Function
Select the code you wish to refactor and then press the F1 key to open the command pallette. Begin typing the name of the refactoring and select the correct refactoring from the list. You will be prompted for any necessary information.
Extract Method Creates new function with original selection as the body.
Extract Variable Creates new assigned variable declaration and replaces original selection.
Inline Variable Replaces all references to variable with variable initialization expression, deletes variable declaration.
Convert To Arrow Function Converts a function expression to an arrow function.
Convert To Function Declaration Converts a function expression, assigned to a variable, to a function declaration.
Convert To Function Expression Converts an arrow function to a function expression.
Convert To Template Literal Converts a string concatenation expression to a template literal.
Export Function creates new export declaration for selected function or function name
Introduce Function creates new function from existing function call or variable assignment
Lift and Name Function Expression Lifts function expression from current context, replacing it with provided name and adds name to expression
Shift Parameters Shifts function parameters to the left or right by the selected number of places
Wrap In Condition Wraps selected code in an if statement, adding indentation as necessary
Wrap in function takes your selected code, at line-level precision, and wraps all of the lines in a named function.
Wrap in IIFE wraps selected code in an immediately invoked function expression (IIFE).
JS Refactor supports several common code snippets:
Type the abbreviation, such as fn, in your code and hit enter. When the snippet is executed, the appropriate code will be inserted into your document. Any snippets which require extra information like names or arguments will have named tab-stops where you can fill in the information unique to your program.
anon Inserts a tab-stopped anonymous function snippet into your code
export Adds a module.exports single var assignment in your module
exportObj Adds a module.exports assignment with an object literal
fn Inserts a tab-stopped named function snippet into your code
lfn Inserts a tab-stopped lambda function snippet into your code
iife Inserts a new, tab-stopped IIFE into your code
mfn Inserts a new color-delimited member function to your prototype -- Protip be inside a prototype object when using this.
require Inserts a new require statement in your module
strict Inserts 'use strict' into your code
Visual Studio Code plugin that autocompletes npm modules in import statements.
![]() Eliminate context switching and costly distractions. Create and merge PRs and perform code reviews from inside your IDE while using jump-to-definition, your favorite keybindings, and other IDE tools.
Eliminate context switching and costly distractions. Create and merge PRs and perform code reviews from inside your IDE while using jump-to-definition, your favorite keybindings, and other IDE tools.
Learn more
In the command palette (cmd-shift-p) select Install Extension and choose npm Intellisense.
Something missing? Found a bug? - Create a pull request or an issue. Github
{
"npm-intellisense.importES6": true,
"npm-intellisense.importQuotes": "'",
"npm-intellisense.importLinebreak": ";\r\n",
"npm-intellisense.importDeclarationType": "const",
}
{
"npm-intellisense.importES6": false,
"npm-intellisense.importQuotes": "'",
"npm-intellisense.importLinebreak": ";\r\n",
"npm-intellisense.importDeclarationType": "const",
}
Npm intellisense scans only dependencies by default. Set scanDevDependencies to true to enable it for devDependencies too.
{
"npm-intellisense.scanDevDependencies": true,
}
Shows build in node modules like 'path' of 'fs'
{
"npm-intellisense.showBuildInLibs": true,
}
Look for package.json inside nearest directory instead of workspace root. It's enabled by default.
{
"npm-intellisense.recursivePackageJsonLookup": true,
}
Open subfolders of a module. This feature is work in progress and experimental.
{
"npm-intellisense.packageSubfoldersIntellisense": false,
}
This software is released under MIT License
VSCode extension to integrate JavaScript Standard Style into VSCode.
We support JavaScript Semi-Standard Style too, if you prefer keeping the semicolon.
JavaScript Standard Style with custom tweaks is also supported if you want to fine-tune your ESLint config while keeping the power of Standard.
This plugin also works with [TypeScript Standard Style][https://github.com/toddbluhm/ts-standard] which has additonal rules for TypeScript based projects.
Install the 'JavaScript Standard Style' extension
If you don't know how to install extensions in VSCode, take a look at the documentation.
You will need to reload VSCode before new extensions can be used.
Install standard, semistandard, standardx or ts-standard
This can be done globally or locally. We recommend that you install them locally (i.e. saved in your project's devDependencies), to ensure that other developers have it installed when working on the project.
Disable the built-in VSCode validator
To do this, set "javascript.validate.enable": false in your VSCode settings.json.
We give you some options to customize vscode-standardjs in your VSCode settings.json.
| Option | Description | Default |
|---|---|---|
standard.enable |
enable or disable JavaScript Standard Style | true |
standard.run |
run linter onSave or onType |
onType |
standard.autoFixOnSave |
enable or disable auto fix on save. It is only available when VSCode's files.autoSave is either off, onFocusChange or onWindowChange. It will not work with afterDelay. |
false |
standard.nodePath |
use this setting if an installed standard package can't be detected. |
null |
standard.validate |
an array of language identifiers specify the files to be validated | ["javascript", "javascriptreact", "typescript", "typescriptreact] |
standard.workingDirectories |
an array for working directories to be used. | [] |
standard.engine |
You can use semistandard, standardx or ts-standard instead of standard. Just make sure you've installed the semistandard, the standardx or the ts-standard package, instead of standard. |
standard |
standard.usePackageJson |
if set to true, JavaScript Standard Style will use project's package.json settings, otherwise globally installed standard module is used |
false |
You can still configure standard itself with the standard.options setting, for example:
"standard.options": {
"globals": ["$", "jQuery", "fetch"],
"ignore": [
"node_modules/**"
],
"plugins": ["html"],
"parser": "babel-eslint",
"envs": ["jest"]
}
It's recommended to change these options in your package.json file on a per-project basis, rather than setting them globally in settings.json. For example:
"standard": {
"plugins": ["html"],
"parser": "babel-eslint"
}
If you've got multiple projects within a workspace (e.g. you're inside a monorepo), VSCode prevents extensions from accessing multiple package.json files.
If you want this functionality, you should add each project folder to your workspace ( File -> Add folder to workspace...). If you can't see this option, download the VSCode Insiders Build to get the latest features.
When you open the Command Palette in VSCode (⇧⌘P or Ctrl+Shift+P), this plugin has the following options:
Fix all auto-fixable problems - applies JavaScript Standard Style auto-fix resolutions to all fixable problems.Disable JavaScript Standard Style for this Workspace - disable JavaScript Standard Style extension for this workspace.Enable JavaScript Standard Style for this Workspace - enable JavaScript Standard Style extension for this workspace.Show output channel - view the linter output for JavaScript Standard Style.How do I lint script tags in vue or html files?
You can lint them with eslint-plugin-html. Make sure it's installed, then enable linting for those file types in your settings.json:
"standard.validate": [
"javascript",
"javascriptreact",
"html"
],
"standard.options": {
"plugins": ["html"]
},
"files.associations": {
"*.vue": "html"
},
If you want to enable autoFix for the new languages, you should enable it yourself:
"standard.validate": [
"javascript",
"javascriptreact",
{
"language": "html",
"autoFix": true
}
],
"standard.options": {
"plugins": ["html"]
}
npm install right under project root.watch build task (⇧⌘B or Ctrl+Shift+B) to compile the client and server.Launch Extension launch configuration (from the VSCode debug panel).Attach to Server launch configuration.npm install,npm run compile,npm run package to build a .vsix file, then you can install it with code --install-extension vscode-standardjs.vsix.Extension for Visual Studio Code - Insert File Header Comment such as date, time
This extension allow you to insert timestamp, copyright or any information to your file like comment below
/*
* Created on Tue Feb 18 2020
*
* Copyright (c) 2020 - Your Company
*/
date, time, datetime, day, month, year, hour, minute, second, company, filename ext install fileheadercomment
By default you don't have to set anything. It will detect most programming language for appropriate comment syntax.
Execute it from Command Pallete (menu View - Command Pallete...) then type command below:
FileHeaderComment: Insert Default Template at CursorFileHeaderComment: Select from Available TemplatesThe second command will show your available templates defined in Settings
If you want to set your own parameter and template (set from menu Preferences - User Settings), you can read explanation below
This is default configuration
"fileHeaderComment.parameter":{
"*":{
"commentbegin": "/*",
"commentprefix": " *",
"commentend": " */",
"company": "Your Company"
}
},
"fileHeaderComment.template":{
"*":[
"${commentbegin}",
"${commentprefix} Created on ${date}",
"${commentprefix}",
"${commentprefix} Copyright (c) ${year} ${company}",
"${commentend}"
]
}
Define all custom variables/paramenters in asterisk * like
"fileHeaderComment.parameter":{
"*":{
"company": "Your Company"
"myvar1": "My Variable 1",
"myvar2": "My Variable 2"
}
}
Use your variable in template like (asterisk * will be default template)
"fileHeaderComment.template":{
"*":[
"${commentbegin}",
"${commentprefix} Created on ${date}",
"${commentprefix}",
"${commentprefix} Copyright (c) ${year} ${company}",
"${commentprefix} my variables are ${myvar1} and ${myvar2}",
"${commentend}"
]
}
You can define multiple templates, for instance template for MIT License
"fileHeaderComment.parameter":{
"*":{
"author": "Your Name",
"license_mit":[
"The MIT License (MIT)",
" Copyright (c) ${year} ${author}",
"",
" Permission is hereby granted, free of charge, to any person obtaining a copy of this software",
" and associated documentation files (the \"Software\"), to deal in the Software without restriction,",
" including without limitation the rights to use, copy, modify, merge, publish, distribute, sublicense,",
" and/or sell copies of the Software, and to permit persons to whom the Software is furnished to do so,",
" subject to the following conditions:",
"",
" The above copyright notice and this permission notice shall be included in all copies or substantial",
" portions of the Software.",
"",
" THE SOFTWARE IS PROVIDED \"AS IS\", WITHOUT WARRANTY OF ANY KIND, EXPRESS OR IMPLIED, INCLUDING BUT NOT LIMITED",
" TO THE WARRANTIES OF MERCHANTABILITY, FITNESS FOR A PARTICULAR PURPOSE AND NONINFRINGEMENT. IN NO EVENT SHALL",
" THE AUTHORS OR COPYRIGHT HOLDERS BE LIABLE FOR ANY CLAIM, DAMAGES OR OTHER LIABILITY, WHETHER IN AN ACTION OF CONTRACT,",
" TORT OR OTHERWISE, ARISING FROM, OUT OF OR IN CONNECTION WITH THE SOFTWARE OR THE USE OR OTHER DEALINGS IN THE SOFTWARE."
]
}
},
"fileHeaderComment.template":{
"mit":[
"${commentbegin}",
"${commentprefix} Created on ${date}",
"${commentprefix}",
"${commentprefix} ${license_mit}",
"${commentend}"
]
}
You can use your mit template above by calling it through Command Pallete and choose FileHeaderComment: Select from Available Templates.
You can use parameters below in your template
date : print current datetime : print current timetime24h : print current time in 24 hour formatdatetime: print current date + timedatetime24h : print current date + time in 24 hour formatcompany : print "Your Company"day: print day of the monthmonth: print current monthyear: print current yearhour: print current hour (24h)minute: print current minutesecond: print current secondfilename: print filename
![]()
It helps you to navigate in your code, moving between important positions easily and quickly. No more need to search for code. It also supports a set of selection commands, which allows you to select bookmarked lines and regions between bookmarked lines. It's really useful for log file analysis.
Here are some of the features that Bookmarks provides:
Bookmarks: Toggle Mark/unmark positions with bookmarksBookmarks: Toggle Labeled Mark labeled bookmarksBookmarks: Jump to Next Move the cursor forward, to the bookmark belowBookmarks: Jump to Previous Move the cursor backward, to the bookmark aboveBookmarks: List List all bookmarks in the current fileBookmarks: List from All Files List all bookmarks from all filesBookmarks: Clear remove all bookmarks in the current fileBookmarks: Clear from All Files remove all bookmarks from all filesBookmarks (Selection): Select Lines Select all lines that contains bookmarksBookmarks (Selection): Expand Selection to Next Expand the selected text to the next bookmarkBookmarks (Selection): Expand Selection to Previous Expand the selected text to the previous bookmarkBookmarks (Selection): Shrink Selection Shrink the select text to the Previous/Next bookmarkYou can easily Mark/Unmark bookmarks on any position. You can even define Labels for each bookmark.
Quicky move between bookmarks backward and forward, even if located outside the active file.
List all bookmarks from the current file/project and easily navigate to any of them. It shows a line preview and temporarily scroll to its position.
You can use Bookmarks to easily select lines or text blocks. Simply toggle bookmarks in any position of interest and use some of the Selection commands available.
Select all bookmarked lines. Specially useful while working with log files.
Manipulate the selection of lines between bookmarks, up and down.
false by default) "bookmarks.navigateThroughAllFiles": true
true by default) "bookmarks.wrapNavigation": true
false by default) "bookmarks.saveBookmarksInProject": true
"bookmarks.gutterIconPath": "c:\\temp\\othericon.png"
"bookmarks.backgroundLineColor"
Deprecated in 10.7: Use
workbench.colorCustomizationsinstead. More info in Available Colors
true by default) "bookmarks.showCommandsInContextMenu": true
false by default) "bookmarks.useWorkaroundForFormatters": true
This workaround should be temporary, until a proper research and suggested APIs are available
false by default) "bookmarks.sideBar.expanded": true
Choose how multi cursor handles already bookmarked lines ( allLinesAtOnce by default)
allLinesAtOnce: Creates bookmarks in all selected lines at once, if at least one of the lines don't have a bookmarkeachLineIndependently: Literally toggles a bookmark in each line, instead of making all lines equals "bookmarks.multicursor.toggleMode": "eachLineIndependently"
Choose how labels are suggested when creating bookmarks ( dontUse by default)
dontUse: Don't use the selection (original behavior)useWhenSelected: Use the selected text (if available) directly, no confirmation requiredsuggestWhenSelected: Suggests the selected text (if available). You still need to confirm.suggestWhenSelectedOrLineWhenNoSelected: Suggests the selected text (if available) or the entire line (when has no selection). You still need to confirm "bookmarks.label.suggestion": "useWhenSelected"
"workbench.colorCustomizations": {
"bookmarks.lineBackground": "#157EFB22"
}
"workbench.colorCustomizations": {
"bookmarks.lineBorder": "#FF0000"
}
"workbench.colorCustomizations": {
"bookmarks.overviewRuler": "#157EFB88"
}
The Bookmarks extension has its own Side Bar, giving you more free space in your Explorer view. You will have a few extra commands available:
The bookmarks are saved per session for the project that you are using. You don't have to worry about closing files in Working Files. When you reopen the file, the bookmarks are restored.
It also works even if you only preview a file (simple click in TreeView). You can put bookmarks in any file and when you preview it again, the bookmarks will be there.
MIT © Alessandro Fragnani
Markdown converter for Visual Studio Code. Contribute to yzane/vscode-markdown-pdf development by creating an account on GitHub.
Include markdown fragment files: :[alternate-text](relative-path-to-file.md).
Chromium download starts automatically when Markdown PDF is installed and Markdown file is first opened with Visual Studio Code.
However, it is time-consuming depending on the environment because of its large size (~ 170Mb Mac, ~ 282Mb Linux, ~ 280Mb Win).
During downloading, the message Installing Chromium is displayed in the status bar.
If you are behind a proxy, set the http.proxy option to settings.json and restart Visual Studio Code.
If the download is not successful or you want to avoid downloading every time you upgrade Markdown PDF, please specify the installed Chrome or 'Chromium' with markdown-pdf.executablePath option.
F1 or Ctrl+Shift+Pexport and select belowmarkdown-pdf: Export (settings.json)markdown-pdf: Export (pdf)markdown-pdf: Export (html)markdown-pdf: Export (png)markdown-pdf: Export (jpeg)markdown-pdf: Export (all: pdf, html, png, jpeg)
markdown-pdf: Export (settings.json)markdown-pdf: Export (pdf)markdown-pdf: Export (html)markdown-pdf: Export (png)markdown-pdf: Export (jpeg)markdown-pdf: Export (all: pdf, html, png, jpeg)
"markdown-pdf.convertOnSave": true option to settings.jsonVisual Studio Code User and Workspace Settings
markdown-pdf.* settings
markdown-pdf.type"markdown-pdf.type": [ "pdf", "html", "png", "jpeg" ],
markdown-pdf.convertOnSavemarkdown-pdf.convertOnSaveExclude"markdown-pdf.convertOnSaveExclude": [ "^work", "work.md\$", "work|test", "[0-9][0-9][0-9][0-9]-work", "work\\test" // All '\' need to be written as '\\' (Windows) ],
markdown-pdf.outputDirectory\ need to be written as \\ (Windows)"markdown-pdf.outputDirectory": "C:\\work\\output",
Markdown file, it will be interpreted as a relative path from the filefolder, it will be interpreted as a relative path from the root folderworkspace, it will be interpreted as a relative path from the each root folder
"markdown-pdf.outputDirectory": "output",
~, it will be interpreted as a relative path from the home directory"markdown-pdf.outputDirectory": "~/output",
relative path, it will be created if the directory does not existabsolute path, an error occurs if the directory does not existmarkdown-pdf.outputDirectoryRelativePathFilemarkdown-pdf.outputDirectoryRelativePathFile option is set to true, the relative path set with markdown-pdf.outputDirectory is interpreted as relative from the filemarkdown-pdf.styles\ need to be written as \\ (Windows)"markdown-pdf.styles": [
"C:\\Users\\
Markdown file, it will be interpreted as a relative path from the filefolder, it will be interpreted as a relative path from the root folderworkspace, it will be interpreted as a relative path from the each root folder
"markdown-pdf.styles": [ "markdown-pdf.css", ],
~, it will be interpreted as a relative path from the home directory"markdown-pdf.styles": [ "~/.config/Code/User/markdown-pdf.css" ],
"markdown-pdf.styles": [ "https://xxx/markdown-pdf.css" ],
markdown-pdf.stylesRelativePathFilemarkdown-pdf.stylesRelativePathFile option is set to true, the relative path set with markdown-pdf.styles is interpreted as relative from the filemarkdown-pdf.includeDefaultStylesmarkdown-pdf.highlightmarkdown-pdf.highlightStyle"markdown-pdf.highlightStyle": "github.css",
markdown-pdf.breaksmarkdown-pdf.emojimarkdown-pdf.executablePath\ need to be written as \\ (Windows)"markdown-pdf.executablePath": "C:\\Program Files (x86)\\Google\\Chrome\\Application\\chrome.exe"
markdown-pdf.scalemarkdown-pdf.displayHeaderFootermarkdown-pdf.headerTemplatemarkdown-pdf.footerTemplate<span class='date'></span> : formatted print date<span class='title'></span> : markdown file name<span class='url'></span> : markdown full path name<span class='pageNumber'></span> : current page number<span class='totalPages'></span> : total pages in the document"markdown-pdf.headerTemplate": "
"markdown-pdf.footerTemplate": "
markdown-pdf.printBackgroundmarkdown-pdf.orientationmarkdown-pdf.pageRanges"markdown-pdf.pageRanges": "1,4-",
markdown-pdf.format"markdown-pdf.format": "A4",
markdown-pdf.widthmarkdown-pdf.height"markdown-pdf.width": "10cm", "markdown-pdf.height": "20cm",
markdown-pdf.margin.topmarkdown-pdf.margin.bottommarkdown-pdf.margin.rightmarkdown-pdf.margin.left"markdown-pdf.margin.top": "1.5cm", "markdown-pdf.margin.bottom": "1cm", "markdown-pdf.margin.right": "1cm", "markdown-pdf.margin.left": "1cm",
markdown-pdf.quality"markdown-pdf.quality": 100,
markdown-pdf.clip.xmarkdown-pdf.clip.ymarkdown-pdf.clip.widthmarkdown-pdf.clip.height// x-coordinate of top-left corner of clip area "markdown-pdf.clip.x": 0,
// y-coordinate of top-left corner of clip area "markdown-pdf.clip.y": 0,
// width of clipping area "markdown-pdf.clip.width": 1000,
// height of clipping area "markdown-pdf.clip.height": 1000,
markdown-pdf.omitBackgroundmarkdown-pdf.plantumlOpenMarkermarkdown-pdf.plantumlCloseMarkermarkdown-pdf.plantumlServerFor example, to run Plantuml Server locally #139 :
docker run -d -p 8080:8080 plantuml/plantuml-server:jetty
markdown-pdf.markdown-it-include.enablemarkdown-pdf.mermaidServerUsing files.autoGuessEncoding option of the Visual Studio Code is useful because it automatically guesses the character code. See files.autoGuessEncoding
"files.autoGuessEncoding": true,
If you always want to output to the relative path directory from the Markdown file.
For example, to output to the "output" directory in the same directory as the Markdown file, set it as follows.
"markdown-pdf.outputDirectory" : "output", "markdown-pdf.outputDirectoryRelativePathFile": true,
Please use the following to insert a page break.
Live Execution and Results
Code runs immediately as you type, on unsaved changes; no need to do anything manually or switch context. Error messages are displayed right next to the code that caused them. Console logs and identifier expression values are displayed inline as well.
Live Coverage
Indicators in the gutter of your code editor are constantly updated in realtime to display code coverage so you can quickly see which lines of code are the source of an error, which are fully covered, only partially covered or not covered at all.
Value Explorer
Value Explorer allows non-primitive runtime values to be viewed and explored in an easy-to-navigate real-time treeview. This feature is great for exploring larger objects and makes debugging easier and faster. Opened paths / values can be copied directly to the clipboard.
Live Comments and Values
Show and copy expression values by selecting them in your editor or with editor commands, accessible using keyboard shortcuts. A special comment format can also be used to evaluate any expressions and includes the ability to measure code execution times.
Project Files Import
Import any files from your project into your Quokka file. Quokka will watch project files for changes and automatically update when dependent files change. Babel or TypeScript may be used for imported files compilation.
Quick Package Install
Quickly install any node package, without switching away from your editor, and without having to type the package name. When you install, choose whether to install just for the active Quokka session or for your entire project.
To get started with Quokka.js in VS Code, install the
extension
first by clicking on the Extensions icon in the Activity Bar on the side
of VS Code and searching for Quokka{.highlighter-rouge
.language-plaintext}. Note that Quokka requires VS Code version 1.10.0
or higher.
You may create a new Quokka file, or start Quokka on an existing file.
The results of the execution are displayed right in the editor. To see
the full execution output, you may view the Quokka Console by invoking
the `Show Output` command or
clicking the bottom-right status bar indicator.
``You may create a new Quokka file, or start Quokka on an existing file.
The results of the execution are displayed right in the editor. To see
the full execution output, you may view the Quokka Console by invoking
theShow Output` command or
clicking the bottom-left output panel icon.
You may create a new Quokka file, or start Quokka on an existing file by
using the Start Quokka context
menu action in any opened file editor (you may also assign some shortcut
to the action). The results of the execution are displayed right in the
editor. To see the full execution output, you may view the Quokka
Console by clicking the bottom-right status bar indicator.
If you create a new Quokka scratch file and want to save it, then you
may press F5 to do so. Later
on, you may open the file and run Quokka using the
Start Quokka context menu
action in the opened file editor.
It is recommended that you memorize a couple of Quokka keyboard shortcuts (you may see them when using the editor's command palette). This will make working with Quokka much faster.
To open a new Quokka file use Cmd/Ctrl + K, J{.highlighter-rouge
.language-plaintext} for JavaScript, or
Cmd/Ctrl + K, T for
TypeScript. To start/restart Quokka on an existing file, use
Cmd/Ctrl + K, Q .
**Live Logging/Compare**
You may use console.log or
identifier expressions (i.e. just typing a variable name) to log any
values.\
You may also use sequence expressions to compare objects:
**Note that when using identifier expressions for logging (for example,
typing `a` to see the value of
the `a` variable), you may hit
some limits in terms of the number of displayed properties and the
logged object traversal depth.**
In this case, you may use
console.log(a) to display
objects without the limitations.
Please also note that Boolean, Number and Function data types are **not
supported** when use sequence expressions to compare objects (e.g.
`obj1, obj2` ).
## Live Code Coverage
Once Quokka.js is running, you can see the code coverage in the gutter
of your editor. The coverage is live, so you can start changing your
code and the coverage will automatically be updated, just as you type.
As you may see, there are various colored squares displayed for each
line of your source code.
- Gray squares mean that the source line has not been executed.
- Green squares mean that the source line has been executed.
- Yellow squares mean that the source line has only been partially
executed. Quokka supports branch code coverage level, so if a line
contains a logical expression or a ternary operator with both
covered and uncovered branches, it will be displayed with yellow
gutter indicator.
- Red squares mean that the source line is the source of an error, or
is in the stack of an error.
## Value Explorer
Value Explorer allows you to inspect everything that is logged in Quokka
with `console.log` , identifier
expressions, [live comments, and the `Show Value`{.highlighter-rouge
.language-plaintext} command](https://quokkajs.com/docs/#comments).
Results are displayed in an easy-to-navigate tree view that is updated
in realtime as you write your code.
Expression paths and values can be copied using the tree node's context
menu.
Note that while Value Explorer is available for both Community and Pro
editions, in Community edition only 2 levels of the explorer's tree can
be expanded.
### Auto-Expand Value Explorer Objects {#auto-expand-value-explorer-objects .vsc-doc .jb-doc style="display: block;"}
**Identifier Expressions** and **Live Comments** can be provided with an
additional hint to automatically expand objects when they are logged to
Value Explorer. Inserting the special comment
`/*?+*/` **after any expression
will expand your object** and its properties within the Value Explorer
tree.
Use this feature with small- to medium-sized objects when you want to
expand all properties in Value Explorer. Having the properties expanded
also helps when using the 'Copy Data' action on the Value Explorer tree
node, because it only copies expanded properties' data.

Note that automatically expanded objects have the following limitations:
- Cyclic Depedencies are not automatically expanded
- Functions are not automatically expanded
- Strings beyond 8192 characters are not automatically expanded
- Only the first 100 properties on a single object will be expanded
- Only the first 100 elements of an array will be expanded
- Only the first 10 levels of nested properties will be expanded
- Only the first 5000 properties across all objects will be expanded
## VS Code Live Share Integration {#live-share-integration .vsc-doc style="display: block;"}
When Microsoft's [VS Code plugin for Live
Share](https://marketplace.visualstudio.com/items?itemName=MS-vsliveshare.vsliveshare)
is installed alongside Quokka, Quokka provides software developers with
the ability to **interactively collaborate on the same code at the same
time**. This feature adds a new dimension to real-time instructor-led
training as well as interactive prototyping/debugging and works best
when guests and host use Live Share's
`follow participant` command.
### How does it work?
When the host and client both have Quokka plugin installed during a Live
Share collaboration, when code changes are made and Quokka is running,
Quokka will execute the code changes **on the host** and immediately
send the display values to all collaboration participants. Before
sharing the Quokka session with clients, the host will be prompted to
either `Allow` or
`Deny` sharing Quokka with the
Live Share collaboration.
Members of the Live Share collaboration see the same Quokka display
values when they are visible to the host. If the Live Share session is
configured to be read-only, only the host can edit code but
collaborators will see all of the Quokka execution results. If the Live
Share session is editable by other collaborators, as non-host code edits
are made, Quokka will evaluate the changes on the host and send the
execution results to all collaborators.
## Interactive Examples
The Wallaby.js team curates a set of [interactive
examples](https://github.com/wallabyjs/interactive-examples) that may be
launched from within VS Code using the
`Create File (Ctrl + K, L)`
command. These examples are useful for both experienced developers (as
references) and for new developers (to learn).
## Live Comments
[PRO](https://quokkajs.com/pro "Quokka.js Professional Edition Feature")
While `console.log` may do a
great job for displaying values, sometimes you may need to see the value
right in the middle of an expression. For example, given a chain of
`a.b().c().d()` , you may want to
inspect the result of `a.b().c()`{.highlighter-rouge
.language-plaintext} before `.d()`{.highlighter-rouge
.language-plaintext} is called.
The most powerful way to log **any** expression is to **use a special
comment right after the expression you want to log**.
Inserting the special comment `/*?*/`{.highlighter-rouge
.language-plaintext} after an expression (or just
`//?` after a statement) will
log just the value of that expression.
For example,
```{.highlight .language-javascript}
a.b()/*?*/.c().d()
Copy
will output the result of a.b(){.highlighter-rouge
.language-plaintext} expression, and
```{.highlight .language-javascript} a.b().c().d() /?/ // or just a.b().c().d() //?
Copy
will output the result of the full `a.b().c().d()`{.highlighter-rouge
.language-plaintext} expression.
You may also write **any JavaScript code right in the comment** to shape
the output. The code has the access to the `$`{.highlighter-rouge
.language-plaintext} variable which is the expression that the comment
is appended to. The executed code is within a closure, so it also has
the access to any objects that you may access from within the current
lexical environment.
Note that there's no constraints in terms of what the comment code can
do. For example, the watch comment below is incrementing
`d.e` value, and returning
`$` , which points to the
expression that the comment is appended to (`a.b`{.highlighter-rouge
.language-plaintext}).

Also, unlike console logging, the special comment logging has some
built-in smarts. For example, when you place the comment after an
expression that is a promise, the **resolved value of the promise** is
logged. Similarly, if an expression is an **observable, then its values
are displayed**. So you don't need to insert a
`.then` function to just inspect
the resolved value of the promise or a `forEach`{.highlighter-rouge
.language-plaintext}/`subscribe`
function to inspect the observable values.
#### Live comment snippet
To save some time on typing the comment when you need it, you may
[create a code
snippet](https://code.visualstudio.com/docs/editor/userdefinedsnippets#_assign-keybindings-to-snippets)
with a custom keybinding.
To save some time on typing the comment when you need it, you may
[create a live
template.](https://www.jetbrains.com/help/webstorm/creating-and-editing-live-templates.html)
To save some time on typing the comment when you need it, you may
[create a code
snippet](http://flight-manual.atom.io/using-atom/sections/snippets/)
with a [custom
keybinding.](https://discuss.atom.io/t/keymaps-for-inserting-code-snippets/11284)
To save some time on typing the comment when you need it, you may
[create code
snippets.](http://docs.sublimetext.info/en/latest/extensibility/snippets.html)
## Live Value Display
[PRO](https://quokkajs.com/pro "Quokka.js Professional Edition Feature")
While the [Live Comments](https://quokkajs.com/docs/#comments) feature
provides an excellent way to log expression values and will keep
displaying values when you change your code, sometimes you may want to
**display or capture expression values without modifying code**. The
`Show Value` and
`Copy Value` features allow you
to do exactly that.
### Show Value
If you want to quickly display some expression value, but without
modifying your code, you may do it by **simply selecting an expression
in an editor**.
If you want to quickly display some expression value, but without
modifying your code, you may do it by **simply selecting an expression
in an editor**.
### Copy Value
If you want to **copy an expression value to your clipboard without
modifying your code**, Live Value Display allows you to do it with a
special command (`Show Value`
command, or with the `Cmd + K, X`{.highlighter-rouge
.language-plaintext} keyboard shortcut).
If you want to **copy an expression value to your clipboard without
modifying your code**, Live Value Display allows you to do it with a
special intention action (`Alt+Enter`{.highlighter-rouge
.language-plaintext} & select the `Copy Value`{.highlighter-rouge
.language-plaintext} action).
## Project Files Import
[PRO](https://quokkajs.com/pro "Quokka.js Professional Edition Feature")
Quokka 'Community' edition allows you to import any locally installed
node modules to a Quokka file. In addition to that, Quokka 'Pro' edition
also allows to **import any files from your project**:
- with [Babel](https://quokkajs.com/docs/configuration.html#babel) or
[TypeScript](https://quokkajs.com/docs/configuration.html#typescript)
compilation if required;
- Quokka will also watch project files for changes and automatically
update when dependent files change.
Quokka also resolves imported modules with non-relative names when using
`tsconfig.json` and
`jsconfig.json` files that
specify `baseUrl` and/or
`paths` settings.
## Quick Package Install
[PRO](https://quokkajs.com/pro "Quokka.js Professional Edition Feature")
This feature allows you to quickly install any node package, via
`npm` or
`yarn` , **without switching away
from your editor, and without even having to type the package name**
(there is enough information in your code already). The **package may be
installed just for the active Quokka session**, so that when you are
just playing with things, **your `node_modules`{.highlighter-rouge
.language-plaintext} folder is not trashed**. Having said that, you may
also target the project's `node_modules`{.highlighter-rouge
.language-plaintext}, if you want to do it.
You may install missing packages via intention actions
(`Alt+Enter` ), or via the links
in the Quokka output.
You may install missing packages by using the hover message, or with the
`Cmd + K, I` keyboard shortcut
(whenever there's a missing package), via command palette
(`Quokka.js: Install Missing Package ...`{.highlighter-rouge
.language-plaintext} commands), or via the links in the Quokka output.

By default Quokka uses the
`npm install {packageName}`
command. You may change it to
`yarn add {packageName}` by
setting the `installPackageCommand`{.highlighter-rouge
.language-plaintext} value in [your Quokka
config](https://quokkajs.com/docs/configuration.html):
```{.highlight .language-json}
{
"installPackageCommand": "yarn add {packageName}"
}
Copy
The feature allows to quickly see how various parts of your code perform. It can be very helpful for identifying possible bottlenecks in your app and for doing the performance optimization, or just for experimenting to see how different things perform.
Inserting the special comment /*?.*/{.highlighter-rouge
.language-plaintext} after any expression will report how much time it
took to execute the expression.
Adding the comment to an expression that gets executed multiple times, for example inside a loop, will make the tool to display total execution time, average execution time (total execution time divided by number of times the expression had been executed), minimum and maximum execution time.
You may also use the execution time reporting comment and add to it any expression that you may use in live comments to display both an expression execution time and execution result.
For example,
```{.highlight .language-bash} a() //?. $
Copy
displays `a()` execution time
and result.
## Run on Save/Run Once
[PRO](https://quokkajs.com/pro "Quokka.js Professional Edition Feature")
Choose how and when Quokka should run on your files. In addition to the
community edition's **Automatic** mode, you can start Quokka and only
**Run on Save** or tell Quokka to start and just **Run Once**. This
feature is helpful for using Quokka to run slow-running scripts, or
scripts with side-effects.
The **Run on Save** and **Run Once** actions are available along-side
other Quokka commands, in your IDE's list of commands. If you use these
commands often, you can improve your productivity by adding
key-bindings.
## Runtime
Quokka.js is using your system's node.js to run your code. You also may
configure Quokka to use [any specific node.js
version](https://quokkajs.com/docs/configuration.html#nodejs-version),
if you are using `nvm` for
example.
By default Quokka uses [`esm`
module](https://github.com/standard-things/esm) for JavaScript files,
allowing ES imports and top level await to be used with zero
configuration.
## Browser-like Runtime
To simulate a **browser environment**, Quokka supports jsdom. The
[`jsdom`{.highlighter-rouge
.language-plaintext}](https://github.com/jsdom/jsdom) package must be
installed and available from your project as well adding as [a few
simple Quokka configuration
settings](https://quokkajs.com/docs/configuration.html#jsdom).
## Configuration
Quokka.js does not need any configuration by default. It will run your
code using your system's node.js. It may also run your TypeScript code
without any configuration.
If you would like to use Babel/React JSX or override your
`tsconfig.json` settings, then
you may [configure
Quokka.js](https://quokkajs.com/docs/configuration.html).
If you are using VS Code, you can override our editor display settings
with VS Code User Setting overrides. You can view the overridable
settings in the VS Code Settings editor under **Settings -\> Extensions
-\> Quokka**. \
\
You may override the coverage indicator colors in VS Code's user
settings (`settings.json` file).
The snippet below shows the config with Quokka's default colors.
{ ...
"quokka.colors": {
"covered": "#62b455",
"errorPath": "#ffa0a0",
"errorSource": "#fe536a",
"notCovered": "#cccccc",
"partiallyCovered": "#d2a032"
}
}

**Copy**
If you are using VS Code, you may change your Quokka console output to
`compact` mode by updating your
VS Code setting `quokka.compactMessageOutput`{.highlighter-rouge
.language-plaintext} to `true` .
## Plugins
Quokka.js provides a plugin model that may be configured by using [the
`plugins`
setting](https://quokkajs.com/docs/configuration.html#plugins). Quokka's
plugin model allows you to specify a file or a node module with code to
execute at various stages of Quokka.js' code execution pipeline. You may
find more information about how to write a Quokka plugin in the
[Extensibility docs
section](https://quokkajs.com/docs/extensibility.html).
## Examples
Because Quokka.js runs your code using `node.js`{.highlighter-rouge
.language-plaintext}, sometimes a little more configuration may be
required to match your project's runtime configuration. If the examples
below aren't relevant for your project, search [our support
repository](https://github.com/wallabyjs/quokka/issues) for an existing
configuration.
- [Create-React-App](https://quokkajs.com/docs/configuration.html#create-react-app)
- [Babel +
import](https://github.com/wallabyjs/quokka-babel-import-sample)
- [TypeScript +
import](https://github.com/wallabyjs/quokka-typescript-import-sample)
- [React + Babel + jsdom
plugin](https://github.com/wallabyjs/quokka-react-sample)
- [Quokka
Alias](https://github.com/davestewart/alias-quokka-plugin-demo)
## Questions and issues
If you find an issue, please report it in [our support
repository](https://github.com/wallabyjs/quokka/issues).
[Configuration\*\*](https://quokkajs.com/docs/configuration.html "Next Article")
Please enable JavaScript to view the [comments powered by
Disqus.](https://disqus.com/?ref_noscript)
1. [Getting started](https://quokkajs.com/docs/#getting-started)
2. [Live Feedback](https://quokkajs.com/docs/#live-feedback)
3. [Live Logging/Compare](https://quokkajs.com/docs/#live-logging)
4. [Live Code Coverage](https://quokkajs.com/docs/#live-code-coverage)
5. [Value Explorer](https://quokkajs.com/docs/#value-explorer)
6. [VS Code Live Share
Integration](https://quokkajs.com/docs/#live-share-integration)
7. [Interactive
Examples](https://quokkajs.com/docs/#interactive-examples)
8. [Live Comments](https://quokkajs.com/docs/#comments)
9. [Live Value Display](https://quokkajs.com/docs/#live-value-display)
10. [Project Files Import](https://quokkajs.com/docs/#project-files)
11. [Quick Package Install](https://quokkajs.com/docs/#modules)
12. [Live Performance Testing](https://quokkajs.com/docs/#performance)
13. [Run on Save/Run Once](https://quokkajs.com/docs/#run-modes)
14. [Runtime](https://quokkajs.com/docs/#runtime)
15. [Browser-like
Runtime](https://quokkajs.com/docs/#browser-like-runtime)
16. [Configuration](https://quokkajs.com/docs/#configuration)
17. [Plugins](https://quokkajs.com/docs/#plugins)
18. [Examples](https://quokkajs.com/docs/#examples)
19. [Questions and
issues](https://quokkajs.com/docs/#questions-and-issues)
---
### <========(Browser Preview)========>
---
[](https://marketplace.visualstudio.com/items?itemName=bierner.markdown-emoji)
Adds [:emoji:](https://www.webpagefx.com/tools/emoji-cheat-sheet/) syntax support to VS Code's built-in Markdown preview

# Features
- Adds support for [:emoji:](https://www.webpagefx.com/tools/emoji-cheat-sheet/) syntax to VS Code's built-in markdown preview
---
### <========( Microsoft Edge Tools)========>
---
# Microsoft Edge Tools for VS Code - Visual Studio Marketplace
> Extension for Visual Studio Code - Use the Microsoft Edge Tools from within VS Code to see your site's runtime HTML structure, alter its layout, fix styling issues as well as see your site's network requests.
**Show the browser's Elements and Network tool inside the Visual Studio Code editor and use it to fix CSS issues with your site and inspect network activity.**
A Visual Studio Code extension that allows you to use the browser's Elements and Network tool from within the editor. The DevTools will connect to an instance of Microsoft Edge giving you the ability to see the runtime HTML structure, alter layout, fix styling issues, and view network requests. All without leaving Visual Studio Code.
**Note**: This extension _only_ supports Microsoft Edge (version greater than 80.0.361.48)

## Supported Features
- Debug configurations for launching Microsoft Edge browser in remote-debugging mode and auto attaching the tools.
- Side Bar view for listing all the debuggable targets, including tabs, extensions, service workers, etc.
- Fully featured Elements and Network tool with views for HTML, CSS, accessibility and more.
- Screen-casting feature to allow you to see your page without leaving Visual Studio Code.
- Go directly to the line/column for source files in your workspace when clicking on a link or CSS rule inside the Elements tool.
- Auto attach the Microsoft Edge Tools when you start debugging with the [Debugger for Microsoft Edge](https://marketplace.visualstudio.com/items?itemName=msjsdiag.debugger-for-edge) extension.
- Debug using a windowed or headless version of the Microsoft Edge Browser
## Using the Extension
### Getting Started
For use inside Visual Studio Code:
1. Install any channel (Canary/Dev/etc.) of [Microsoft Edge](https://aka.ms/edgeinsider).
2. Install the extension [Microsoft Edge Tools](https://marketplace.visualstudio.com/items?itemName=ms-edgedevtools.vscode-edge-devtools).
3. Open the folder containing the project you want to work on.
4. (Optional) Install the [Debugger for Microsoft Edge](https://marketplace.visualstudio.com/items?itemName=msjsdiag.debugger-for-edge) extension.
### Changing Extension Settings
You can customize the extension to your needs. You can reach the settings by clicking the gear icon of the extension listing or via the settings menu.

#### Turning on Network Inspection
You can enable the Network Pane to inspect any network request of the attached browser. To do this, change the setting and restart the extension.

You can see an example of the change in the following screencast. After restart, you get an extra tab with network functionality.

#### Turning on Headless Mode
By default, the extension will launch the browser in its own window. This means you get an extra browser icon in your task bar and you need to turn on casting to see the browser inside the editor. You can also choose "headless mode" to not have the browser open in an own window, but embed itself directly into Visual Studio Code.
**Note**: In the past we had issues on Macintosh computers where the Microsoft Edge instance reported itself as "inactive" when the window wasn't visible. Using headless mode fixes that problem.

You can see an example of the change in the following screencast:

### Using the tools
The extension operates in two modes - it can launch an instance of Microsoft Edge navigated to your app, or it can attach to a running instance of Microsoft Edge. Both modes requires you to be serving your web application from local web server, which is started from either a Visual Studio Code task or from your command-line. Using the `url` parameter you tell Visual Studio Code which URL to either open or launch in the browser.
You can now use the high-fidelity tools to tweak your CSS and inspect network calls and go directly back to your code without leaving the editor.

#### Opening source files from the Elements tool
One of the features of the Elements tool is that it can show you what file applied the styles and event handlers for a given node.

The source files for these applied styles and attached event handlers appear in the form of links to a url specified by the browser. Clicking on one will attempt to open that file inside the Visual Studio Code editor window. Correctly mapping these runtime locations to actual files on disk that are part of your current workspace, may require you to enable source maps as part of your build environment.
An example webpack configuration for sass and typescript is given below:
module.exports = {
devtool: "source-map",
module: {
rules: [
{
test: /\.ts$/,
loader: "ts-loader"
},
{
test: /\.(s*)css$/,
use: [
{ loader: MiniCssExtractPlugin.loader },
{ loader: "css-loader", options: { sourceMap: true } },
{ loader: "sass-loader", options: { sourceMap: true } }
]
},
]
}
}
With source maps enabled, you may also need to configure the extension settings/launch.json config to add customized paths between your runtime urls and your workspace paths, see [Sourcemaps](#sourcemaps) for more information.
#### Debug Configuration
You can launch the Microsoft Edge Tools extension like you would a debugger, by using a `launch.json` config file.
Microsoft Edge Tools works great when paired with [Debugger for Microsoft Edge](https://marketplace.visualstudio.com/items?itemName=msjsdiag.debugger-for-edge), you can use the first one to design your frontend and the latter to debug your code and set breakpoints
To add a new debug configuration, in your `launch.json` add a new debug config with the following parameters:
- `type` - The name of the debugger which must be `vscode-edge-devtools.debug.` **Required.**
- `request` - `launch` to open a new browser tab or `attach` to connect to an existing tab. **Required.**
- `name` - A friendly name to show in the Visual Studio Code UI. **Required.**
- `url` - The url for the new tab or of the existing tab. **Optional.**
- `file` - The local file path for the new tab or of the existing tab. **Optional.**
- `webRoot` - The directory that files are served from. Used to resolve urls like `http://localhost:8000/app.js` to a file on disk like `/out/app.js`. **Optional.**
{
"version": "0.1.0",
"configurations": [
{
"type": "vscode-edge-devtools.debug",
"request": "launch",
"name": "Launch Microsoft Edge and open the Edge DevTools",
"file": "${workspaceFolder}/index.html"
},
{
"type": "vscode-edge-devtools.debug",
"request": "attach",
"name": "Attach to Microsoft Edge and open the Edge DevTools",
"url": "http://localhost:8000/",
"webRoot": "${workspaceFolder}/out"
}
]
}
#### Other optional launch config fields
- `browserPath`: The full path to the browser executable that will be launched. If not specified the most stable channel of Microsoft Edge will be launched from the default install location instead.
- `hostname`: By default the extension searches for debuggable instances using `localhost`. If you are hosting your web app on a remote machine you can specify the hostname using this setting.
- `port`: By default the extension will set the remote-debugging-port to `9222`. Use this option to specify a different port on which to connect.
- `userDataDir`: Normally, if Microsoft Edge is already running when you start debugging with a launch config, then the new instance won't start in remote debugging mode. So by default, the extension launches Microsoft Edge with a separate user profile in a temp folder. Use this option to set a different path to use, or set to false to launch with your default user profile instead.
- `useHttps`: By default the extension will search for attachable instances using the `http` protocol. Set this to true if you are hosting your web app over `https` instead.
- `sourceMaps`: By default, the extension will use sourcemaps and your original sources whenever possible. You can disable this by setting `sourceMaps` to false.
- `pathMapping`: This property takes a mapping of URL paths to local paths, to give you more flexibility in how URLs are resolved to local files. `"webRoot": "${workspaceFolder}"` is just shorthand for a pathMapping like `{ "/": "${workspaceFolder}" }`.
- `sourceMapPathOverrides`: A mapping of source paths from the sourcemap, to the locations of these sources on disk. See [Sourcemaps](#sourcemaps) for more information
- `urlFilter`: A string that can contain wildcards that will be used for finding a browser target, for example, "localhost:\*/app" will match either "http://localhost:123/app" or "http://localhost:456/app", but not "https://stackoverflow.com". This property will only be used if `url` and `file` are not specified.
- `timeout`: The number of milliseconds that the Microsoft Edge Tools will keep trying to attach to the browser before timing out. Defaults to 10000ms.
#### Sourcemaps
The elements tool uses sourcemaps to correctly open original source files when you click links in the UI, but sometimes the sourcemaps aren't generated properly and overrides are needed. In the config we support `sourceMapPathOverrides`, a mapping of source paths from the sourcemap, to the locations of these sources on disk. Useful when the sourcemap isn't accurate or can't be fixed in the build process.
The left hand side of the mapping is a pattern that can contain a wildcard, and will be tested against the `sourceRoot` + `sources` entry in the source map. If it matches, the source file will be resolved to the path on the right hand side, which should be an absolute path to the source file on disk.
A few mappings are applied by default, corresponding to some common default configs for Webpack and Meteor: Note: These are the mappings that are included by default out of the box, with examples of how they could be resolved in different scenarios. These are not mappings that would make sense together in one project.
"sourceMapPathOverrides": {
"webpack:///./~/*": "${webRoot}/node_modules/*",
"webpack:///./*": "${webRoot}/*",
"webpack:///*": "*",
"webpack:///src/*": "${webRoot}/*",
"meteor://💻app/*": "${webRoot}/*"
}
If you set `sourceMapPathOverrides` in your launch config, that will override these defaults. `${workspaceFolder}` and `${webRoot}` can be used there.
See the following examples for each entry in the default mappings (`webRoot = /Users/me/project`):
"webpack:///./~/*": "${webRoot}/node_modules/*"
Example:
"webpack:///./~/querystring/index.js"
-> "/Users/me/project/node_modules/querystring/index.js"
"webpack:///./*": "${webRoot}/*"
Example:
"webpack:///./src/app.js" -> "/Users/me/project/src/app.js"
"webpack:///*": "*"
Example:
"webpack:///project/app.ts" -> "/project/app.ts"
"webpack:///src/*": "${webRoot}/*"
Example:
"webpack:///src/app.js" -> "/Users/me/project/app.js"
"meteor://💻app/*": "${webRoot}/*"
Example:
"meteor://💻app/main.ts"` -> `"/Users/me/project/main.ts"
#### Ionic/gulp-sourcemaps note
Ionic and gulp-sourcemaps output a sourceRoot of `"/source/"` by default. If you can't fix this via your build config, try this setting:
"sourceMapPathOverrides": {
"/source/*": "${workspaceFolder}/*"
}
### Launching the browser via the side bar view
- Start Microsoft Edge via the side bar
- Click the `Microsoft Edge Tools` view in the side bar.
- Click the `Open a new tab` icon to launch the browser (if it isn't open yet) and open a new tab.
- Attach the Microsoft Edge Tools via the side bar view
- Click the `Attach` icon next to the tab to open the Microsoft Edge Tools.
### Launching the browser manually
- Start Microsoft Edge with remote-debugging enabled on port 9222:
- `msedge.exe --remote-debugging-port=9222`
- Navigate the browser to the desired URL.
- Attach the Microsoft Edge Tools via a command:
- Run the command `Microsoft Edge Tools: Attach to a target`
- Select a target from the drop down.
### Attaching automatically when launching the browser for debugging
- Install the [Debugger for Microsoft Edge](https://marketplace.visualstudio.com/items?itemName=msjsdiag.debugger-for-edge) extension
- Setup your `launch.json` configuration to launch and debug Microsoft Edge.
- See [Debugger for Microsoft Edge Readme.md](https://github.com/microsoft/vscode-edge-debug2/blob/master/README.md).
- Start Microsoft Edge for debugging.
- Once debugging has started, the Microsoft Edge Tools will auto attach to the browser (it will keep retrying until the Debugger for Microsoft Edge launch.json config `timeout` value is reached).
- This auto attach functionality can be disabled via the `vscode-edge-devtools.autoAttachViaDebuggerForEdge` Visual Studio Code setting.
This project welcomes contributions and suggestions. Most contributions require you to agree to a Contributor License Agreement (CLA) declaring that you have the right to, and actually do, grant us the rights to use your contribution. For details, visit \[https://cla.microsoft.com\].
See [CONTRIBUTING.md](https://github.com/Microsoft/vscode-edge-devtools/blob/master/CONTRIBUTING.md) for more information.
## Data/Telemetry
This project collects usage data and sends it to Microsoft to help improve our products and services. Read [Microsoft's privacy statement](https://privacy.microsoft.com/en-US/privacystatement) to learn more.
## [Source](https://marketplace.visualstudio.com/items?itemName=ms-edgedevtools.vscode-edge-devtools)
### <========( Turbo Console Log)========>
---
# Turbo Console Log
> Extension for Visual Studio Code - Automating the process of writing meaningful log messages.
## Main Functionality
---
This extension make debugging much easier by automating the operation of writing meaningful log message.
## Features
---
I) Insert meaningful log message automatically
Two steps:
- Selecting the variable which is the subject of the debugging
- Pressing ctrl + alt + L
The log message will be inserted in the next line relative to the selected variable like this:
console.log("SelectedVariableEnclosingClassName -> SelectedVariableEnclosingFunctionName -> SelectedVariable", SelectedVariable)

Multiple cursor support:

Properties:
- turboConsoleLog.wrapLogMessage (boolean): Whether to wrap the log message or not.
- turboConsoleLog.logMessagePrefix (string): The prefix of the log message.
- turboConsoleLog.addSemicolonInTheEnd (boolean): Whether to put a semicolon in the end of the log message or not.
- turboConsoleLog.insertEnclosingClass (boolean): Whether to insert or not the enclosing class of the selected variable in the log message.
- turboConsoleLog.insertEnclosingFunction (boolean): Whether to insert or not the enclosing function of the selected variable in the log message.
- turboConsoleLog.quote (enum): Double quotes (""), single quotes ('') or backtick(\`\`).
A wrapped log message :

II) Comment all log messages, inserted by the extension, from the current document
All it takes to comment all log messages, inserted by the extension, from the current document is to press alt + shift + c

III) Uncomment all log messages, inserted by the extension, from the current document
All it takes to uncomment all log messages, inserted by the extension, from the current document is to press alt + shift + u

IV) Delete all log messages, inserted by the extension, from the current document
All it takes to delete all log messages, inserted by the extension, from the current document is to press alt + shift + d

---
### <========(Regex Previewer - Visual Studio Marketplace)========>
---
# Regex Previewer - Visual Studio Marketplace
> Extension for Visual Studio Code - Regex matches previewer for JavaScript, TypeScript, PHP and Haxe in Visual Studio Code.
## Features
Shows the current regular expression's matches in a side-by-side document. This can be turned on/off with `Ctrl+Alt+M` (`⌥⌘M`).
Global and multiline options can be added for evaluation with a side-by-side document through a status bar entry. This can be useful when the side-by-side document has multiple examples to match.

## [Source](https://marketplace.visualstudio.com/items?itemName=chrmarti.regex)
### <========(JavaScript Snippet Pack)========>
---
# JavaScript Snippet Pack - Visual Studio Marketplace
> Extension for Visual Studio Code - A snippet pack to make you more productive working with JavaScript
## JavaScript Snippet Pack for Visual Studio Code
## Usage
---
A snippet pack to make you more productive working with JavaScript. Based on [Visual Studio extension](https://github.com/madskristensen/JavaScriptSnippetPack) by [Mads Kristensen](https://github.com/madskristensen), which is based on [Atom snippets](https://atom.io/packages/javascript-snippets).
This extension ships a bunch of useful code snippets for the JavaScript and TypeScript editors.
Here's the full list of all the snippets:
## Console
### \[cd\] console.dir
console.dir(${1});
### \[ce\] console.error
console.error(${1});
### \[ci\] console.info
console.info(${1});
### \[cl\] console.log
console.log(${1});
### \[cw\] console.warn
console.warn(${1});
### \[de\] debugger
debugger;
## DOM
### \[ae\] addEventListener
${1:document}.addEventListener('${2:load}', function(e) {
${3:// body}
});
### \[ac\] appendChild
${1:document}.appendChild(${2:elem});
### \[rc\] removeChild
${1:document}.removeChild(${2:elem});
### \[cel\] createElement
${1:document}.createElement(${2:elem});
### \[cdf\] createDocumentFragment
${1:document}.createDocumentFragment();
### \[ca\] classList.add
${1:document}.classList.add('${2:class}');
### \[ct\] classList.toggle
${1:document}.classList.toggle('${2:class}');
### \[cr\] classList.remove
${1:document}.classList.remove('${2:class}');
### \[gi\] getElementById
${1:document}.getElementById('${2:id}');
### \[gc\] getElementsByClassName
${1:document}.getElementsByClassName('${2:class}');
### \[gt\] getElementsByTagName
${1:document}.getElementsByTagName('${2:tag}');
### \[ga\] getAttribute
${1:document}.getAttribute('${2:attr}');
### \[sa\] setAttribute
${1:document}.setAttribute('${2:attr}', ${3:value});
### \[ra\] removeAttribute
${1:document}.removeAttribute('${2:attr}');
### \[ih\] innerHTML
${1:document}.innerHTML = '${2:elem}';
### \[tc\] textContent
${1:document}.textContent = '${2:content}';
### \[qs\] querySelector
${1:document}.querySelector('${2:selector}');
### \[qsa\] querySelectorAll
${1:document}.querySelectorAll('${2:selector}');
## Loop
### \[fe\] forEach
${1:array}.forEach(function(item) {
${2:// body}
});
## Function
### \[fn\] function
function ${1:methodName} (${2:arguments}) {
${3:// body}
}
### \[afn\] anonymous function
function(${1:arguments}) {
${2:// body}
}
### \[pr\] prototype
${1:object}.prototype.${2:method} = function(${3:arguments}) {
${4:// body}
}
### \[iife\] immediately-invoked function expression
(function(${1:window}, ${2:document}) {
${3:// body}
})(${1:window}, ${2:document});
### \[call\] function call
${1:method}.call(${2:context}, ${3:arguments})
### \[apply\] function apply
${1:method}.apply(${2:context}, [${3:arguments}])
### \[ofn\] function as a property of an object
${1:functionName}: function(${2:arguments}) {
${3:// body}
}
## JSON
### \[jp\] JSON.parse
JSON.parse(${1:obj});
### \[js\] JSON.stringify
JSON.stringify(${1:obj});
## Timer
### \[si\] setInterval
setInterval(function() {
${0:// body}
}, ${1:1000});
### \[st\] setTimeout
setTimeout(function() {
${0:// body}
}, ${1:1000});
## Misc
### \[us\] use strict
'use strict';
### \[al\] alert
alert('${1:msg}');
### \[co\] confirm
confirm('${1:msg}');
### \[pm\] prompt
prompt('${1:msg}');
---
### <========(Node.js Exec)========>
---
# Node.js Exec - Visual Studio Marketplace
> Extension for Visual Studio Code - Execute the current file or your selected code with node.js.
### Execute the current file or your selected code with node.js.
## Usage
- To execute the current file or the selection press `F8` or use the command `Execute Node.js`
- To cancel a running process press `F9`
## Configuration
Clear output before execution
{
"miramac.node.clearOutput": true
}
Show start and end info
{
"miramac.node.showInfo": true
}
Show stdout and stderr
{
"miramac.node.showStdout": true,
"miramac.node.showStderr": true
}
If `miramac.node.legacyMode` is `true` (default) the extention will not use new features and options. Because of some strange problems I can't reproduce, the extension remains in legacy mode. To use the following options simply set this option to `false`
{
"miramac.node.legacyMode": false
}
### The folloing options need to set the legacyMode off
Set environment variables for execution:
{
"miramac.node.env": {
"NODE_ENV": "production"
}
}
Add arguments for execution:
{
"miramac.node.args": ["--port", "1337"]
}
Add options for execution:
{
"miramac.node.options": ["--require", "babel-register"]
}
Change the node binary for execution
{
"miramac.node.nodeBin": "/path/to/some/bin/node-7.0"
}
Some code that is executed with each run
{
"miramac.node.includeCode": "const DEBUG = true; const fs = require('fs'); "
}
## How it works
The selected code or if nothing is selected, the active file, is written in a temporarily file (something like `node_<random-sring>.tmp`). You don't have to save the file for execution. This file will be executed by your installed version of node.js. Therefore `node` has to be in the PATH.
require('child_process').spawn('node', options,[tmpFile, args])
---
### <========(Search Editor)========>
---
# Search Editor: Apply Changes - Visual Studio Marketplace
> Extension for Visual Studio Code - Apply local Search Editor edits to your workspace
In the marketplace [here](https://marketplace.visualstudio.com/items?itemName=jakearl.search-editor-apply-changes).
Apply changes in a Search Editor to files in a workspace.

Steps:
- Run a search
- Edit results
- Run command "Apply Search Editor changes to worksapce"
> Warning: Ensure the workspace is in sync with the Search Editor before starting to make changes, otherwise data loss may occur. This can be done by simply rerunning the Editor's search.
Search editor changes will overwrite their target files at the lines specified in the editor - if the lines in the target document have been modified shifted around this will result in erroneous overwriting of existing data.
This is a very early expermient of what writing local search editor changes out to the workspace might look like, please file bugs and feature requests as you see fit!
## Known Limitations
- No way to apply edits that insert or delete lines.
## Keybindings
You may find the following keybinding helpful for making the default "save" behaviour write out to workspace rather than save a copy of the results:
{
"key": "cmd+s",
"command": "searchEditorApplyChanges.apply",
"when": "inS,earchEditor"
}
## [Source](https://marketplace.visualstudio.com/items?itemName=jakearl.search-editor-apply-changes)
### <========(Node TDD)========>
---
# Node TDD - Visual Studio Marketplace
> Extension for Visual Studio Code - Ease test-driven development in Node and JavaScript
> A [Visual Studio Code](http://code.visualstudio.com/) [extension](https://marketplace.visualstudio.com/items?itemName=prashaantt.node-tdd) to ease [test-driven development](https://en.wikipedia.org/wiki/Test-driven_development) in Node and JavaScript.
## Features

- Activates when a workspace containing `package.json` is opened.
- Triggers an automatic test build whenever source files are updated.
- Shows a colour-coded build summary.
- Shows the average test coverage (experimental).
- Optionally, if your test runner generates [TAP outputs](https://testanything.org/producers.html#javascript), use the `nodeTdd.reporter` setting to provide a more meaningful test summary:

- Finally, use `nodeTdd.minimal` to reclaim some status bar real estate:

## Settings
This extension contributes the following settings:
| Setting | Type | Default | Description |
| --------------------------- | ---------------- | --------------------------------- | ------------------------------------------------------------------- |
| `nodeTdd.activateOnStartup` | boolean | `true` | Activate TDD mode when workspace is opened |
| `nodeTdd.testScript` | string | `test` | The npm script to run tests |
| `nodeTdd.glob` | string | `{src,test}/**/*.{js,ts,jsx,tsx}` | The glob pattern for files to watch, relative to the workspace root |
| `nodeTdd.verbose` | boolean / object | `false` / `{onlyOnFailure: true}` | Show build status dialogs |
| `nodeTdd.minimal` | boolean | `false` | Minimise status bar clutter |
| `nodeTdd.buildOnActivation` | boolean | `false` | Run tests when TDD mode is activated |
| `nodeTdd.buildOnCreate` | boolean | `false` | Run tests when matching files are created |
| `nodeTdd.buildOnDelete` | boolean | `false` | Run tests when matching files are deleted |
| `nodeTdd.showCoverage` | boolean | `false` | Show the average test coverage if reported (experimental) |
| `nodeTdd.coverageThreshold` | number / null | `null` | The coverage threshold percentage, used to colour-code the coverage |
| `nodeTdd.reporter` | string / null | `null` | The test reporter used (currently only "tap" is supported) |
## Commands
The following commands are available from the commands menu as well as status bar buttons:
| Command | Action |
| -------------- | ------------------------------------ |
| `activate` | Activate `node-tdd` in a workspace |
| `deactivate` | Deactivate `node-tdd` in a workspace |
| `toggleOutput` | Toggle detailed test results output |
| `stopBuild` | Stop a running build |
## Limitations and known issues
- The extension doesn't get activated if `package.json` was not initially present when the workspace was opened; a window restart will be required to detect a change.
- It doesn't work with watch mode/incremental test builds. The build process used for running tests must exit on each execution, otherwise it will never report the status.
- `showCoverage` is an experimental setting that currently only works with the text-summary reports from [Lab](https://github.com/hapijs/lab), [Istanbul](https://github.com/gotwarlost/istanbul) and [nyc](https://github.com/istanbuljs/nyc). Disable it if it doesn't work for you or its output looks funny.
- Despite recent fixes, it might still be [flaky](https://github.com/prashaantt/node-tdd/issues/5) on Windows. Please report any issues.
- Ironically for a TDD extension, it has very few tests of its own because I don't yet know how to test UI elements in VS Code. :/
---
### <=============(Power Tools)=============>
---
# - Visual Studio Marketplace
> Extension for Visual Studio Code - A set of useful and handy tools for Visual Studio Code.
## Install \[[↑](#table-of-contents)\]
Launch VS Code Quick Open (`Ctrl + P`), paste the following command, and press enter:
ext install vscode-powertools
Or search for things like `vscode-powertools` in your editor.
## How to use \[[↑](#table-of-contents)\]
### Apps \[[↑](#how-to-use-)\]
Apps are [Node.js based scripts](https://nodejs.org/), which are running with a [web view](https://code.visualstudio.com/api/extension-guides/webview) and can also interact with a [Visual Studio Code](https://code.visualstudio.com/api/references/vscode-api) instance.

For more information, have a look at the [wiki](https://github.com/egodigital/vscode-powertools/wiki/Apps).
### Buttons \[[↑](#how-to-use-)\]
Buttons can be used to run tasks, like scripts or shell commands, by user's click.

For more information, have a look at the [wiki](https://github.com/egodigital/vscode-powertools/wiki/Buttons).
### Commands \[[↑](#how-to-use-)\]
To enhance your editor, you can register custom [commands](https://code.visualstudio.com/api/references/commands), which can be used from anywhere in the editor, by using the [API](https://code.visualstudio.com/api/references/vscode-api), e.g.

For more information, have a look at the [wiki](https://github.com/egodigital/vscode-powertools/wiki/Commands).
### Events \[[↑](#how-to-use-)\]
The extension makes it possible to run tasks, like scripts, on specific events.

For more information, have a look at the [wiki](https://github.com/egodigital/vscode-powertools/wiki/Events).
### Jobs \[[↑](#how-to-use-)\]
Jobs can be used to run tasks, like scripts or shell commands, periodically.

For more information, have a look at the [wiki](https://github.com/egodigital/vscode-powertools/wiki/Jobs).
### Scripts \[[↑](#how-to-use-)\]
Scripts can be used to any kind of custom logic for a workspace.

For more information, have a look at the [wiki](https://github.com/egodigital/vscode-powertools/wiki/Scripts).
### Startups \[[↑](#how-to-use-)\]
_Startups_ are similar to _Autostart_ in Windows.
For more information, have a look at the [wiki](https://github.com/egodigital/vscode-powertools/wiki/Startups).
### Tools \[[↑](#how-to-use-)\]
A set of useful sub commands.

For more information, have a look at the [wiki](https://github.com/egodigital/vscode-powertools/wiki/Tools).
### Values \[[↑](#how-to-use-)\]
Values (or _placeholders_) can be used to define dynamic settings, e.g.

For more information, have a look at the [wiki](https://github.com/egodigital/vscode-powertools/wiki/Values).
## Documentation \[[↑](#table-of-contents)\]
The complete reference of classes, functions and interfaces, can be found [here](https://egodigital.github.io/vscode-powertools/api/).
A repository with code samples, can be found at [vscode-powertools-samples](https://github.com/egodigital/vscode-powertools-samples). If you would like to request for one or more examples, you can open an [issue here](https://github.com/egodigital/vscode-powertools-samples/issues).
---
### <========()========>
---
---
### <========()========>
---
---
### <========()========>
---
---
### <========()========>
---
---
### <========()========>
---
---
### <========()========>
---
---
### <========()========>
---
---
### <========()========>
---
---
### <========()========>
---
---
### <========()========>
---
---
### <========()========>
---
---
### <========()========>
---
---
### <========()========>
---
---
### <========()========>
---
---
### <========()========>
---
</span>
1.30-seconds.30-seconds-of-code
2.aaron-bond.better-comments
3.ahmadawais.shades-of-purple
4.akamud.vscode-javascript-snippet-pack
5.akamud.vscode-theme-onedark
6.akamud.vscode-theme-onelight
7.akmarnafi.comment-headers
8.alefragnani.Bookmarks
9.anseki.vscode-color
10.arcticicestudio.nord-visual-studio-code
11.Atishay-Jain.All-Autocomplete
12.auchenberg.vscode-browser-preview
13.azemoh.one-monokai
14.bbenoist.shell
15.bceskavich.theme-dracula-at-night
16.bengreenier.vscode-node-readme
17.bierner.github-markdown-preview
18.bierner.markdown-emoji
19.bierner.markdown-preview-github-styles
20.blackblackcat.dracula-pure
21.blackmist.LinkCheckMD
22.bradzacher.vscode-copy-filename
23.brunnerh.insert-unicode
24.capaj.vscode-standardjs-snippets
25.chenxsan.vscode-standardjs
26.chris-noring.node-snippets
27.christian-kohler.npm-intellisense
28.christian-kohler.path-intellisense
29.cmstead.jsrefactor
30.codemooseus.vscode-devtools-for-chrome
31.codezombiech.gitignore
32.CoenraadS.bracket-pair-colorizer
33.csholmq.excel-to-markdown-table
34.cweijan.vscode-excel
35.cweijan.vscode-office
36.cxfksword.goto-documentation
37.daenuprobst.hardcore-theme
38.darkriszty.markdown-table-prettify
39.DavidAnson.vscode-markdownlint
40.dbaeumer.vscode-eslint
41.deaniusolutions.deckset
42.dhedgecock.radical-vscode
43.docsmsft.docs-article-templates
44.docsmsft.docs-authoring-pack
45.docsmsft.docs-build
46.docsmsft.docs-images
47.docsmsft.docs-linting
48.docsmsft.docs-markdown
49.docsmsft.docs-metadata
50.docsmsft.docs-preview
51.docsmsft.docs-yaml
52.donjayamanne.githistory
53.donjayamanne.jquerysnippets
54.donjayamanne.python-extension-pack
55.dracula-theme.theme-dracula
56.dsznajder.es7-react-js-snippets
57.eamodio.gitlens
58.ecmel.vscode-html-css
59.eg2.vscode-npm-script
60.EliverLara.andromeda
61.Equinusocio.vsc-community-material-theme
62.Equinusocio.vsc-material-theme
63.equinusocio.vsc-material-theme-icons
64.ericTurf.vscode-gif-cards
65.esbenp.prettier-vscode
66.fabiospampinato.vscode-open-in-code
67.felipecaputo.git-project-manager
68.felixfbecker.php-intellisense
69.firefox-devtools.vscode-firefox-debug
70.formulahendry.auto-rename-tag
71.formulahendry.code-runner
72.formulahendry.terminal
73.Fr43nk.seito-openfile
74.gerane.Theme-rainbow
75.GitHub.github-vscode-theme
76.Gruntfuggly.todo-tree
77.Gydunhn.javascript-essentials
78.hdg.live-html-previewer
79.HookyQR.beautify
80.howardzuo.vscode-favorites
81.humao.rest-client
82.Hyzeta.vscode-theme-github-light
83.IBM.output-colorizer
84.infi.jbpc
85.inu1255.easy-snippet
86.ionutvmi.path-autocomplete
87.iZDT.javascript-unit-test-snippet
88.jabacchetta.vscode-essentials
89.jakearl.search-editor-apply-changes
90.jasonlhy.hungry-delete
91.jasonlhy.vscode-browser-sync
92.jasonnutter.search-node-modules
93.jebbs.markdown-extended
94.JerryHong.autofilename
95.jhofker.awesome-vscode
96.johnpapa.vscode-peacock
97.jolaleye.horizon-theme-vscode
98.jsonchou.text-compact
99.keshan.markdown-live
100.kim-sardine.flashcards
101.kisstkondoros.vscode-codemetrics
102.kisstkondoros.vscode-gutter-preview
103.kiteco.kite
104.KnisterPeter.vscode-github
105.kortina.vscode-markdown-notes
106.lacroixdavid1.vscode-format-context-menu
107.LeetCode.vscode-leetcode
108.leizongmin.node-module-intellisense
109.LevinFaber.markdown-refactor
110.lfurzewaddock.vscode-opn
111.lglong519.terminal-tools
112.lkytal.pomodoro
113.magicstack.MagicPython
114.manuth.markdown-converter
115.marqu3s.aurora-x
116.Massi.javascript-docstrings
117.mdickin.markdown-shortcuts
118.mechatroner.rainbow-csv
119.mervin.markdown-formatter
120.mgmcdermott.vscode-language-babel
121.mhutchie.git-graph
122.mikestead.dotenv
123.mkaufman.HTMLHint
124.ms-azuretools.vscode-docker
125.ms-edgedevtools.network-edge-devtools
126.ms-edgedevtools.vscode-edge-devtools
127.ms-python.python
128.ms-python.vscode-pylance
129.ms-vscode-remote.remote-containers
130.ms-vscode-remote.remote-wsl
131.ms-vscode.vscode-typescript-next
132.ms-vsliveshare.vsliveshare
133.msjsdiag.debugger-for-chrome
134.msjsdiag.debugger-for-edge
135.msjsdiag.vscode-react-native
136.MULU-github.jsflowchart
137.mushan.vscode-paste-image
138.mutantdino.resourcemonitor
139.nathanchapman.JavaScriptSnippets
140.naumovs.color-highlight
141.nhoizey.gremlins
142.Nimda.deepdark-material
143.Nipu.javascript-expert
144.njLeonZhang.markdown-image-paste
145.Nur.just-black
146.octref.vetur
147.oderwat.indent-rainbow
148.oouo-diogo-perdigao.docthis
149.Perkovec.jsdoc-live-preview
150.pflannery.vscode-versionlens
151.PKief.material-icon-theme
152.planbcoding.vscode-react-refactor
153.pnp.polacode
154.pranaygp.vscode-css-peek
155.psxcode.justcode
156.qcz.text-power-tools
157.qezhu.gitlink
158.qinjia.view-in-browser
159.quicktype.quicktype
160.RandomFractalsInc.vscode-data-preview
161.raymondcamden.htmlescape-vscode-extension
162.redhat.vscode-yaml
163.RedVanWorkshop.explorer-exclude-vscode-extension
164.ritwickdey.live-sass
165.ritwickdey.LiveServer
166.rokoroku.vscode-theme-darcula
167.samundrak.esdoc-mdn
168.sburg.vscode-javascript-booster
169.sdras.night-owl
170.Shan.code-settings-sync
171.shd101wyy.markdown-preview-enhanced
172.sidthesloth.html5-boilerplate
173.SirTori.indenticator
174.spoonscen.es6-mocha-snippets
175.streetsidesoftware.code-spell-checker
176.t7yang.hyper-javascript-snippets
177.TabNine.tabnine-vscode
178.techer.open-in-browser
179.telesoho.vscode-markdown-paste-image
180.thegeoffstevens.best-dark-themes-pack
181.thegeoffstevens.best-light-themes-pack
182.thenikso.github-plus-theme
183.thomascsd.vscode-readme-pattern
184.thykka.superpowers
185.TMcGinn.insight
186.tomoki1207.pdf
187.treedbox.treedboxjavascript
188.TwoDevs.lightless
189.urbantrout.refactor-css
190.usernamehw.remove-empty-lines
191.VisualStudioExptTeam.vscodeintellicode
192.vscode-icons-team.vscode-icons
193.waderyan.nodejs-extension-pack
194.WallabyJs.quokka-vscode
195.wesbos.theme-cobalt2
196.whizkydee.material-palenight-theme
197.whtouche.vscode-js-console-utils
198.wmaurer.change-case
199.xabikos.JavaScriptSnippets
200.xabikos.ReactSnippets
201.xaver.theme-ysgrifennwr
202.YuTengjing.open-in-external-app
203.yzane.markdown-pdf
204.yzhang.markdown-all-in-one
205.zhouzhipeng.LiveServerPP
206.zhuangtongfa.material-theme
207.Zignd.html-css-class-completion
---
---
---
---->Best Practices:
[Variables](#variables)
[Functions](#functions)
[Objects and Data Structures](#objects-and-data-structures)
[Classes](#classes)
[SOLID](#solid)
[Testing](#testing)
[Concurrency](#concurrency)
[Error Handling](#error-handling)
[Formatting](#formatting)
[Comments](#comments)
[Translation](#translation)
:::
:::
[ABOUT](#about)
[CURRENT VERSION](#currentversion)
[THE DOM](#thedom)
[Conventions](#conventions)
[Linting](#linting)
[Object Oriented](#objectoriented)
[Anonymous Functions](#anonymousfunctions)
[Functions as Firstclass Objects](#functionsasfirstclassobjects)
[Loose Typing](#loosetyping)
[Scoping and Hoisting](#scopingandhoisting)
[Function Binding](#functionbinding)
[Closure Function](#closurefunction)
[Strict mode](#strictmode)
[ImmediatelyInvoked Function Expression (IIFE)](#immediatelyinvokedfunctionexpressioniife)
[Arindam Paul JavaScript VM internals, EventLoop, Async and ScopeChains](#arindampauljavascriptvminternalseventloopasyncandscopechains)
[GENERAL PURPOSE](#generalpurpose)
[MV\*](#mv)
[Library](#library)
[Animation](#animation)
:::
:::
[The 16 JavaScript debugging tips](#the16javascriptdebuggingtips)
[2\. Display objects as a table](#2displayobjectsasatable)
[3\. Try all the sizes](#3tryallthesizes)
[4\. How to find your DOM elements quickly](#4howtofindyourdomelementsquickly)
[5\. Benchmark loops using console.time() and console.timeEnd()](#5benchmarkloopsusingconsoletimeandconsoletimeend)
[6\. Get the stack trace for a function](#6getthestacktraceforafunction)
[7\. Unminify code as an easy way to debug JavaScript](#7unminifycodeasaneasywaytodebugjavascript)
[8\. Quickfind a function to debug](#8quickfindafunctiontodebug)
[9\. Black box scripts that are NOT relevant](#9blackboxscriptsthatarenotrelevant)
[10\. Find the important things in complex debugging](#10findtheimportantthingsincomplexdebugging)
[11\. Watch specific function calls and arguments](#11watchspecificfunctioncallsandarguments)
[12\. Quickly access elements in the console](#12quicklyaccesselementsintheconsole)
[13\. Postman is great (but Firefox is faster)](#13postmanisgreatbutfirefoxisfaster)
[14\. Break on node change](#14breakonnodechange)
[15\. Use page speed services](#15usepagespeedservices)
[16\. Breakpoints everywhere](#16breakpointseverywhere)
:::
:::
[TOOLS](#tools)
[The best JavaScript debugging tools for 2020 and beyond](#thebestjavascriptdebuggingtoolsfor2020andbeyond)
[1\. Developer tools in modern web browsers](#1developertoolsinmodernwebbrowsers)
[Chrome developer tools](#chromedevelopertools)
[React developer tools for Chrome](#reactdevelopertoolsforchrome)
[Firefox developer tools](#firefoxdevelopertools)
[Safari Develop Menu](#safaridevelopmenu)
[>Opera Chromium dev tools>](#blockquoteoperachromiumdevtoolsblockquote)
[>Edge Developer Tools>](#blockquoteedgedevelopertoolsblockquote)
[2\. The hackable debug tool — debugger](#2thehackabledebugtooldebugger)
[3\. Node.js Inspector for debugging requests to Node apps](#3nodejsinspectorfordebuggingrequeststonodeapps)
[4\. Postman for debugging requests and responses](#4postmanfordebuggingrequestsandresponses)
[5\. ESLint](#5eslint)
[6\. JS Bin](#6jsbin)
[7\. JSON Formatter and Validator](#7jsonformatterandvalidator)
[8\. Webpack](#8webpack)
[9\. SessionStack](#9sessionstack)
[10\. Raygun Error Monitoring](#10raygunerrormonitoring)
---
---
---
---
================================================================================
---->Extension Guide *******************************************************************************************************************************
================================================================================
---
---
---
---
- [### <========(Markdown PDF)========>](#markmarkmarkmarkmarkmarkmarkmarkdown-pdfmarkmarkmarkmarkmarkmarkmark)
- [Markdown PDF](#markdown-pdf)
- [Table of Contents](#table-of-contents-1)
- [Features](#features-1)
- [mermaid](#mermaid)
- [Install](#install)
- [Usage](#usage)
- [Command Palette](#command-palette)
- [Menu](#menu)
- [Auto convert](#auto-convert)
- [Extension Settings](#extension-settings)
- [Options](#options) - [List](#list) - [Save options](#save-options)
- [Styles options](#styles-options) - [`markdown-pdf.styles`](#markdown-pdfstyles) - [`markdown-pdf.stylesRelativePathFile`](#markdown-pdfstylesrelativepathfile) - [`markdown-pdf.includeDefaultStyles`](#markdown-pdfincludedefaultstyles) - [Syntax highlight options](#syntax-highlight-options) - [`markdown-pdf.highlight`](#markdown-pdfhighlight) - [`markdown-pdf.highlightStyle`](#markdown-pdfhighlightstyle) - [Markdown options](#markdown-options) - [`markdown-pdf.breaks`](#markdown-pdfbreaks) - [Emoji options](#emoji-options) - [`markdown-pdf.emoji`](#markdown-pdfemoji) - [Configuration options](#configuration-options) - [`markdown-pdf.executablePath`](#markdown-pdfexecutablepath) - [Common Options](#common-options) - [`markdown-pdf.scale`](#markdown-pdfscale) - [PDF options](#pdf-options) - [`markdown-pdf.displayHeaderFooter`](#markdown-pdfdisplayheaderfooter) - [PNG JPEG options](#png-jpeg-options)
- [FAQ](#faq-1)
- [How can I change emoji size ?](#how-can-i-change-emoji-size-)
- [Auto guess encoding of files](#auto-guess-encoding-of-files)
- [Output directory](#output-directory)
- [Page Break](#page-break)
- [Known Issues](#known-issues)
- [`markdown-pdf.styles` option](#markdown-pdfstyles-option)
- [Release Notes](#release-notes)
<---------------------------------------------------------------------->
- [### <========(Open in External App)========>](#markmarkmarkmarkmarkmarkmarkopen-in-external-appmarkmarkmarkmarkmarkmarkmark)
- [Open in External App](#open-in-external-app)
- [💡 Motivation](#-motivation)
- [🔌 Installation](#-installation)
- [🔧 Configuration](#-configuration)
- [:loudspeaker: Limits](#-limits)
- [1. Node package: open](#1-node-package-open)
- [2. VSCode extension API: `vscode.env.openExternal(target: Uri)`](#2-vscode-extension-api-vscodeenvopenexternaltarget-uri)
<---------------------------------------------------------------------->
- [### <========(Change Case Extension for Visual Studio Code)========>](#h1-idchange-case-extension-for-visual-studio-code-137markmarkmarkmarkmarkmarkmarkchange-case-extension-for-visual-studio-codemarkmarkmarkmarkmarkmarkmarkh1)
- [Change Case Extension for Visual Studio Code](#change-case-extension-for-visual-studio-code)
- [Install](#install-1)
- [Commands](#commands)
- [Support](#support)
<---------------------------------------------------------------------->
- [### <========( vscode-js-console-utils)========>](#markmarkmarkmarkmarkmarkmark-vscode-js-console-utilsmarkmarkmarkmarkmarkmarkmark)
- [vscode-js-console-utils](#vscode-js-console-utils)
- [Installing](#installing)
<---------------------------------------------------------------------->
- [### <========(Node.js Extension Pack)========>](#markmarkmarkmarkmarkmarkmarknodejs-extension-packmarkmarkmarkmarkmarkmarkmark)
- [Node.js Extension Pack](#nodejs-extension-pack)
- [Extensions Included](#extensions-included)
- [Want to see your extension added?](#want-to-see-your-extension-added)
<---------------------------------------------------------------------->
- [### <========(Refactor CSS)========>](#markmarkmarkmarkmarkmarkmarkrefactor-cssmarkmarkmarkmarkmarkmarkmark)
- [Refactor CSS](#refactor-css)
- [Features](#features-2)
- [Release Notes](#release-notes-1)
- [Roadmap](#roadmap)
<---------------------------------------------------------------------->
- [### <========(Treedbox Javascript)========>](#markmarkmarkmarkmarkmarkmarktreedbox-javascriptmarkmarkmarkmarkmarkmarkmark)
- [Treedbox JavaScript - Visual Studio Marketplace](#treedbox-javascript---visual-studio-marketplace)
- [VS Code Javascript extension](#vs-code-javascript-extension)
- [Screenshots:](#screenshots)
- [Install](#install-2)
- [Pages](#pages)
- [Features](#features-3) - [All Math properties and methods](#all-math-properties-and-methods)
- [How to use](#how-to-use)
- [Example:](#example)
<---------------------------------------------------------------------->
- [### <========(pdf)========>](#markmarkmarkmarkmarkmarkmarkpdfmarkmarkmarkmarkmarkmarkmark)
- [pdf](#pdf)
- [Contribute](#contribute)
- [Upgrade PDF.js](#upgrade-pdfjs)
- [Change log](#change-log)
- [License](#license)
<---------------------------------------------------------------------->
- [### <========(Superpowers)========>](#markmarkmarkmarkmarkmarkmarksuperpowersmarkmarkmarkmarkmarkmarkmark)
- [Superpowers](#superpowers)
- [Preview](#preview)
- [Features](#features-4)
- [Map/Sort operation usage](#mapsort-operation-usage)
- [Dynamic snippets / completion](#dynamic-snippets--completion)
- [Extension Settings](#extension-settings-1)
<---------------------------------------------------------------------->
- [### <========(Readme Pattern)========>](#markmarkmarkmarkmarkmarkmarkreadme-patternmarkmarkmarkmarkmarkmarkmark)
- [Readme Pattern](#readme-pattern)
- [Features](#features-5)
- [Logo](#logo)
<---------------------------------------------------------------------->
- [### <========(Markdown Paste)========>](#markmarkmarkmarkmarkmarkmarkmarkdown-pastemarkmarkmarkmarkmarkmarkmark)
- [Markdown Paste](#markdown-paste)
- [Requirements](#requirements)
- [Features](#features-6)
- [Config](#config)
- [Format](#format)
- [File name format](#file-name-format)
- [File link format](#file-link-format)
<---------------------------------------------------------------------->
- [### <========(Spelling Checker for Visual Studio Code)========>](#markmarkmarkmarkmarkmarkmarkspelling-checker-for-visual-studio-codemarkmarkmarkmarkmarkmarkmark)
- [Spelling Checker for Visual Studio Code](#spelling-checker-for-visual-studio-code)
- [Support Further Development](#support-further-development)
- [Functionality](#functionality)
- [Example](#example-1)
- [Suggestions](#suggestions)
- [Install](#install-3)
- [Special case will ALL CAPS words](#special-case-will-all-caps-words)
- [Things to note](#things-to-note)
- [In Document Settings](#in-document-settings)
- [Enable / Disable checking sections of code](#enable--disable-checking-sections-of-code)
- [Disable Checking](#disable-checking)
- [Enable Checking](#enable-checking)
- [Example](#example-2)
- [Ignore](#ignore)
- [Words](#words)
- [Enable / Disable compound words](#enable--disable-compound-words)
- [Excluding and Including Text to be checked.](#excluding-and-including-text-to-be-checked)
- [Exclude Example](#exclude-example)
- [Include Example](#include-example)
- [Predefined RegExp expressions](#predefined-regexp-expressions)
- [Exclude patterns](#exclude-patterns)
- [Include Patterns](#include-patterns)
- [Customization](#customization)
- [Adding words to the Workspace Dictionary](#adding-words-to-the-workspace-dictionary)
<---------------------------------------------------------------------->
- [### <========(Settings viewer)========>](#markmarkmarkmarkmarkmarkmarksettings-viewermarkmarkmarkmarkmarkmarkmark)
- [Settings viewer](#settings-viewer)
<---------------------------------------------------------------------->
- [### <========(Awesome plugin for Visual Studio Code)========>](#markmarkmarkmarkmarkmarkmarkawesome-plugin-for-visual-studio-codemarkmarkmarkmarkmarkmarkmark)
- [Awesome plugin for Visual Studio Code :sunglasses: [Beta]](#awesome-plugin-for-visual-studio-code--beta)
- [Quickly see docs from MDN in VS Code](#quickly-see-docs-from-mdn-in-vs-code)
- [Usage](#usage-1)
- [Is the semicolon necessary?](#is-the-semicolon-necessary)
- [Examples](#examples)
- [Supports](#supports)
<---------------------------------------------------------------------->
- [### <========(Live Server)========>](#markmarkmarkmarkmarkmarkmarklive-servermarkmarkmarkmarkmarkmarkmark)
- [Live Server](#live-server)
- [Shortcuts to Start/Stop Server](#shortcuts-to-startstop-server)
- [Features](#features-7)
- [Installation](#installation)
- [Settings](#settings)
<---------------------------------------------------------------------->
- [### <========(CSS PEAK)========>](#markmarkmarkmarkmarkmarkmarkcss-peakmarkmarkmarkmarkmarkmarkmark)
- [Functionality](#functionality-1)
- [Configuration](#configuration)
- [Contributing](#contributing)
<---------------------------------------------------------------------->
- [### <========(jsdoc-live-preview)========>](#markmarkmarkmarkmarkmarkmarkjsdoc-live-previewmarkmarkmarkmarkmarkmarkmark)
- [jsdoc-live-preview](#jsdoc-live-preview)
- [Installation](#installation-1)
- [Usage](#usage-2)
<---------------------------------------------------------------------->
- [### <========(Resource Monitor)========>](#markmarkmarkmarkmarkmarkmarkresource-monitormarkmarkmarkmarkmarkmarkmark)
- [Resource Monitor](#resource-monitor)
- [Features](#features-8)
- [Screenshots](#screenshots-1)
- [Requirements](#requirements-1)
- [Extension Settings](#extension-settings-2)
- [Known Issues](#known-issues-1)
<---------------------------------------------------------------------->
- [### <========(JS FLOWCHART)========>](#markmarkmarkmarkmarkmarkmarkjs-flowchartmarkmarkmarkmarkmarkmarkmark)
- [Features](#features-9)
- [Quick start](#quick-start)
- [Installation in development mode](#installation-in-development-mode)
<---------------------------------------------------------------------->
- [### <========(Visual Studio Code Remote Development)========>](#h1-idvisual-studio-code-remote-development-137markmarkmarkmarkmarkmarkmarkvisual-studio-code-remote-developmentmarkmarkmarkmarkmarkmarkmarkh1)
- [Visual Studio Code Remote Development](#visual-studio-code-remote-development)
- [Documentation](#documentation)
<---------------------------------------------------------------------->
- [### <========(Docker for Visual Studio Code )========>](#h1-iddocker-for-visual-studio-code--134markmarkmarkmarkmarkmarkmarkdocker-for-visual-studio-code-markmarkmarkmarkmarkmarkmarkh1)
- [Overview of the extension features](#overview-of-the-extension-features)
- [Editing Docker files](#editing-docker-files)
- [Generating Docker files](#generating-docker-files)
- [Docker view](#docker-view)
- [Docker commands](#docker-commands)
- [Docker Compose](#docker-compose)
- [Using image registries](#using-image-registries)
- [Debugging services running inside a container](#debugging-services-running-inside-a-container)
- [Azure CLI integration](#azure-cli-integration)
<---------------------------------------------------------------------->
- [### <========(vscode-htmlhint)========>](#h1-idvscode-htmlhint-137markmarkmarkmarkmarkmarkmarkvscode-htmlhintmarkmarkmarkmarkmarkmarkmarkh1)
- [vscode-htmlhint](#vscode-htmlhint)
- [Configuration](#configuration-1)
- [Usage](#usage-3)
- [Rules](#rules)
- [.htmlhintrc](#htmlhintrc)
- [Additional file types](#additional-file-types)
- [Option 1: Treating your file like any other html file](#option-1-treating-your-file-like-any-other-html-file)
- [Option 2: Associating HTMLHint extension with your file type](#option-2-associating-htmlhint-extension-with-your-file-type)
- [Settings](#settings-1)
<---------------------------------------------------------------------->
- [### <========(Git Graph extension for Visual Studio Code)========>](#h1-idgit-graph-extension-for-visual-studio-code-137markmarkmarkmarkmarkmarkmarkgit-graph-extension-for-visual-studio-codemarkmarkmarkmarkmarkmarkmarkh1)
- [Git Graph extension for Visual Studio Code](#git-graph-extension-for-visual-studio-code)
- [Features](#features-10)
- [Extension Settings](#extension-settings-3)
- [Extension Commands](#extension-commands)
- [Release Notes](#release-notes-2)
- [Visual Studio Marketplace](#visual-studio-marketplace)
- [Acknowledgements](#acknowledgements)
<---------------------------------------------------------------------->
- [### <========(MARKDOWN SHORTCUTS)========>](#h1-idmarkdown-shortcuts-134markmarkmarkmarkmarkmarkmarkmarkdown-shortcutsmarkmarkmarkmarkmarkmarkmarkh1)
- [Exposed Commands](#exposed-commands)
<---------------------------------------------------------------------->
- [### <========(MarkdownConverter)========>](#h1-idmarkdownconverter-137markmarkmarkmarkmarkmarkmarkmarkdownconvertermarkmarkmarkmarkmarkmarkmarkh1)
- [MarkdownConverter](#markdownconverter)
- [What's `MarkdownConverter`?](#whats-markdownconverter)
- [Usage](#usage-4)
- [[VSCode]: https://code.visualstudio.com/](#)
<---------------------------------------------------------------------->
- [### <========(vscode-opn)========>](#h1-idvscode-opn-137markmarkmarkmarkmarkmarkmarkvscode-opnmarkmarkmarkmarkmarkmarkmarkh1)
- [vscode-opn](#vscode-opn)
- [Install](#install-4)
- [Easiest from the Extension Gallery](#easiest-from-the-extension-gallery)
- [Alternatively, with the Packaged Extension (.vsix) file](#alternatively-with-the-packaged-extension-vsix-file)
- [Usage](#usage-5)
- [Customise behaviour per language (optional)](#customise-behaviour-per-language-optional)
- [forLang](#forlang)
- [openInApp](#openinapp)
- [openInAppArgs](#openinappargs)
- [isUseWebServer](#isusewebserver)
- [isUseFsPath](#isusefspath)
- [isWaitForAppExit](#iswaitforappexit)
- [Web server settings (applies to all languages)](#web-server-settings-applies-to-all-languages)
- [vscode-opn.webServerProtocol](#vscode-opnwebserverprotocol)
- [vscode-opn.webServerHostname](#vscode-opnwebserverhostname)
- [vscode-opn.webServerPort](#vscode-opnwebserverport)
- [Tested](#tested)
- [Release notes](#release-notes-3)
- [Contributions](#contributions)
- [Dependencies](#dependencies)
- [License](#license-1)
<---------------------------------------------------------------------->
- [### <========( Node.js Modules Intellisense)========>](#h1-id-nodejs-modules-intellisense-134markmarkmarkmarkmarkmarkmark-nodejs-modules-intellisensemarkmarkmarkmarkmarkmarkmarkh1)
- [Node.js Modules Intellisense](#nodejs-modules-intellisense)
- [Installation](#installation-3)
- [Issues & Contribution](#issues--contribution)
- [Configuration](#configuration-2)
<---------------------------------------------------------------------->
- [### <========(VSCode format in context menus)========>](#h1-idvscode-format-in-context-menus-137markmarkmarkmarkmarkmarkmarkvscode-format-in-context-menusmarkmarkmarkmarkmarkmarkmarkh1)
- [VSCode format in context menus](#vscode-format-in-context-menus)
- [Features](#features-11)
- [Extension Settings](#extension-settings-4)
<---------------------------------------------------------------------->
- [### <========(vscode-github README)========>](#h1-idvscode-github-readme-137markmarkmarkmarkmarkmarkmarkvscode-github-readmemarkmarkmarkmarkmarkmarkmarkh1)
- [vscode-github README](#vscode-github-readme)
- [Features](#features-12)
- [Setup Personal Access Token](#setup-personal-access-token)
- [Usage](#usage-6)
- [Create a new pull request](#create-a-new-pull-request)
- [Create a new pull request from a forked repository](#create-a-new-pull-request-from-a-forked-repository)
- [Checkout pull request](#checkout-pull-request)
- [Browser pull request](#browser-pull-request)
- [Merge pull request](#merge-pull-request)
- [Telemetry data (extension usage)](#telemetry-data-extension-usage)
- [### <===========(Kite Autocomplete Plugin for Visual Studio Code)===========>](#h1-idkite-autocomplete-plugin-for-visual-studio-code-137markmarkmarkmarkmarkkite-autocomplete-plugin-for-visual-studio-codemarkmarkmarkmarkmarkh1)
- [Kite Autocomplete Plugin for Visual Studio Code](#kite-autocomplete-plugin-for-visual-studio-code)
- [Requirements](#requirements-2)
- [Installation](#installation-4)
- [Installing the Kite Engine](#installing-the-kite-engine)
- [Installing the Kite Plugin for Visual Studio Code](#installing-the-kite-plugin-for-visual-studio-code)
- [Usage](#usage-7)
- [Autocompletions](#autocompletions)
- [Hover (Python only)](#hover-python-only)
- [Documentation (Python only)](#documentation-python-only)
- [Definitions (Python only)](#definitions-python-only)
- [Function Signatures (Python only)](#function-signatures-python-only)
- [Commands](#commands-1)
- [Troubleshooting](#troubleshooting)
- [About Kite](#about-kite)
<---------------------------------------------------------------------->
- [### <========(Code Metrics - Visual Studio Code Extension)========>](#h1-idcode-metrics---visual-studio-code-extension-137markmarkmarkmarkmarkmarkmarkcode-metrics---visual-studio-code-extensionmarkmarkmarkmarkmarkmarkmarkh1)
- [Code Metrics - Visual Studio Code Extension](#code-metrics---visual-studio-code-extension)
- [Complexity calculation](#complexity-calculation)
- [It looks like this](#it-looks-like-this)
- [Install](#install-5)
- [Customization](#customization-1)
- [Commands](#commands-2)
- [License](#license-2)
<---------------------------------------------------------------------->
- [### <========(Peacock for Visual Studio Code)========>](#h1-idpeacock-for-visual-studio-code-137markmarkmarkmarkmarkmarkmarkpeacock-for-visual-studio-codemarkmarkmarkmarkmarkmarkmarkh1)
- [We can even add meta tags to the page! This sets the keywords meta tag.](#we-can-even-add-meta-tags-to-the-page-this-sets-the-keywords-meta-tag)
- [<meta name="keywords" content="my SEO keywords"/>](#meta-namekeywords-contentmy-seo-keywords)
- [- content: vscode "visual studio code" peacock theme extension documentation docs guide help "get started"](#ullicontent-vscode-visual-studio-code-peacock-theme-extension-documentation-docs-guide-help-get-startedliul)
- [Peacock for Visual Studio Code](#peacock-for-visual-studio-code)
- [Overview](#overview)
- [Install](#install-6)
- [Quick Usage](#quick-usage)
- [Features](#features-13)
- [Settings](#settings-2)
- [Favorite Colors](#favorite-colors)
- [Commands](#commands-3)
- [Keyboard Shortcuts](#keyboard-shortcuts-2)
- [Integrations](#integrations)
- [VS Live Share Integration](#vs-live-share-integration)
- [Remote Development Integration](#remote-development-integration)
- [Input Formats](#input-formats)
- [Example 1](#example-1)
- [How does title bar coloring work](#how-does-title-bar-coloring-work)
- [How are foreground colors calculated](#how-are-foreground-colors-calculated)
- [Why is the foreground hard to see with my transparent color](#why-is-the-foreground-hard-to-see-with-my-transparent-color)
- [Why are my affected elements not transparent](#why-are-my-affected-elements-not-transparent)
- [What are recommended favorites](#what-are-recommended-favorites)
- [What are mementos](#what-are-mementos)
- [Migration](#migration)
- [To Version 3+](#to-version-3)
- [Try the Code](#try-the-code)
- [Badges](#badges)
- [Resources](#resources)
<---------------------------------------------------------------------->
- [### <========(Markdown Extended Readme)========>](#h1-idmarkdown-extended-readme-131markmarkmarkmarkmarkmarkmarkmarkdown-extended-readmemarkmarkmarkmarkmarkmarkmarkh1)
- [Markdown Extended Readme](#markdown-extended-readme)
- [Features](#features-14)
- [Q: Why You Don't Integrate Some Plugin?](#q-why-you-dont-integrate-some-plugin)
- [Exporter](#exporter)
- [Export Configurations](#export-configurations)
- [Helpers](#helpers)
- [Extended Syntaxes](#extended-syntaxes)
<---------------------------------------------------------------------->
- [### <========(Search node_modules)========>](#h1-idsearch-node_modules-131markmarkmarkmarkmarkmarkmarksearch-node_modulesmarkmarkmarkmarkmarkmarkmarkh1)
- [Search node_modules](#search-node_modules)
- [Features](#features-15)
- [Settings](#settings-3)
- [Extension Packs](#extension-packs)
- [Links](#links)
<---------------------------------------------------------------------->
- [### <========(Browser Sync)========>](#h1-idbrowser-sync-131markmarkmarkmarkmarkmarkmarkbrowser-syncmarkmarkmarkmarkmarkmarkmarkh1)
- [Objective](#objective)
- [Requirement](#requirement)
- [Features](#features-16)
- [Behaviour](#behaviour)
- [Server Mode](#server-mode)
- [Proxy Mode](#proxy-mode)
- [Configuration](#configuration-3)
- [Example setting (different browser)](#example-setting-different-browser)
- [Example setting (relative path)](#example-setting-relative-path)
- [How it works](#how-it-works)
- [Static HTML file](#static-html-file)
- [Proxy for dynamic site](#proxy-for-dynamic-site)
- [Enhancement Planning](#enhancement-planning)
- [3. Better error handling](#3-better-error-handling)
<---------------------------------------------------------------------->
- [### <========(VSCode Essentials (Extension Pack))========>](#h1-idvscode-essentials-extension-pack-131markmarkmarkmarkmarkmarkmarkvscode-essentials-extension-packmarkmarkmarkmarkmarkmarkmarkh1)
- [VSCode Essentials (Extension Pack)](#vscode-essentials-extension-pack)
- [Introduction](#introduction)
- [Features](#features-17)
- [Recommended Settings](#recommended-settings)
- [All Autocomplete](#all-autocomplete)
- [CodeStream](#codestream)
- [Customize UI](#customize-ui)
- [GitLens](#gitlens)
- [Macros](#macros)
- [MetaGo](#metago)
- [Project Manager](#project-manager)
- [Rewrap](#rewrap)
- [Settings Cycler](#settings-cycler)
- [Settings Sync](#settings-sync)
- [Todo Tree](#todo-tree)
- [Bug Reports](#bug-reports)
- [Known Issues](#known-issues-2)
- [Included Extensions](#included-extensions)
<---------------------------------------------------------------------->
- [### <========( VS Code JavaScript Unit Test snippets )========>](#h1-id-vs-code-javascript-unit-test-snippets--131markmarkmarkmarkmarkmarkmark-vs-code-javascript-unit-test-snippets-markmarkmarkmarkmarkmarkmarkh1)
- [JavaScript](#javascript)
- [## VS Code JavaScript Unit Test snippets](#h2-idvs-code-javascript-unit-test-snippets-131vs-code-javascript-unit-test-snippetsh2)
- [Installation](#installation-5)
- [Snippets](#snippets)
- [Import and export](#import-and-export)
<---------------------------------------------------------------------->
- [### <========(Path Autocomplete for Visual Studio Code)========>](#h1-idpath-autocomplete-for-visual-studio-code-131markmarkmarkmarkmarkmarkmarkpath-autocomplete-for-visual-studio-codemarkmarkmarkmarkmarkmarkmarkh1)
- [Path Autocomplete for Visual Studio Code](#path-autocomplete-for-visual-studio-code)
- [Features](#features-18)
- [Installation](#installation-6)
- [Options](#options-1)
- [Configure VSCode to recognize path aliases](#configure-vscode-to-recognize-path-aliases)
- [Tips](#tips)
<---------------------------------------------------------------------->
- [### <========(easy-snippet)========>](#h1-ideasy-snippet-131markmarkmarkmarkmarkmarkmarkeasy-snippetmarkmarkmarkmarkmarkmarkmarkh1)
- [easy-snippet](#easy-snippet)
- [Features](#features-19)
<---------------------------------------------------------------------->
- [### <========(VSCode Log Output Colorizer)========>](#h1-idvscode-log-output-colorizer-131markmarkmarkmarkmarkmarkmarkvscode-log-output-colorizermarkmarkmarkmarkmarkmarkmarkh1)
- [VSCode Log Output Colorizer](#vscode-log-output-colorizer)
- [In action](#in-action)
- [VSCode Git Output](#vscode-git-output)
- [Default Dark Theme](#default-dark-theme)
- [Default Light Theme](#default-light-theme)
- [Night Blue Theme](#night-blue-theme)
- [Helpful References:](#helpful-references)
<---------------------------------------------------------------------->
- [### <========(REST Client)========>](#h1-idrest-client-131markmarkmarkmarkmarkmarkmarkrest-clientmarkmarkmarkmarkmarkmarkmarkh1)
- [REST Client](#rest-client)
- [Main Features](#main-features)
- [Usage](#usage-8)
- [Select Request Text](#select-request-text)
- [Install](#install-7)
- [Making Request](#making-request)
- [Request Line](#request-line)
- [Query Strings](#query-strings)
- [Request Headers](#request-headers)
- [Request Body](#request-body)
- [Making GraphQL Request](#making-graphql-request)
- [Making cURL Request](#making-curl-request)
- [Copy Request As cURL](#copy-request-as-curl)
- [Cancel Request](#cancel-request)
- [Rerun Last Request](#rerun-last-request)
- [Request History](#request-history)
- [Save Full Response](#save-full-response)
- [Save Response Body](#save-response-body)
- [Fold and Unfold Response Body](#fold-and-unfold-response-body)
<---------------------------------------------------------------------->
- [### <========((vscode-favorites))========>](#h1-idvscode-favorites-131markmarkmarkmarkmarkmarkmarkvscode-favoritesmarkmarkmarkmarkmarkmarkmarkh1)
- [vscode-favorites](#vscode-favorites)
- [Install](#install-8)
- [Usage](#usage-9)
<---------------------------------------------------------------------->
- [### <========(js-beautify for VS Code)========>](#h1-idjs-beautify-for-vs-code-131markmarkmarkmarkmarkmarkmarkjs-beautify-for-vs-codemarkmarkmarkmarkmarkmarkmarkh1)
- [js-beautify for VS Code](#js-beautify-for-vs-code)
- [How we determine what settings to use](#how-we-determine-what-settings-to-use)
- [VS Code | .jsbeautifyrc settings map](#vs-code--jsbeautifyrc-settings-map)
- [Keyboard Shortcut](#keyboard-shortcut)
<---------------------------------------------------------------------->
- [### <========(Todo Tree)========>](#h1-idtodo-tree-131markmarkmarkmarkmarkmarkmarktodo-treemarkmarkmarkmarkmarkmarkmarkh1)
- [Todo Tree](#todo-tree-1)
- [Highlighting](#highlighting)
- [Installing](#installing-1)
- [Source Code](#source-code)
- [Controls](#controls)
- [Folder Filter Context Menu](#folder-filter-context-menu)
- [Commands](#commands-4)
- [Tags](#tags)
- [Export](#export)
- [Configuration](#configuration-5)
- [Multiline TODOs](#multiline-todos)
- [Excluding files and folders](#excluding-files-and-folders
<---------------------------------------------------------------------->
- [### <========(Open file)========>](#h1-idopen-file-131markmarkmarkmarkmarkmarkmarkopen-filemarkmarkmarkmarkmarkmarkmarkh1)
- [Open file](#open-file)
- [Example](#example-3)
- [Main Features](#main-features-1)
- [Path Lookup Detail](#path-lookup-detail)
<---------------------------------------------------------------------->
- [### <========(Code Runner)========>](#h1-idcode-runner-131markmarkmarkmarkmarkmarkmarkcode-runnermarkmarkmarkmarkmarkmarkmarkh1)
- [Code Runner](#code-runner)
- [Features](#features-20)
- [Usages](#usages)
- [Configuration](#configuration-6)
- [About CWD Setting (current working directory)](#about-cwd-setting-current-working-directory)
- [Note](#note)
- [Telemetry data](#telemetry-data)
- [Change Log](#change-log-2)
- [Issues](#issues)
- [Contribution](#contribution)
<---------------------------------------------------------------------->
- [### <========(Git Project Manager)========>](#h1-idgit-project-manager-131markmarkmarkmarkmarkmarkmarkgit-project-managermarkmarkmarkmarkmarkmarkmarkh1)
- [Git Project Manager](#git-project-manager)
- [Available commands](#available-commands-1)
- [GPM: Open Git Project _(Defaults to: Ctrl+Alt+P)_](#gpm-open-git-project-defaults-to-ctrlaltp)
- [GPM: Refresh Projects](#gpm-refresh-projects)
- [GPM: Refresh specific project folder](#gpm-refresh-specific-project-folder)
- [GPM: Open Recent Git Project _(Defaults to Ctrl+Shift+Q)_](#gpm-open-recent-git-project-defaults-to-ctrlshiftq)
- [Available settings](#available-settings)
- [Participate](#participate)
<---------------------------------------------------------------------->
- [### <========(Open in Code)========>](#h1-idopen-in-code-131markmarkmarkmarkmarkmarkmarkopen-in-codemarkmarkmarkmarkmarkmarkmarkh1)
- [Open in Code](#open-in-code)
- [Install](#install-9)
- [Usage](#usage-10)
- [Contributing](#contributing-1)
- [License](#license-6)
<---------------------------------------------------------------------->
- [### <========(Reactjs)========>](#h1-idreactjs-131markmarkmarkmarkmarkmarkmarkreactjsmarkmarkmarkmarkmarkmarkmarkh1)
- [Reactjs](#reactjs)
- [VS Code Reactjs snippets](#vs-code-reactjs-snippets)
- [Installation](#installation-7)
- [Supported languages (file extensions)](#supported-languages-file-extensions)
- [Breaking change in version 2.0.0](#breaking-change-in-version-200)
- [Breaking change in version 1.0.0](#breaking-change-in-version-100)
- [Usage](#usage-11)
- [Snippets](#snippets-1)
<---------------------------------------------------------------------------------->
- [### <========(jQuery Code Snippets)========>](#h1-idjquery-code-snippets-131markmarkmarkmarkmarkmarkmarkjquery-code-snippetsmarkmarkmarkmarkmarkmarkmarkh1)
- [jQuery Code Snippets](#jquery-code-snippets)
- [Snippets](#snippets-2)
- [column0](#column0)
- [Source](#source)
- [License](#license-7)
<---------------------------------------------------------------------->
- [### <========( Markdown table prettifier extension for Visual Studio Code)========>](#h1-id-markdown-table-prettifier-extension-for-visual-studio-code-131markmarkmarkmarkmarkmarkmark-markdown-table-prettifier-extension-for-visual-studio-codemarkmarkmarkmarkmarkmarkmarkh1)
- [Markdown table prettifier extension for Visual Studio Code](#markdown-table-prettifier-extension-for-visual-studio-code)
- [Features](#features-21)
- [CLI formatting](#cli-formatting)
- [Formatting with docker](#formatting-with-docker)
- [Extension Settings](#extension-settings-5)
- [Known Issues](#known-issues-3)
- [- Tables with mixed character widths (eg: CJK) are not always properly formatted (issue #4).](#ullitables-with-mixed-character-widths-eg-cjk-are-not-always-properly-formatted-issue-4liul)
<------------------------------------------------------------------------------------------>
- [### <========(vscode-goto-documentation)========>](#h1-idvscode-goto-documentation-131markmarkmarkmarkmarkmarkmarkvscode-goto-documentationmarkmarkmarkmarkmarkmarkmarkh1)
- [vscode-goto-documentation](#vscode-goto-documentation)
- [Supports](#supports-1)
- [Installation](#installation-8)
- [How to use](#how-to-use-1)
- [Edit the urls](#edit-the-urls)
- [The available settings are:](#the-available-settings-are)
<---------------------------------------------------------------------->
- [### <========(VSCode DevTools for Chrome)========>](#h1-idvscode-devtools-for-chrome-131markmarkmarkmarkmarkmarkmarkvscode-devtools-for-chromemarkmarkmarkmarkmarkmarkmarkh1)
- [VSCode DevTools for Chrome](#vscode-devtools-for-chrome)
- [Attaching to a running chrome instance:](#attaching-to-a-running-chrome-instance)
- [Launching a 'debugger for chrome' project and using screencast:](#launching-a-debugger-for-chrome-project-and-using-screencast)
- [Using the extension](#using-the-extension)
- [Launching as a Debugger](#launching-as-a-debugger)
- [Launching Chrome manually](#launching-chrome-manually)
- [Launching Chrome via the extension](#launching-chrome-via-the-extension)
- [Known Issues](#known-issues-4)
- [Developing the extension itself](#developing-the-extension-itself)
<---------------------------------------------------------------------->
- [### <========(JS Refactor)========>](#h1-idjs-refactor-131markmarkmarkmarkmarkmarkmarkjs-refactormarkmarkmarkmarkmarkmarkmarkh1)
- [JS Refactor](#js-refactor)
- [Supported Language Files](#supported-language-files)
- [Installation](#installation-9)
- [Extensions Panel:](#extensions-panel)
- [Command Pallette](#command-pallette)
- [Automated Refactorings](#automated-refactorings)
- [Keybindings](#keybindings)
- [Usage](#usage-12)
- [Explanations](#explanations)
- [Core Refactorings](#core-refactorings)
- [Other Utilities](#other-utilities)
- [Snippets](#snippets-3)
- [Usage](#usage-13)
- [Explanations](#explanations-1)
<---------------------------------------------------------------------->
- [### <========(Npm Intellisense)========>](#h1-idnpm-intellisense-131markmarkmarkmarkmarkmarkmarknpm-intellisensemarkmarkmarkmarkmarkmarkmarkh1)
- [Npm Intellisense](#npm-intellisense)
- [Sponsors](#sponsors)
- [Installation](#installation-10)
- [Contributing](#contributing-2)
- [Features](#features-22)
- [Import command](#import-command)
- [Import command (ES5)](#import-command-es5)
- [Scan devDependencies](#scan-devdependencies)
- [Show build in (local) libs](#show-build-in-local-libs)
- [Lookup package.json recursive](#lookup-packagejson-recursive)
- [Experimental: Package Subfolder Intellisense](#experimental-package-subfolder-intellisense)
- [License](#license-8)
<------------------------------------------------------------------------------------------>
- [### <========(vscode-standardjs)========>](#h1-idvscode-standardjs-131markmarkmarkmarkmarkmarkmarkvscode-standardjsmarkmarkmarkmarkmarkmarkmarkh1)
- [vscode-standardjs](#vscode-standardjs)
- [How to use](#how-to-use-2)
- [Plugin options](#plugin-options)
- [Configuring Standard](#configuring-standard)
- [Commands](#commands-5)
- [FAQ](#faq-3)
- [How to develop](#how-to-develop)
- [How to package](#how-to-package)
- [TODO](#todo)
<---------------------------------------------------------------------->
- [### <========(COMMENT HEADERS)========>](#h1-idcomment-headers-131markmarkmarkmarkmarkmarkmarkcomment-headersmarkmarkmarkmarkmarkmarkmarkh1)
- [File Header Comment - Visual Studio Marketplace](#file-header-comment---visual-studio-marketplace)
- [Features](#features-23)
- [Install](#install-10)
- [Extension Settings](#extension-settings-6)
<---------------------------------------------------------------------->
- [### <========(Bookmarks)========>](#h1-idbookmarks-131markmarkmarkmarkmarkmarkmarkbookmarksmarkmarkmarkmarkmarkmarkmarkh1)
- [Bookmarks](#bookmarks)
- [Features](#features-24)
- [Available commands](#available-commands-2)
- [Manage your bookmarks](#manage-your-bookmarks)
- [Toggle / Toggle Labeled](#toggle--toggle-labeled)
- [Navigation](#navigation)
- [Jump to Next / Previous](#jump-to-next--previous)
- [List / List from All Files](#list--list-from-all-files)
- [Selection](#selection)
- [Select Lines](#select-lines)
- [Expand Selection to the Next/Previous Bookmark or Shrink the Selection](#expand-selection-to-the-nextprevious-bookmark-or-shrink-the-selection)
- [Available Settings](#available-settings-1)
- [Available Colors](#available-colors)
- [Side Bar](#side-bar)
- [Project and Session Based](#project-and-session-based)
- [License](#license-9)
<------------------------------------------------------------------------------------------
- [### <========(vscode-markdown-pdf)========>](#h1-idvscode-markdown-pdf-131markmarkmarkmarkmarkmarkmarkvscode-markdown-pdfmarkmarkmarkmarkmarkmarkmarkh1)
- [yzane/vscode-markdown-pdf](#yzanevscode-markdown-pdf)
- [Usage](#usage-14)
- [Command Palette](#command-palette-1)
- [Menu](#menu-1)
- [Auto convert](#auto-convert-1)
- [Extension Settings](#extension-settings-7)
- [Options](#options-2)
- [List](#list-1)
- [Save options](#save-options-1)
(#markdown-pdfconvertonsaveexclude-1)
(#markdown-pdfoutputdirectoryrelativepathfile-1)
- [Styles options](#styles-options-1)
(#markdown-pdfstylesrelativepathfile-1)
- [`markdown-pdf.includeDefaultStyles`](#markdown-pdfincludedefaultstyles-1)
- [Syntax highlight options](#syntax-highlight-options-1)
- [Markdown options](#markdown-options-1)
- [Emoji options](#emoji-options-1)
- [Configuration options](#configuration-options-1)
- [Common Options](#common-options-1)
- [PDF options](#pdf-options-1)
(#markdown-pdfdisplayheaderfooter-1)
- [PNG JPEG options](#png-jpeg-options-1)
- [FAQ](#faq-4)
- [How can I change emoji size ?](#how-can-i-change-emoji-size--1)
- [Auto guess encoding of files](#auto-guess-encoding-of-files-1)
- [Output directory](#output-directory-1)
- [Page Break](#page-break-1)
- [Source](#source-1)
<---------------------------------------------------------------------->
- [### <========()========>](#h1-id-2349markmarkmarkmarkmarkmarkmarkmarkmarkmarkmarkmarkmarkmarkh1)
- [194.WallabyJs.quokka-vscode](#194wallabyjsquokka-vscode)
- [Rapid JavaScript Prototyping in your Editor](#rapid-javascript-prototyping-in-your-editor)
- [Quokka.js is a developer productivity tool for rapid JavaScript / TypeScript prototyping. Runtime values are updated and displayed in your IDE next to your code, as you type.](#quokkajs-is-a-developer-productivity-tool-for-rapid-javascript--typescript-prototyping-runtime-values-are-updated-and-displayed-in-your-ide-next-to-your-code-as-you-type)
- [Quick Start](#quick-start-1)
- [## Live Feedback](#h2-idlive-feedback-131live-feedbackh2)
- [Live Code Coverage](#live-code-coverage)
- [Value Explorer](#value-explorer)
- [Auto-Expand Value Explorer Objects {#auto-expand-value-explorer-objects .vsc-doc .jb-doc style="display: block;"}](#auto-expand-value-explorer-objects)
- [VS Code Live Share Integration {#live-share-integration .vsc-doc style="display: block;"}](#vs-code-live-share-integration)
- [How does it work?](#how-does-it-work)
- [Interactive Examples](#interactive-examples)
- [Live Comments](#live-comments)
- [Live comment snippet](#live-comment-snippet)
- [Live Value Display](#live-value-display)
- [Show Value](#show-value)
- [Copy Value](#copy-value)
- [Project Files Import](#project-files-import)
- [Quick Package Install](#quick-package-install)
- [Live Performance Testing](#live-performance-testing)
- [Run on Save/Run Once](#run-on-saverun-once)
- [Runtime](#runtime)
- [Browser-like Runtime](#browser-like-runtime)
- [Configuration](#configuration-7)
- [Plugins](#plugins)
- [Examples](#examples-1)
- [Questions and issues](#questions-and-issues)
<---------------------------------------------------------------------->
- [### <========(Browser Preview)========>](#h1-idbrowser-preview-131markmarkmarkmarkmarkmarkmarkbrowser-previewmarkmarkmarkmarkmarkmarkmarkh1)
- [Features](#features-25)
<---------------------------------------------------------------------->
- [### <========( Microsoft Edge Tools)========>](#h1-id-microsoft-edge-tools-131markmarkmarkmarkmarkmarkmark-microsoft-edge-toolsmarkmarkmarkmarkmarkmarkmarkh1)
- [Microsoft Edge Tools for VS Code - Visual Studio Marketplace](#microsoft-edge-tools-for-vs-code---visual-studio-marketplace)
- [Supported Features](#supported-features)
- [Using the Extension](#using-the-extension-1)
- [Getting Started](#getting-started)
- [Changing Extension Settings](#changing-extension-settings)
- [Turning on Network Inspection](#turning-on-network-inspection)
- [Turning on Headless Mode](#turning-on-headless-mode)
- [Using the tools](#using-the-tools)
- [Opening source files from the Elements tool](#opening-source-files-from-the-elements-tool)
- [Debug Configuration](#debug-configuration)
- [Other optional launch config fields](#other-optional-launch-config-fields)
- [Sourcemaps](#sourcemaps)
- [Ionic/gulp-sourcemaps note](#ionicgulp-sourcemaps-note)
- [Launching the browser via the side bar view](#launching-the-browser-via-the-side-bar-view)
- [Launching the browser manually](#launching-the-browser-manually)
- [Attaching automatically when launching the browser for debugging](#attaching-automatically-when-launching-the-browser-for-debugging)
- [Data/Telemetry](#datatelemetry)
- [Source](#source-2)
<---------------------------------------------------------------------->
- [### <========( Turbo Console Log)========>](#h1-id-turbo-console-log-131markmarkmarkmarkmarkmarkmark-turbo-console-logmarkmarkmarkmarkmarkmarkmarkh1)
- [Turbo Console Log](#turbo-console-log)
- [Main Functionality](#main-functionality)
- [Features](#features-26)
<---------------------------------------------------------------------->
- [### <========(Regex Previewer - Visual Studio Marketplace)========>](#h1-idregex-previewer---visual-studio-marketplace-131markmarkmarkmarkmarkmarkmarkregex-previewer---visual-studio-marketplacemarkmarkmarkmarkmarkmarkmarkh1)
- [Regex Previewer - Visual Studio Marketplace](#regex-previewer---visual-studio-marketplace)
- [Features](#features-27)
- [Source](#source-3)
<---------------------------------------------------------------------->
- [### <========(JavaScript Snippet Pack)========>](#h1-idjavascript-snippet-pack-118markmarkmarkmarkmarkmarkmarkjavascript-snippet-packmarkmarkmarkmarkmarkmarkmarkh1)
- [JavaScript Snippet Pack - Visual Studio Marketplace](#javascript-snippet-pack---visual-studio-marketplace)
- [JavaScript Snippet Pack for Visual Studio Code](#javascript-snippet-pack-for-visual-studio-code)
- [Usage](#usage-15)
- [Console](#console)
- [DOM](#dom)
- [Loop](#loop)
- [\[fe\] forEach](#fe-foreach)
- [Function](#function)
(#iife-immediately-invoked-function-expression)
(#ofn-function-as-a-property-of-an-object)
- [JSON](#json)
- [Timer](#timer)
- [Misc](#misc)
<---------------------------------------------------------------------->
- [### <========(Node.js Exec)========>](#h1-idnodejs-exec-104markmarkmarkmarkmarkmarkmarknodejs-execmarkmarkmarkmarkmarkmarkmarkh1)
- [Node.js Exec - Visual Studio Marketplace](#nodejs-exec---visual-studio-marketplace)
- [Execute the current file or your selected code with node.js.](#execute-the-current-file-or-your-selected-code-with-nodejs)
- [Usage](#usage-16)
- [Configuration](#configuration-8)
- [The folloing options need to set the legacyMode off](#the-folloing-options-need-to-set-the-legacymode-off)
- [How it works](#how-it-works-1)
<---------------------------------------------------------------------->
- [### <========(Search Editor)========>](#h1-idsearch-editor-97markmarkmarkmarkmarkmarkmarksearch-editormarkmarkmarkmarkmarkmarkmarkh1)
- [Search Editor: Apply Changes - Visual Studio Marketplace](#search-editor-apply-changes---visual-studio-marketplace)
- [Known Limitations](#known-limitations)
- [Keybindings](#keybindings-1)
- [Source](#source-4)
<---------------------------------------------------------------------->
- [### <========(Node TDD)========>](#h1-idnode-tdd-87markmarkmarkmarkmarkmarkmarknode-tddmarkmarkmarkmarkmarkmarkmarkh1)
- [Node TDD - Visual Studio Marketplace](#node-tdd---visual-studio-marketplace)
- [Features](#features-28)
- [Settings](#settings-5)
- [Commands](#commands-6)
- [Limitations and known issues](#limitations-and-known-issues)
<----------------------------------------------------------------------> ```
