- Regular Expressions Learning Objectives
- HTTP Full-Stack Learning Objectives
- The Uniform Resource Locator (URL)
- Regular Expressions Cheat Sheet
- RegexOne Practice
- HTTP
Full-Stack Project
- Project overview
- Get started
- Phase 1: Installing one tool
- Phase 2: Getting the server started
- Phase 3: Understand the code
- Phase 4: Showing images
- Phase 4b: No image found
- Phase 5: Showing a static HTML page
- Phase 6: First step in dynamic content
- Phase 7: Handling the adding of an item
- Phase 8: Generate dynamic content
- Phase 9
- Complete!
- <=(Express)==>
- Express Learning Objectives
- Pug Template Learning Objectives
- Moving Into the Express Lane
- Templating - Meet Pug!
- Digging Into the Pug Template Syntax
- Exploring Route Paths
- Express Routers
- Routing Roundup Project
- <=(Form Handeling)==>
- HTML Forms Learning Objectives
- HTML Forms: An Introduction
- HTML Forms in Express
- Data Validation
- Express Middleware
- Protecting forms from CSRF
- Formative Forms Project
- <=(Data Driven Ap)==>
- Data-Driven Web Sites Learning Objectives
- Acclimating to Environment Variables
- Asynchronous Route Handlers in Express
- Handling Errors in Express
- Data-Driven Websites - Part 1: Setting Up the Project
- Data-Driven Websites Project (Part 2: Integrating Sequelize with Express)
- Data-Driven Websites Project (Part 3: Using Sequelize to Perform CRUD Operations)
<=(Node HTTP Servers)=>
- <=()>
- Regular Expressions Learning Objectives
- HTTP Full-Stack Learning Objectives
- The Uniform Resource Locator (URL)
- Regular Expressions Cheat Sheet
- RegexOne Practice
- HTTP
Full-Stack Project
- Project overview
- Get started
- Phase 1: Installing one tool
- Phase 2: Getting the server started
- Phase 3: Understand the code
- Phase 4: Showing images
- Phase 4b: No image found
- Phase 5: Showing a static HTML page
- Phase 6: First step in dynamic content
- Phase 7: Handling the adding of an item
- Phase 8: Generate dynamic content
- Phase 9
- Complete!
- <=()>
Regular Expressions Learning Objectives
Regular expressions are a delight and a nightmare. They please and they
confound. They are an important part of every developer's toolbox. By the time
you finish this, you should be able to
- Define the effect of the * operator and use it in a regular expression
- Define the effect of the ? operator and use it in a regular expression
- Define the effect of the + operator and use it in a regular expression
- Define the effect of the . operator and use it in a regular expression
- Define the effect of the ^ operator and use it in a regular expression
- Define the effect of the $ operator and use it in a regular expression
- Define the effect of the [] bracket expression and use it in a regular
expression - Define the effect of the - inside brackets and use it in a regular expression
- Define the effect of the ^ inside brackets and use it in a regular expression
HTTP Full-Stack Learning Objectives
Understanding how Node.js handles incoming HTTP requests using the
IncomingMessage and ServerResponse objects provide a strong foundation of
being able to predict problems when you use frameworks to ease the burden of
writing Web applications. When you complete the associated material for this
lesson, you should be able to:
- Identify the five parts of a URL
- Identify at least three protocols handled by the browser
- Use an
IncomingMessageobject to- access the headers sent by a client (like a Web browser) as part of the HTTP
request - access the HTTP method of the request
- access the path of the request
- access and read the stream of content for requests that have a body
- access the headers sent by a client (like a Web browser) as part of the HTTP
- Use a
ServerResponseobject to- write the status code, message, and headers for an HTTP response
- write the content of the body of the response
- properly end the response to indicate to the client (like a Web browser)
that all content has been written
The Uniform Resource Locator (URL)
We use URLs all the time. Now, it's time to really understand how they work.
From this reading, you should be able to
- Recall where to find the definition of a URL,
- Identify and recall the five components of a URL, and
- Identify properly formatted URLs
The specification
Almost all good things that define how the Internet works has one or more things
called IETF RFCs which define how they work. There are two acronyms there:
- IETF: Internet Engineering Task Force
- RFC: Request For Comments
The IETF is an open standards organization that creates voluntary standards to
maintain and improve the usability and interoperability of the Internet. Things
like the way travels across the Internet is created an maintained by the IETF.
In particular, the Simple Mail Transfer Protocol is now governed by RFC
5321. RFC 5321 made obsolete RFC 2821 which, in turn, made obsolete RFC 821.
The IETF is always working to make the Internet better with respect to its
growth and usage.
An RFC is a document usually created by programmers, engineers, and scientists
in the form of a memorandum. They publish the RFC for peer review. When enough
people have reviewed it, and it seems worthy of adoption, the IETF will change
its status to "Internet Standard" which means that everyone should comply with
it if they implement that standard.
The RFC 3986, Uniform Resource Identifier (URI): Generic
Syntax, is an
"Internet Standard". That means that software applications that use URLs need to
conform to the specification found in that document lest they be publicly shamed
by computer programmers trying to use the non-conforming software.
What is this "resource" thing?
Well, the standard doesn't do much for you in providing a definition of this
word "resource".
This specification does not limit the scope of what might be a resource;
rather, the term "resource" is used in a general sense for whatever might be
identified by a URI. Familiar examples include an electronic document, an
image, a source of information with a consistent purpose (e.g., "today's
weather report for Los Angeles"), a service (e.g., an HTTP-to-SMS gateway),
and a collection of other resources. A resource is not necessarily accessible
via the Internet; e.g., human beings, corporations, and bound books in a
library can also be resources. Likewise, abstract concepts can be resources,
such as the operators and operands of a mathematical equation, the types of a
relationship (e.g., "parent" or "employee"), or numeric values (e.g., zero,
one, and infinity).
That influence comes from one of the authors, Dr. Roy Fielding. He has some
strong ideas about how the Internet works and, much to his disappointment, it
continues to move away from his ideals.
For your purposes, a URL points to a (hopefully) accessible resource that can
be accessed, like HTML, CSS, JavaScript, and pure data in the form of JSON.
The components of a URL
In Section 3, Syntax Components, of RFC 3986 contains this helpful ASCII art
graphic to show you the components of a URL.
  foo://example.com:8042/over/there?name=ferret#nose
  \_/   \______________/\_________/ \_________/ \__/
   |           |            |            |        |
scheme     authority       path        query   fragment
Here's an explanation of each of those components.
The "scheme" of a URL
This section used to be called "the protocol", but was updated when URLs became
part of a larger family known as URIs, Uniform Resource Identifiers, which is
what RFC 3986 actually covers.
You've actually used three schemes already in class! Can you remember them?
If you replied "http" and "https", that's right! When you type an authority in
the browser, like "duckduckgo.com" or "localhost:3000", the browser
assumes that
you want to use HTTP, so it prepends that scheme to the authority. The browser
would then make requests to "http://duckduckgo.com" or "http://localhost:3000".
When you double click on an HTML file and it opens locally in your browser, that
is using the "file" scheme, meaning that it is looking for a file local to the
computer! You've done this countless times during this course. You may have
noticed the "file" part in the address bar. That's the scheme it used to access
local files as opposed to making an HTTP request.
This is why it was once named "protocol", because it was the protocol that the
browser would use to locate the resource using a Uniform Resource Locator.
Stuff between the scheme and authority
The standard tells us that for URLs that have an authority, the characters "😕/"
must exist between the scheme and the authority. That's why you have to type
those characters. You can blame Sir Tim Berners-Lee for that because he defined
it in the original RFC for this subject, RFC 1738, Uniform Resource Locators
(URL).
The authority
This part of as URL is normally the domain name of the resource that has the
resource that you're trying to access.
Sometimes it has a port number, too, like when you start a local HTTP server
with Node.js. Then, you type "http://localhost:3000". The authority is
the
entire "localhost:3000". That means that, even if "http://localhost:3000"
and
"http://localhost:8081" return the exact same content, they're considered to
be
two different URLs to the same content.
The path
Paths are in the first part of an HTTP request, if you recall. When you click on
a link in your browser that takes you to "https://duckduckgo.com/about", that
results in an HTTP request that begins with the following line:
GET /about HTTP/1.1
That's the path.
If the path is omitted from a URL, it is assumed to be "/".
The query
This is extra information sent to the browser meant for the processing of the
request. For example, when you go to DuckDuckGo and perform a search for "RFC
3986" by typing it into the search box, the URL that your browser is directed to
reads "https://duckduckgo.com/?q=RFC+3986".
The question mark and everything that comes after it (up to the fragment) is
considered the "query" of the URL. Because it's part of the URL, it means that
different values of the query part of the URL points to different resources even
if the exact same content is returned.
With respect to URLs used for the World Wide Web, queries generated by browsers
(and possibly by your code) will have the following format:
- Entries in the query are "URL encoded" key-value pairs with an equal sign
between them - Entries are concatenated with the ampersand symbol
When the key or value of an entry in a query contains a character that is not
one of the reserved or unreserved characters, then it gets "URL encoded". That
process replaces each character a percent sign and its hexadecimal ASCII Code.
For example, when your provide the value "Mary" and "/" because those
aren't allowable characters. Those characters' ASCII Code values are 24 and 2F,
respectively. That transforms the string to "Mary%24quite%2Fcontrary".
Luckily, JavaScript has built-in methods called encodeURI (link) and
decodeURI (link) that
handles that transformation for you!
The fragment
The fragment is never sent to the server. Instead, it tells the browser to
access a specific section of the page after it loads. For example, if you look
at the following link
https://en.wikipedia.org/wiki/URL#Protocol-relative_URLs
you can see that there is a fragment value of "#Protocol-relative_URLs". If you
click on that link, the browser will load that page and, then, scroll that
section into view for you.
Unlike with changing values in any of the other sections, if you change the
value in the fragment, the browser will not reload the page.
Reading RFCs
Unfortunately, RFCs tend to be very unappealing and technical, not fun to read
at all. However, you should try reading them when you have a question about how
something works that's governed by the IETF. You will gain insight that only
comes from technical documentation.
As a side note, it is a common thing for programmers to publish April Fool's
RFCs. Their sense of humor is ... shockingly technical and dry. Here are some
interesting ones, for example.
- Hypertext Jeopardy Protocol (HTJP/1.0)
- Design Considerations for Faster-Than-Light (FTL) Communication
- TCP Option to Denote Packet Mood
Yep, that's the kind of humor in deeply computer science-y groups.
¯\(◉◡◔)/¯
What you've learned
You learned that the five parts of a URL are
- The scheme (required),
- The authority (required),
- The path (optional),
- The query (optional), and
- The fragment (optional, not sent to the server).
You were reminded that you actually know three schemes: http, https, and file.
And, that's it for URLs. 😃
Regular Expressions Cheat Sheet
This article lists the most commonly-used regular expressions operators. You
can use it as a handy reference for later while you write regular expressions.
The * operator
The * operator is known as the Kleene Star, one of the Kleene operators.
You use the Kleene Star operator to match any number, zero or more, of the
character it follows.
For example, take the following regular expression patterns and compare them
with the strings below:
Example 1: xy*z
Matches:
xxz
xyyyzzz
Does not match:
yyy
xyxz
Example 2: x*yz
Matches:
xxyz
yyyzzz
Does not match:
xxx
xyyz
Example 3: xyz*
Matches:
xy
xxyzzz
Does not match:
zzz
xyyz
The ? operator
The question mark operator denotes that the character preceding ? is an
optional character. Note that when you want to use a
normal question mark as a
normal character and NOT as a regular expression operator, you need to escape
the character with a forward slash like \?.
Take the following pattern and compare it with the strings below. Notice how
the s? portion of the expression makes the "s" character optional, allowing
the pattern to match both "video" and "videos".
Example 1: videos?
Matches:
cat video
dog videos
Does not match:
bird vids
hedgehog vides
Example 2: videos\?
Matches:
dog videos?
videos? hello?
Does not match:
cat video
videos
Note different effect of the regular expression with an escaped question mark
verses a non-escaped question mark.
Example 3: videos? watched\?
Matches:
dog video watched?
cat videos watched?
Does not match:
bird video watched
hedgehog videos not watched
The + operator
The + operator is known as the Kleene Star Plus. You use Kleene Star Plus
to match one or more of the character it follows, instead of zero or more
like the Kleene Star.
For example, take the following regular expression patterns and strings below:
Example 1: xy+z
Matches:
xyyyzzz
xxxyzz
Does not match:
xxz
xyxz
Note how "xxz" is matched by xy*z but not by xy+z.
Example 2: x+yz
Matches:
xyzzz
xxxyzz
Does not match:
yzz
xyyz
Example 3: xyz+
Matches:
xyzzz
xxyz
Does not match:
xy
xxy
The . operator
The dot operator matches any single character. It acts as a wildcard that
can match any single number, letter, symbol, or even whitespace. Like the
question mark operator, in order to use . as a normal character instead of a
regular expression operator, you need to escape the character with a forward
slash (\.).
Take the example expressions and strings below:
Example 1: ..a..
Matches:
12aa3
brains
Does not match:
123a4
catch
Example 2: .at.
Matches:
?att
catch
Does not match:
1a1t
atss
Remember that using a forward slash before a question mark in a regular
expression escapes the question mark so that ? is not interpreted as a
regular expression operator.
Example 3: ...\?
Matches:
123?
????
Does not match:
123
?cat
The ^ operator without brackets
The ^ operator is known as the hat operator. The hat operator can be used in
two ways:
- Without square brackets to match the start of a line.
- Within square brackets to denote when you want to exclude characters.
When using ^ at the beginning of a regular expression pattern, you are
indicating a match with statements that begin with the characters in your
pattern. Note the case sensitivity in the examples below.
Example 1: ^Dog
Matches:
Doggie daycare
Dog food
Does not match:
doG master
puppy Dog
Example 2: ^dog
Matches:
doggie
dogs
Does not match:
hotdog
small dog
Example 3: ^\?
Matches:
? hello
???
Does not match:
hi?
\?bye
The $ operator
The dollar sign operator is used to define the end of a line. Like how the ^
hat operator is used to specifically match the beginning characters of a line,
the $ dollar sign operator is used to specifically match the end of a line.
Take the following patterns and strings below:
Example 1: smell$
Matches:
doggie smell
doggie has an interesting smell
Does not match:
doggie smells
doggie is smelling
Example 2: dog.$
Matches:
sit, dog.
good dog!
Does not match:
sit, doggie
dogs.
In the example below, the hat and dollar sign operators are used together to
create a pattern that matches the entire "doggie smell" string from beginning
to end.
Example 3: ^doggie smell$
Matches:
doggie smell
Does not match:
big doggie smell
doggie has an interesting smell
doggie smells
The [] bracket expression
You use square brackets in regular expressions to match and include characters.
You can do so by listing out specific characters or using an alphanumeric range.
You can also use the square brackets in conjunction with a hat operator to
exclude characters.
Take the following patterns that include characters in the strings below:
Example 1: [aei]n
Matches:
ban
hen
Does not match:
undo
on
Example 2: robot [0-9]
Matches:
robot 7
brobot 180
Does not match:
robots 7
robot seven
Example 3: \.[dw]
Matches:
.whale
.dog
Does not match:
.cat
whale
The - inside brackets
You use the dash character to create character ranges
within square brackets.
Multiple ranges can be set in the same square brackets. For example, the
expression [A-Za-z0-9_] is often used to match all alphanumeric characters
in the English language.
Take the following expressions and strings below:
Example 1: [0-5] cats
Matches:
3 cats
33 cats
Does not match:
336 cats
3cats
Example 2: [A-D][l-p][o-s]
Matches:
Apple
Dose
Does not match:
apple
bone
Example 3: [a-z][0-9][A-Z]
Matches:
h4T
bl7XYZ
Does not match:
h44T
XYZ7bl
The ^ inside brackets
When using ^ inside of square brackets, you are denoting that you want to
exclude characters. In order to exclude characters,
you need to wrap the
operator and the characters you want to exclude within square brackets.
Example 1: [^b]
Matches:
hog
dog
Does not match:
bog
blog
Example 2: [^bc]at
Matches:
chat
rat
Does not match:
hat
cat
Example 3: [^bc]o[^g]
Matches:
hot
pot
Does not match:
cog
blog
RegexOne Practice
Just like with Flexbox Froggy and CSS Grid Garden, there are Web sites on the
Internet that really stand out as excellent resources from which to learn.
RegexOne is one of those resources.
It is a set of simple interactive exercises to help you practice your new-found
knowledge of regular expressions. Do all of the 15 exercises and eight problems.

HTTP Full-Stack Project
In this project, you are going to use Node.js to build a data-driven Web site.
This project already includes the Sequelize models and migrations for you. You
will create a Node.js HTTP server and use it to handle incoming requests from a
browser. Then, you will generate HTML to respond to the request.
Today's project does not address the aesthetics of the visual appearance of the
Web pages. You will have an opportunity later this week to do that. Today is
about functionality.
Project overview
You will build a simple inventory tracking system for managing the amount of
stuff that you have. The Sequelize data model is already created for you because
you now know how to do that pretty well. You'll get to flex those muscles later
this week, too.
You will build the server that accepts incoming HTTP requests using only
functionality built into Node.js. You will process the incoming request,
determine what needs to be done, and generate HTML to send back to the client.
This project shows you the underpinnings of how Node.js-based Web applications
work. Then, when you use a framework like Express.js or Koa.js, you will know
what they're doing.
The data model
To focus on the server portion of this, the data model is very simple. It
consists of one entity, the Item. The Item has the following properties.
| Property name | Data type | Constraints |
|---|---|---|
| name | string | not null, unique |
| description | text | not null |
| imageName | string | |
| amount | integer | not null, default 0 |
The functionality
You will create two HTML pages, one static and one dynamic. The static HTML page
will consist of a form that allows you to add new items that you want to track.
The dynamic HTML page will list the each item and its details and give you a
way to reduce the amount on hand.
Get started
-
Clone the starter repository from
https://github.com/appacademy-starters/node-web-app-starter. But, this time,
use an extended version of the Gitclonecommand to put it in a specific
directory. You will use the same starter project in the next project, too.git clone https://github.com/appacademy-starters/node-web-app-starter native-node-appInstead of creating a directory named after the repository,
"node-web-app-starter", this wil create a directory named "native-node-app"
and put the cloned repository into there. -
Change the working directory into "native-node-app"
-
Install the npm dependencies
-
Create a database user named "native_node_app" with the password
"oMbE4FNk3db2LwFT" and the CREATEDB privilege which will look likeCREATE USER ... WITH CREATEDB PASSWORD ...
You add the CREATEDB in there so you can do the next step and not be bothered
with creating the database yourself -
Run the Sequelize CLI with the
db:createcommand to create the database -
Run the Sequelize CLI to migrate the database
-
Run the Sequelize CLI to seed the database
Phase 1: Installing one tool
You will use a development tool to restart the server each time you make a
change to a JavaScript file. This prevents you from having to hit CTRL+C each
time you want to stop and start your server.
The tool is named nodemon and is the standard for this type of server
restarting. It is a development tool, so you will install it as a special kind
of dependency, a development dependency. You can do that with
npm install nodemon --save-dev
When you deploy your application to production, npm will ignore the development
dependencies because they're not needed when you run your application for other
people to use. Hopefully by that point, your Web application doesn't restart!
Phase 2: Getting the server started
Open the package.json file. It specifies that the "main" file for this
project is server/index.js. Create a server directory and an
index.js file in there.
Now, in package.json, find the "scripts" section. Add a new entry in there
named "dev" with the value "nodemon server/index.js". It should look like this.
"scripts": {
  "dev": "nodemon server/index.js",
  "test": "echo \"Error: no test specified\" && exit 1"
},
That sets up a way to conveniently run the "nodemon" command by typing the
command npm run dev. You can run that right now. Because you have an empty
server/index.js file, it should report something like this:
[nodemon] starting `node server/index.js server/index.js`
[nodemon] clean exit - waiting for changes before restart
So, it's just waiting for you to add some code!
To get an HTTP server up and running, you will add code to do the following in
the server/index.js file.
- Import the built-in "http" module
- Create a server using the "http" module that returns "I have items" to every
request - Tell that server to start listening on port 8081
- Print a message when the server is ready to accept incoming messages
Please look at the sample on the About Node.js® page. It has all of
the code
that you need to get the above done. You'll want to change the port number from
what it uses to 8081. You'll also want to change the text it sends to the
browser from what it reads to "I have items".
See if you can figure that out on your own. You'll know you're done when you
open up your browser to http://localhost:8081/ (or refresh it because
it's
already there) and see the following.
Phase 3: Understand the code
Hopefully, your code looks similar to the following code.
const http = require('http');

const hostname = '127.0.0.1';
const port = 8081;

const server = http.createServer((req, res) => {
  res.statusCode = 200;
  res.setHeader('Content-Type', 'text/plain');
  res.end('I have items');
});

server.listen(port, hostname, () => {
  console.log(`Server running at http://${hostname}:${port}/`);
});
Just a reminder: the first three variable declarations and the last call to
listen are boilerplate code. Every time you write a Node.js server, you would
write the same code over and over. The real meat of the application is in the
callback function that you pass to createServer.
(req, res) => {
  // The code here is what matters. This is the stuff
  // that handles requests from the browser and sends
  // content back to it.
}
The first parameter is the "request" object and is of type
http.IncomingMessage (link). The second parameter is
the "response" object and is of type http.ServerResponse (link).
In the code that you wrote, you set the status code of the response to 200 which
means "OK", if you recall. Then, you set the content type of the content of the
response to "text/plain" which means the browser should just show the content
as plain text. Finally, you use the end method to send some content and end
the response.
That last part is very important. If you don't end the response, the browser
will just hang, waiting, expecting more from your server.
In this project, you will use more methods and properties of the
IncomingMessage and ServerResponse objects to get your application working.
Phase 4: Showing images
In the assets/images directory of this project are four images that your
server should be able to show. (And more, if you add more.)
A normal thing to do is to translate a URL to a path relative to your
application's root directory. For example, say you typed the following URL into
your browser.
http://localhost:8081/images/thread.jpeg
It would make sense to have the server send back the content of
assets/images/thread.jpeg so the browser can show it. That's what you will
do in this step, but for any of the images.
You'll need a way to read the contents of each file. The modern way to do this
is to use the Promises-based portion of the file system library. At the top of
your index.js, import the readFile function from the "promises" property
of "fs" library.
const { readFile } = require('fs').promises;
You will use the await keyword with that function, so you need to change the
signature of the callback method that you pass to the createServer method.
Note the addition of the async keyword before the parameter list.
const server = http.createServer(async (req, res) => {
Again, you will map requests for images to the corresponding file in the
images directory. It looks like this.
http://localhost:8081/images/filename.ext
                     \__________________/
                              |
                 +------------+
          _______|_________
         /                 \
./assets/images/filename.ext
If the image exists, you'll send the contents of the image to the browser. If it
does not, then you will tell the browser that it does not exist by sending a 404
NOT FOUND status code.
Phase 4a: The happy path
To determine if the path is one that you want, at the top of your async
callback, put an if statement that tests if the req.url property (which is a
string) starts with "/images/". Replace the comment below to do that.
const server = http.createServer((req, res) => {
  if (/* req.url start with "/images" */) {

  }


  res.statusCode = 200;
  res.setHeader('Content-Type', 'text/plain');
  res.end('I have items');
});
If the test passes, that means that req.url will contain a string like
"/images/thread.jpeg". That means that you will want to load the file from
"./assets/images/thread.jpeg" which is the concatenation of the string
"./assets" and the value of req.url. This code goes inside the if block.
const imageFilePath = './assets' + req.url;
const imageFileContents = await readFile(imageFilePath);
Notice that you did not specify 'utf-8' as part of the readFile call.
That's because the content of an image file is not UTF-8 encoded text.
Instead, it's binary. This way without the encoding just returns the raw data
that is then sent to the browser.
After that, you need to should set the status code of the response to 200 to
indicate everything is OK. Then, you need to set the content type which takes a
little bit of figuring, so you can delay that for just a moment. Assume that the
browser has requested an image in the JPEG format. Finally, you end the response
by sending the data of the file that you read.
Add this code inside the if block after reading the file's contents.
res.statusCode = 200;
res.setHeader('Content-Type', 'image/jpeg');
res.end(imageFileContents);
return;
The return at the end prevents any other code after it to run, that code at
the bottom that sends back plain text.
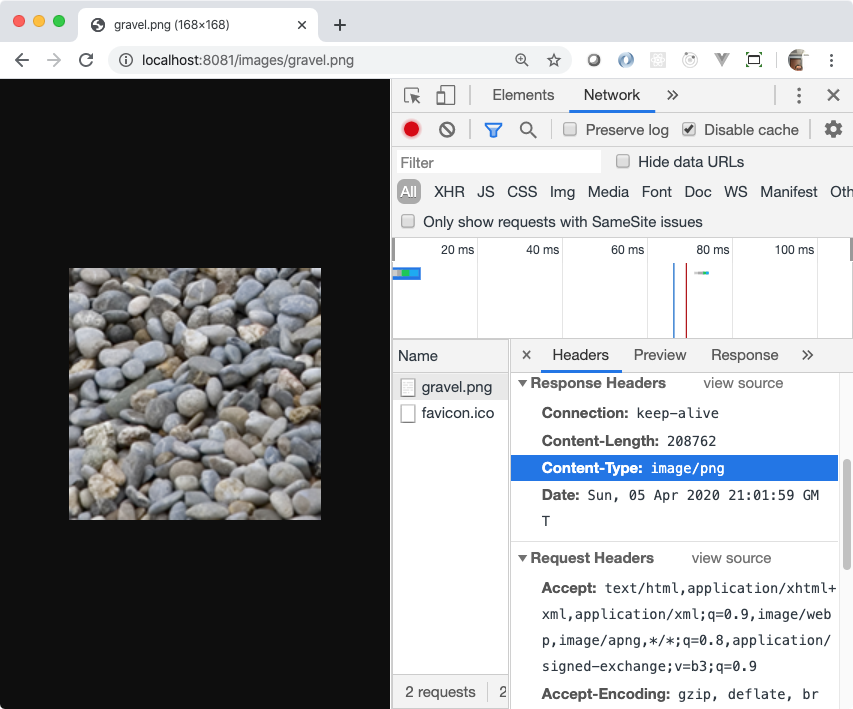
You should now be able to see any of the following in your browser!
- http://localhost:8081/images/thread.jpeg
- http://localhost:8081/images/horseshoe.jpeg
- http://localhost:8081/images/lint.jpeg
Most likely, you can also see the following image, too.
That's because browsers are really for giving. Even though you tell the browser
that you are sending JPEG data with the content type "image/jpeg", the browser
inspects the data and figures out it's an image in the PNG format. But, you
should not rely on the forgiveness of the browser. Instead, you should determine
the type of image format the file contains from the file extension, either
".jpeg" or ".png". Then, you send back "image/jpeg" or "image/png" based on the
file extension.
You can use the built-in "path" library to determine the file extension. Then,
you can use that information to send back the correct image format type in the
setHeader method.
At the top of the index.js file, import the "path" library.
const path = require('path');
Here's a link to the "path" library: https://nodejs.org/api/path.html. Find the
method that will extract the file extension from a path. Then, use that in
your code to send back the correct image type.
const fileExtension = /* Use the path library to get the file extension */;
const imageType = 'image/' + fileExtension.substring(1);
res.statusCode = 200;
res.setHeader('Content-Type', imageType); // Use the image type
Make sure you still see "I have items" when you go to http://localhost:8081.
Phase 4b: No image found
Try accessing this URL: images/unknown.png. You will see
an error message in your console about an unhandled promise rejection not being
able to open './assets/images/unknown.png'. Worse yet, the browser is just
hanging. That's because this line of code:
const imageFileContents = await readFile(imageFilePath);
threw an error, it wasn't handled, and the end method never gets called on the
response object. That means the browser just waits and waits and waits.
If you get a request for an image that does not exist, you can just catch this
error and send back a 404 and no content. Replace that single line of code
above with this block of code.
Wrap that line of code above in a try/catch block. In the catch block,
set the status code of the response to 404. Then, just call the end method
of the response with no parameters. The last statement of the catch block
should be a return; statement to prevent other code from running after you
handle this error.
You'll have to fix the declaration of the imageFileContents variable so that
it works.
Refresh the browser. You should now get a 404 page when you try to access an
image that does not exist. You should see the images that do exist when you go
to their corresponding URLs.
Make sure you still see "I have items" when you go to http://localhost:8081.
Phase 5: Showing a static HTML page
Here's some HTML that shows a form that you will use to add new items to the
database. You will serve this statically. That means you won't change any of
its contents. Instead, you'll just read the file from disk and send it to the
browser.
<!DOCTYPE html>
<html lang="en">
<head>
  <meta charset="UTF-8">
  <title>Add an item</title>
</head>
<body>
  <header>
    <a href="/">Back to the main page</a>
  </header>
  <main>
    <form method="post" action="/items">
      <div>
        <label for="name">Name</label>
        <input type="text" name="name" id="name" required>
      </div>
      <div>
        <label for="description">Description</label>
        <textarea name="description" id="description" required></textarea>
      </div>
      <div>
        <label for="amount">Starting amount</label>
        <input type="number" name="amount" id="amount" required>
      </div>
      <div>
        <button type="submit">Create a new item</button>
      </div>
    </form>
  </main>
</body>
</html>
You'll learn a lot more about forms, this week. There are three things to note
about this form.
- The "method" attribute of the
formelement is "post" which means the value
ofreq.methodin our request handler will be "POST". (It is always
uppercase when read from thereq.methodproperty.) - The "action" attribute of the
formelement is "/items". That will be the
value ofreq.urlthat you will need to check when you want to handle the
form submission. - The "name" attribute of the
inputandtextarea(and all form elements) are
the keys that we will use to get the values that a person supplies by typing
into the form.
Create a views directory in the root of your project. Save the HTML into a
file there named add-item.html.

To serve this HTML, create a new if block that checks to see if the value of
the req.url property is equal to "/items/new". If it is, then do what you did
with the images. The path to the HTML file should be "./views/add-item.html".
Read the file's contents. Set the status code to 200. Set the content type to
"text/html". Send the content of the file to the browser and end the response.
Use a return; statement to make sure no other code runs.
When you get that working, you should be able to navigate to
http://localhost:8081/items/new and see this.

Phase 6: First step in dynamic content
Navigate your browser back to http://localhost:8081 where you see "I
have
items". (If that's not working, figure out how it broke and fix it.) Now, you
will query the database for the number of items in it and report it. Instead of
seeing "I have items", it should report something like "I have 4 items".
This is primarily Sequelize code. At the top of index.js, import the Item
model.
const { Item } = require('../models');
Down at the bottom of your callback after your if blocks and before the line
that reads res.statusCode = 200;, use the findAll method of the Item model
to get all of the items in the database. That should return an array of the
objects. Use the length of that array to show the current number of items in the
database by changing res.end('I have items'); to include the number of items.

It may surprise you to learn that this is really what most Web applications do.
Read some data from a database. Use that data to generate some content. Send
the content to the browser. That's the simple recipe.
Do something real quick before the next phase. Instead of serving plain text,
here, change that content type to serve HTML. Then, in whatever string you're
passing to the res.end method, add this HTML snippet at the beginning of it so
you can easily get to the "add a new item" form.
<div><a href="/items/new">Add a new item</a></div>

Test the link by clicking on it. It should take you to the form.
Phase 7: Handling the adding of an item
Now's the time to handle the adding of an item from that form! Click the link
to get to the add the form or navigate to http://localhost:8081/items/new in
your browser. If you fill out the form and click the button, it just takes you
back to the main page and doesn't do anything. It's time to change that.
Add a new if block that checks that both of these conditions are true:
- The value of
req.urlis equal to "/items" - The value of
req.methodis equal to "POST"
Inside that if block is where you will handle the data that someone sends to
the server through the form. You'll use it to create a new Item and save it to
the database. Then, you'll redirect back to the main page.
Phase 7a: Getting the submitted data
Open up your developer tools. On the Network tab, click the "Preserve log"
checkbox above the timeline. Then, fill out the form and click the "Create a new
item" button. That will make the request. Select the "items" entry in the list
of network requests below the timeline. You should see a section entitled
Form Data. Click the "view source" link.

What you see is likely like this, but with whatever values you put in the
fields.
name=Shoe&description=I+have+one+shoe+that+I+cant+seem+to+find+its+pair.+So%2C+I+guess+I+have+one+of+those.&amount=1
That's the content that is sent with the HTTP request to your server. The full
HTTP request looks something like
POST /items HTTP/1.1
Host: localhost:8081
Content-Type: application/x-www-form-urlencoded
Content-Length: 116
... more headers ...

name=Shoe&description=I+have+one+shoe+that+I+cant+seem+to+find+its+pair.+So%2C+I+guess+I+have+one+of+those.&amount=1
That's the "URL encoded" format that you read about in the Five Parts Of A URL
reading. You'll parse that in the next step. What you have to do, now, is get it
from the IncomingMessage object. That object is a readable stream, so you will
read the bytes from the stream and turn them into a string to use in the next
step.
When your callback is invoked by the server object, it has only read the
headers portion of the HTTP request. The body of the HTTP request (if there is
one) could still be traveling over the airwaves and wires from your computer to
the server. This way, your Web application can look at the values in the headers
and determine whether or not it wants to even respond. Maybe the content length
is 400Gb. You don't want your server spending however long it takes to read all
of that data, so you can just end it.
To do this easily, you will use a variety of the for loop that works with
asynchronous iterable values as well as normal one. It is the for
await...of
loop. Like the for of loop, it loops over values rather than indexes. But, the
value after the of can return Promises which the for loop will wait on for
them to resolve before invoking the block of code.
That's a lot of words. Here's what it looks like. Put this in your if block
that handles "POST /items".
let body = '';
for await (let chunk of req) {
  body += chunk;
}
// body now contains all of the data
// from the request
This works because req is an IncomingMessage message object which inherits
from ReadableStream which implements the asynchronous iterator
property.
Phase 7b: Parsing the submitted data
Now that you have all of the data in the body variable, it's time to split it
up into the data that you want. From the form, it will look like this as a raw
string:
name=value1&description=value2&amount=value3
Use string manipulation to break that into its separate pieces so that you can
access each of key value pairs.
- Split the string on ampersands, first.
- Split each value from the previous step on equal signs.
To handle the encoded values on the right side of the equal sign, it is a
two-step process:
- Replace each of the "+" characters with a space. You have to use a global
regular expression to do this with thereplacemethod because JavaScript
will only replace the first occurrence in the string without a global
regular expression. If the value is in a variable nameds, you would call
s.replace(/\+/g, ' ')to replace all of the "+' characters in a string with
spaces. - After replacing the plusses, take the value and pass it to the
decodeURIComponentfunction which will go about translating the percent-sign
encoded values into single characters.
Phase 7c: Create an Item
You should have the data broken into pieces that you can now access. Use your
Item model to build and save (or create) a new item.
Phase 7d: Redirect the browser
Redirecting the browser to go to another URL is a two-step process, too. You
send back status code 302. You also set the header "Location" to the URL that
you want it to navigate to. For this project, set the "Location" to "/". Then
end the response.
Make sure that you use a return statement or something to prevent the default
code at the bottom of your request handler from running.
Phase 8: Generate dynamic content
At the bottom of your handler, you've already queried the items in your Item
objects from the database. Now, it is time to show the items rather than just
displaying how many are in the database.
You can use the write method of the ServerResponse object in the res
to
write your HTML to the browser as you're generating it. Your code may look
something like this.
const items = await Item.findAll();
res.statusCode = 200;
res.setHeader('Content-Type', 'text/html');
res.end(`
  <div><a href="/items/new">Add a new item</a></div>
  I have ${items.length} items
`);
Take a look at this code which just expands on the previous block. It writes the
proper beginning of an HTML document, then writes the dynamic content, then ends
it with the proper end of an HTML document.
const items = await Item.findAll();
res.statusCode = 200;
res.setHeader('Content-Type', 'text/html');
res.write(`
  <!DOCTYPE html>
  <html lang="en">
  <head>
    <meta charset="UTF-8">
    <title>Inventory</title>
  </head>
  <body>
    <header>
      <div><a href="/items/new">Add a new item</a></div>
    </header>
    <main>`);

res.write(`I have ${items.length} items`);

res.end(`
    </main>
  </body>
  </html>`);
In the place where there's only the one line of dynamic content, change it to
have something else, something that shows the name of the item, the amount of
them you have, and the associated image, if imageName is not null or
undefined.
The following screenshot shows where an open table tag has been added to the
end of the string for the first write, a close table tag has been added to the
beginning of the string of the res.end call, and looping is used to create a
new table row (tr) with table data (td) for each of the properties of the
Item.
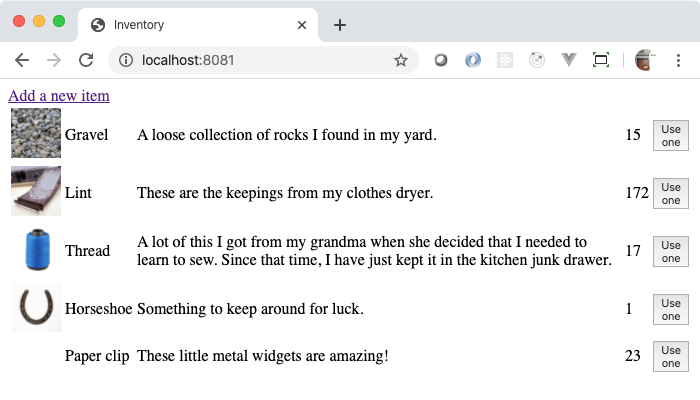
It looks, in part, like this.
for (let item of items) {
  res.write(`
    <tr></td>
  `);

  // Only write an IMG tag if there is a value
  // in imageName

  res.write(`
    </td>

    <!-- Write more TDs here with the details of the item -->

    <td>`);
  if (item.amount > 0) {
    res.write(`
      <form method="post" action="/items/${item.id}/used">
        <button type="submit">Use one</button>
      </form>
    `);
  }
  res.write(`</td>
  </tr>`);
}
As seen above, for each item, you should also create a form that has the
following content for items with an amount greater than 0.
<form method="post" action="/items/«item id»/used">
  <button type="submit">Use one</button>
</form>
That's the last handler that you'll write to complete the project!
Phase 9
When there is a POST request to the path "/items/«item id»/used", you want to
reduce the amount by 1 of the item specified by the «item id» in the path. Write
another if block that handles that HTTP request. Parse the id from the path.
Use that id to get the Item from the database. Reduce the amount by 1. Save the
Item back to the database. Redirect back to "/".
Complete!
That was quite a ride! You created a full-stack Web application! You pulled data
from a database to generate HTML. You sent the HTML to the browser. You handled
requests, both GET and POST, from the browser to interact with and modify the
data in the database. This is literally what Web developers do every single day.
Except with better tools. Tools like you learn about tomorrow.
<=(Express)==>
- <=(Node HTTP Servers)=>
- Regular Expressions Learning Objectives
- HTTP Full-Stack Learning Objectives
- The Uniform Resource Locator (URL)
- Regular Expressions Cheat Sheet
- RegexOne Practice
- HTTP
Full-Stack Project
- Project overview
- Get started
- Phase 1: Installing one tool
- Phase 2: Getting the server started
- Phase 3: Understand the code
- Phase 4: Showing images
- Phase 4b: No image found
- Phase 5: Showing a static HTML page
- Phase 6: First step in dynamic content
- Phase 7: Handling the adding of an item
- Phase 8: Generate dynamic content
- Phase 9
- Complete!
- <=(Express)==>
- Express Learning Objectives
- Pug Template Learning Objectives
- Moving Into the Express Lane
- Templating - Meet Pug!
- Digging Into the Pug Template Syntax
- Exploring Route Paths
- Express Routers
- Routing Roundup Project
- <=(Form Handeling)==>
- HTML Forms Learning Objectives
- HTML Forms: An Introduction
- HTML Forms in Express
- Data Validation
- Express Middleware
- Protecting forms from CSRF
- Formative Forms Project
- <=(Express)==>
Express Learning Objectives
Express is the de facto standard for building HTTP applications with Node.js.
When you complete this lesson, you should be able to
- Send plain text responses for any HTTP request
- Use pattern matching to match HTTP request paths to route handlers
- Use the Pug template engine to generate HTML from Pug templates to send to the
browser - Pass data to Pug templates to generate dynamic content
- Use the
Routerclass to modularize the definition of routes
Pug Template Learning Objectives
Using Pug.js helps reduce the overall creation and maintenance of source code
for HTML generation. It is one of many template engines supported by Express.js
and remains one of the most popular. At the end of this lesson, you will be able
to effectively use Pug.js to
- Declare HTML tags and their associated ids, classes, attributes, and content
- Use conditional statements to determine whether or not to render a block
- Use interpolation to mix static text and dynamic values in content and
attributes - Use iteration to generate multiple blocks of HTML based on data provided to
the template
Moving Into the Express Lane
In an earlier lesson, you created a simple HTTP server using JavaScript and
Node.js. That HTTP server, or web application, returned a simple response based
upon the incoming request's URL (and HTTP method in one case). For example, a
request to the URL http://localhost:300/OK returned a 200 OK HTTP response
status code.
Overall, this was easy to do using Node's native APIs, though the requirements
were relatively straightforward. Using Node to create a web application with
features commonly found in websites unfortunately requires a fair amount of
boilerplate code (i.e. verbose, repetitive code). This can slow down and
distract developers from working on more important tasks.
Enter Express, a popular Node.js framework for building web applications.
Express aims to make common web development tasks easier to implement by
reducing the amount of boilerplate code you need to write. This allows you to
focus on the things that makes your web application special. At the same time,
Express is, in its own words, unopinionated and minimalistic, giving you the
flexibility to decide what's best for your situation.
As an introduction to Express, let's create a simple web application. Your
application will return a plain text response containing "Hello from Express!"
for any request to http://localhost:8081/.
When you finish this article, you should be able to:
- Use the
express()function to create an Express application; - Recall that routing is determining how an application responds to a client
request to a specific URI (or path) and HTTP method combination; - Use the Application
get()method to define a route that handlesGET
requests; - Use the Response object
res.send()method to send a plain text response to a
client; and - Use the
app.listen()method to start a server listening for HTTP connections
on a specific port.
Installing Express
Before you can use Express to create a web application, you need to install it
using npm. Open a terminal or command prompt window, browse to your project's
folder, and initialize npm by running the following command:
npm init -y
You'll now have package.json and package-lock.json files in the root of your
project. The package.json file keeps track of your application's
dependencies—npm packages that your application needs to successfully start and
run.
Run the following command to install Express 4.0:
npm install express@^4.0.0
The package.json file will now list Express as a dependency:
{
 "name": "my-project-folder-name",
 "version": "1.0.0",
 "description": "",
 "main": "index.js",
 "scripts": {
   "test": "echo \"Error: no test specified\" && exit 1"
 },
 "keywords": [],
 "author": "",
 "license": "ISC",
 "dependencies": {
   "express": "^4.17.1"
 }
}
At the time of this writing, the latest version of Express 4.0 is
4.17.1.
While newer minor or patch versions of Express 4.0 should work fine, newer
major versions (5.0+) might not work as expected. The caret character (^)
the precedes the version number in thepackage.jsonfile (^4.17.1)
instructs npm to allow versions greater than4.17.1and less than5.0.0.
Git and the node_modules folder
In an earlier lesson, you learned that when using npm install to install an
npm package locally into your project, npm downloads and installs the specified
package to the node_modules folder. Over time, as you install dependencies,
the node_modules folder tends to grow to be very large, containing many
folders and files.
If you're using Git for source control, it's important to add a .gitignore
file to the root of your project and add the entry node_modules/ so that the
node_modules folder won't be tracked by Git.
As alternative to creating your own
.gitignorefile, you can use GitHub's
comprehensive.gitignorefile for Node.js projects.
Creating an Express application
Now you're ready to create your Express application!
Add a file named app.js to your project folder and open it in your code
editor. Use the require directive to import the express module and assign it
to a variable named express. The express variable references a function
(exported by the express module) that you can call to create an Express
application. Assign the return value from the express function call to a
variable named app:
const express = require('express');

// Create the Express app.
const app = express();
The app variable holds a reference to an Express Application (app) object.
You'll call methods on the app object as you build out your web application.
Handling requests
Next, you need to configure the routing for your application.
The process of configuring routing is determining how an application should
respond to a client request to an endpoint—a specific URI (or path) and HTTP
method combination. For example, when a client makes a GET request to your
application by browsing to the URL http://localhost:8081/, it should return
the plain text response "Hello from Express!".
Do you remember the parts of a URL? In the URL
http://localhost:8081/,
the protocol ishttp, the domain islocalhost, the port is8081(we'll
see in a bit how to configure the port for your application), and the path is
/.
The Express Application (app) object contains a collection of methods for
defining an application's routes:
get()- to handleGETrequestspost()- to handlePOSTrequestsput()- to handlePUTrequestsdelete()- to handleDELETErequests
GET and POST are two of the most commonly used HTTP methods, followed by
PUT and DELETE.
See the Express documentation for a complete list of the available routing
methods.
To define a route to handle GET requests, call the app.get() method passing
in the route path and a route handler function:
app.get('/', (req, res) => {
  // TODO Send a response back to the client.
});
Express provides a lot of flexibility with the format of the route path. A route
path can be a string, string pattern, regular expression, or an array containing
any combination of those. For now, you'll just use a string, but in later
articles you'll see how to use the other options.
The route handler function is called by Express whenever an incoming request
matches the route. The function defines two parameters, req and res, giving
you access respectively to the Request and Response objects. The Request (req)
object is used to get information about the client request that's currently
being processed. The Response (res) object is used to prepare a response to
return to the client.
To send a plain text response to the client, call the res.send() method
passing in the desired content:
app.get('/', (req, res) => {
  res.send('Hello from Express!');
});
Here's the code for your application so far:
const express = require('express');

// Create the Express app.
const app = express();

// Define routes.

app.get('/', (req, res) => {
  res.send('Hello from Express!');
});
Listening for HTTP connections
Great job so far! Now you need to start the server listening for HTTP
connections from clients. To do that, call the app.listen() method passing in
the desired port to use and an optional callback function:
const port = 8081;

app.listen(port, () => console.log(`Listening on port ${port}...`));
The callback function will be called when the server has started listening for
connections. Logging a message to the console gives you an easy way to see when
the server is ready for testing.
Here's the complete code for your application:
const express = require('express');

// Create the Express app.
const app = express();

// Define routes.

app.get('/', (req, res) => {
  res.send('Hello from Express!');
});

// Define a port and start listening for connections.

const port = 8081;

app.listen(port, () => console.log(`Listening on port ${port}...`));
Testing your application
To test your application, open a terminal or command prompt window, browse to
your project's folder, and run the following command:
node app.js
If your application starts successfully, you'll see the text "Listening on port
8081…" displayed in the terminal or command prompt window. Next, open a web
browser and browse to the address http://localhost:8081/. You should see the
text "Hello from Express!" displayed in the browser.
If you see the expected text, congrats! If you don't, double check the
following:
- Make sure that you started your application by running the command
node app.js. - Double check that the URL you entered into your browser's address bar is
http://localhost:8081/. - Check the terminal or command prompt window to see if an error is occurring.
What you learned
In this article, you learned
- how to use the
express()function to create an Express application; - that routing is determining how an application responds to a client request to
a specific URI (or path) and HTTP method combination; - how to use the Application
get()method to define a route that handlesGET
requests; - how to use the Response object
res.send()method to send a plain text
response to a client; and - how to use the
app.listen()method to start a server listening for HTTP
connections on a specific port.
See also…
As you learn about Express, you'll find it helpful to explore Express' official
documentation at expressjs.com.
Templating - Meet Pug!
In a previous article, you learned how to use the Response object's res.send()
method to send a plain text response to the client. Sending plain text is, well,
plain! A much more common content format when sending a response to browser
clients is HTML.
You could use the res.send() method to send a string of HTML content to
the client:
app.get('/', (req, res) => {
  res.send(`
    <!DOCTYPE html>
    <html>
      <head><title>Welcome</head></title>
      <body>
        <h1>Hello from Express!</h1>
      </body>
    </html>
  `);
});
While it works, using this technique is tedious and prone to errors. Can you
spot the error in the above HTML (hint: look at the nesting of the HTML
elements)?
Luckily, there's a better way. Developers have used templates (files that
contain markup and code) to render HTML content for many years (that's
practically centuries in internet time!) Express integrates with many popular
templating engines (libraries that provide support for writing templates). In
this article you'll learn how to use the popular Pug templating engine to
render HTML content.
When you finish this article, you should be able to:
- Create a Pug template that contains one or more variables;
- Use the
app.set()method and theview engineapplication setting property
to configure Express to use the Pug template engine; and - Use the Response object
res.render()method to render a Pug template to send
an HTML response to a client.
What is a template?
A template allows developers to easily combine static and dynamic content.
Templates are typically written using a special, proprietary syntax to make it
as easy as possible for developers to create content. Here's an example of a
simple Pug template:
html
  head
    title Welcome
  body
    h1 Welcome #{username}!
Notice the lack of angle brackets (i.e. < and >) in this example on the
html, head, title, body, and h1 elements.
You also don't have to close elements. Pug will take care of that for you. It
uses indents to determine which elements are children of other elements. In the
above example, head is a child of html because head is indented more
than
html. When Pug turns that into HTML, it will place the <head>...</head>
element inside the <html>...</html> element. Look at all the typing that Pug
has saved you!
Element content is provided just to the right of the element name. The content
for the title element is "Welcome" and the content for the h1 element is
"Welcome #{username}!".
At runtime, the templating engine combines data (often retrieved from a
database) with a template to render the content for the response to return to
the client. In the above template, Pug will replace the text #{username} with
the username variable value that you give it when you tell express to render
that template. Assuming that the username variable is set to the value
mycoolusername, Pug would render the following HTML:
<html><head><title>Welcome</title></head><body><h1>Welcome mycoolusername!</h1></body></html>
Pug, by default, removes indentation and all whitespace between elements.
In some rare cases you might need to manually control how whitespace
is handled. For information on how to do this, see the official Pug
documentation.
Rendering a simple template
Before we further explore Pug's template syntax, let's see how to use Express to
render a simple template to send a response to a client.
Setting up the project
Create a folder for your project, open a terminal or command prompt window,
browse to your project's folder, and initialize npm. (You use the -y flag so
that you don't have to answer those annoying questions. npm will just use
default values for everything.)
npm init -y
Then install Express using npm.
npm install express
Now you're ready to create the application. Add a file named app.js to your
project folder. Import the express module and assign it to a variable named
express, then call the express function and assign the return value to a
variable named app:
const express = require('express');

// Create the Express app.
const app = express();
In the previous article, you used the app.get() method to define a route for
handling GET requests. As an alternative to the app.get() method, Express
provides a method named all() that can be used to define a route that handles
any HTTP method.
Call the app.all() method, passing in an asterisk (*) for the route path and
a route handler function that calls the res.send() method to send a plain text
response to the client:
// Define a route.
app.all('*', (req, res) => {
  res.send('Hello from the Pug template example app!');
});
Remember that the route handler function is called by Express whenever an
incoming request matches the route. The function defines two parameters, req
and res, giving you access respectively to the Request and Response objects.
The asterisk (*) in the route path is a wildcard character that will match any
number of characters in the incoming request's URL path (e.g. /, /about,
/about/foo, and so on). Combining this route path with the get.all() method
defines a route that will match any incoming request, regardless of its path or
HTTP method.
This approach is unorthodox and not commonly seen in real world applications.
Generally speaking, you should prefer to use theappmethods that map to
individual HTTP methods. We're using theapp.all()in this article to
demonstrate the flexibility that Express provides when defining routes.
When a route can match any incoming request it can be helpful to know the
current request's method and path. The Request object passed into the route
handler function via the req parameter provides information about the incoming
request. You can log two Request object properties in particular, req.method
and req.path, to the console to see the current request's method and path:
// Define a route.
app.all('*', (req, res) => {
  console.log(`Request method: ${req.method}`);
  console.log(`Request path: ${req.path}`);

  res.send('Hello from the Pug template example app!');
});
The Express Request and Response objects provide a number of helpful
properties and methods for working with HTTP requests and responses. To learn
more, see the official Express docs for the Request and
Response objects.
Now start the server listening for HTTP connections by calling the
app.listen() method:
// Define a port and start listening for connections.

const port = 8081;

app.listen(port, () => console.log(`Listening on port ${port}...`));
Here's what the code for your application should look like at this point:
const express = require('express');

// Create the Express app.
const app = express();

// Define a route.
app.all('*', (req, res) => {
  console.log(`Request method: ${req.method}`);
  console.log(`Request path: ${req.path}`);

  res.send('Hello from the Pug template example app!');
});

// Define a port and start listening for connections.

const port = 8081;

app.listen(port, () => console.log(`Listening on port ${port}...`));
To test your application, open a terminal, browse to your project's folder, and
run the command:
node app.js
The text "Listening on port 8081…" should display in the terminal or command
prompt window. Open a web browser and browse to the address
http://localhost:8081/ to confirm that the application sends a response
containing the plain text "Hello from the Pug template example app!".
Creating a template
Templates are stored in the views folder by default. To create a template, add
a folder named views to your project, then add a file named layout.pug
containing the following code:
html
  head
    title= title
  body
    h1= heading
The assignment operator (=) following the title and h1 element names
instructs Pug to set the content for those elements respectively to the title
and heading variables.
You'll learn more about how to render data in a Pug template in a later
article.
Configuring Express to use a template engine
Before you can use the Pug template engine in an Express application, you need
to install it:
npm install pug@^2.0.0
To configure Express to use Pug as its default template engine, call the
app.set() method and set the view engine application setting property to the
value pug:
const express = require('express');

// Create the Express app.
const app = express();

// Set the pug view engine.
app.set('view engine', 'pug');
The
view engineproperty is just one of the available application settings.
For a list of available settings see the Express documentation.
Setting the view engine application setting property isn't required, but it
has the following benefits:
- It makes it clearer to code reviewers that your application is using the Pug
template engine; and - You don't have to supply the file extension of the template when rendering a
template (we'll see how this works next).
Rendering a template
Now you're ready to update your application to use your template. Update your
route handler function to call the Response object's res.render() method,
passing in the name of the template:
// Define a route.
app.all('*', (req, res) => {
  console.log(`Request method: ${req.method}`);
  console.log(`Request path: ${req.path}`);

  res.render('layout');
});
At this point, if run and test your application, you won't see any content
displayed in the browser.
If you left your application running in the terminal or command prompt window,
you'll need to stop and restart it so that Node picks up your latest code
changes. To do that, pressCTRL+Cto stop the application and runnode app.jsto restart the application.
If you view the source for the page in the browser, you'll see the following
HTML:
<html><head><title></title></head><body><h1></h1></body></html>
Notice that the title and h1 elements don't have any content. The template
expects data for the title and heading variables, but you're currently not
passing any data. To fix that, pass an object literal containing title and
heading properties as a second argument to the res.render() method call:
// Define a route.
app.all('*', (req, res) => {
  console.log(`Request method: ${req.method}`);
  console.log(`Request path: ${req.path}`);

  const pageData = { title: 'Welcome', heading: 'Home' };
  res.render('layout', pageData);
});
Now if run and test your application, you should see the expected content
displayed in the browser.
Here's what the code for your application should look like after updating it to
render the Pug template:
app.js
const express = require('express');

// Create the Express app.
const app = express();

// Set the pug view engine.
app.set('view engine', 'pug');

// Define a route.
app.all('*', (req, res) => {
  console.log(`Request method: ${req.method}`);
  console.log(`Request path: ${req.path}`);

  const pageData = { title: 'Welcome', heading: 'Home' };
  res.render('layout', pageData);
});

// Define a port and start listening for connections.

const port = 8081;

app.listen(port, () => console.log(`Listening on port ${port}...`));
views/layout.pug
html
  head
    title= title
  body
    h1= heading
What you learned
In this article, you learned
- how to create a Pug template that contains one or more variables;
- how to use the
app.set()method and theview engineapplication setting
property to configure Express to use the Pug template engine; and - how to use the Response object
res.render()method to render a Pug template
to send an HTML response to a client.
Digging Into the Pug Template Syntax
Now that you've seen how to create and render a simple Pug template, let's
explore Pug's syntax in more depth. Learning Pug's syntax takes time and effort,
but the payoff is that writing and maintaining templates will generally take
less time overall.
When you finish this article, you should be able to use the Pug template syntax
to:
- Render elements;
- Set element attribute values;
- Set element class and ID attribute values;
- Set element content from a variable;
- Set an element attribute value from a variable;
- Inject a variable value into text using interpolation;
- Iterate the elements in an array to generate content; and
- Conditionally display content.
Setting up a sandbox application
Exercise your brain! Use the following application as a sandbox to test
and experiment with the Pug syntax as it's introduced in this article. Doing
this will help you to remember what you've learned.
Create a folder for your project, open a terminal or command prompt window,
browse to your project's folder, and initialize npm:
npm init -y
Then install Express 4.0 and Pug 2:
npm install express@^4.0.0 pug@^2.0.0
Add a folder named views to your project, then add a file named layout.pug
containing the following code:
html
  head
    title= title
  body
    h1= heading
Then add a file named app.js to your project folder containing the following
code:
const express = require('express');

// Create the Express app.
const app = express();

// Set the pug view engine.
app.set('view engine', 'pug');

// Define a route.
app.all('*', (req, res) => {
  console.log(`Request method: ${req.method}`);
  console.log(`Request path: ${req.path}`);

  res.render('layout', { title: 'Pug Template Syntax Sandbox', heading: 'Welcome to the Sandbox!' });
});

// Define a port and start listening for connections.

const port = 8081;

app.listen(port, () => console.log(`Listening on port ${port}...`));
To test your application, open a terminal or command prompt window, browse to
your project's folder, and run the command:
node app.js
The text "Listening on port 8081…" should display in the terminal or command
prompt window. Open a web browser and browse to the address
http://localhost:8081/ to confirm that the application sends a response that
displays an HTML <h1> element containing the text "Welcome to the Sandbox!".
Rendering elements
Consider the following excerpt from a Pug template:
ul
  li Item A
  li Item B
  li Item C
This renders an HTML unordered list:
<ul>
  <li>Item A</li>
  <li>Item B</li>
  <li>Item C</li>
</ul>
Text at the beginning of a line (with or without white space) represents an HTML
element. Any text included after the element name will be added as the element's
inner text. To add an element as a child element, simply indent the line for the
child element by one or more spaces (two spaces is a common convention).
Whether you decide to use two or four spaces for indenting elements, it's
important to keep your indentation consistent throughout the template. Not
doing so might result in Pug throwing an error at runtime.
Setting element attribute values
To set attribute values on an element, follow the element name with a pair of
parentheses containing one or more attribute name/value pairs:
a(href='/about' class='menu-button') About
Renders to:
<a href="/about" class="menu-button">About</a>
Setting class and id
attribute values
Element class and ID attributes are very common attributes to set, so Pug
provides a shortcut syntax for each. You can set an element's class attribute
using the syntax .classname and an element's id attribute using #idname:
div#container
  a.button Cancel
Renders to:
<div id="container">
  <a class="button">Cancel</a>
</div>
You can also combine a class name with an ID name or chain multiple class names:
div#container.main
  a.button.large Cancel
Renders to:
<div id="container" class="main">
  <a class="button large">Cancel</a>
</div>
This example can be further condensed. <div> elements are so common, Pug
allows you to remove the <div> element's name:
#container.main
  a.button.large Cancel
Rendering data
As you saw in an earlier article, you can provide data to a template by passing
an object to the res.render() method:
res.render('layout', { firstName: 'Grace', lastName: 'Hopper' });
Properties on the object passed as the second argument to the res.render()
method are defined within a template as local variables, which can be used to
set element content:
ul
  li= firstName
  li= lastName
Which would render to:
<ul>
  <li>Grace</li>
  <li>Hopper</li>
</ul>
Variables can also be used to set element attribute values:
form
  div
    label First Name:
    input(type='text' name='firstName' value=firstName)
  div
    label Last Name:
    input(type='text' name='lastName' value=lastName)
Renders to:
<form>
  <div>
    <label>First Name:</label>
    <input type="text" name="firstName" value="Grace"/>
  </div>
  <div>
    <label>Last Name:</label>
    <input type="text" name="lastName" value="Hopper"/>
  </div>
</form>
You can also use interpolation to inject a variable value into text:
p Welcome #{firstName} #{lastName}!
Renders to:
<p>Welcome Grace Hopper!</p>
Notice how Pug's interpolation syntax
#{expression}differs from
JavaScript's string template literal interpolation syntax${expression}. In
a Pug template, the text to the right of the element name is just plain text,
not JavaScript.
Iteration and conditionals
You can even use dynamic data to control the generation of HTML in your
templates. Suppose you pass an array of colors to the res.render() method:
res.render('layout', { colors: ['Red', 'Green', 'Blue'] });
Using that array of values, you can generate an ordered list:
ul
  each color in colors
    li= color
Which renders as:
<ul>
  <li>Red</li>
  <li>Green</li>
  <li>Blue</li>
</ul>
You can also conditionally display content. First, send a boolean value to the
template that indicates if the current user is logged in or not:
res.render('layout', { userIsLoggedIn: true });
Then you can use that boolean variable to determine what content to display:
if userIsLoggedIn
  h2 Welcome!
else
  a(href='/login') Please login
If the userIsLoggedIn variable is true (indicating that the user has logged
in) then the template would render:
<h2>Welcome!</h2>
Otherwise the template would render:
<a href="/login">Please login</a>
What you learned
In this article, you learned how to
- render elements;
- set element attribute values;
- set element class and ID attribute values;
- set element content from a variable;
- set an element attribute value from a variable;
- inject a variable value into text using interpolation;
- iterate the elements in an array to generate content; and
- conditionally display content.
See also…
There's so much more that you can do with Pug! Be sure to take some time to
explore Pug's documentation.
Exploring Route Paths
You've seen that defining route paths in Express using a string is easy to do:
app.get('/about', (req, res) => {
  res.send('About');
});

app.get('/contact', (req, res) => {
  res.send('Contact');
});

app.get('/our-team', (req, res) => {
  res.send('Our Team');
});
You can also easily include child paths:
app.get('/our-team/sf', (req, res) => {
  res.send('Our Team - San Francisco');
});

app.get('/our-team/nyc', (req, res) => {
  res.send('Our Team - New York City');
});
But what if you need to match multiple paths for a single resource? Having to
define a route using a string route path for each variation is time consuming
and difficult to maintain. In some cases, it might be impossible to spell out
every possible variation. For example, what if the variable part of the path
represents the ID of a database record to retrieve? Luckily, Express provides a
wealth of options for defining route paths that you can use to solve virtually
any routing challenge.
When you finish this article, you should be able to:
- Recall that route parameters are named URL segments used to capture values;
- Define a route whose path contains one or more route parameters;
- Recall that a route path can be a string, string pattern, regular expression,
or an array containing any combination of those; - Define a route path using a string pattern; and
- Define a route path using a regular expression.
Getting data from a path
Imagine that you're developing a website for the Best Company Ever. As a
starting point, your project's app.js file contains the following code:
const express = require('express');

// Create the Express app.
const app = express();

// TODO Define routes.

// Define a port and start listening for connections.

const port = 8081;

app.listen(port, () => console.log(`Listening on port ${port}...`));
To follow along, be sure to initialize npm in your project folder (
npm init -y) and install Express (npm install express@^4.0.0). Usenode app.jsto
run the server. Remember that if you leave the server running in the terminal
or command prompt window while you're working, you'll need to stop and restart
it so that Node picks up your latest code changes. To do that, pressCTRL+C
to stop the server and runnode app.jsagain to restart the server.
You need to define your application's first route for a "Product" page that
displays information about a product from the Best Company Ever's catalog. The
product to display is variable—meaning that it depends on the product ID that's
passed via the URL path:
/product/1- displays information for the product whose database ID is1;/product/2- displays information for the product whose database ID is2;- and so on.
Your initial thought is to use a query string parameter for the product ID (e.g.
/product?id=1) instead of including it in the path. But after a bit of
research, you decide
against that approach for SEO (search engine optimization)
reasons.
Defining routes using string based route paths for the first two products gives
you something like this:
app.get('/product/1', (req, res) => {
  res.send('Product ID: 1');
});

app.get('/product/2', (req, res) => {
  res.send('Product ID: 2');
});
This works, but the Best Company Ever is very successful (of course they are…
they're the best company ever!) and they have over 1,000 products in their
catalog. That means you have at least 998 routes left to define! Clearly, using
string based route paths simply won't work. Also, you want to keep your code as
DRY (don't repeat yourself!) as possible.
Leveraging route parameters
Express route parameters are specifically designed for this situation.
A path is divided into segments using forward slashes (/). For example, given
the path /locations/ca/search, locations, ca, and search would
all be
segments. A route parameter is a named path segment that captures the value at
that position in the path. The captured value is available within a route
handler function via the req.params object.
Here's the "Product" page route defined using an id route parameter:
app.get('/product/:id', (req, res) => {
  res.send(`Product ID: ${req.params.id}`);
});
Using this route definition, the following request URL paths all match:
/product/1- displays "Product ID: 1"/product/2- displays "Product ID: 2"/product/asdf- displays "Product ID: asdf"
That's progress! But unfortunately, while 1 and 2 are valid product IDs, the
string asdf is not.
Restricting route parameter matches
By default, a route parameter will match almost any character (exceptions
include a question mark ? which denotes the beginning of the query string and
a slash / which marks the beginning of the next path segment). Given that,
1, 2, and asdf are all valid values.
You can use a regular expression to exert more control over which values will
match. Regular expressions use a language agnostic syntax for matching string
patterns. For example, a dot . represents any character in a regular
expression, so the expression c.t can match cat, cot, or cut,
but not
can nor bat.
There are many other special characters that you can use to match specific
string patterns:
- the special character
\dmatches a single digit (i.e.0through9); and - adding a plus sign
\d+matches one or more digits.
To apply a regular expression to a route parameter, place it in parentheses just
after the route parameter name:
app.get('/product/:id(\\d+)', (req, res) => {
  res.send(`Product ID: ${req.params.id}`);
});
Now the route will only match URL paths that have a number in the route
parameter's position:
/product/1- displays "Product ID: 1"/product/2- displays "Product ID: 2"/product/asdf- displays "Cannot GET /product/asdf" (404 Not Found)
The regular expression has an extra backslash
\in the route path before
\d+because the backslash character is used to escape special characters
within a JavaScript string literal. For more information see the "Escape
notation" section on the MDN Web DocsStringpage.
Now the route parameter only matches a numeric value in the URL path but the
value via the req.params object is still a string. If you need the route
parameter value as a number, you'll need to convert it:
app.get('/product/:id(\\d+)', (req, res) => {
  const productId = parseInt(req.params.id, 10);
  res.send(`Product ID: ${productId}`);
});
For more information on the
parseInt()function, see this page on MDN Web
Docs.
Defining flexible route paths
As you develop websites and web applications, you'll likely find that using a
combination of strings and route parameters to define your routes will cover the
majority of your use cases. Sometimes though, situations will come up that will
require a different approach.
Your next task for the Best Company Ever website is to define a route for their
"Products" page. After spending some time with the internal stakeholders for the
project from the Sales, Marketing, and Customer Support departments, you've
determined that the following use cases and issues all need to be addressed:
- Marketing somehow managed to design and publish advertisements using both
www.bestcompanyever.com/productsandwww.bestcompanyever.com/our-products
as the URLs for the same "Products" page. - Customer Support has noticed that sometimes customers forget the "s" at the
end of "products" and get frustrated when they get a "Page Not Found" error
trying to browse to the URLwww.bestcompanyever.com/product. - Customer Support has also noticed that sometimes customers mistype the word
"products" as "prodcts" or "productts". - Sales would like to allow customers to use "productos" (Spanish for
"products") to make it as easy as possible for everyone to find the "Products"
page.
All of this translates into mapping the following paths to the "Products" page:
/products/our-products/product/prodcts/productts/productos
Having to define a route for each of these paths would be less than ideal.
Luckily, Express provides a number of options for defining route paths including
using
- a string (this is what you've been using up to this point);
- a string pattern;
- a regular expression; or
- an array containing any combination of those.
Let's use these options to develop a solution!
Using a string pattern
Your first attempt at defining the route for the "Products" page looks like
this:
app.get('/products', (req, res) => {
  res.send('Products');
});
Currently, when running the application (node app.js) the only URL that
returns the string "Products" is http://localhost:8081/products (i.e. the path
/products). This makes sense, as our route's path is defined using the string
/products.
You can use a string pattern to define a route path that will match more
incoming request URL paths. The following characters, when used within a string
based route path, behave somewhat like their regular expression counterparts:
- question mark
?- specifies that the previous character can appear zero to
one time - plus sign
+- specifies that the previous character can appear one or more
times - asterisk
*- matches any number of characters (i.e. "wildcard" character)
Looking at your route again, adding a question mark ? after the s in the
path /products specifies that the s can appear zero to one time:
app.get('/products?', (req, res) => {
  res.send('Products');
});
Now your route will match the URL paths /products and /product.
After reviewing the list of paths that you need to match, you notice that you
can add an additional question mark ? after the u:
app.get('/produ?cts?', (req, res) => {
  res.send('Products');
});
Now both the u and the s are effectively optional, allowing the following
URL paths to match:
/products/product/prodcts
Taking it a step further, you add a plus sign + after the t:
app.get('/produ?ct+s?', (req, res) => {
  res.send('Products');
});
That change allows one or more ts to appear in the URL path, allowing the
following URL paths to match:
/products/product/prodcts/productts
And now for the master stroke: you add an asterisk * in between the / and
p:
app.get('/*produ?ct+s?', (req, res) => {
  res.send('Products');
});
Now all of the following URL paths match:
/products/product/prodcts/productts/our-products
Using string patterns to define route paths are useful but fairly limited in
capability. For example, our string pattern based route path has the following
deficiencies:
- The asterisk
*matches the URL path/our-productsbut also literally
anything else between the/andp, including/cool-products,
asdf-products, and so on. - The plus sign
+after thetmatchesttbut alsottt,tttt, and so
on.
Depending on your specific situation, these shortcomings might be something you
can live with. If you can't, you can write a more sophisticated route path using
a regular expression.
Using a regular expression
When defining a route, Express allows you to define your route path using a
regular expression. You can rewrite your original "Products" page route using a
regular expression like this:
app.get(/^\/products\/?$/i, (req, res) => {
  res.send('Products');
});
At this point, only the URL path /products will match.
Regular expressions can be difficult to read and understand. Here's a
step-by-step breakdown, from left to right, of the above regular expression
(don't worry about committing all of this regular expression syntax to memory;
you'll have access to documentation when designing complex regular expression
based routes):
/- Denotes the beginning of the regular expression.^- Indicates that the expression must match the beginning of the URL path
string.\/- Matches a forward slash/. Because forward slashes have special
meaning (they mark the beginning and ending of a regular expression) they must
be escaped with a backslash\.products- Matches the literal stringproducts.\/?- Matches zero or one instance of a forward slash/.- Since you're using the
^and$characters to match the beginning and
ending of the URL path string, you need to add an optional forward slash at
the end of the expression in order to allow for URL paths that have a
trailing forward slash.
- Since you're using the
$- Indicates that the expression must match the ending of the URL path
string./- Denotes the ending of the regular expression.i- Indicates that the regular expression is case-insensitive.
We're just scratching the surface of what's possible with regular expressions.
For more information about regular expressions, see this page on MDN Web
Docs.
Now let's work on extending the regular expression to match more URL paths.
Since the question mark ? character behaves like it does within a string
pattern, you can make the u and the s in products optional like you did
before:
app.get(/^\/produ?cts?\/?$/i, (req, res) => {
  res.send('Products');
});
This allows the following URL paths to match:
/products/product/prodcts
Instead of using the plus sign + after the t to allow one or more ts
to
appear in the URL path, you can use a set of curly braces {} to specify the
minimum and maximum number of instances:
app.get(/^\/produ?ct{1,2}s?\/?$/i, (req, res) => {
  res.send('Products');
});
Now the following URL paths will match:
/products/product/prodcts/productts(but not/producttts,/productttts, or so on)
To match on the URL path /our-products, you can use a set of parentheses ()
to define a capture group containing the string our- and follow the capture
group with a question mark ? to make it optional:
app.get(/^\/(our-)?produ?ct{1,2}s?\/?$/i, (req, res) => {
  res.send('Products');
});
Capture groups are a powerful tool when writing regular expressions. In this
example, you're simply using a capture group as a way to group the characters
our-together so that the question mark?that follows the group will
apply to the group as if it were a single character.
Going one step further, you can add another capture group by wrapping
(our-)?produ?ct{1,2}s? in another set of parentheses. Then, within the new
capture group, append the text |productos:
app.get(/^\/((our-)?produ?ct{1,2}s?|productos)\/?$/i, (req, res) => {
  res.send('Products');
});
The pipe character | is used to create a logical "OR" expression (i.e. "this"
or "that"). Adding the pipe | within the new group specifies that the
expression (our-)?produ?ct{1,2}s? or productos should match.
With this change in place, the following URL paths all match:
/products/product/prodcts/productts(but not/producttts,/productttts, or so on)/our-products/productos
Don't worry if you found this section difficult to understand. A lot of
developers find regular expressions to be challenging to write, test, and
debug. Unless your work requires you to write regular expressions on a
frequent basis, it's likely that you'll need to spend time brushing up your
regular expressions skills before you can successfully write or update an
expression. Using a good tool can make a big difference—ask your fellow
developers what tool(s) they've found to be helpful!
Using an array of paths
In addition to the techniques you've seen so far, you can also use an array of
values for the route path:
app.get([/^\/(our-)?produ?ct{1,2}s?\/?$/i, '/productos'], (req, res) => {
 res.send('Products');
});
When a route is defined using an array of values for the route path, Express
will check each of the array's elements to determine if an incoming request URL
path is a match.
Using an array allows you to simplify the regular expression a bit by pulling
the /productos path out of the regular expression into its own route path
string. This change has no effect on the outward functionality of your
application; it's all about choosing the option that's easiest to read,
understand, and maintain.
Redirecting "incorrect" requests
All of the internal stakeholders at the Best Company Ever love the new website.
They're especially happy that you were able to address all of the URL path
oddities surrounding the "Products" page.
There's one final issue to address though. A sharp-eyed tester noticed that when
you request the "Products" page using one of the non-preferred paths (e.g.
/prodcts) the page displays as expected, but the URL in the browser's address
bar shows the non-preferred path (i.e.
http://www.bestcompanyever.com/prodcts). Ideally, when a client requests the
"Products" page using anything other than the preferred route of /products,
they'd be redirected back to the page using the preferred path.
You can accomplish this by updating the route handler to check if the current
request's path (i.e. req.path) starts with the preferred path, and if not,
uses the res.redirect() method to redirect the client:
// If the current request path doesn't match our preferred
// route path then redirect the client.
if (!req.path.toLowerCase().startsWith('/products')) {
  res.redirect('/products');
}
By default, Express routing isn't case-sensitive, so the request path
/Productswould match our preferred route path/products. To prevent from
redirecting requests that only differ by casing, the stringtoLowerCase()
method is being used to force the request path to all lowercase. Also, Express
allows incoming request paths that have an optional trailing forward slash
(i.e./products/) to match a route path without a trailing forward slash
(i.e./products). Using the stringstartsWith()method gives us an easy
way to check for the preferred path without having to account for the trailing
slash.
After finishing all of the refactoring, the final version of your app.js file
should now look like this:
const express = require('express');

// Create the Express app.
const app = express();

// Define routes.

app.get('/product/:id(\\d+)', (req, res) => {
  res.send(`Product ID: ${req.params.id}`);
});

app.get([/^\/(our-)?produ?ct{1,2}s?\/?$/i, '/productos'], (req, res) => {
 // If the current request path doesn't match our preferred
 // route path then redirect the client.
 if (!req.path.toLowerCase().startsWith('/products')) {
   res.redirect('/products');
 }

 res.send('Products');
});

// Define a port and start listening for connections.

const port = 8081;

app.listen(port, () => console.log(`Listening on port ${port}...`));
What you learned
In this article, you learned
- that route parameters are named URL segments used to capture values;
- how to define a route whose path contains one or more route parameters;
- that a route path can be a string, string pattern, regular expression, or an
array containing any combination of those; - how to define a route path using a string pattern; and
- how to define a route path using a regular expression.
Express Routers
As you've learned about Express routing, you've defined routes within a single
app.js file. While this is a convenient approach to use while learning, it's
not very practical for "real world" web applications.
In the real world, web applications tend to target groups of resources, where
each resource is associated with multiple routes. For example, a customer order
management application might target resources like "Customers", "Products",
"Product Categories", and "Orders", and each of those resources might have
routes for creating, retrieving, updating, and deleting records (often referred
to as CRUD operations). Additionally, some resources might need to share the
same routes.
In these situations, defining all of your web application's routes within a
single JavaScript file is simply put, a bad idea.
Express routers allow developers to create collections of modular, mountable
route handlers. Using routers helps to keep your code organized and DRY (don't
repeat yourself!), ensuring that your code is as readable and maintainable as
possible.
As an introduction to Express routers, let's create routing for a sports team
application. You'll use a router to define routes for "Home", "Schedule", and
"Roster" pages. Then you'll see how to mount that router onto your application
so that its routes are shared across multiple teams.
When you finish this article, you should be able to:
- Use the
express.Routerclass to define a collection of route handlers; and - Use the
app.use()method to mount a Router instance for a specific route
path.
Setting up the initial project
Create a folder for your project, open a terminal or command prompt window,
browse to your project's folder, and initialize npm:
npm init -y
Then install Express 4.0:
npm install express@^4.0.0
Add a file named app.js file to your project containing the following code:
const express = require('express');

// Create the Express app.
const app = express();

// TODO Mount router instances.

// Define a port and start listening for connections.

const port = 8081;

app.listen(port, () => console.log(`Listening on port ${port}...`));
Your application doesn't contain any routes yet, so hold off on testing for a
bit.
Remember that if you leave your application running in the terminal or command
prompt window while you're working, you'll need to stop and restart it so that
Node picks up your latest code changes. To do that, pressCTRL+Cto stop the
application and runnode app.jsto restart the application.
Defining a collection of route handlers
While it's not required, a common convention is to create each Express router
instance within its own Node module. Remember that in Node, each file is treated
as a separate module. So, to create a new module for your router, add a new file
named routes.js to your project.
Typically, the name of the module reflects the resource that the router will
be defining routes for. Going back to the customer order management
application, you'd have files namedcustomers.jsandproducts.js
containing routers (and route definitions) for the Customers and Products
resources. For this article, you'll keep things simple and just use the
filenameroutes.js.
At the top of the file, use the require directive to import the express
module and assign it to a variable named express:
const express = require('express');
You've had a lot of practice using the express function (exported by the
express module) to create Express applications. The express module also
exports the Router class via a property on the express function, which you
can use to create an instance of a router:
// Create the Router instance.
const router = express.Router();
Everything that you've done so far with defining routes using an Express
Application (app) object can be done with a router instance. For this reason,
a router can be thought of as a "mini-app".
The Express Application (
app) object and Router objects also handle
middleware in the same way. You'll learn about middleware in a future lesson.
Using the router.get() method, define a collection of routes for a sports team
including "Home", "Schedule", and "Roster" pages:
// Define routes.

router.get('/', (req, res) => {
 res.send('Home');
});

router.get('/schedule', (req, res) => {
 res.send('Schedule');
});

router.get('/roster', (req, res) => {
 res.send('Roster');
});
Code contained within a module isn't automatically visible or callable to code
contained in other modules. To expose code to other modules, you can use the
module.exports object. Since you only have one object to export from your
module, simply assign the router variable to the module.exports property:
module.exports = router;
Here's the completed code for the routes.js file:
const express = require('express');

// Create the Router instance.
const router = express.Router();

// Define routes.

router.get('/', (req, res) => {
 res.send('Home');
});

router.get('/schedule', (req, res) => {
 res.send('Schedule');
});

router.get('/roster', (req, res) => {
 res.send('Roster');
});

module.exports = router;
Mounting a Router instance
Now that you've finished setting up your router instance, you're ready to make
use of it within your app.js file. At the top of the file just below where
you're importing the express module, use the require directive to import the
routes module and assign it to a variable named routes:
const express = require('express');
const routes = require('./routes');
Notice that the call to the
requiredirective to import theroutesmodule
starts with a relative path (i.e. a dot.followed by a forward slash/).
This tells Node that theroutesmodule is a local module contained within
our project, as opposed to a module contained within an external dependency
located in thenode_modulesfolder (that was installed using thenpm installcommand).
To expose your router instance to the outside world so that it can handle
incoming HTTP requests, you need to tell your Express Application (app) object
to use it. To do that, call the app.use() method passing in an optional route
path along with the routes variable (the instance of your router):
// Create the Express app.
const app = express();

// Mount router instances.
app.use('/portland-thorns', routes);
Providing a route path when mounting your router instance allows you to mount
the router instance multiple times each with a different route path:
// Create the Express app.
const app = express();

// Mount router instances.
app.use('/portland-thorns', routes);
app.use('/orlando-pride', routes);
The combination of the router mount paths and the route paths defined within the
router allows you to easily and quickly build a hierarchy of routes:
/portland-thorns//portland-thorns/schedule/portland-thorns/roster/orlando-pride//orlando-pride/schedule/orlando-pride/roster
If you mounted the router instance without supplying a route path (i.e.
app.use(routes)), then your application would only have the following routes
configured:
//schedule/roster
Mounting a router instance without a route path might not seem very useful at
first glance, but it can be helpful technique for keeping your project
organized by defining top-level routes in their own module using a router.
The completed code for your app.js file should look like this:
const express = require('express');
const routes = require('./routes');

// Create the Express app.
const app = express();

// Mount router instances.
app.use('/portland-thorns', routes);
app.use('/orlando-pride', routes);

// Define a port and start listening for connections.

const port = 8081;

app.listen(port, () => console.log(`Listening on port ${port}...`));
Testing the application
To test your application, open a terminal or command prompt window, browse to
your project's folder, and run the following command:
node app.js
If your application starts successfully, you'll see the text "Listening on port
8081…" displayed in the terminal or command prompt window. Next, open a web
browser and browse to each of the following addresses for the Portland Thorns:
http://localhost:8081/portland-thorns- displays the text "Home" in the
browser.http://localhost:8081/portland-thorns/schedule- displays the text
"Schedule" in the browser.http://localhost:8081/portland-thorns/roster- displays the text "Roster" in
the browser.
Now browse to the following addresses for the Orlando Pride:
http://localhost:8081/orlando-pride- displays the text "Home" in the
browser.http://localhost:8081/orlando-pride/schedule- displays the text "Schedule"
in the browser.http://localhost:8081/orlando-pride/roster- displays the text "Roster" in
the browser.
Congrats on creating your first Express application with routers!
What you learned
In this article, you learned
- how to use the
express.Routerclass to define a collection of route
handlers; and - how to use the
app.use()method to mount a Router instance for a specific
route path.
See also…
For more information about the Express Router class, see
the official
documentation.
Routing Roundup Project
Now that you've learned about routing in Express, it's time to create an
application to apply your knowledge! In this project, you'll:
- Create a web application using Express;
- Use Express to send an HTTP response containing plain text;
- Use Express to send an HTTP response containing HTML rendered from a Pug
template; - Define route paths using a string, string pattern, or regular expression;
- Define a route path containing a route parameter; and
- Use an Express router to define a collection of route handlers.
Getting started
- Clone the repository from
https://github.com/appacademy-starters/routing-roundup-starter - Run
npm installto install the dependencies - When you want to run tests, run
npm test
Phase 1: Defining the default route
To get started, install Express 4.x using npm.
Now you're ready to create your Express application. Add a file named app.js
to your project. For your first route, the application should return the plain
text response "Hello from Express!" for GET requests to the default or root
resource. Configure your application to listen for HTTP connections on port
8081.
If you would like to, setup nodemon as a dev dependency so you don't have to
restart your server when you make code changes.
To manually test your application, use Node to start your application. Open up a
browser and browse to the URL http://localhost:8081/. You should see the plain
text "Hello from Express!" displayed.
We've also provided automated integration tests that you can use to test your
application. With your application started and listening for HTTP connections
on port 8081, run the command npm test from a terminal. (You will need two
terminals open to do this, one to run the app and one to run the tests.)
The tests will confirm that each of your application's routes return the
expected HTTP responses. Initially, most of the tests will fail as you haven't
implemented all of the expected routes yet. As you work your way through the
project, more tests will start to pass. If you have any trouble with using the
tests don't hesitate to ask a TA for help!
Phase 2: Using a template to render HTML
For your next route, you'll use Express to send an HTTP response containing HTML
rendered from a Pug template.
Start with creating a Pug template with three variables for the request method,
the request path, and a random number. Render the variable values using an
unordered list:
<ul>
  <li>[method]</li>
  <li>[path]</li>
  <li>[random number]</li>
</ul>
Replace the [method], [path], and [random number] text with the
respective
variable values.
After you complete your template, install Pug 2 and configure Express to use it
as its default view engine. Then define a route that will match any request,
regardless of the HTTP method, to a top level resource (such as /about or
/foo). Use Express to render your template passing in the request method, the
request path, and a random number. For the request method and path, remember
that a route handler function's req parameter references the Express Request
object which provides detail about the client request that's currently being
processed. For the random number, use a whole number (no fractional or decimal
part) greater than or equal to zero.
Note: there are multiple ways to define a route path that'll match any request
for a top level resource. Experiment a bit and use the approach that feels the
easiest to implement. Think carefully about the order of your route
definitions to ensure that you don't prevent other routes from being able to
match their intended requests.
Additional note: remember that you can use the
console.log()method to
output thereqparameter to the console as a way to inspect the properties
that are available on the Request object. You can also use the official
Express documentation to research the available
properties.
To manually test your application, use Node to start your application, open up a
browser, and browse to the URL http://localhost:8081/about. You should see the
request method (GET), the request path (/about), and a random number
displayed in an HTML unordered list.
To test your application using the provided automated integration tests, start
your application listening for HTTP connections on port 8081 and run the
command mocha from a terminal. You should see an additional set of tests pass
that were previously failing.
Phase 3: Defining another flexible route
For this route, you'll use Express to define a route that'll match any GET
request whose path ends with the letters "xyz". The route should return the
plain text response "That's all I wrote."
Note: there are multiple ways to define a route path that'll match any request
whose path ends with a specific set of characters. Experiment a bit and use
the approach that feels the easiest to implement. Again, think carefully about
the order of your route definitions to ensure that all of your application's
routes continue to work as intended.
To manually test your application, use Node to start your application, open up a
browser, and browse to the URL http://localhost:8081/xyz or
http://localhost:8081/something-else-xyz. You should see the plain text
"That's all I wrote." displayed.
To test your application using the provided automated integration tests, start
your application listening for HTTP connections on port 8081 and run the
command mocha from a terminal. Same as before, you should see an additional
set of tests pass that were previously failing.
Phase 4: Capturing a value from the URL path
Next, you'll use Express to define a route that'll match any GET request whose
path starts with the path /capital-letters/. The route should return a plain
text response of the uppercase version of the text in the path that follows
/capital-letters/. For example, a request URL path of
/capital-letters/little would return the plain text response "LITTLE".
To complete this part of the project, think about how to define a route whose
path contains a named path segment that captures the value at that position in
the path. For more information, review the "Exploring Route Paths" article in
this lesson to help you arrive at a solution.
To manually test your application, start your application, open up a browser,
and browse to the URL http://localhost:8081/capital-letters/express. You
should see the plain text "EXPRESS" displayed.
To test your application using the provided automated integration tests, start
your application and run the command mocha from a terminal. You should see an
additional set of tests pass that were previously failing.
Phase 5: Defining a collection of route handlers
To complete your project, you'll use an Express router to define a collection of
route handlers. One of those route handlers should respond to the URL path
/bio with the plain text "Bio" and another should response to /contact with
the plain text "Contact".
Once you've defined your router, mount two instances to your application so
that:
-
A request with the URL path
/margot/biowill return the plain text response
"Bio" and/margot/contactwill return the plain text response "Contact"; and -
A request with the URL path
/margeaux/biowill return the plain text
response "Bio" and/margeaux/contactwill return the plain text response
"Contact".
To manually test your application, start your application, open up a browser,
and browse to the URLs http://localhost:8081/margot/bio,
http://localhost:8081/margot/contact, http://localhost:8081/margeaux/bio,
and http://localhost:8081/margeaux/contact, and check that the application
returns the expected responses.
To test your application using the provided automated integration tests, start
your application and run the command mocha from a terminal. Now you should see
all of the tests pass!
What We've Learned
Your Express routing application is now complete! Great job building out your
application's routes using a variety of techniques.
In this project, you:
- Created a web application using Express;
- used Express to send an HTTP response containing plain text;
- used Express to send an HTTP response containing HTML rendered from a Pug
template; - defined route paths using a string, string pattern, or regular expression;
- defined a route path containing a route parameter; and
- used an Express router to define a collection of route handlers.
<=(Form Handeling)==>
- HTML Forms Learning Objectives
- HTML Forms: An Introduction
- HTML Forms in Express
- Data Validation
- Express Middleware
- Protecting forms from CSRF
- Formative Forms Project
HTML Forms Learning Objectives
HTML forms are the way that you collect data from a user to power your Web
application. Using forms is a vital building block for your Web application
knowledge. After this lesson, you should be able to:
- Describe the interaction between the client and server when an HTML form is
loaded into the browser, the user submits it, and the server processes it - Create an HTML form using the Pug template engine
- Use express to handle a form's POST request
- Use the built-in
express.urlencoded()middleware function to parse incoming
request body form data - Explain what data validation is and why it's necessary for the server to
validate incoming data - Validate user-provided data from within an Express route handler function
- Write a custom middleware function that validates user-provided data
- Use the
csurfmiddleware to embed a token value in forms to protect against
Cross-Site Request Forgery exploits
HTML Forms: An Introduction
HTML Forms are an essential and ubiquitous part of the web. You use forms to
search, create resources (i.e. account, posts), update resources, and more.
While forms may seem simple on the surface, there's more complexity that you
have to think about as a developer when you're building a web app that uses HTML
forms. In this introductory lesson you will learn about:
- the key components of a form
- the client and browser interaction when it comes to handling HTML forms
- the usual flow of a form submission
Key components of a form
Let's imagine that a user just landed on a website you built and loads up a form
that allows users to sign up for a mailing list.
The browser would load up HTML that includes something like this:
<h1>Sign up for an account</h1>
<form action="/sign-up" method="post">
  <label for="name">Name:</label>
  <input type="text" id="name" name="fullname" />

  <label for="email">Email:</label>
  <input type="email" id="email" name="email" />

  <input type="submit" value="Sign Up" />
</form>
Let's first break down the various components of the form.
<form>
The <form> element is the parent element of all of the input fields. This
element has two attributes that are unique to <form> elements: action and
method.
The action attribute defines the location (URL) where the form should send the
data to when it is submitted. In this example, the action attribute has a
value of /sign-up. The action can be set to either an absolute
URL or a
relative
URL. If it is a relative URL (ex: /sign-up), then it will be sent
to the server that served up the website that the user is on.
The method attribute defines the HTTP verb that should be used to make the
request to the server. Browsers support only two values for this attribute:
"get" and "post". You will use "post" 99% of the time.
Forms typically use POST requests because POST requests are used to send data
that results in a change on the server. For example, if someone wanted to sign
up for an account, that form would use a POST request. In contrast, GET
requests are used to retrieve data from the server. A typical use case for a
form that uses a GET method is a search form. For example, the search input on
www.google.com is part of a form that uses a GET method.
In this example, when the form is submitted, it will make a POST request to the
server's /sign-up route.
<input>
In this example, there are two input fields for entering data: one for the
user's name, and one for the user's email. These fields are represented by the
<input> element.
Notice how there is a type attribute in each <input> element. The type
attribute tells the browser what kind of input it expects, and the browser
enforces different rules for each type of input.
For example, in the <input> field with type="email", if the user tries to
submit an email that does not have the "@" character in it, then most browsers
will display notify users that they have put in an invalid email address.
There are several types of inputs, including number, password, and checkbox. You
can learn more about all of the different types types in the
MDN docs on input types. Some of the
less-commonly-used ones are quite
interesting!
There are also other HTML elements that serve as data input fields but are not
represented by an <input> element, such as <textarea> and
<select>.
The first two <input> fields in the example also have a name attribute. The
name attribute is important because when the form data is sent to the server,
the data is represented in key-value pairs with the value of the name
attribute set as the key. For form submissions with a "post" method, the input
field data would be sent to the server in the body of the HTTP request in the
x-www-form-urlencoded format. For example, the data for the example form would
look something like this when it is submitted to the server:
fullname=John+Doe&email=john@doe.com
The id attribute ties the <input> element to the <label>
element by
matching the <label> element's for attribute. Associating a
<label>
element with the <input> field in this way offers accessibility and useability
benefits. For example, if the user clicks on a <label> element that is
associated with an <input> field, then the <input> field would come into
focus.
Finally, the last <input> element with type="submit" is unique in that it
does not store any data. Instead, this element renders as a button with text
that is equal to its value attribute. You could also write <input> elements
with type="submit" as a <button> element, like this:
<button type="submit">Sign Up</button>. When the user clicks on this button,
then the form is submitted.
Submitting the form
As mentioned earlier, when this form is submitted, it will make a POST request
to the server's /sign-up route.
In the previous lesson, you learned about routing in an Express server, so you
can imagine that the above example might make a request to a route that looks
something like this:
app.post("/sign-up", (req, res) => {
  // handle the request here
});
When the request reaches the server, the data captured in the form is then
validated. For example, you might want to set up a validation that verifies that
the user actually typed something into the fullname field before submitting.
There are various validations that you can set on the frontend elements
themselves. For example, if you add arequiredattribute to an<input>
field, then the browser would prevent the user from being able to submit a
form if that required field were empty. However, frontend validations can
be easily manipulated: someone could simply open up the dev tools and remove
therequiredattribute and then submit the form with an empty input. This is
why server-side validations are crucial and necessary.
If the data is invalid, then the server would send back error messages to the
frontend to be displayed to the user. For example, if the user had submitted a
form with an empty fullname field, then the server can send back an error
message to notify the user that the "Name field is required". Specifically, the
error would return a complete HTML page containing the entire form along with
the error messages. This is so that the user can resolve the error and then
resubmit the form, effectively repeating the whole form submission process
again.
Validations can also be more robust than simple checks for whether or not a
field was filled out. As a developer, you can customize and set up any sort of
validation on the data that the user is submitting. In a later reading, you'll
learn more about validations.
Finally, once the user resolves the errors, then the server can successfully
process the data. At this point, the server would typically redirect the user to
a different page by responding with a 302 Found status. For example, if a user
had just signed up for a new account, the server might redirect them to the
profile page after they have successfully signed up.
What you've learned
In this reading, you learned about:
- the key components of a form
- the client and browser interaction when it comes to handling HTML forms
- the usual flow of a form submission
In the next reading, you'll get an opportunity to build out a form that
interacts with an Express server!
HTML Forms in Express
In the previous reading, you learned about the fundamental components of an HTML
form and how the client and server interacts when a form is submitted.
In this reading, you'll learn how to:
- Create an HTML form using the Pug template engine.
- Define a pair of GET and POST routes to deliver an HTML form to the user and
process requests from that form. - Create and use a Pug layout template to eliminate code duplication across Pug
views. - Configure an Express application to use the built-in
urlencodedmiddleware
function to parse incoming request body form data (encoded as
x-www-form-urlencoded).
Forms example setup
Let's learn about forms with an example. In this example, your friends are
having a wedding, and they want you want to build a simple website that lets
them keep track of their guest list!
Here's how the website will work:
- The website has two main pages: the home page where your friends can see the
full list of guests, and a "guest form" page that has a form where they can
add guests. - At the top of both pages, there should be two links that lets them easily
navigate back and forth between the home page and the guest form page. - When they add a guest, they should be redirected back to the home page so
they can see the newly added guest.
Follow along by creating a forms-demo directory, starting up a Node project,
installing the dependencies, and then creating the necessary files:
mkdir forms-demo
cd forms-demo
npm init --yes
npm install express@^4.0.0 pug@^2.0.0
npm install nodemon@^2.0.0 --save-dev
mkdir views
touch index.js views/index.pug
Since this example will be used and built upon in all of the remaining readings
in this lesson, it's highly recommended that you actively follow along in this
example. Executing the above commands should leave you with a forms-demo
directory that looks like:
forms-demo
│   node_modules/
|   views/
│   │   index.pug
│   index.js
│   package-lock.json
│   package.json
Let's also set up a start script. Update your package.json so that it looks
something like:
{
  "name": "forms-demo",
  "version": "1.0.0",
  "description": "",
  "main": "index.js",
  "scripts": {
    "start": "nodemon index.js"
  },
  "keywords": [],
  "author": "",
  "license": "ISC",
  "dependencies": {
    "express": "^4.17.1",
    "pug": "^2.0.4"
  },
  "devDependencies": {
    "nodemon": "^2.0.2"
  }
}
Don't worry if the minor and patch versions of your dependencies don't end up
matching exactly.
In your index.js file, set up the your Express server. In the server file,
keep track of your guests with an array. When the server is first started, the
guests array should be empty. Keep in mind that this guests array will be reset
every time the server/application restarts. In a future lesson, you'll learn how
to persist this type of data to a database in your Express applications.
Go ahead and also set up a root route that renders the index.pug template
along with the title and guests array:
const express = require("express");

// Create the Express app.
const app = express();

// Set the pug view engine.
app.set("view engine", "pug");

const guests = [];

// Define a route.
app.get("/", (req, res) => {
  res.render("index", { title: "Guest List", guests });
});

// Define a port and start listening for connections.
const port = 8081;

app.listen(port, () => console.log(`Listening on port ${port}...`));
Finally, populate the index.pug template with some Pug content. Set the
title in the head element, render an h1 element to display the
title,
and then also set up two links to allow users to easily navigate back and forth
between the / and /guest URL.
Underneath the navigation links, render a table element that will be used to
keep track of all of the invited guests. There will be three pieces of
information will be tracked for each guest:
- Full Name
- Guests (i.e. will they have a "plus one"? Can they bring their kids?)
After following the instructions above, your index.pug should look something
like this:
doctype html
html
  head
    title= title
  body
    h1= title
    div
      a(href="/") Home
    div
      a(href="/guest") Add Guest

    table
      thead
        tr
          th Full Name
          th Email
          th # Guests
      tbody
        each guest in guests
          tr
            td #{guest.fullname}
            td #{guest.email}
            td #{guest.numGuests}
Alright! At this point you should be able to start up your server by running
npm start. Navigate to http://localhost:8081/ to see a page with an h1
element that says "Guest List", two navigation links, and an empty guests table.
Getting the "Add Guest" form
Now that you have the home page set up, let's first set up the /guest
route and view.
As a reminder, this view should show a very basic form that allows users to add
a guest to the guest list.
First, create a guest-form.pug template for that view, and add a simple form
to it with a full name input field, an email input field, a number of guests
input field, and a submit input.
Then, add the method and action attributes to the form. Use "post" for the
method attribute. For action, go ahead and set it so that the form
submission is routed to "/guest":
Here's what your guest-form.pug file should look like:
h2 Add Guest
form(method="post" action="/guest")
  label(for="fullname") Full Name:
  input(type="fullname" id="fullname" name="fullname")
  label(for="email") Email:
  input(type="email" id="email" name="email")
  label(for="numGuests") Num Guests
  input(type="number" id="numGuests" name="numGuests")
  input(type="submit" value="Add Guest")
Note: You'll want to be sure that the
nameof your inputs are consistent
with theguestsarray object properties. The rationale for this will become
clearer later in the reading when you start saving each guest into the
guestsarray, but essentially, you want to keep your variable names
consistent between the frontend and the backend.
Then, set up the route in the Express server so that the guest-form.pug
template gets rendered when the user navigates to localhost:8081/guest. For
this route, set the title to "Guest Form":
app.get("/guest", (req, res) => {
  res.render("guest-form", { title: "Guest Form" });
});
// REST OF FILE NOT SHOWN
Here's what the index.js file should look like now:
const express = require("express");

// Create the Express app.
const app = express();

// Set the pug view engine.
app.set("view engine", "pug");
app.use(express.urlencoded());

const guests = [];

// Define a route.
app.get("/", (req, res) => {
  res.render("index", { title: "Guest List", guests });
});

app.get("/guest", (req, res) => {
  res.render("guest-form", { title: "Guest Form" });
});

// Define a port and start listening for connections.
const port = 8081;

app.listen(port, () => console.log(`Listening on port ${port}...`));
When users navigate to localhost:8081/guest, the HTTP request will be routed
to the app.get('/guest') route, which responds by rendering the
guest-form.pug template. You should now see a form that allows users to input
a guest's email, full name, and number of allowed guests.
A quick aside: Pug layout templates
One thing to note right now is that the guest-form.pug template is missing the
navigation links that allows users to easily move back and forth between the
home page and the guest form page.
To fix this, you have a couple of options. You could simply copy and paste the
top of index.pug to the top of guest-form.pug. However, this solution
quickly grows unwieldy once you need to add other templates that also need easy
navigation.
Fortunately, Pug provides a clean way of preventing duplication of code with its
template inheritance feature. Pug provides two keywords for template
inheritance: block and extends.
According to the Pug documentation, a
block is a chunk of Pug code that "a
child template can replace". To understand what this means, go ahead and start a
new template called layout.pug.
Then, move all of the content that you'd like all of your templates to share
into this layout.pug file. Finally, at the bottom, declare a new block by
writing "block content", and nest an h1 element in that block that says
"This is the layout template." Here's what your new layout.pug template should
look like:
doctype html
html
  head
    title= title
  body
    h1= title
    div
      a(href="/") Home
    div
      a(href="/guest") Add Guest

    block content
      h1 This is the layout template
Next, update your index.pug to this:
extends layout.pug

block content
  table
    thead
      tr
        th Full Name
        th Email
        th # Guests
    tbody
      each guest in guests
        tr
          td #{guest.fullname}
          td #{guest.email}
          td #{guest.numGuests}
Finally, update your guest-form.pug file to this:
extends layout.pug

block content
  h2 Add Guest
  form(method="post" action="/guest")
    label(for="fullname") Full Name:
    input(type="fullname" id="fullname" name="fullname")
    label(for="email") Email:
    input(type="email" id="email" name="email")
    label(for="numGuests") Num Guests
    input(type="number" id="numGuests" name="numGuests")
    input(type="submit" value="Add Guest")
Then, navigate back and forth between localhost:8081/ and
localhost:8081/guest and see what happens.
Let's explore how this works. The extends key word denotes that the
index.pug and guest-form.pug templates are now inheriting from the
layout.pug template. This means that when the index.pug and
guest-form.pug
templates are rendered, they will render all of the content that exists in
layout.pug.
The block allows for any child template to redefine the content within that
block. In layout.pug, a block named "content" is defined with an h1
element underneath it. In guest-form.pug, the "content" block is now
redefined to render the guest form instead of that h1 element.
This would work even if the original "content" block in layout.pug had no
content inside of it. For example, go ahead and remove that "This is the layout
template" h1 from layout.pug, and notice how the block redefinition
still
works. You don't need to add that h1 back to the template. That was only there
to make block redefinitions a little bit clearer.
Using template inheritance, you can simply inherit from layout.pug in all of
your new Pug templates. This is especially useful if you want to render the same
navigation elements throughout your entire web application.
Submitting the guest form
Let's get back to finishing up the guest form.
Right now, if the user submits the form, it makes a POST request to "/guest".
Set up the route that would handle this request:
app.post("/guest", (req, res) => {
  // MORE CODE TO COME
});
x-www-form-urlencoded
The previous reading briefly touched on how when forms are submitted with a
"post" method, the data is sent to the server in the body of the HTTP request.
It also mentioned how the data is encoded in a x-www-form-urlencoded format.
Simply put, x-wwww-form-urlencoded format means that the data is formatted in
a consistent way so that the server understands exactly what is being submitted.
This will make more sense with an example. When input data is sent in the body
of the HTTP request, they're sent in a key-value string format, like this:
fullname=[FULLNAME_VALUE]&email=[EMAIL_VALUE]&numGuests=[NUM_GUESTS_VALUE].
Let's suppose you know a married couple called Jack Hill and Jill Hill. You plan
on inviting them, but you really don't want to have to enter them twice. Plus,
they're one of those couples that share email addresses, so it would be super
convenient to enter them as one entry. So for the fullname field, you enter
"Jack&Jill Hill". In the email field, you enter their email,
"jack.jill@hill.com", and then put down "2" for number of guests.
The problem here is that some characters in the key-value string format have
special meaning. For example, notice how the "&" character is used to split the
two key-value pairs.
Unfortunately, because you put down "Jack&Jill Hill" for the fullname field,
it could be confusing as to whether or not the "&" character was actually part
of one of the input values or if it's there to split up a key-value pair. In
order to clarify the meaning, the data string needs to be encoded so that those
special characters are consistently mapped to other characters that don't have
special meaning.
So in our example, the "@" character would be represented instead by "%40" and
the "&" symbol would be represented by "%3D". This results in the data being
sent in the x-www-form-urlencoded format that looks like this:
fullname=Jack%3DJill+Hill&email=jack.jill%40hill.com&numGuests=2.
"%40" and "%3D" are percent encoded values. Values after the "%" character
are hexadecimal values.
Parsing the request body
Once the request reaches the server, because the body of the request is now
encoded in an x-www-form-urlencoded format, it needs to be decoded and parsed,
preferably into a format that would be easy for the routes to handle.
Fortunately, the Express framework comes with a middleware function that does
this for us. You'll learn more about middleware in an upcoming reading, but for
now, go ahead and add app.use(express.urlencoded()) to your index.js file
under where the view engine is being set:
const express = require("express");

// Create the Express app.
const app = express();

// Set the pug view engine.
app.set("view engine", "pug");
app.use(express.urlencoded());

const guests = [];

// Define a route.
app.get("/", (req, res) => {
  res.render("layout", { title: "Guest List" });
});

app.get("/guest-form", (req, res) => {
  res.render("guest-form", { title: "Guest Form" });
});

app.post("/guest", (req, res) => {
  // MORE CODE TO COME
});

// Define a port and start listening for connections.
const port = 8081;

app.listen(port, () => console.log(`Listening on port ${port}...`));
Because of the express.urlencoded() middleware function, the body data is now
available in the req object. Specifically, req.body has now been formatted
as an object that looks like this:
{
  fullname: 'Jack&Jill Hill',
  email: 'jack.jill@hill.com',
  numGuests: '2'
}
Notice how the number of guests field is a string even though the
inputtype
was a "number". This will be discussed in more detail in the next reading.
Let's parse out the fields from the req.body object and push this guest entry
into the guests array. Then, redirect the user back to the home page by using
the res object's redirect method. That method redirects the user by sending
a response with a 302 Found HTTP status code to the client.
app.post("/guest", (req, res) => {
  const guest = {
    fullname: req.body.fullname,
    email: req.body.email,
    numGuests: req.body.numGuests
  };
  guests.push(guest);
  res.redirect("/");
});
To recap, when the user submits the add guest form, the following happens:
- Because the
<form>has a "post"method, the form data is sent in the body
of the HTTP request in anx-www-form-urlencodedformat. - When the request reaches the server, the
express.urlencodedmiddleware
function parses the urlencoded body into an object available via the
req.bodyproperty. - The request is handled by the
/guestPOST route. - After the guest is added to the
guestsarray, the server redirects the user
back to the home page by sending a302 Foundresponse. (Feel free confirm
this in thenetworktab of your developer tools.) - When users lands on the home page, they can see the newly added guest in the
guests table.
What you've learned
There were a lot of steps that went into submitting just one simple form, but
this form submission process is a common flow that you'll encounter often as a
developer!
In this reading, you learned how to:
- Create an HTML form using the Pug template engine.
- Define a pair of GET and POST routes to deliver an HTML form to the user and
process requests from that form. - Create and use a Pug layout template to eliminate code duplication across Pug
views. - Configure an Express application to use the built-in
urlencodedmiddleware
function to parse incoming request body form data (encoded as
x-www-form-urlencoded).
Data Validation
When setting up HTML forms, it's important to check and clean the incoming data
to ensure that the data is correct.
In this lesson, you will:
- Understand what data validation is and why it's necessary for the server to
validate incoming data. - Validate user-provided data from within an Express route handler function and
return a response containing user-friendly validation error messages when
necessary.
Importance of server-side data validation
Data validation is the process of ensuring that the incoming data is correct.
This section will cover the rationale for validating incoming
data on the server side.
Even though you could add add validations on the client side, client-side
validations are not as secure and can be circumvented. Because client-side
validations can be circumvented, it's necessary to implement server-side data
validations.
Lack of trust in client-side validations
Let's talk through an example. Suppose you had an HTML form that collects a
user's age. First of all, the whole point of the form is to collect the user's
age, so you want to ensure that the "age" field is not blank. To account for
this, you set a required attribute on the age <input>.
You also want to make sure that users submit a number for their age, so you set
the <input> field's type attribute equal to "number":
<for method="post" action="/age">
  <label for="age">Age: </label>
  <input required type="number" id="age" />
  <input type="submit" />
</form>
Excellent, now, whenever users fill out this form, they're unable to submit the
form unless the "age" field is filled out with a number. This seems like it
would ensure that you have clean and correct data being submitted to your
server.
Unfortunately, those frontend validations are not reliable. Someone could open
up the developer's console and remove the required attribute, and then change
the type to equal "text".
Another situation to account for is that the end user might not even be using
that specific form to submit data. Someone could be programmatically submitting
a POST request to the server. In this scenario, they would never interact with
the HTML form and its validations.
Ultimately, client-side validations are good for immediate feedback to the user,
but they should not be relied upon for enforcing clean data submission.
Server-side validations
So what kind of data validations should you implement on the server side? Let's
walk through a few examples.
Expected data types
The previous reading discussed how when a form is submitted, the data is
typically urlencoded. One effect of this url encoding is that each value will
arrive at the server as a string. Because of this, there's a tremendous need to
validate that the provided string can be successfully converted to the desired
type.
The previous example about the "age" field discussed how a user could circumvent
the type="number" attribute on the frontend. Without server-side data
validation on that "age" field, you could end up with an invalid value (for
example, NaN) when trying to convert the "age" value into a number in the
server.
Other examples of data type validations include:
- Checking for integer vs. float
(perhaps you want to only store the user's age as an integer) - Checking that an input date string can be converted to a valid date.
Valid ranges and format
To continue with our "age" field example, one logical validation you might want
to enforce is that users submit a valid age. For example, it's unlikely that a
user is over 120 years old.
You could also check that values come in the correct format. A telephone number
should not have any letters in it, and if you want to ensure that it is
a US-based telephone number, you might also want to check that the phone number
is 10 digits long.
Another example might be that you want to ensure that your users are creating
strong and secure passwords. To do this, you could require and check for the
presence of a symbol and a number in the password, or prevent users from setting
"password" as their password.
Other validations
Validations do not have to be constrained to just checking one field at a time.
To continue with the example on passwords, let's suppose you also wanted to add
a "Confirm Password" field to ensure that users did not make a typo on their
password when creating an account. In this scenario, it's necessary to add a
validation to ensure that the "Password" and "Confirmed Password" fields have
the same value.
Validations could get even more complex based on the needs of your application.
For example, let's suppose you have a form for users to order products. You
probably want to validate that their selected shipment order is valid given the
order's weight and destination postal code. After all, you don't want users
trying to select "1-day delivery" for a couch that needs to be transported
across the country.
Server-side validations: an example
Let's pick up where last reading's example left off and add some server-side
validations. As a reminder, in the last reading, you built a website that allows
you to add guests to a guest list.
Setup
At this moment, the directory of that example should look like this:
forms-demo
│   node_modules/
|   views/
│   │   guest-form.pug
│   │   index.pug
│   │   layout.pug
│   index.js
│   package-lock.json
│   package.json
The index.js file should look like this:
const express = require("express");

// Create the Express app.
const app = express();

// Set the pug view engine.
app.set("view engine", "pug");
app.use(express.urlencoded());

const guests = [];

// Define a route.
app.get("/", (req, res) => {
  res.render("index", { title: "Guest List", guests });
});

app.get("/guest", (req, res) => {
  res.render("guest-form", { title: "Guest Form" });
});

app.post("/guest", (req, res) => {
  const guest = {
    fullName: req.body.fullName,
    email: req.body.email,
    numGuests: req.body.numGuests
  };
  guests.push(guest);
  res.redirect("/");
});

// Define a port and start listening for connections.
const port = 8081;

app.listen(port, () => console.log(`Listening on port ${port}...`));
The views/layout.pug template should look like this:
doctype html
html
  head
    title= title
  body
    h1= title
    div
      a(href="/") Home
    div
      a(href="/guest") Add Guest

    block content
The views/index.pug file should look like this:
extends layout.pug

block content
  table
    thead
      tr
        th Full Name
        th Email
        th # Guests
    tbody
      each guest in guests
        tr
          td #{guest.fullName}
          td #{guest.email}
          td #{guest.numGuests}
Finally, the guest-form.pug should look like this:
extends layout.pug

block content
  h2 Add Guest
  form(method="post" action="/guest")
    label(for="fullName") Full Name:
    input(type="text" id="fullName" name="fullName")
    label(for="email") Email:
    input(type="email" id="email" name="email")
    label(for="numGuests") Num Guests
    input(type="number" id="numGuests" name="numGuests")
    input(type="submit" value="Add Guest")
Validations: checking that all fields are filled
First, because all three fields are important, let's add validations to ensure
that each of the field is filled out with a value before it can be successfully
submitted.
To be clear, you can add a required attribute to the three input fields, and
the user would not be able to submit until each field has a value. However, as
was discussed in the previous reading, these kinds of front-end validations can
be circumvented, so for this reading, let's focus on how to implement these
validations in the server.
To do this, instantiate an errors array in app.post('/guest'). Then, check
for truthy values in each of the req.body fields, and if any of the fields are
missing, then push in an error message into the errors array to notify the
user about how that field is required:
app.post("/guest", (req, res) => {
  const { fullName, email, numGuests } = req.body;
  const errors = [];

  if (!fullName) {
    errors.push("Please fill out the full name field.");
  }

  if (!email) {
    errors.push("Please fill out the email field.");
  }

  if (!numGuests) {
    errors.push("Please fill out the field for number of guests.");
  }

  const guest = {
    fullName,
    email,
    numGuests
  };
  guests.push(guest);
  res.redirect("/");
});
Now, if the errors array has an error message in it, then don't add the
guest to the guests array. Instead, give the user an opportunity to fix the
errors before resubmitting the form again.
You can do this by rendering the guest-form.pug template again along with the
errors array. Then, update that template to display each error message to the
user. Also, if there are errors, let's go ahead and return out of the callback
function and ensure that none of the code below executes. Add this below the
validations:
// VALIDATIONS HERE

if (errors.length > 0) {
  res.render("guest-form", { title: "Guest Form", errors });
  return; // `return` if there are errors.
}

// REST OF CODE NOT SHOWN
Here's what that route should look like now:
app.post("/guest", (req, res) => {
  const { fullName, email, numGuests } = req.body;
  const errors = [];

  if (!fullName) {
    errors.push("Please fill out the full name field.");
  }

  if (!email) {
    errors.push("Please fill out the email field.");
  }

  if (!numGuests) {
    errors.push("Please fill out the field for number of guests.");
  }

  if (errors.length > 0) {
    res.render("guest-form", { title: "Guest Form", errors });
    return;
  }

  const guest = {
    fullName,
    email,
    numGuests
  };
  guests.push(guest);
  res.redirect("/");
});
Update guest-form.pug to display error messages whenever they exist:
extends layout.pug

block content
  div
    ul
      each error in errors
        li #{error}
  h2 Add Guest
  form(method="post" action="/guest")
    label(for="fullName") Full Name:
    input(type="text" id="fullName" name="fullName")
    label(for="email") Email:
    input(type="email" id="email" name="email")
    label(for="numGuests") Num Guests
    input(type="number" id="numGuests" name="numGuests")
    input(type="submit" value="Add Guest")
There's one more thing to fix here. One problem is that when the user navigates
to localhost:8081/guest now, when guest-form.pug is rendered, the
app.get('/guest') route is not rendering an errors variable. Therefore,
when guest-form.pug tries to iterate through the errors array, there's an
error because errors does not exist.
You have a couple of options here: you can either check for the truthiness of
errors in guest-form.pug, or you can render an empty errors array
variable
in the app.get('/guest') route callback. For now, let's go ahead and go
with the first option and update the guest-form.pug template:
extends layout.pug

block content
  if errors
    div
      ul
        each error in errors
          li #{error}
  h2 Add Guest
  form(method="post" action="/guest")
    label(for="fullName") Full Name:
    input(type="text" id="fullName" name="fullName")
    label(for="email") Email:
    input(type="email" id="email" name="email")
    label(for="numGuests") Num Guests
    input(type="number" id="numGuests" name="numGuests")
    input(type="submit" value="Add Guest")
Things should be working properly now! If the user forgets to submit any of the
fields, the user should get a very specific message about which field needs to
be filled out still.
Validations: ensuring that
numGuests is valid
Let's add a couple more validations on the numGuests field to get really
comfortable with data validations. First, it probably makes sense that the
number of guests per entry on the guest list is at least one. Also, as
previously mentioned, each of the values will arrive at the server as a string.
Although, JavaScript automatically converts strings into numbers when a string
is being compared to a number, it's good practice to compare values of the same
type.
This brings up another necessary validation. Add a validation that checks to
make sure that the numGuests field is actually a value that can be converted
into a number. When you've added these validations, your app.post('/guest')
route should look something like this:
app.post("/guest", (req, res) => {
  const { fullName, email, numGuests } = req.body;
  const numGuestsNum = parseInt(numGuests, 10);
  const errors = [];

  if (!fullName) {
    errors.push("Please fill out the full name field.");
  }

  if (!email) {
    errors.push("Please fill out the email field.");
  }

  if (!numGuests || numGuests < 1) {
    errors.push("Please fill out a valid number for number of guests.");
  }

  if (errors.length > 0) {
    res.render("guest-form", { title: "Guest Form", errors });
    return;
  }

  const guest = {
    fullName,
    email,
    numGuests: numGuestsNum
  };
  guests.push(guest);
  res.redirect("/");
});
There are now validations in place to ensure that the numGuests field is a
valid number that is greater than 0. Test to make sure this is working properly
by changing the numGuests input type to "text" and submitting invalid data
(you can either edit this directly in guest-form.pug or by opening up the
developers console to edit the HTML)
Improve user experience
One thing that's somewhat annoying right now is that any time there is a
server-side error, all the fields get wiped, and the user has to fill them all
out again. For example, even if the fullName and email fields were filled
out without any issue, a small mistake on the numGuests field would require
the user to have to start the whole process over again and fill out each field.
Let's improve the user experience by pre-setting each field with the values that
they had just submitted. To do this, whenever there is an error, not only should
you render the errors array, but also go ahead and render back the values from
req.body:
if (errors.length > 0) {
  res.render("guest-form", {
    title: "Guest Form",
    errors,
    email,
    fullName,
    numGuests
  });
  return;
}
Then, in guest-form.pug, set each input's value attribute to equal the
associated variables that was rendered back:
extends layout.pug

block content
  if errors
    div
      ul
        each error in errors
          li #{error}
  h2 Add Guest
  form(method="post" action="/guest")
    label(for="fullName") Full Name:
    input(type="text" id="fullName" name="fullName" value=fullName)
    label(for="email") Email:
    input(type="email" id="email" name="email" value=email)
    label(for="numGuests") Num Guests
    input(type="number" id="numGuests" name="numGuests" value=numGuests)
    input(type="submit" value="Add Guest")
Go ahead and test out the improved user experience! Now, each field's value
should persist even if there was an error.
Recap
In this lesson, you learned:
- What data validation is and why it's necessary for the server to
validate incoming data. - How to validate user-provided data from within an Express route handler
function and return a response containing user-friendly validation error
messages when necessary.
Express Middleware
In a previous reading, we briefly introduced the urlencoded middleware function.
Middleware functions are a critical part of a robust Express server. In this
reading you will:
- Understand that the request pipeline in an Express application is composed of
a series of middleware functions. - Write a custom middleware function that validates user-provided data
(submitted via an HTML form), sets an array of user-friendly validation error
messages on the Request object when necessary, and passes control to the next
middleware function.
Middleware overview
Express middleware is kind of a misnomer: because of the "middle" in
"middleware", you might assume that middleware is anything that sits between the
client and the Express server. However, according to the
Express documentation on using middleware: "An
Express application is
essentially a series of middleware function calls." Let's dive into what this
means.
For starters, start up a demo server by running the following commands:
mkdir middleware-demo
cd middleware-demo
npm init --yes
npm install express@^4.0.0
npm install nodemon@^2.0.0 --save-dev
touch index.js
Then, in your index.js, handle get requests to the root path by responding
with "Hello World!":
const express = require("express");

const app = express();

app.get("/", (req, res) => {
  res.send("Hello World!");
});

// Define a port and start listening for connections.
const port = 3000;

app.listen(port, () => console.log(`Listening on port ${port}...`));
Set up a start script in your package.json:
{
  "name": "middleware-demo",
  "version": "1.0.0",
  "description": "",
  "main": "index.js",
  "scripts": {
    "start": "nodemon index.js"
  },
  "keywords": [],
  "author": "",
  "license": "ISC",
  "dependencies": {
    "express": "^4.17.1"
  },
  "devDependencies": {
    "nodemon": "^2.0.2"
  }
}
Then start up your server by running npm start
Anatomy of a middleware function
In Express, a middleware function is a function that takes three arguments, in
this specific order:
req- the request objectres- the response objectnext- according to the Express documentation on using middleware: "the
next middleware function in the application’s request-response cycle"
These arguments might seem a little familiar. Up to this point, you've been
handling all requests with a callback function that takes a req and res
argument.
For example, take a look at the callback function that you just set up to send
back "Hello World!": it takes req and res as the first two arguments. There
is, in fact, an optional next argument that you could have passed into this
function as well. The next argument will be discussed in more depth later in
this reading.
This means that all of the callback functions that you've been writing this
whole time to handle requests and send back responses are actually middleware
functions.
Series of middleware functions
As a reminder, the documentation mentioned that "an Express application is a
series of middleware function calls." To explore what "series" means there,
let's set up another middleware function.
Here's the goal: let's set up a middleware function that logs the time of each
request.
Remember, a middleware function takes three arguments: req, res, and
next.
In index.js, create a middleware function logTime that console logs the
current time formatted as an ISO string. At the end of the middleware function,
invoke the next function, which represents the next middleware function:
const logTime = (req, res, next) => {
  console.log("Current time: ", new Date().toISOString());
  next();
};
Now, update the app.get('/') route so that it calls logTime before it
invokes the anonymous callback function that sends back "Hello World!":
app.get("/", logTime, (req, res) => {
  res.send("Hello World!");
});
To confirm that this is working, refresh localhost:3000 and check that your
server logs are showing the current time of each request.
Let's recap what just happened:
- When the user lands on
localhost:3000, a GET request is made to the "/" route of the Express server. - The first middleware function this route invokes is
logTime. InlogTime, the current time is logged. At the end oflogTime, it invokesnext, which represents the next middleware function. - The next middleware function in this example is the anonymous callback
function that runsres.send("Hello World!").
You could invoke as many middleware functions as you'd like. In addition,
because the req and res objects are passed through every one of the
middleware functions, you could store values in the req object for the next
middleware function to use.
Let's explore this by creating another middleware function called passOnMessage:
const passOnMessage = (req, res, next) => {
  console.log("Passing on a message!");
  req.passedMessage = "Hello from passOnMessage!";
  next();
};
Then, let's add this middleware function to the app.get('/') route and then
console.log the req.passedMessage in one of the later middleware functions:
app.get("/", logTime, passOnMessage, (req, res) => {
  console.log("Passed Message: ", req.passedMessage);
  res.send("Hello World!");
});
In the example above, the
passedMessagewas added to thereqobject so
that it could be used in a later middleware function. Alternatively, you might
instead want to store properties inside of the res.local object so that you
don't accidentally override an existing property in thereqobject.
Instead of passing each middleware function in separate arguments, you could
also pass them all in as one array argument:
app.get("/", [logTime, passOnMessage], (req, res) => {
  console.log("Passed Message: ", req.passedMessage);
  res.send("Hello World!");
});
The order does matter. Try changing up the order of the middleware functions and
see the order of the console.log statements.
Application-level middleware
To be clear, with the current set up, logTime and passOnMessage will only be
executed for the app.get('/') route. For example, let's say you set up another
route:
app.get("/bye", (req, res) => {
  res.send("Bye World.");
});
Because that route does not currently take in logTime as one of its arguments,
it would not invoke the logTime middleware function. To fix this, you could
simply pass in the logTime function, but if there was a middleware function
that you wanted to execute for every single route, this could be pretty tedious.
Setting up an application-level middleware function that runs for every single
route is simple. In fact, the express.urlencoded middleware you set up in the
previous reading was an application-level middleware.
To do this, remove logTime from the app.get('/') arguments. Instead, add it
as an application-wide middleware by writing app.use(logTime). After doing
this, your index.js file should look like this:
const express = require("express");

const app = express();

const logTime = (req, res, next) => {
  console.log("Current time: ", new Date().toISOString());
  next();
};

app.use(logTime);

const passOnMessage = (req, res, next) => {
  console.log("Passing on a message!");
  req.passedMessage = "Hello from passOnMessage!";
  next();
};

app.get("/", passOnMessage, (req, res) => {
  console.log("Passed Message: ", req.passedMessage);
  res.send("Hello World!");
});

app.get("/bye", (req, res) => {
  res.send("Bye World.");
});

// Define a port and start listening for connections.
const port = 3000;

app.listen(port, () => console.log(`Listening on port ${port}...`));
Now, whenever you navigate to either localhost:3000 or localhost:3000/bye,
the passTime middleware function will be executed. Note how the
passOnMessage is only executed for the app.get('/') route.
Data validations with middleware
In the previous reading, you set up data validations in your Express server in
the "Guest List" example.
Let's pick up where that example left off and move the data validations into a
middleware function.
At this point, your index.js should look like this:
const express = require("express");

// Create the Express app.
const app = express();

// Set the pug view engine.
app.set("view engine", "pug");
app.use(express.urlencoded());

const guests = [];

// Define a route.
app.get("/", (req, res) => {
  res.render("index", { title: "Guest List", guests });
});

app.get("/guest", (req, res) => {
  res.render("guest-form", { title: "Guest Form" });
});

app.post("/guest", (req, res) => {
  const { fullname, email, numGuests } = req.body;
  const numGuestsNum = parseInt(numGuests, 10);
  const errors = [];

  if (!fullname) {
    errors.push("Please fill out the full name field.");
  }

  if (!email) {
    errors.push("Please fill out the email field.");
  }

  if (!numGuests || numGuests < 1) {
    errors.push("Please fill out a valid number for number of guests.");
  }

  if (errors.length > 0) {
    res.render("guest-form", {
      title: "Guest Form",
      errors,
      email,
      fullname,
      numGuests
    });
    return;
  }

  const guest = {
    fullname,
    email,
    numGuests: numGuestsNum
  };
  guests.push(guest);
  res.redirect("/");
});

// Define a port and start listening for connections.
const port = 8081;

app.listen(port, () => console.log(`Listening on port ${port}...`));
You might be wondering why you would want to move the validation logic into a
middleware function. Suppose you now wanted to add a route that would allow the
user to update a guest on the guest list.
In that update route, you probably want to enforce the same validations. You
could simply copy and paste over all of those validations, but having it in a
middleware function would keep your code DRY.
To start, create a function called validateGuest and move all of the
validation logic into that function.
Because this will be a middleware function, be sure to accept req, res, and
next as arguments in the function.
Finally, your validateGuest functions should pass on error messages to a later
function so the later function can render the error messages back to the client.
When you're done with your validateGuest function, it should look something
like this:
const validateGuest = (req, res, next) => {
  const { fullname, email, numGuests } = req.body;
  const numGuestsNum = parseInt(numGuests, 10);
  const errors = [];

  if (!fullname) {
    errors.push("Please fill out the full name field.");
  }

  if (!email) {
    errors.push("Please fill out the email field.");
  }

  if (!numGuests || numGuests < 1) {
    errors.push("Please fill out a valid number for number of guests.");
  }

  req.errors = errors;
  next();
};
Notice how the errors array is passed on to the next middleware function by
being added to the req object. Update your app.post('/guest') route so that
it now uses the validateGuest middleware function and so that it checks
req.errors for error messages:
app.post("/guest", validateGuest, (req, res) => {
  const { fullname, email, numGuests } = req.body;
  if (req.errors.length > 0) {
    res.render("guest-form", {
      title: "Guest Form",
      errors: req.errors,
      email,
      fullname,
      numGuests
    });
    return;
  }

  const guest = {
    fullname,
    email,
    numGuests
  };
  guests.push(guest);
  res.redirect("/");
});
In summary, moving validations into a middleware allows you to concisely reuse
validations across different routes. In production-level projects, you'll likely
use a validation library called express-validator, which
follows the same
pattern of validating data in middleware functions and then passing on error
messages through the req object.
The express-validator library gives you a wide range of
pre-built validations
so that you don't have to implement validation logic from scratch. For example,
it comes with a pre-built validation for checking whether an input field's is in
a proper email format: check('email').isEmail(). You'll get a chance to
explore the express-validator middleware functions more in today's project!
What you learned
In this reading, you learned:
- that the request pipeline in an Express application is composed of a series
of middleware functions - how to write a custom middleware function that validates user-provided data
(submitted via an HTML form), sets an array of user-friendly validation error
messages on the Request object when necessary, and passes control to the next
middleware function.
Protecting forms from CSRF
The web, unfortunately, is full of bad actors who consistently try to exploit
any insecurities that a web application might have. This reading will talk about
one common attack called Cross Site Request Forgery (CSRF).
In this reading, you will learn:
- How to use the
csurfmiddleware to embed a token value in forms to protect
against CSRF exploits.
CSRF explained
Let's explain what CSRF is with an example. Imagine that you are a customer at a
bank called "Bad Bank Inc.". To put it bluntly, this bank sucks, and their
website is full of security issues.
In any case, you decide one day that you need to send your brother some money,
so you go http://badbank.com and sign into your account. Once you have
provided the correct credentials to log in, http://badbank.com sends back a
cookie.
Brief overview of cookies: At a super high level, when a user logs into a
website, one way that the server can "log in the user" is by sending back a
cookie to the client. For example, if you log tofacebook.com,
facebook.com's server would send the browser back a cookie. Now, on every
subsequent request tofacebook.com, the browser would attach that cookie to
the request. When the request arrives at the server, the server sees the
cookie and sees that you're logged in and authorized to navigate around your
account.
Now that you're logged in, you navigate to http://badbank.com/send-money,
which renders a a page that looks like this:
<!DOCTYPE html>
<html lang="en">
  <head>
    <title>Bad Bank</title>
  </head>
  <body>
    <h1>Send Money</h1>
    <form action="/send-money" method="post">
      <label for="recipient">Recipient Email: </label>
      <input type="email" id="recipient" name="recipient" />
      <label for="amount">Amount: </label>
      <input type="number" id="amount" name="amount" />
      <input type="submit" value="Send Money" />
    </form>
  </body>
</html>
The page has a form where you can fill out a "recipient" field and an "amount"
field. You fill out your brother's email joe@gmail.com in the recipient field
and $100 for the amount, and then hit the 'Send Money' button.
When you hit the 'Send Money' button, the following happens:
- An HTTP POST request is made to
http://badbank.com/send-money. When you
logged in earlier, your browser received a cookie and stored it in
association withhttp://badbank.com. Now, your browser sees this "send
money" request going to thehttp://badbank.comdomain, so it attaches that
cookie to the HTTP request. - The request arrives at the server. The server sees that there is a cookie,
and it checks the cookie. - Since the cookie is valid, the server knows that you are logged in, and the
server processes the form data to see who you're sending money to and how
much you are sending. - The server finishes processing the form data and sends $100 to your brother
Joe.
Things are going well so far!
Unfortunately, a devious hacker comes along. The hacker puts up another website
that looks like this:
<!DOCTYPE html>
<html lang="en">
  <head>
    <title>See Cute Puppies</title>
    <style>
      form {
        visibility: hidden;
      }
      input[type="submit"] {
        visibility: visible;
      }
    </style>
  </head>
  <body>
    <form action="http://badbank.com/send-money" method="post">
      <label for="recipient">Recipient Email: </label>
      <input
        type="email"
        id="recipient"
        name="recipient"
        value="hacker@gmail.com"
      />
      <label for="amount">Amount: </label>
      <input type="number" id="amount" name="amount" value="1000000" />
      <input type="submit" value="See the cutest puppies!" />
    </form>
  </body>
</html>
Let's break down what's going on in the hacker's website:
- First, the hacker puts up the exact same "Send Money" form on his website: it
hits the same endpoint (http://badbank.com/send-money) with the same method
("post"), and it has all the fields that the endpoint expects when parsing
the form ("recipient" and "amount"). - One difference here is that the hacker hid the form on the website with CSS
by setting the form's visibility to hidden. - The other key difference is that the hacker went ahead and pre-filled the
recipient field's value to his own email address, "hacker@gmail.com", and
then also pre-filled the "amount" field's value to 1 million. - The only part of the form that the hacker decides to show is the submit
button, and he changed the button text to an irresistible prompt: "See the
cutest puppies!". - Naturally, you love puppies, so as you're browsing the web and land on this
hacker's website, you click the button, thinking that you're about to see
puppies. - Instead, a "ost" request gets sent to
http://badbank.com/send-moneyalong
with the pre-filled form data.
Here's the problem, because you had recently logged into http://badbank.com,
your browser is currently storing the cookie to keep you logged in. When the
browser sees that you are making another request to the badbank.com domain, it
attaches the same cookie to the request that the hacker tricked you into making.
Now, when the hacker's request makes it to badbank.com's server, it sees the
cookie, sees that you're logged in and thinks that it's you making the request,
so it sends $1 million to "hacker@gmail.com".
Preventing CSRF
One foundational strategy to prevent a CSRF attack would be to have your server
render a secret token as part of the form. Then, when the form gets submitted,
it checks for the secret token to verify that it actually came from a form that
the server itself had rendered, and not from some other malicious source.
Now, when a hacker tries to imitate the form on his own website, his form
wouldn't have the secret token, and the server would know to reject any requests
from that malicious form.
Let's pick up where we left off in our previous reading's "Guest List" example
and walk through how to implement this CSRF token strategy.
Example setup
At this point, here's what the index.js file for the "Guest List" example
project should look like:
const express = require("express");

// Create the Express app.
const app = express();

// Set the pug view engine.
app.set("view engine", "pug");
app.use(express.urlencoded());

const guests = [];

// Define a route.
app.get("/", (req, res) => {
  res.render("index", { title: "Guest List", guests });
});

app.get("/guest", (req, res) => {
  res.render("guest-form", { title: "Guest Form" });
});

const validateGuest = (req, res, next) => {
  const { fullname, email, numGuests } = req.body;
  const numGuestsNum = parseInt(numGuests, 10);
  const errors = [];

  if (!fullname) {
    errors.push("Please fill out the full name field.");
  }

  if (!email) {
    errors.push("Please fill out the email field.");
  }

  if (!numGuests || numGuests < 1) {
    errors.push("Please fill out a valid number for number of guests.");
  }

  req.errors = errors;
  next();
};

app.post("/guest", validateGuest, (req, res) => {
  const { fullname, email, numGuests } = req.body;
  if (req.errors.length > 0) {
    res.render("guest-form", {
      title: "Guest Form",
      errors: req.errors,
      email,
      fullname,
      numGuests
    });
    return;
  }

  const guest = {
    fullname,
    email,
    numGuests
  };
  guests.push(guest);
  res.redirect("/");
});

// Define a port and start listening for connections.
const port = 8081;

app.listen(port, () => console.log(`Listening on port ${port}...`));
Here's what the index.pug file looks like:
extends layout.pug

block content
  table
    thead
      tr
        th Full Name
        th Email
        th # Guests
    tbody
      each guest in guests
        tr
          td #{guest.fullname}
          td #{guest.email}
          td #{guest.numGuests}


Here's what the `guest-form.pug` file looks like:

```pug
extends layout.pug

block content
  if errors
    div
      ul
        each error in errors
          li #{error}
  h2 Add Guest
  form(method="post" action="/guest")
    label(for="fullname") Full Name:
    input(type="fullname" id="fullname" name="fullname" value=fullname)
    label(for="email") Email:
    input(type="email" id="email" name="email" value=email)
    label(for="numGuests") Num Guests
    input(type="number" id="numGuests" name="numGuests" value=numGuests)
    input(type="submit" value="Add Guest")
Using the csurf library
Let's use the csurf library to handle this whole process of creating a secret
token for the form and then checking the secret token when forms are submitted.
The csurf library creates a middleware function that does the following:
- It creates a secret value, which is sent to the client and stored as a cookie
named_csrf. - On every request for a form, a CSRF token is generated from that secret
value. That CSRF token is then sent back to the client as part of the form in
a hidden input field. - Whenever the client submits the form, the server checks the CSRF token that's
embedded in the form and verifies that it is a valid CSRF token by checking
it against the secret_csrfvalue that was attached to the request as a
cookie.
By taking the steps above, the hacker site would not have the CSRF token
embedded as part of the form on his site, and therefore it would fail the CSRF
token verification process.
Let's implement the above flow in the "Guest List" project. First, start by
running npm install csurf@^1.0.0.
Then, go ahead and also install the cookie-parser middleware by running
npm install cookie-parser@^1.0.0. Remember, the secret value is stored as a
cookie named _csrf, so whenever the form is submitted, the server needs to be
able to parse out the cookie in order to verify the CSRF token against the
secret _csrf value.
At the top of index.js, require the csurf and cookie-parser
dependencies.
Add the cookie-parser middleware as an application-wide middleware function.
For the csurf middleware, go ahead and create the function now so that you can
later use it in specific routes:
const express = require("express");
const cookieParser = require("cookie-parser");
const csrf = require("csurf");

// Create the Express app.
const app = express();

// Set the pug view engine.
app.set("view engine", "pug");
app.use(cookieParser()); // Adding cookieParser() as application-wide middleware
app.use(express.urlencoded());
const csrfProtection = csrf({ cookie: true }); // creating csrfProtection middleware to use in specific routes

// REST OF FILE NOT SHOWN
In the app.get('/guest-form') route, pass in the csrfProtection function as
one of the middleware functions for that route. Then in the route's final
callback middleware function, generate a CSRF token by calling
req.csrfToken().
The csrfToken() function was added to the req object by the
csrfProtection
middleware. The middleware function also generated a secret _csrf value and
stored it in the res object's headers so that the client can store it as a
cookie. Finally, render the CSRF token under a csrfToken key so that the
guest-form.pug template can use it:
app.get("/guest-form", csrfProtection, (req, res) => {
  res.render("guest-form", { title: "Guest Form", csrfToken: req.csrfToken() });
});
In guest-form.pug, add a hidden input field with a name attribute of
"_csrf" and the value attribute set to the csrfToken that the server
renders:
extends layout.pug

block content
  if errors
    div
      ul
        each error in errors
          li #{error}
  h2 Add Guest
  form(method="post" action="/guest")
    input(type="hidden" name="_csrf" value=csrfToken)
    label(for="fullname") Full Name:
    input(type="fullname" id="fullname" name="fullname" value=fullname)
    label(for="email") Email:
    input(type="email" id="email" name="email" value=email)
    label(for="numGuests") Num Guests
    input(type="number" id="numGuests" name="numGuests" value=numGuests)
    input(type="submit" value="Add Guest")
Finally, back in index.js, pass in the csrfProtection function to
app.post('/guest'):
app.post("/guest", csrfProtection, validateGuest, (req, res) => {
  // REST OF CODE NOT SHOWN
}
Now whenever the form is submitted, the csrfProtection middleware function
verifies that the CSRF token that was set in the hidden input field is a valid
token by checking it against the secret _csrf value that was sent as a cookie.
In summary, now, if a hacker tries to add a guest to your guest list, his form
would be missing the CSRF token. Therefore, the endpoint throw an error and
prevent a guest from being added.
There are other considerations to take into account
to fully protect your web
applications from CSRF attacks. For now, adding the CSRF token is a solid first
line of defense.
What you learned
In this reading, you learned how to use the csurf middleware to embed a token
value in forms to protect against CSRF exploits.
This reading concludes this lesson on HTML Forms, and you're now ready to build
out your own Express application that uses forms!
Formative Forms Project
Today you'll be going through the formative experience of building out an
Express application that uses HTML forms!
This application allows users to create two types of user accounts: a normal
user account and an interesting user account. It keeps track of all of the users
in a table on the home page.
When you're done with the project, your web application should have the
following features:
- Site-wide navigation elements that allows users to navigate between the home
page and the two other pages. - A table that shows all of the existing users.
- A form that can be used to create a normal user account.
- A form that can be used to create an interesting user account.
Getting started
- Clone the starter project from
https://github.com/appacademy-starters/formative-forms-starter - Run
npm installto install the dependencies - Run
npm testto run the tests for the project
Phase 0: Intro to the skeleton directory
The skeleton directory has a bare bone index.js file that renders "Hello
World!" when a user land on localhost:3000/. There's also a users array that
already has one user created for you. Throughout the project, as you add new
users, you'll do so by pushing the new users into this array.
It also has a layout.pug template that your other templates can extend. The
layout.pug imports Bootstrap stylesheets in the head element. Feel free to
make your website look fancy with the available Bootstrap styling by adding
Bootstrap class names to your elements.
For example, here is the documentation on how to
add Bootstrap styles to a form element by adding
the Bootstrap classes to each
element.
Phase 1: Home page
Pass each of the specs in 01_home.test.js file. Running npm test will run
every single test across all five test files. If you only want to run the specs
in 01_home.test.js, run npm test -- --grep home. The --grep flag only
executes tests with names that match the passed in option value.
Overall, this project will give you ample opportunity to get familiar with
reading specs and then building out features to satisfy those specs. Be sure to
check the specs often for guidance!
In this first phase, create an index.pug template and update the app.get("/")
route so that it renders the index template. Remember to render the users
array so that it's available in the index.pug template.
Extend the index.pug template to inherit
from layout.pug. Declare a block
named "content" and add a table to render existing users. Follow the specs to
create an h2 header for the table.
Hint: Read the error messages to see the expected header name.
Create table headers and columns for each user's information.
Hint: Take a look at 01_home.test.js to view what columns are expected in
the table.
At the top of the body element in layout.pug, add navigation links so that
users can easily navigate between the home page ("/" route), normal user
creation form ("/create" route), and interesting user creation form
("/create-interesting" route).
Phase 2: Create the normal user form
Pass each of the specs in 02_create_form.test.js. You can run the specs in
this file by running npm test -- --grep create-normal.
In this phase, go ahead and set up this route to use the csurf
middleware to
render a CSRF token in a hidden input field. Be sure to in the {cookie: true}
options when creating the middleware function.
Because your application will be using cookies to store the secret CSRF value,
go ahead and also set up the cookie-parser middleware as
an application-wide
middleware function.
Set up a route so that when users land on /create, a form renders with the
following fields:
_csrf(hidden field)firstNamelastNameemailpasswordconfirmedPassword
Be sure to set correct input type and name attributes, and also remember to
add a label correlating to each
input field's name.
Make sure your _csrf field has an appropriate value from your middleware. At
this point, remove some duplication from your Pug template by leveraging
mixins. Create a mixin to easily generate label
and input element pairs.
Think of how you would create a mixin using input attributes as parameters.
Phase 3: Submitting the form
Pass each of the specs in 03_form_submit.test.js. You can run the specs in
this file by running npm test -- --grep form-submit.
Begin by setting up a "/create" route to handle POST requests. Now that you
are handling POST requests, you'll need access to req.body. Have your
application use the express.urlencoded middleware to decode the form's request
body string into data that can be accessible in req.body.
The next step is to protect this route from CSRF attacks by using the middleware
function that you set up using the csurf library. Make sure
you've included
the middleware function in both of the GET and POST "/create" routes.
Now set up data validations and create an errors array within the
app.post("/create") route. You want to validate whether the user has provided
a firstName, lastName, email, and password. Read the error
messages from
the specs to determine what messages to push into your errors array.
Time to update the create.pug template to render the error messages. Start by
creating an unordered list at the top of your create-form.pug block. Inside of
the unordered list, add a paragraph element with the following content:
The following errors were found:. Now, iterate through each error to create
list items with the error messages. Only render errors if they are present in
the errors array. How can you determine if there are errors present?
You'll want to be sure that you're pre-filling each input field with
already-submitted values so that users don't have to fill out all of the fields
again whenever there are errors. How can you update your input elements so
that already-submitted values are still showing even after a form submission
fails a data validation?
Phase 4: Create interesting user form
Pass each of the specs in 04_create_interesting_form.test.js. You can run the
specs in this file by running npm test -- --grep create-interesting.
Notice how this form includes all of the fields from the first form. Reduce code
duplication by leveraging the Pug includes feature.
One way you could refactor is to create an includes directory inside your
views and make the following files:
views/includes/errors.pugviews/includes/form-inputs.pug
Now create a create-interesting.pug template for your "interesting user form"
and refactor your create.pug template to leverage the Pug includes feature.
Start by dividing your existing create.pug template into errors.pug and
form-inputs.pug. Think of how to use the templates to keep your code DRY.
Phase 5: Submit create interesting user form
Pass each of the specs in 05_interesting_form_submit.test.js. You can run the
specs in this file by running npm test -- --grep submit-interesting.
Go ahead and add validations and write error messages for this new form. Because
this new form still has the same base fields as the other form, be sure to still
run the same validations that you are currently running for the
app.post('/create') route. If you have not done so already, go ahead and move
all of the validations for the first form into a custom middleware function that
both app.post('/create') and app.post('/create-interesting) can use. Be sure
to store those errors on the req object so that they can be used in a later
middleware function.
Once you've ensured that your base fields are being validated, go ahead and add
validations for the new age and favoriteBeatle fields. Follow the error
messages in the specs to determine what your error messages should be. Please
write these new validations in a custom middleware function.
Create mixins for the favoriteBeatle options.
How can you make sure that a
user's favoriteBeatle is automatically selected when a form with errors
re-renders upon submission?
How can you make sure a user's iceCream checkbox accurately renders whether
the user likes ice cream upon an unsuccessful form submission? When saving the
user, be sure to use the checkbox's value (ex: "on") to convert the
user.iceCream property to a boolean.
Finally, make sure your index.pug template is also rendering your new user
properties.
You've made it! Confirm that your whole app works as expected by running
npm test.
Bonus
In a production-level Express application, you'll likely use a library to help
handle most of your data validation. One of the most popular data validation
libraries is the express-validator library, which gives
you a wide range of
robust validations right out of the box.
Install this dependency and use it to add a validation to check that the user
password being submitted is at least 5 characters long and that it at least has
one number in it.
Then, go ahead and migrate any validations that you had on the age and
favoriteBeatle fields to use the express-validator library instead.
Once you're done with those fields, continue migrating all other validations to
use express-validator and add validations to check
all user input (e.g,
checking that a valid email is submitted).
<=(Data Driven Ap)==>
- Data-Driven Web Sites Learning Objectives
- Acclimating to Environment Variables
- Asynchronous Route Handlers in Express
- Handling Errors in Express
- Data-Driven Websites - Part 1: Setting Up the Project
- Data-Driven Websites Project (Part 2: Integrating Sequelize with Express)
- Data-Driven Websites Project (Part 3: Using Sequelize to Perform CRUD Operations)
Data-Driven Web Sites Learning Objectives
This is where it all comes together: databases, HTTP servers, HTML, CSS, request
and response, JavaScript powering it all. This is full-stack. At the end of
this content, you should be able to:
- Use environment variables to specify configuration of or provide sensitive
information for your code - Use the
dotenvnpm package to load environment variables defined in an
.envfile - Recall that Express cannot process unhandled Promise rejections from
within route handler (or middleware) functions; - Use a Promise
catchblock or atry/catchstatement withasync/await
to properly handle errors thrown from within an asynchronous route handler
(or middleware) function - Write a wrapper function to simplify catching errors thrown within
asynchronous route handler (or middleware) functions - Use the
morgannpm package to log requests to the terminal window to assist
with auditing and debugging - Add support for the Bootstrap front-end component library to a Pug layout
template - Install and configure Sequelize within an Express application.
- Use Sequelize to test the connection to a database before starting the HTTP
server on application startup - Define a collection of routes (and views) that perform CRUD operations
against a single resource using Sequelize - Handle Sequelize validation errors when users are attempting to create or
update data and display error messages to the user so that they can resolve
any data quality issues - Describe how an Express.js error handler function differs from middleware
and route handler functions - Define a global Express.js error-handling function to catch and process
unhandled errors - Define a middleware function to handle requests for unknown routes by
returning a 404 NOT FOUND error
Acclimating to Environment Variables
As your Express applications increase in complexity, the need to have a
convenient way to configure your applications will also increase.
For example, consider an application that uses a database for data persistence.
To connect to the database, do you simply provide the username and password to
use when making a connection to the database directly in your code? What if your
teammate uses a different username or password? Do they modify the code to make
it work for them? If they do that, how do you keep the application working on
your system?
It's not just the differences between you and your teammates' systems. Your
applications won't always run locally; eventually they'll need to run on
external servers to facilitate testing or to ultimately serve your end users. In
most cases, your application will need to be configured differently when it's
running on an external server than when it's running locally.
You need a solution for managing your application's configuration! When you
finish this article, you should be able to:
- Recall what environment variables are and how they're commonly used;
- Set and get an environment variable value;
- Store environment variable values in an
.envfile; - Use a module to organize environment variables; and
- Understand how to run npm scripts in different environments.
What are environment variables?
To understand what an environment variable is, we need to start with
understanding what an environment is.
An environment is the system that an application is deployed to and running in.
Up to now your applications have been running on your local machine, which is
typically referred to as the "local environment" or "local development
environment".
For real life applications, there are usually several environments—aside from
each developer's local environment—that the application will be deployed and ran
within:
- Testing - An environment that's used to test the application to ensure that
recent changes don't affect existing functionality and that new features meet
the project's requirements. - Staging - An environment that mirrors the production environment to ensure
that nothing unexpected occurs before the application is deployed to
production. - Production - The environment that serves end users. For applications that need
to support a large number of users, the production environment can contain
multiple servers (sometimes dozens or even hundreds of servers).
Environment variables are application configuration related variables whose
values change depending on the environment that the application is running in.
Using environment variables allows you to change the behavior of your
application by the environment that it's running in without having to hard code
values in your code.
How are environment variables commonly used?
In an earlier lesson, you learned how to use the Sequelize ORM to connect to a
PostgreSQL database to retrieve, create, update, and delete data. To connect to
the database, you provided values for the following configuration variables
within a module named config/database.js:
module.exports = {
  development: {
    username: "mydbuser",
    password: "mydbuserpassword",
    database: "mydbname",
    host: "127.0.0.1",
    dialect: "postgres",
  },
};
The database connection settings that you use in your local development
environment—in particular the username and password values—won't be the same
that the testing, staging, or production environments will need.
Sequelize allows you to define database connection settings per environment like
this:
module.exports = {
  development: {
    username: "mydbuser",
    password: "mydbuserpassword",
    database: "mydbname",
    host: "127.0.0.1",
    dialect: "postgres",
  },
  test: {
    username: "testdbuser",
    password: "testdbuserpassword",
    database: "testdbname",
    host: "127.0.0.1",
    dialect: "postgres",
  },
  production: {
    username: "proddbuser",
    password: "proddbuserpassword",
    database: "proddbname",
    host: "127.0.0.1",
    dialect: "postgres",
  },
};
While you could hard code different settings for each environment this approach
is inelegant, difficult to maintain, and insecure. Application configuration can
unexpectedly need to change in test, staging, and production environments.
Having to make a code change to change an application's configuration in a
specific environment isn't ideal.
Using environment variables for the database connection settings separates the
configuration from the application's code and allows the configuration to be
updated without having to make a code change.
Where else should you use environment variables? Anywhere that the behavior of
your code needs to change based upon the environment that it's running in.
Environment variables are commonly used for:
- Database connection settings (as you've just seen)
- Server HTTP ports
- Static file locations
- API keys and secrets
Setting and getting environment variable values
Now that you know what environment variables are and how they're used, it's time
to see how to set and get an environment variable value.
Setting an environment variable value
The simplest way to set an environment variable, is via the command line, by
declaring and setting the environment variable before the node command:
PORT=8080 node app.js
You can even declare and set multiple environment variables:
PORT=8080 NODE_ENV=development node app.js
The
NODE_ENVenvironment variable is a special variable that's used by
many node programs to determine what environment the application is running
in. For example, setting theNODE_ENVenvironment variable toproduction
enables features in Express that help to improve the overall performance of
your application. For more information, see this page in
the Express documentation.
Sequelize also uses theNODE_ENVvariable to determine which section of the
config.jsonfile it will use for database configuration.
This approach also works within an npm start script:
{
  "scripts": {
    "start": "PORT=8080 NODE_ENV=development node app.js"
  }
}
Getting an environment variable value
To get an environment variable value, you simply use the process.env property:
const port = process.env.PORT;
The process object is a global Node object, so you can safely access the
process.env property from anywhere within your Node application.
If the PORT environment variable isn't declared and set, it'll have a value of
undefined. You can use the logical OR (||) operator to provide a
default
value in code:
const port = process.env.PORT || 8080;
Storing environment variables in a
.env file
Passing environment variables from the command line is not an ideal solution.
Defining an npm start script keeps you from having to type the variables again
and again, but it's still not a convenient way to maintain them.
Using the dotenv npm package, you can declare and set all of your environment
variables in a .env file and the dotenv package will load your variables
from that file and set them on the process.env property.
To start, install the dotenv npm package as a development dependency:
npm install dotenv --save-dev
Remember that npm tracks two main types of dependencies in the
package.json
file: dependencies (dependencies) and development dependencies
(devDependencies). Dependencies (dependencies) are the packages that
your project needs in order to successfully run when in production (i.e. your
application has been deployed or published to a server that can be accessed by
your users). Development dependencies (devDependencies) are the packages
that are needed locally when doing development work on the project. Passing
the--save-devflag when installing a dependency tells npm to install the
dependency as a development dependency.
Then add an .env file to the root of your project that contains all of your
environment variables:
PORT=8080
DB_USERNAME=mydbuser
DB_PASSWORD=mydbuserpassword
DB_DATABASE=mydbname
DB_HOST=localhost
Pro tip for VS Code users: Install the DotENV extension to add syntax coloring in
.envfiles.
Loading environment variables on application startup
Using the dotenv npm package, it's easy to load your environment variables
when your Express application starts up. Just run this code before you configure
and start your Express application:
// app.js

const express = require('express');

// Load the environment variables from the .env file
require('dotenv').config();

// Create the Express app.
const app = express();

// Define routes.

app.get('/', (req, res) => {
  res.send('Hello from Express!');
});

// Define a port and start listening for connections.

const port = process.env.PORT || 8080;

app.listen(port, () => console.log(`Listening on port ${port}...`));
Another way to use dotenv
Another way to use the dotenv module is to load it before your app loads on
the Node.JS command line by using Node.JS's -r option to require a module
immediately. To use it this way you could change your npm start command
in your package.json to look like this:
  {
  "scripts": {
    "start": "node -r dotenv/config app.js"
  }
}
Doing it this way makes sure that all of the environment variables are loaded
before you execute any of the code of your app.
Whichever way you decide to go, the main point is to load the contents of your
.env file as early as possible so those variables will be available to your
code.
Keeping the .env file out of
source control
It's important to keep your .env file out of your source control as it will
often contain sensitive information like database connection settings or API
keys and secrets. If you're using Git for your source control, make sure that
your .gitignore file includes an entry for .env files.
If you're working on a team, you'll need a way to document what the contents of
the .env should look like. One approach is to update the project's README.md
file with instructions on what environment variables need to be defined in the
.env file. Another option is to add an .env.example file to your project
that mirrors the contents of the .env file but replaces any sensitive
information with dummy values:
PORT=8080
DB_USERNAME=dbuser
DB_PASSWORD=dbuserpassword
DB_DATABASE=dbname
DB_HOST=localhost
In many companies, managing the environment variables or .env files will
be handled by whatever process the company uses to get the code deployed and
running on the actual servers. Often companies will have dedicated teams of
System Administrators or "DevOps" personnel that handle these tasks. As a
developer you may have to work with these teams to determine what the best
strategy is for getting the environment variables set for your application.
Using a module to organize environment variables
Earlier we mentioned that the process object is a global Node object, which
means that you can safely access the process.env property from anywhere within
your Node application. While that's true, you might find it helpful to
encapsulate all of your process.env property access into a single config
module. The config module has a single purpose: to import all of your
environment variables and export them to make them available to the rest of your
application:
// config.js

module.exports = {
  environment: process.env.NODE_ENV || 'development',
  port: process.env.PORT || 8080,
  db: {
    username: process.env.DB_USERNAME,
    password: process.env.DB_PASSWORD,
    database: process.env.DB_DATABASE,
    host: process.env.DB_HOST,
  },
};
Creating a config module also gives you a convenient place to optionally
provide default values and to alias environment variable names (notice how the
NODE_ENV environment variable is being aliased to environment).
Any other module in your application that needs access to a configuration
variable value just needs to require the config module:
Make sure this is done after the environment variables are loaded if you are
using thedotenvmodule.
// app.js

const express = require('express');

// Load the environment variables from the .env file
require('dotenv').config();

// Get the port environment variable value.
const { port } = require('./config');

// Create the Express app.
const app = express();

// Define routes.

app.get('/', (req, res) => {
  res.send('Hello from Express!');
});

// Start listening for connections.
app.listen(port, () => console.log(`Listening on port ${port}...`));
Notice how destructuring is being used to get a specific configuration variable
value when requiring the config module:
const { port } = require('./config');
Without using destructuring, you could get the port configuration variable
value like this:
const config = require('./config');
const port = config.port;
Or like this:
const port = require('./config').port;
Any of these approaches work fine. Deciding which to use is one of the many
stylistic choices you'll make as a developer.
Running npm binaries
Using npx to run an npm binary like the Sequelize CLI won't work if you've
defined environment variables in an .env file for your database connection
settings. You'll need to use a tool like the dotenv-cli npm package as an
intermediary between npx and the Sequelize CLI to load your environment
variables from the .env file and run the command that you pass into it.
To start, install the dotenv-cli package as a development dependency:
npm install dotenv-cli --save-dev
Then use npx to run the dotenv command passing in the command to invoke using
the set of environment variables loaded from your .env file:
npx dotenv sequelize db:migrate
Defining environment specific npm scripts
Sometimes you may want to run different npm scripts for different NODE_ENV
environments.
For instance you might have this in your package.json for local development.
{
  "scripts": {
    "start": "nodemon app.js"
  }
}
But in production we may not want to run nodemon, since our code won't be
changing constantly. Perhaps, production needs a package.json like this instead:
{
  "scripts": {
    "start": "node app.js"
  }
}
To keep from having to manually change your npm start script before you deploy
your application to the production environment, you can use a tool like the
per-env npm package that allows you to define npm scripts for each of your
application's environments.
To start, install the per-env package:
npm install per-env
Then update your npm scripts to this:
{
  "scripts": {
    "start": "per-env",
    "start:development": "nodemon app.js",
    "start:production": "node app.js",
  }
}
If the NODE_ENV environment variable is set to production, then running the
start script will result in the execution of the start:production script. If
the NODE_ENV variable isn't defined, then the start:development script will
be executed by default.
Using this approach, you can conveniently define a start script (or any
predefined or custom script) for each environment that your application will be
deployed to.
What you learned
In this article, you learned how to
- set and get an environment variable value
- store environment variable values in an
.envfile - use a module to organize environment variables
- handle running different npm scripts in different environments.
Asynchronous Route Handlers in Express
Up to this point, your Express route handler functions have been
synchronous—each statement predictably executes in the order that they're
written in. Most Express applications, at some point, need to interact with a
database or an API (or both). Interacting with those external resources requires
you to write asynchronous code, which in turn requires your route handler
functions to be asynchronous.
In modern JavaScript applications, writing asynchronous code means working with
Promises and optionally the async/await keywords. When working with Promises
in Express route handlers or middleware functions, special attention needs to be
spent on how errors are handled.
When you finish this article, you should be able to:
- Recall that Express cannot process unhandled Promise rejections from
within route handler (or middleware) functions; - Use a Promise
catchblock or atry/catchstatement withasync/await
to properly handle errors thrown from within an asynchronous route handler (or
middleware) function; and - Write a wrapper function to simplify catching errors thrown within
asynchronous route handler (or middleware) functions.
Calling asynchronous functions or methods within route handlers
To see how to properly call asynchronous functions or methods within route
handlers, you need an asynchronous function or method to call.
Creating a simple asynchronous function
In a future article, you'll see how to integrate your Express application with a
database. For now keep things as simple as possible by creating a standalone
function that wraps the built-in setTimeout() function in a Promise:
/** * Asynchronous function that delays for the provided length of time. * If the length of time to wait is less than '0', then the returned * Promise will reject, otherwise it'll resolve. * @param {number} timeToWait - The length of time to wait in milliseconds. */ const delay = (timeToWait) => new Promise((resolve, reject) => { setTimeout(() => { if (timeToWait < 0) { reject(new Error('An error has occurred!')); } else { resolve(`All done waiting for ${timeToWait}ms!`); } }, Math.abs(timeToWait)); });
The above delay() function accepts a timeToWait value and returns a new
Promise that calls the setTimeout() function passing in the timeToWait
absolute value. When the setTimeout() function call completes, the Promise is
resolved if the timeToWait value is a positive number or it's rejected if the
timeToWait value is a negative number.
Note: The
Math.abs()function is used to get the absolute value of the
timeToWaitparameter value. Getting the absolute value ensures that the
value passed to thesetTimeout()function is always a positive number. For
more information about absolute values, see this Wikipedia page.
Setting up the Express application
With your delay() function in hand, use it to create a simple Express
application:
// app.js const express = require('express'); /** * Asynchronous function that delays for the provided length of time. * If the length of time to wait is less than '0', then the returned * Promise will reject, otherwise it'll resolve. * @param {number} timeToWait - The length of time to wait in milliseconds. */ const delay = (timeToWait) => new Promise((resolve, reject) => { setTimeout(() => { if (timeToWait < 0) { reject(new Error('An error has occurred!')); } else { resolve(`All done waiting for ${timeToWait}ms!`); } }, Math.abs(timeToWait)); }); // Create the Express app. const app = express(); // Define routes. app.get('*', (req, res) => { // TODO }); // Define a port and start listening for connections. const port = 8080; app.listen(port, () => console.log(`Listening on port ${port}...`));
Note: If you're following along, don't forget to use npm to install
Express (i.e.npm install express)!
Now call the delay() function within your route handler function. Remember
that the delay() function returns a Promise, so you can use the Promise
then() method to execute code when the delay() method completes. Within the
callback that you pass to the then() method, send the value returned from the
delay() function to the client using the res.send() method:
app.get('*', (req, res) => { delay(5000).then((value) => res.send(value)); });
If you start your application (i.e. node app.js) and browse to
http://localhost:8080/ you'll see that the request hangs for 5 seconds before
the server sends the response "All done waiting for 5000ms!"
Feel free to experiment by varying the number of milliseconds that you're
passing to the delay() function. For now, continue to pass a positive number;
we'll see in just a moment what happens when we pass a negative number.
Using async/await
Instead of using the Promise then() method to execute code when an
asynchronous function or method call has completed, you can use the await
keyword.
Start with adding the async keyword to your route handler function to indicate
that it's going to make an asynchronous function or method call. Then use the
await keyword to wait for a result to be returned from the delay() function
call:
app.get('*', async (req, res) => { const result = await delay(5000); res.send(result); });
If you test your application again you'll see that it behaves the same as it did
before—the request hangs for 5 seconds before the server sends the response "All
done waiting for 5000ms!"
Catching errors thrown by asynchronous functions or methods
So far, you've stayed on the "happy" path by passing a positive number to the
delay() function. If you pass a negative number to the delay() function,
it'll throw an error:
app.get('*', async (req, res) => { const result = await delay(-5000); res.send(result); });
This time when testing your application, the browser will indefinitely hang as
it waits for the server to return a response. If you look in the terminal,
you'll see that an error occurred:
(node:89455) UnhandledPromiseRejectionWarning: Error: An error has occurred!
at Timeout._onTimeout ([path to the project folder]/app.js:13:14)
at listOnTimeout (internal/timers.js:537:17)
at processTimers (internal/timers.js:481:7)
(node:89455) UnhandledPromiseRejectionWarning: Unhandled promise rejection. This error originated either by throwing inside of an async function without a catch block, or by rejecting a promise which was not handled with .catch(). To terminate the node process on unhandled promise rejection, use the CLI flag `--unhandled-rejections=strict` (see https://nodejs.org/api/cli.html#cli_unhandled_rejections_mode). (rejection id: 1)
(node:89455) [DEP0018] DeprecationWarning: Unhandled promise rejections are deprecated. In the future, promise rejections that are not handled will terminate the Node.js process with a non-zero exit code.
Node.js is warning you that an unhandled Promise rejection occurred.
Furthermore, it's warning that in a future version of Node, unhandled Promise
rejections will terminate the Node process (which would result in your
application being stopped)!
Luckily, this issue is easy to deal with—simply add a try/catch statement
around your asynchronous function or method call:
app.get('*', async (req, res, next) => { try { const result = await delay(-5000); res.send(result); } catch (err) { next(err); } });
Notice that you need to add the next parameter to your route handler function
parameter list and pass the caught error to the next() method in the catch
block. Passing the error to the next() method allows the Express default error
handler process the error.
Note: When writing custom middleware functions, calling the
next()
method without an argument passes control to the next middleware function.
Calling thenext()method with an argument results in Express handling
the current request as an error and skipping any remaining routing and
middleware functions.
The Express default error handler is a special type of middleware function
that's responsible for handling errors. In a development environment, the
default error handler logs the error to the console and sends a response with an
HTTP status code of 500 Internal Server Error to the client containing the
error message along with the stack trace.
If you test your application again, you'll see the default error handler in
action as it provides details about the unhandled error that occurred after the
delay() function has waited for the number of milliseconds that you passed in:
Error: An error has occurred!
at Timeout._onTimeout ([path to the project folder]/app.js:13:14)
at listOnTimeout (internal/timers.js:537:17)
at processTimers (internal/timers.js:481:7)
If you're not using the async/await keywords, you need to call the
catch()
method on the Promise returned by the delay() function to handle any thrown
errors:
app.get('*', (req, res, next) => { delay(-5000) .then((value) => res.send(value)) .catch((err) => next(err)); });
Again, notice that you need to add the next parameter to your route handler
function parameter list and call the next() method passing in the error caught
by the catch() method.
If you're only passing the error to the next() method, you can simplify your
code by passing the reference to the next() method directly to the catch()
method call:
app.get('*', (req, res, next) => { delay(-5000) .then((value) => res.send(value)) .catch(next); });
Express is able to automatically catch errors thrown by synchronous route
handlers. When performing asynchronous operations within route handlers, it's
important to remember that Express is unable to catch errors thrown by
asynchronous route handlers. Given that, asynchronous route handlers need to
catch their own errors and pass them to the next() method.
Note: While all of the examples that you've seen in this article are built
around route handlers, everything that's been shown and discussed equally
applies to asynchronous custom middleware functions.
Reducing boilerplate code
Adding a try/catch statement to each route handler function that needs to
call an asynchronous function or method can result in a lot of boilerplate code.
If your application only has a handful of routes that's probably not an issue,
but if your application has dozens of routes (or more), it's worth taking a look
at how you can reduce the amount of boilerplate code you need to write.
Writing an asynchronous route handler wrapper function
One approach to avoiding writing boilerplate code is to write a simple
asynchronous route handler wrapper function to catch errors.
Start by defining a function named asyncHandler that accepts a reference to a
route handler function and returns a function that defines three parameters,
req, res, and next:
const asyncHandler = (handler) => { return (req, res, next) => { // TODO }; };
Then, within the function that's being returned, call the passed in route
handler function (i.e. the handler parameter), passing in the req, res,
and next parameters:
const asyncHandler = (handler) => { return (req, res, next) => { return handler(req, res, next); }; };
And finally, call the catch() method on the Promise returned from the route
handler function passing in the next parameter:
const asyncHandler = (handler) => { return (req, res, next) => { return handler(req, res, next).catch(next); }; };
Remember, passing the next parameter to the catch() method allows the
Express default error handler to process any errors thrown by the route handler
function.
Because each of the arrow functions return a single statement, the
asyncHandler() function can optionally be written a little more concisely:
const asyncHandler = (handler) => (req, res, next) => handler(req, res, next).catch(next);
Note: Developers sometimes find the more concise version to be more
difficult to read and understand, so if you're working on a team, talk with
your teammates and determine which approach is the team's preferred approach.
Using the asynchronous route handler wrapper function
As a reminder, this is what your asynchronous route handler currently looks
like:
app.get('*', async (req, res, next) => { try { const result = await delay(-5000); res.send(result); } catch (err) { next(err); } });
Wrapping your asynchronous route handler with your asyncHandler() helper
function looks like this:
app.get('*', asyncHandler(async (req, res) => { const result = await delay(5000); res.send(result); }));
Because the asyncHandler() function is calling the catch() method on the
Promise that's returned from the asynchronous route handler you can safely
remove the try/catch statement. This makes asynchronous route handlers
cleaner and easier to read and maintain.
Note: You might wonder how the
asyncHandler()function can successfully
call thecatch()method after invoking the asynchronous route handler
function if the route handler function doesn't explicitly return a Promise.
Remember that marking a function or method with theasynckeyword results in
that function or method implicitly returning a Promise. Your asynchronous
route handler is marked as anasyncfunction, so it implicitly returns a
Promise.
What you learned
In this article, you learned
- that Express cannot process unhandled Promise rejections from within a route
handler (or middleware) function; - how to use a Promise
catchblock or atry/catchstatement with
async/awaitto properly handle errors thrown from within asynchronous
route handler (or middleware) function; and - how to write a wrapper function to simplify catching errors thrown within
asynchronous route handler (or middleware) functions.
See also…
While writing a wrapper function for your asynchronous route handler function is
easy to do, you can also use an npm package to accomplish the same thing without
having to write any extra code. If you're interested to see what this looks
like, check out the express-promise-router npm
package.
Handling Errors in Express
No matter how hard we try, we all make mistakes when writing code. If you're
lucky, the coding mistake will break the execution of the application in a very
obvious way—crashing the application when testing in the local development
environment. If you're unlucky, the coding mistake will go unnoticed, only to
surface as an unexpected error when the application is being used by end users.
When an unexpected error occurs, the default error handler in Express will send
a response to the browser containing the error message along with the stack
trace (if you're not running in a production environment). While the default
error handler might work fine in your local development environment, for most
applications you'll want to create a custom error handler to precisely control
how errors are handled in other environments (i.e. test, staging, or
production).
When you finish this article, you should be able to:
- Describe how an error handler function differs from middleware and route
handler functions; - Define a global error-handling function to catch and process unhandled errors;
and - Define a route to handle requests for unknown routes by throwing a 404 NOT
FOUND error.
Setting up an example Express application
Let's create a simple application to assist with exploring how to handle errors
in Express.
Create a folder for your project (if you haven't already), open a terminal and
browse to your project folder, and run the following commands:
npm init -y npm install express@^4.0.0 pug@^2.0.0 npm install nodemon --save-dev
Important: If you're using Git, don't forget to add a
.gitignorefile in
the root of your project folder that contains an entry to ignore the
node_modulesfolder! Thenode_modulesfolder tends to be very large and
would bloat the Git repository if it was committed and pushed. Ignoring the
node_modulesfolder is possible because it can be generated on demand by
running thenpm installcommand.
Add an app.js file to the root of your project containing the following code:
// app.js const express = require('express'); // Create the Express app. const app = express(); // Set the pug view engine. app.set('view engine', 'pug'); // Define routes. app.get('/', (req, res) => { res.render('index', { title: 'Home' }); }); app.get('/throw-error', (req, res) => { throw new Error('An error occurred!'); }); // Define a port and start listening for connections. const port = 8080; app.listen(port, () => console.log(`Listening on port ${port}...`));
Next, define an npm start script in your package.json file that uses Nodemon
to run the application:
{ "name": "handling-errors-in-express", "version": "1.0.0", "description": "", "main": "app.js", "scripts": { "start": "nodemon app.js" }, "keywords": [], "author": "", "license": "ISC", "dependencies": { "express": "^4.17.1", "pug": "^2.0.4" }, "devDependencies": { "nodemon": "^2.0.2" } }
Pro Tip: Creating scripts in the
package.jsonfile allows you to
customize and rename often used terminal commands. For example, the above
"start": "nodemon app.js"script allows you to runnpm startinstead of
npx nodemon app.jsin your terminal to run the application.
The last bit of set up business is to create a couple of Pug views. Add a
views folder to the root of the project. Then add two files to the views
folder: layout.pug and index.pug:
//- layout.pug doctype html html head title Custom Error Handlers - #{title} body h1 Custom Error Handlers h2= title div block content
//- index.pug extends layout.pug block content p Welcome to the Custom Error Handlers project!
Now you're ready to run and test your application! From the terminal, run the
command npm start, then browse to the URL http://localhost:8080/. You should
see the application's Home page.
The default error handler in Express
After an error is thrown or the next() method is called with an argument from
within a route handler, Express will handle the error using its default error
handler.
You can see the default error handler in action by starting the example
application (i.e. npm start) and browsing to
http://localhost:8080/throw-error. The default error handler will send a
response to the browser containing the error message along with the stack trace:
Error: An error occurred!
at throwError ([path to the project folder]/app.js:14:9)
at [path to the project folder]/app.js:29:3
at Layer.handle [as handle_request] ([path to the project folder]/node_modules/express/lib/router/layer.js:95:5)
at next ([path to the project folder]/node_modules/express/lib/router/route.js:137:13)
at Route.dispatch ([path to the project folder]/node_modules/express/lib/router/route.js:112:3)
at Layer.handle [as handle_request] ([path to the project folder]/node_modules/express/lib/router/layer.js:95:5)
at [path to the project folder]/node_modules/express/lib/router/index.js:281:22
at Function.process_params ([path to the project folder]/node_modules/express/lib/router/index.js:335:12)
at next ([path to the project folder]/node_modules/express/lib/router/index.js:275:10)
at expressInit ([path to the project folder]/node_modules/express/lib/middleware/init.js:40:5)
Note: If you're following along, the placeholder text "[path to the
project folder]" in the above error stack trace information will display the
actual absolute path to your project folder.
The response will also have an HTTP status code of 500 Internal Server Error.
You can view the response's HTTP status code by inspecting the network
information using your browser's developer tools.
Do you need a custom error handler?
If the NODE_ENV environment variable is set to "production", then the default
error handler will simply return a response with an HTTP status code of 500 Internal Server Error
containing the text "Internal Server Error".
You can see this in action by setting the NODE_ENV environment variable before
starting the example application:
NODE_ENV=production node app.js

If an end user were to see the above error message in production, it would
likely leave them frustrated and confused. While a custom error handler won't be
able to magically resolve unexpected errors for your users, it will allow you to
display a friendlier message using your website's layout template (you'll see
how to do this later in this article).
Defining a custom error handler will also allow you to log unexpected errors so
that you (or someone on your team) can review them periodically to determine if
an undetected bug has made its way into production.
Defining a custom error handler
As you've seen in earlier lessons, Express middleware functions define three
parameters (req, res, next) and route handlers define two or three
parameters (req, res, and optionally the next parameter):
// Middleware function. app.use((req, res, next) => { console.log('Hello from a middleware function!'); next(); }); // Route handler function. app.get('/', (req, res) => { res.send('Hello from a route handler function!'); });
Error handling functions look the same as middleware functions except they
define four parameters instead of three—err, req, res, and
next:
app.use((err, req, res, next) => { console.error(err); res.send('An error occurred!'); });
Custom error handler functions have to define four parameters otherwise Express
won't recognize the function as an error handler. Route handler function
definitions can omit the next parameter if it's not going to be used; error
handler functions have to include the next parameter.
Define error handler functions after all other calls to app.use() and all of
your application's route definitions:
// app.js const express = require('express'); // Create the Express app. const app = express(); // Set the pug view engine. app.set('view engine', 'pug'); // Define routes. app.get('/', (req, res) => { res.render('index', { title: 'Home' }); }); app.get('/throw-error', (req, res) => { throw new Error('An error occurred!'); }); // Custom error handler. app.use((err, req, res, next) => { console.error(err); res.send('An error occurred!'); }); // Define a port and start listening for connections. const port = 8080; app.listen(port, () => console.log(`Listening on port ${port}...`));
This ensures that your custom error handler will get called to handle errors
from any of your application's middleware or route handler functions.
If you test your custom error handler by browsing to
http://localhost:8080/throw-error you'll see that it sends a response
containing the text "An error occurred!".
If you use your browser's developer tools to inspect the response of
http://localhost:8080/throw-error, you'll notice that the response HTTP status
code is 200 OK, which is the default status code used by Express when sending
responses. You can use the res.status() method to set a different status code:
// Custom error handler. app.use((err, req, res, next) => { console.error(err); res.status(err.status || 500); res.send('An error occurred!'); });
Notice how the err.status property is checked to see if it has a value before
the status is set to the literal numeric value 500. Giving priority to the
err.status property allows code elsewhere in the application to throw an error
that includes the specific HTTP status code to send to the client.
You can return an HTML response instead of plain text by rendering a Pug view:
// Custom error handler. app.use((err, req, res, next) => { console.error(err); res.status(err.status || 500); const isProduction = process.env.NODE_ENV === 'production'; res.render('error', { title: 'Server Error', message: isProduction ? null : err.message, error: isProduction ? null : err, }); });
Be sure to add the error.pug view to the views folder:
//- error.pug extends layout.pug block content div p= message || 'An unexpected error occurred on the server.' if stack h3 Stack Trace pre= stack
Notice that the error message and stack properties are only being passed to
the view if the NODE_ENV environment variable isn't set to "production". For
security reasons, it's important to avoid leaking potentially sensitive
information about your application.
If you test your custom error handler again by browsing to
http://localhost:8080/throw-error you'll see that it sends an HTML response
containing information about the error that was thrown.
To test how the error handler will behave in the production environment, set the
NODE_ENV environment variable to "production" before starting the example
application:
NODE_ENV=production node app.js
Defining multiple custom error handlers
Express allows you to define more than one custom error handler which is useful
if you need to handle specific types of errors differently. It's also useful for
creating an error handler to perform a specific error handling task. Let's look
at an example of defining a second error handler that's responsible for logging
errors.
Error handlers, like route handlers, are executed by Express in the order that
they're defined in, so defining a new error handler before the existing handler
ensures that it'll be called first:
// Custom error handlers. // Error handler to log errors. app.use((err, req, res, next) => { if (process.env.NODE_ENV === 'production') { // TODO Log the error to the database. } else { console.error(err); } next(err); }); // Generic error handler. app.use((err, req, res, next) => { res.status(err.status || 500); const isProduction = process.env.NODE_ENV === 'production'; res.render('error', { title: 'Server Error', message: isProduction ? null : err.message, stack: isProduction ? null : err.stack, }); });
The new error handler simply uses the console.error() method to log errors to
the console, provided that the NODE_ENV environment variable isn't set to
"production". In the production environment, there's a TODO comment to log the
error to the database. The console.error() method call in the existing error
handler was removed; logging errors is now the responsibility of the new error
handler.
Note: Logging errors to a database—or another type of data store—is a
common practice in production environments. Doing this allows a developer or
system administrator to periodically review a log of application errors to
determine if there are any issues that might need to be looked at in more
detail. There are many ways to handle error logging, ranging from npm logging
packages (e.g.winston) to full-blown application
monitoring cloud-based services.
Also notice that the new error handler calls the next() method passing in the
err parameter (the current error) which passes control to the next error
handler. An error handler needs to call next() or return a response. Failing
to do this will result in the request "hanging" and consuming resources on the
server.
Handling "Page Not Found" errors
A common feature for applications to implement is to present a friendly "Page
Not Found" message to end users when a request can't be matched to one of the
application's defined routes. Let's see how to implement this feature using a
combination of a middleware function and an error handler function.
First, add a new middleware function after the last route in your application
(but before any of your error handlers):
// Catch unhandled requests and forward to error handler. app.use((req, res, next) => { const err = new Error('The requested page couldn\'t be found.'); err.status = 404; next(err); });
Placing this middleware function after all of your routes means that this
middleware function will only be invoked if a request fails to match any of your
routes.
Notice that the middleware function creates a new Error object and sets a
status property on the object to the literal number 404. 404 is the
HTTP
status code for "Not Found" responses indicating that the requested resource
could not be found.
After setting the status property, the next() method is called with the
err variable passed as an argument. Remember that calling the next() method
with an argument results in Express handling the current request as an error and
skipping any remaining routing and middleware functions.
At this point, you can test your "Page Not Found" middleware function by
browsing to http://localhost:8080/some-unknown-page (or really any path that
doesn't match one of your application's configured routes). You should see your
"Server Error" page displaying the message "The requested page couldn't be
found."
Creating a "Page Not Found" page
While the current solution works, a more elegant solution would be to present a
specific "Page Not Found" page to the end user.
To do this, define another error handler—in between the logging and generic
error handlers—for handling 404 errors:
// Error handler for 404 errors. app.use((err, req, res, next) => { if (err.status === 404) { res.status(404); res.render('page-not-found', { title: 'Page Not Found', }); } else { next(err); } });
This error handler starts by checking if the err.status property is set to
404—which indicates that the current error is a "Not Found" error. If the
current error is a "Not Found" error, then it sets the response HTTP status code
to 404 and calls the res.render() method to render the page-not-found
view
(you'll create that view in just a bit). Otherwise, the next() method is
called with the err parameter passed as an argument, which passes control to
the next error handler.
Before testing your new error handler, don't forget to add a new view named
page-not-found.pug to the views folder with the following content:
//- page-not-found.pug extends layout.pug block content div p Sorry, we couldn't find the page that you requested.
Now if you test your application again by browsing to
http://localhost:8080/some-unknown-page (or any path that doesn't match one of
your application's configured routes) you should see your new "Page Not Found"
page.
For your reference, here's the final version of the app.js file:
// app.js const express = require('express'); // Create the Express app. const app = express(); // Set the pug view engine. app.set('view engine', 'pug'); // Define routes. app.get('/', (req, res) => { res.render('index', { title: 'Home' }); }); app.get('/throw-error', (req, res) => { throw new Error('An error occurred!'); }); // Catch unhandled requests and forward to error handler. app.use((req, res, next) => { const err = new Error('The requested page couldn\'t be found.'); err.status = 404; next(err); }); // Custom error handlers. // Error handler to log errors. app.use((err, req, res, next) => { if (process.env.NODE_ENV === 'production') { // TODO Log the error to the database. } else { console.error(err); } next(err); }); // Error handler for 404 errors. app.use((err, req, res, next) => { if (err.status === 404) { res.status(404); res.render('page-not-found', { title: 'Page Not Found', }); } else { next(err); } }); // Generic error handler. app.use((err, req, res, next) => { res.status(err.status || 500); const isProduction = process.env.NODE_ENV === 'production'; res.render('error', { title: 'Server Error', message: isProduction ? null : err.message, stack: isProduction ? null : err.stack, }); }); // Define a port and start listening for connections. const port = 8080; app.listen(port, () => console.log(`Listening on port ${port}...`));
What you learned
In this article, you learned
- how an error handler function differs from middleware and route handler
functions; - how to define a global error-handling function to catch and process unhandled
errors; and - how to define a route to handle requests for unknown routes by throwing a 404
NOT FOUND error.
Data-Driven Websites - Part 1: Setting Up the Project
Data-driven websites are everywhere online. From e-commerce websites to search
websites to mega social media websites, data is the foundation of the dynamic,
personalized experiences that users have come to expect of the Web.
You've learned all of the necessary skills—now it's time to bring it all
together to create a data-driven website using Express!
Over the next three articles, you'll create a data-driven Reading List website
that will allow you to view a list of books, add a book to the list, update a
book in the list, and delete a book from the list. In this article, you'll set
up the project. In the next article, you'll learn how to integrate Sequelize
with an Express application. In the last article, you'll create the routes and
views to perform CRUD (create, read, update, and delete) operations using
Sequelize.
When you finish this article, you should be able to:
- Split the Express application and HTTP server into separate modules;
- Use the
morgannpm package to log requests; and - Add support for the Bootstrap front-end component library to your
application's Pug layout template.
You'll also review the following:
- Setting up a new Express project;
- Stubbing out an Express application;
- Adding custom error handlers to an Express application; and
- Configuring environment variables.
Setting up the project
First things first, create a folder for your project. If you're using source
control (and you are—right?), open a terminal, browse to your project folder,
and initialize your Git repository by running the command git init.
You'll be using npm to install packages in just a bit, so be sure to add a
.gitignore file to the root of your project. Then add the entry
node_modules/ to the .gitignore file so that the node_modules folder
(where npm downloads packages to) won't be tracked by Git.
Pro Tip: While configuring Git to not track the
node_modulesfolder is
important to do, it's not necessarily the only thing you want to configure Git
not to track. For a more comprehensive.gitignorefile for Node.js projects,
you can use GitHub's.gitignorefile for Node.js projects.
Initializing npm and installing dependencies
Before you stub out the application, use npm to initialize your project and
install the following dependencies:
npm init -y npm install express@^4.0.0 pug@^2.0.0
Then install Nodemon as a development dependency:
npm install nodemon@^2.0.0 --save-dev
Stubbing out the application
Now it's time to stub out the application by writing the minimal amount of code
to define the route for the default route (i.e. the "Home" page).
Start with adding a routes module by adding a file named routes.js to the
root of your project containing the following code:
// ./routes.js const express = require('express'); const router = express.Router(); router.get('/', (req, res) => { res.render('index', { title: 'Home' }); }); module.exports = router;
The default route renders the index view which you'll create in just a bit.
Next, add the app module (app.js) to the root of your project containing the
following code:
// ./app.js const express = require('express'); const routes = require('./routes'); const app = express(); app.set('view engine', 'pug'); app.use(routes); // Define a port and start listening for connections. const port = 8080; app.listen(port, () => console.log(`Listening on port ${port}...`));
To stub out the initial views for the application, add a folder named views to
the root of the project. Then add two Pug templates to the views
folder—layout.pug and index.pug containing the following code:
//- ./views/layout.pug doctype html html head title Reading List - #{title} body h1 Reading List div h2 #{title} block content
//- ./views/index.pug extends layout.pug block content p Hello from the Reading List app!
The layout.pug template provides the overall HTML for each page in the
application while the index.pug template provides the HTML for the index or
default page for the application.
All four of these files—routes.js, app.js, layout.pug, and
index.pug—will evolve and change as you add features to the Reading List
application.
Testing the initial application setup
It's time to test your initial application setup before you make any further
changes.
Open the package.json file and replace the placeholder npm test script (that
was generated by npm) with the following start script:
"scripts": { "start": "nodemon app.js" }
From the terminal, run the command npm start to start your application, then
browse to http://localhost:8080/. You should see the "Home" page displaying
the message "Hello from the Reading List app!"
Now is a good time to commit your changes (if you haven't already)! In
general, making smaller commits more often where each commit contains a
related set of changes is better than waiting until the end of the day to make
one giant commit that contains all of the changes for the entire day.
Splitting the application and server into separate modules
Now that you've created a simple, initial version of the application, it's time
to start adding additional features and making general improvements to the
overall design of the application.
Up until this point, you've created your Express application and started the
HTTP server within the same module—the app module. A common practice is to
separate the application and server into separate modules. Doing this has the
following benefits:
- Improved separation of concerns: As much as possible, each module in your
application should be responsible for doing one thing and only one thing.
Separating out the server setup and startup into its own module improves the
overall separation of concerns by allowing theappmodule to only be
responsible for creating the Express application. - Improved testability: Removing the startup of the HTTP server from the
appmodule improves the testability of the Express application. While you
won't be writing tests for your Express application in this project,
establishing good coding practices will set you up to write tests for your
application in the future.
Updating the app module
The last two statements in the app module (app.js) are responsible for
defining a port and starting the server listening for HTTP connections:
// Define a port and start listening for connections. const port = 8080; app.listen(port, () => console.log(`Listening on port ${port}...`));
Go ahead and remove that code. In its place, add this line of code to export the
Express application from the module:
module.exports = app;
For reference, here's what the complete app module should look like at this
point:
// ./app.js const express = require('express'); const routes = require('./routes'); const app = express(); app.set('view engine', 'pug'); app.use(routes); module.exports = app;
Defining a new entry point for the application
As a reminder, the npm start script currently looks like this:
"scripts": { "start": "nodemon app.js" }
Nodemon is being used to start the application and to restart the application
when a change is made to any of the files in the project. The app.js file is
provided as the entry point for the application—the module that's responsible
for configuring and starting the application.
Now that the app module doesn't start the server listening for HTTP
connections, it can no longer be used as the entry point for the application. To
create a new entry point for the application, add a folder named bin to the
root of the project. Then add a file named www (with no .js extension)
containing the following code. Make sure #!/usr/bin/env node is on the first
line of your file:
#!/usr/bin/env node const app = require('../app'); // Define a port and start listening for connections. const port = 8080; app.listen(port, () => console.log(`Listening on port ${port}...`));
Then update the npm start script to pass the www file into Nodemon as the
entry point:
"scripts": { "start": "nodemon ./bin/www" }
To test your application's new entry point, run the command npm start, then
browse to http://localhost:8080/. As before, you should see the "Home" page
displaying the message "Hello from the Reading List app!"
Taking a closer look at the
./bin/www file
The bin folder is a common Unix convention for naming a folder that contains
executable scripts. Even though it's lacking the .js file extension, the www
file is actually a JavaScript module that contains the code to start up the
Express application.
You might have noticed that the first line of the www file isn't valid
JavaScript:
#!/usr/bin/env node
This is an instance of a Unix shebang. The shebang has
to
be written on the first line of the www file. It tells the system what
interpreter to pass the file to for execution. In this case, node is specified
as the interpreter via the Unix env command.
The intention of the ./bin/www file is for it to be an executable
script—meaning that you could start the application by simply entering the file
name in the terminal as a command:
bin/www
If you attempt to execute the script, you'll receive a "permission denied"
error. Text files by default do not have the necessary permissions. You can use
the chmod command in the root of your project to add the missing permissions:
chmod +x bin/www
With the proper permissions added, you can run the command bin/www to start
your application.
Note: The ability to run your application via a
binscript is primarily
useful for Node projects that are intended to be used as command line tools or
utilities. The Sequelize CLI is an example of a Node.js command line tool
that's executable via abinfolder script. For Express applications like the
Reading List application, it's far more common to use an npmstartscript to
run the application.
Logging requests using Morgan
Currently, after the application starts up and displays the message "Listening
on port 8080...", nothing else is written to the console to show activity. To
assist with testing and debugging, you can install the morgan npm package, an
HTTP request logger middleware for Node.js and Express:
npm install morgan
Aftering installing morgan, import it into the app module:
// ./app.js const express = require('express'); const morgan = require('morgan'); const routes = require('./routes');
Code organization tip: Notice how the external modules are imported first
and grouped together followed by the imported internal modules. While this
isn't a hard requirement, it can help make it easier to read a module's
dependencies.
Then call the app.use() method to add morgan to the application request
pipeline:
app.use(morgan('dev'));
The string literal "dev" is passed into morgan to configure the request
logging format. The "dev" format is just one of the available predefined
formats.
Now if you start your application and browse to http://localhost:8080/, you'll
see the request logged to the console:
GET / 200 9.851 ms - 172
Here's a breakdown of the above output:
GET- The request HTTP method/- The request path9.851 ms- The response time in milliseconds172- TheContent-Lengthresponse header value that indicates the size of
the response body in bytes
Adding custom error handlers
As you learned in a previous article, Express provides a default error handler,
but for most applications you'll want to create a custom error handler to
precisely control how errors are handled.
In the app module, start with adding a middleware function to catch unmatched
requests and throw a "Page Not Found" error:
// ./app.js // Code remove for brevity. app.use(routes); // Catch unhandled requests and forward to error handler. app.use((req, res, next) => { const err = new Error('The requested page couldn\'t be found.'); err.status = 404; next(err); }); // TODO Add custom error handlers. module.exports = app;
Next, add the following custom error handlers—an error handler to log errors, an
error handler to handle "Page Not Found" errors, and a generic error handler:
// ./app.js // Code remove for brevity. app.use(routes); // Catch unhandled requests and forward to error handler. app.use((req, res, next) => { const err = new Error('The requested page couldn\'t be found.'); err.status = 404; next(err); }); // Custom error handlers. // Error handler to log errors. app.use((err, req, res, next) => { if (process.env.NODE_ENV === 'production') { // TODO Log the error to the database. } else { console.error(err); } next(err); }); // Error handler for 404 errors. app.use((err, req, res, next) => { if (err.status === 404) { res.status(404); res.render('page-not-found', { title: 'Page Not Found', }); } else { next(err); } }); // Generic error handler. app.use((err, req, res, next) => { res.status(err.status || 500); const isProduction = process.env.NODE_ENV === 'production'; res.render('error', { title: 'Server Error', message: isProduction ? null : err.message, stack: isProduction ? null : err.stack, }); }); module.exports = app;
To complete your custom error handlers, add two views to the views
folder—error.pug and page-not-found.pug:
//- error.pug extends layout.pug block content div p= message || 'An unexpected error occurred on the server.' if stack h3 Stack Trace pre= stack
//- page-not-found.pug extends layout.pug block content div p Sorry, we couldn't find the page that you requested.
Testing your custom error handlers
To test your custom error handlers, update the default route (/) in the
routes module to temporarily throw an error:
router.get('/', (req, res) => { throw new Error('This is a test error!'); res.render('index', { title: 'Home' }); });
Start your application and browse to http://localhost:8080/ and you should see
the "Server Error" page. Next, browse to an unknown path like
http://localhost:8080/asdf and you should see the "Page Not Found" page.
You should also see the errors logged to the terminal:
Error: This is a test error! at [path to the project folder]/routes.js:7:9 at Layer.handle [as handle_request] ([path to the project folder]/node_modules/express/lib/router/layer.js:95:5) at next ([path to the project folder]/node_modules/express/lib/router/route.js:137:13) at Route.dispatch ([path to the project folder]/node_modules/express/lib/router/route.js:112:3) at Layer.handle [as handle_request] ([path to the project folder]/node_modules/express/lib/router/layer.js:95:5) at [path to the project folder]/node_modules/express/lib/router/index.js:281:22 at Function.process_params ([path to the project folder]/node_modules/express/lib/router/index.js:335:12) at next ([path to the project folder]/node_modules/express/lib/router/index.js:275:10) at Function.handle ([path to the project folder]/node_modules/express/lib/router/index.js:174:3) at router ([path to the project folder]/node_modules/express/lib/router/index.js:47:12) GET / 500 452.308 ms - 2070
Error: The requested page couldn't be found.
at [path to the project folder]/app.js:16:15
at Layer.handle [as handle_request] ([path to the project folder]/node_modules/express/lib/router/layer.js:95:5)
at trim_prefix ([path to the project folder]/node_modules/express/lib/router/index.js:317:13)
at [path to the project folder]/node_modules/express/lib/router/index.js:284:7
at Function.process_params ([path to the project folder]/node_modules/express/lib/router/index.js:335:12)
at next ([path to the project folder]/node_modules/express/lib/router/index.js:275:10)
at [path to the project folder]/node_modules/express/lib/router/index.js:635:15
at next ([path to the project folder]/node_modules/express/lib/router/index.js:260:14)
at Function.handle ([path to the project folder]/node_modules/express/lib/router/index.js:174:3)
at router ([path to the project folder]/node_modules/express/lib/router/index.js:47:12) {
status: 404
}
GET /asdf 404 15.648 ms - 223
Also notice that thanks to the request logging provided by the morgan
middleware, you can see the 500 (Internal Server Error) and 404 (Not Found)
HTTP response status codes returned by the server.
After confirming that your custom error handlers work as expected, be sure to
remove the code that you temporarily added to your default route!
For a refresher on the custom error handlers, see the "Catching and Handling
Errors in Express" article.
Configuring environment variables
Since the Reading List application will use a database for data persistence,
your project needs to include a way to configure the database connection
settings across environments. To do that, let's use environment variables to
configure the application.
For a refresher on how to use environment variables within an Express
application, see the "Acclimating to Environment Variables" article.
To start, install per-env as a project dependency the dotenv and
dotenv-cli as development dependencies (i.e. dependencies that are only needed
in development environments):
npm install per-env npm install dotenv dotenv-cli --save-dev
As a reminder, the per-env package allows you to define npm scripts for each
of your application's environments. The dotenv package is used to load
environment variables from an .env file and the dotenv-cli package acts as
an intermediary between npx and tools or utilities (like the Sequelize CLI) to
load your environment variables from an .env file and run the command that you
pass into it.
Adding the .env and
.env.example files
Next, add two files to the root of your project—.env and .env.example with
the following content:
PORT=8080
The .env file is where you define the environment variables to configure your
application. At this point in the project, you just need to define the PORT
environment variable. The .env file shouldn't be committed to source control
as the environment variables it defines are specific to your development
environment. Additionally, it might contain sensitive information.
To ensure that the
.envfile isn't committed to source control, add.env
as an entry to your project's.gitignorefile. If you're using GitHub's
.gitignorefile for Node.js projects, this has already been done for you.
Because the .env file isn't committed to source control, the .env.example
file serves as documentation for your teammates so they can create their own
.env files.
Adding the config module
Let's encapsulate all of the process.env property access into a single
config module by importing all of the application's environment variables and
exporting them to make them available to the rest of the application.
Add a folder named config to the root of the project. Then add a file named
index.js to the config folder containing the following code:
module.exports = { environment: process.env.NODE_ENV || 'development', port: process.env.PORT || 8080, };
Now you can update the ./bin/www file to get the port from the config
module:
#!/usr/bin/env node const { port } = require('../config'); const app = require('../app'); // Start listening for connections. app.listen(port, () => console.log(`Listening on port ${port}...`));
Updating the npm start script
To load the environment variables from the .env file in the local development
environment while ignoring the .env file in the production environment, update
the package.json file scripts section:
"scripts": { "start": "per-env", "start:development": "nodemon -r dotenv/config ./bin/www", "start:production": "node ./bin/www" }
To review, if the NODE_ENV environment variable is set to production, then
running the start script will result in the execution of the
start:production script. If the NODE_ENV variable isn't defined (or set to
development), then the start:development script will be executed by default.
At this point, running the command npm start should start your application
just like it before.
Supporting debugging in Visual Studio Code
To use the debugger in Visual Studio Code, configure it to load your environment
variables from your .env file. Open the launch.json file located in the
.vscode folder and add the envFile property to your Node configuration:
{ "version": "0.2.0", "configurations": [ { "type": "node", "request": "launch", "name": "Launch Program", "skipFiles": [ "<node_internals>/**" ], "program": "${workspaceFolder}/bin/www", "envFile": "${workspaceFolder}/.env" } ] }
Note: If you don't have
.vscode/launch.jsonfile in your project, see
this page in the Visual Studio Code
documentation for instructions on how to set up debugging.
Setting up Bootstrap
One last bit of project set up work before installing and configuring Sequelize!
Update the views/layout.pug view with the following Bootstrap template markup:
doctype html html head meta(charset='utf-8') meta(name='viewport' content='width=device-width, initial-scale=1, shrink-to-fit=no') link(rel='stylesheet' href='https://stackpath.bootstrapcdn.com/bootstrap/4.4.1/css/bootstrap.min.css' integrity='sha384-Vkoo8x4CGsO3+Hhxv8T/Q5PaXtkKtu6ug5TOeNV6gBiFeWPGFN9MuhOf23Q9Ifjh' crossorigin='anonymous') title Reading List - #{title} body nav(class='navbar navbar-expand-lg navbar-dark bg-primary') a(class='navbar-brand' href='/') Reading List .container h2(class='py-4') #{title} block content script(src='https://code.jquery.com/jquery-3.4.1.slim.min.js' integrity='sha384-J6qa4849blE2+poT4WnyKhv5vZF5SrPo0iEjwBvKU7imGFAV0wwj1yYfoRSJoZ+n' crossorigin='anonymous') script(src='https://cdn.jsdelivr.net/npm/popper.js@1.16.0/dist/umd/popper.min.js' integrity='sha384-Q6E9RHvbIyZFJoft+2mJbHaEWldlvI9IOYy5n3zV9zzTtmI3UksdQRVvoxMfooAo' crossorigin='anonymous') script(src='https://stackpath.bootstrapcdn.com/bootstrap/4.4.1/js/bootstrap.min.js' integrity='sha384-wfSDF2E50Y2D1uUdj0O3uMBJnjuUD4Ih7YwaYd1iqfktj0Uod8GCExl3Og8ifwB6' crossorigin='anonymous')
Adding support for the Bootstrap front-end component library will give the
Reading List application a nice, polished look. The above markup was taken
directly from the
starter template published in the official Bootstrap
documentation.
Adding Bootstrap won't change the look of the application much at this point.
Later on, once you start adding forms to the application, it'll be easier to
notice the benefits of using a library like Bootstrap.
What you learned
In this article, you learned how to:
- Split the Express application and HTTP server into separate modules;
- Use the
morgannpm package to log requests; and - Add support for the Bootstrap front-end component library to your
application's Pug layout template.
You also reviewed the following:
- Setting up a new Express project;
- Stubbing out an Express application;
- Adding custom error handlers to an Express application; and
- Configuring environment variables.
Next up: integrating Sequelize with an Express application!
Data-Driven Websites Project (Part 2: Integrating Sequelize with Express)
Welcome to part two of creating the data-driven Reading List website!
Over the course of three articles, you'll create a data-driven Reading List
website that will allow you to view a list of books, add a book to the list,
update a book in the list, and delete a book from the list. In the first
article, you created the project. In this article, you'll learn how to integrate
Sequelize with an Express application. In the last article, you'll create the
routes and views to perform CRUD (create, read, update, and delete) operations
using Sequelize.
When you finish this article, you should be able to:
- Install and configure Sequelize within an Express application; and
- Use Sequelize to test the connection to a database before starting the HTTP
server on application startup.
You'll also review the following:
- Using the Sequelize CLI to create a model and migration;
- Using the Sequelize CLI to seed the database; and
- Using Sequelize to query data from the database.
Installing and configuring Sequelize
First things first, you need to install and configure Sequelize!
Use npm to install the following dependencies:
npm install sequelize@^5.0.0 pg@^8.0.0
Then install the Sequelize CLI as a development dependency:
npm install sequelize-cli@^5.0.0 --save-dev
Configuring the Sequelize CLI
Before using the Sequelize CLI to initialize Sequelize within your project, add
a file named .sequelizerc to the root of your project containing the following
code:
const path = require('path'); module.exports = { 'config': path.resolve('config', 'database.js'), 'models-path': path.resolve('db', 'models'), 'seeders-path': path.resolve('db', 'seeders'), 'migrations-path': path.resolve('db', 'migrations') };
The .sequelizerc file configures the Sequelize CLI so that it knows:
- Where your database configuration is located; and
- Where to generate the
models,seeders, andmigrationsfolders.
Initializing Sequelize
Now you're ready to initialize Sequelize by running the following command:
npx sequelize init
When the command completes, your project should now contain the following:
- The
config/database.jsfile; - The
db/migrations,db/models, anddb/seedersfolders; and - The
db/models/index.jsfile.
Creating a new database and database user
To prepare for configuring Sequelize, you need to create a new database for the
Reading List application to use and a new normal or limited user (i.e. a user
without superuser privileges) that has permissions to access the new database.
Open psql by running the command psql (to use the currently logged in user) or
psql -U «super user username» to specify the username of the super user to
use. Then execute the following SQL statements:
create database reading_list; create user reading_list_app with encrypted password '«a strong password for the reading_list_app user»'; grant all privileges on database reading_list to reading_list_app;
Make note of the password that you use as you'll need them for the next step in
the configuration process!
To review how to create a new PostgreSQL database and user, see the "Database
Management Walk-Through" and "User Management Walk-Through" readings in the
SQL lesson.
Adding the database environment variables
Now you're ready to add the DB_USERNAME, DB_PASSWORD, DB_DATABASE, and
DB_HOST environment variables to the .env and .env.example files:
PORT=8080
DB_USERNAME=reading_list_app
DB_PASSWORD=«the reading_list_app user password»
DB_DATABASE=reading_list
DB_HOST=localhost
Next, update the config module (the config/index.js file) with the following
code:
// ./config/index.js module.exports = { environment: process.env.NODE_ENV || 'development', port: process.env.PORT || 8080, db: { username: process.env.DB_USERNAME, password: process.env.DB_PASSWORD, database: process.env.DB_DATABASE, host: process.env.DB_HOST, }, };
Remember that the config module is responsible for providing access to your
application's environment variables. Any part of the application that needs
access to the DB_USERNAME, DB_PASSWORD, DB_DATABASE, and
DB_HOST
environment variables can use the username, password, database, and
host
properties on the config module's db object.
Configuring the Sequelize database connection
Now you're ready to configure the database connection for Sequelize! Update the
config/database.js file with the following code:
const { username, password, database, host, } = require('./index').db; module.exports = { development: { username, password, database, host, dialect: 'postgres', }, };
The first statement uses the require() function to import the config/index
module. Destructuring is used to declare the username, password,
database,
and host variables and initialize them to the values of the corresponding
property names on the config module's db property.
You could remove the destructuring by refactoring the above statement into the
following statements:
const config = require('./index'); const db = config.db; const username = db.username; const password = db.password; const database = db.database; const host = db.host;
The config/database module then exports an object with a property named
development set to an object literal with username, password,
database,
host, and dialect properties:
module.exports = { development: { username, password, database, host, dialect: 'postgres', }, };
The development property name indicates that these configuration settings are
for the development environment. The username, password,
database,
host, and dialect property names are the Sequelize options used to configure
the database connection.
For a complete list of the available Sequelize options, see the official
Sequelize API documentation.
Testing the connection to the database
You've configured Sequelize—specifically the database connection—but how do you
know if Sequelize can actually connect to the database? The Sequelize instance
method authenticate() can be used to test the connection to the database by
attempting to execute the query SELECT 1+1 AS result against the database
specified in the config/database module.
The Reading List application is a data-driven website, so it'll be heavily
dependent on its database. Given that, it's best to test the connection to the
database as early as possible. You can do that by updating the ./bin/www file
to test the connection to the database before starting the application listening
for HTTP connections.
Update the ./bin/www file with the following code:
#!/usr/bin/env node const { port } = require('../config'); const app = require('../app'); const db = require('../db/models'); // Check the database connection before starting the app. db.sequelize.authenticate() .then(() => { console.log('Database connection success! Sequelize is ready to use...'); // Start listening for connections. app.listen(port, () => console.log(`Listening on port ${port}...`)); }) .catch((err) => { console.log('Database connection failure.'); console.error(err); });
In addition to importing the app module, the require() function is called to
import the ./db/models module—a module that was generated by the Sequelize CLI
when you initialized your project to use Sequelize.
The ./db/models module provides access to the Sequelize instance via the
sequelize property. The authenticate() method is called on the Sequelize
instance. The authenticate() method is asynchronous, so it returns a Promise
that will resolve if the connection to the database is successful, otherwise it
will be rejected:
// Check the database connection before starting the app. db.sequelize.authenticate() .then(() => { // The connection to the database succeeded. }) .catch((err) => { // The connection to the database failed. });
Inside of the then() method callback, a message is logged to the console and
the application is started listening for HTTP connections. Inside of the
catch() method callback, an error message and the err object are logged to
the console:
// Check the database connection before starting the app. db.sequelize.authenticate() .then(() => { console.log('Database connection success! Sequelize is ready to use...'); // Start listening for connections. app.listen(port, () => console.log(`Listening on port ${port}...`)); }) .catch((err) => { console.log('Database connection failure.'); console.error(err); });
To test the connection to the database, run the command npm start in the
terminal to start your application. In the console, you should see the success
message if the database connection succeeded, otherwise you'll see the error
message.
Creating the Book model
Now that you've confirmed that the application can successfully connect to the
database, it's time to create the application's first model.
As a reminder, the Reading List website—when it's completed—will allow you to
view a list of books, add a book to the list, update a book in the list, and
delete a book from the list. At the heart of all of these features are books, so
let's use the Sequelize CLI to generate a Book model.
The Book model should include the following properties:
title- A string representing the title;author- A string representing the the author;releaseDate- A date representing the release date;pageCount- An integer representing the page count; andpublisher- A string representing the publisher.
From the terminal, run the following command to use the Sequelize CLI to
generate the Book model:
npx sequelize model:generate --name Book --attributes "title:string, author:string, releaseDate:dateonly, pageCount:integer, publisher:string"
If the command succeeds, you'll see the following output in the console:
New model was created at [path to the project folder]/db/models/book.js . New migration was created at [path to the project folder]/db/migrations/[timestamp]-Book.js .
This confirms that two files were generated: a file for the Book model and a
file for a database migration to add the Books table to the database.
Updating the generated
Book model and migration files
The Book model and migration files generated by the Sequelize CLI are close to
what is needed, but some changes are required. Two things in particular need to
be addressed: column string lengths and column nullability (i.e. the ability for
a column to accept null values).
For your reference, here are the generated model and migration files:
// ./db/models/book.js 'use strict'; module.exports = (sequelize, DataTypes) => { const Book = sequelize.define('Book', { title: DataTypes.STRING, author: DataTypes.STRING, releaseDate: DataTypes.DATEONLY, pageCount: DataTypes.INTEGER, publisher: DataTypes.STRING }, {}); Book.associate = function(models) { // associations can be defined here }; return Book; };
// ./db/migrations/[timestamp]-create-book.js 'use strict'; module.exports = { up: (queryInterface, Sequelize) => { return queryInterface.createTable('Books', { id: { allowNull: false, autoIncrement: true, primaryKey: true, type: Sequelize.INTEGER }, title: { type: Sequelize.STRING }, author: { type: Sequelize.STRING }, releaseDate: { type: Sequelize.DATEONLY }, pageCount: { type: Sequelize.INTEGER }, publisher: { type: Sequelize.STRING }, createdAt: { allowNull: false, type: Sequelize.DATE }, updatedAt: { allowNull: false, type: Sequelize.DATE } }); }, down: (queryInterface, Sequelize) => { return queryInterface.dropTable('Books'); } };
As it is, the generated migration file would create the following Books table
in the database:
reading_list=# \d "Books" Table "public.Books" Column | Type | Collation | Nullable | Default -------------+--------------------------+-----------+----------+------------------------------------- id | integer | | not null | nextval('"Books_id_seq"'::regclass) title | character varying(255) | | | author | character varying(255) | | | releaseDate | date | | | pageCount | integer | | | publisher | character varying(255) | | | createdAt | timestamp with time zone | | not null | updatedAt | timestamp with time zone | | not null | Indexes: "Books_pkey" PRIMARY KEY, btree (id)
Notice that all of the Book string based properties (i.e. title,
author,
and publisher) resulted in columns with a data type of character varying(255), which is
a variable length text based column up to 255 characters
in length. Allowing for 255 characters for the title column seems about right,
but for the author and publisher columns, it seems excessive.
Also notice that the title, author, releaseDate, pageCount,
and
publisher columns all allow null values (a value of not null in the
"Nullable" column means that the column doesn't allow null values, otherwise
the column allows null values). Ideally, each book in the database would have
values for all of those columns.
We can address both of these issues by updating the ./db/models/book.js file
to the following code:
// ./db/models/book.js 'use strict'; module.exports = (sequelize, DataTypes) => { const Book = sequelize.define('Book', { title: { type: DataTypes.STRING, allowNull: false }, author: { type: DataTypes.STRING(100), allowNull: false }, releaseDate: { type: DataTypes.DATEONLY, allowNull: false }, pageCount: { type: DataTypes.INTEGER, allowNull: false }, publisher: { type: DataTypes.STRING(100), allowNull: false } }, {}); Book.associate = function(models) { // associations can be defined here }; return Book; };
The migration file ./db/migrations/[timestamp]-create-book.js also needs to be
updated to the following code:
// ./db/migrations/[timestamp]-create-book.js 'use strict'; module.exports = { up: (queryInterface, Sequelize) => { return queryInterface.createTable('Books', { id: { allowNull: false, autoIncrement: true, primaryKey: true, type: Sequelize.INTEGER }, title: { type: Sequelize.STRING, allowNull: false }, author: { type: Sequelize.STRING(100), allowNull: false }, releaseDate: { type: Sequelize.DATEONLY, allowNull: false }, pageCount: { type: Sequelize.INTEGER, allowNull: false }, publisher: { type: Sequelize.STRING(100), allowNull: false }, createdAt: { allowNull: false, type: Sequelize.DATE }, updatedAt: { allowNull: false, type: Sequelize.DATE } }); }, down: (queryInterface, Sequelize) => { return queryInterface.dropTable('Books'); } };
Applying the pending migration
After resolving the column data type and nullability issues in the model and
migration files, you're ready to apply the pending migration to create the
Books table in the database. In the terminal, run the following command:
npx dotenv sequelize db:migrate
Notice that you're using npx to invoke the dotenv tool which loads your
environment variables from the .env file and then invokes the sequelize db:migrate
command. In the console, you should see something similar to the
following output:
Loaded configuration file "config/database.js". Using environment "development". == [timestamp]-create-book: migrating ======= == [timestamp]-create-book: migrated (0.021s)
To confirm the creation of the Books table, you can run the following command
from within psql:
\d "Books"
Be sure that you're connected to the
reading_listdatabase in psql. If you
are, the cursor should readreading_list=#. If you're not connected to the
correct database, you can run the command\c reading_listto connect to the
reading_listdatabase.
After running the \d "Books" command, you should see the following output
within psql:
Table "public.Books" Column | Type | Collation | Nullable | Default -------------+--------------------------+-----------+----------+------------------------------------- id | integer | | not null | nextval('"Books_id_seq"'::regclass) title | character varying(255) | | not null | author | character varying(100) | | not null | releaseDate | date | | not null | pageCount | integer | | not null | publisher | character varying(100) | | not null | createdAt | timestamp with time zone | | not null | updatedAt | timestamp with time zone | | not null | Indexes: "Books_pkey" PRIMARY KEY, btree (id)
Seeding the database
With the Books table created in the database, you're ready to seed the table
with some test data!
To start, you need to create a seed file by running the following command in the
terminal from the root of your project:
npx sequelize seed:generate --name test-data
If the command succeeds, you'll see the following output in the console:
seeders folder at "[path to the project folder]/db/seeders" already exists. New seed was created at [path to the project folder]/db/seeders/[timestamp]-test-data.js .
This confirms that the seed file was generated. Go ahead and replace the
contents of the ./db/seeders/[timestamp]-test-data.js with the following code:
// ./db/seeders/[timestamp]-test-data.js 'use strict'; module.exports = { up: (queryInterface, Sequelize) => { return queryInterface.bulkInsert('Books', [ { title: 'The Martian', author: 'Andy Weir', releaseDate: new Date('2014-02-11'), pageCount: 384, publisher: 'Crown', createdAt: new Date(), updatedAt: new Date() }, { title: 'Ready Player One', author: 'Ernest Cline', releaseDate: new Date('2011-08-16'), pageCount: 384, publisher: 'Crown', createdAt: new Date(), updatedAt: new Date() }, { title: 'Harry Potter and the Sorcerer\'s Stone', author: 'J.K. Rowling', releaseDate: new Date('1998-10-01'), pageCount: 309, publisher: 'Scholastic Press', createdAt: new Date(), updatedAt: new Date() }, ], {}); }, down: (queryInterface, Sequelize) => { return queryInterface.bulkDelete('Books', null, {}); } };
The up property references an anonymous method that uses the
queryInterface.bulkInsert() method to insert an array of books into the Book
table while the down property references an anonymous method that uses the
queryInterface.bulkDelete() method to delete all of the data in the Books
table.
Feel free to add to the array of books… have fun with it!
To seed your database with your test data, run the following command:
npx dotenv sequelize db:seed:all
In the console, you should see something similar to the following output:
Loaded configuration file "config/database.js". Using environment "development". == [timestamp]-test-data: migrating ======= == [timestamp]-test-data: migrated (0.009s)
Then you can use psql to check if the Books table contains the test data:
select * from "Books";
Which should produce the following output:
id | title | author | releaseDate | pageCount | publisher | createdAt | updatedAt ----+---------------------------------------+--------------+-------------+-----------+------------------+----------------------------+---------------------------- 2 | The Martian | Andy Weir | 2014-02-11 | 384 | Crown | 2020-03-31 19:06:32.452-07 | 2020-03-31 19:06:32.452-07 3 | Ready Player One | Ernest Cline | 2011-08-16 | 384 | Crown | 2020-03-31 19:06:32.452-07 | 2020-03-31 19:06:32.452-07 4 | Harry Potter and the Sorcerer's Stone | J.K. Rowling | 1998-10-01 | 309 | Scholastic Press | 2020-03-31 19:06:32.452-07 | 2020-03-31 19:06:32.452-07 (3 rows)
Querying and rendering a temporary list of books
Now that you've installed and configured Sequelize, created the Book model and
associated migration, and seeded the Books table, you're ready to update your
application's default route to query the for a list of books and render the data
in the index view!
In the routes module (the ./routes.js file), use the require() function
to
import the models module:
const db = require('./db/models');
Then update the default route (/) to this:
router.get('/', async (req, res, next) => { try { const books = await db.Book.findAll({ order: [['title', 'ASC']] }); res.render('index', { title: 'Home', books }); } catch (err) { next(err); } });
The async keyword was added to make the route handler an asynchronous function
and the db.Book.findAll() method is used to retrieve a list of books from the
database.
For your reference, here's what the complete ./routes.js file should look
like:
// ./routes.js const express = require('express'); const db = require('./db/models'); const router = express.Router(); router.get('/', async (req, res, next) => { try { const books = await db.Book.findAll({ order: [['title', 'ASC']] }); res.render('index', { title: 'Home', books }); } catch (err) { next(err); } }); module.exports = router;
Now you can update the ./views/index.pug view to render the array of books:
extends layout.pug block content p Hello from the Reading List app! h3 Books ul each book in books li= book.title
For now, the formatting of the book list is very simple. In the next article,
you'll see how to use Bootstrap to improve the look and feel of the book list
table.
Run the command npm start to start your application (if it's not already
started) and browse to http://localhost:8080/. You should see the list of
books from the database rendered to the page in an unordered list!
What you learned
In this article, you learned how to:
- Install and configure Sequelize within an Express application; and
- Use Sequelize to test the connection to a database before starting the HTTP
server on application startup.
You also reviewed the following:
- Using the Sequelize CLI to create a model;
- Using the Sequelize CLI to seed the database; and
- Using Sequelize to query data from the database.
Next up: creating the routes and views to perform CRUD (create, read, update,
and delete) operations using Sequelize!
Data-Driven Websites Project (Part 3: Using Sequelize to Perform CRUD Operations)
Welcome to part three of creating the data-driven Reading List website!
Over the course of three articles, you'll create a data-driven Reading List
website that will allow you to view a list of books, add a book to the list,
update a book in the list, and delete a book from the list. In the first
article, you created the project. In the second article, you learned how to
integrate Sequelize with an Express application. In this article, you'll create
the routes and views to perform CRUD (create, read, update, and delete)
operations using Sequelize.
When you finish this article, you should be able to:
- Define a collection of routes and views that use Sequelize to perform CRUD
operations against a single resource; and - Handle Sequelize validation errors when users are attempting to create or
update data and display error messages to the user so that they can resolve
any data quality issues.
You'll also review the following:
- Using a wrapper function to catch errors thrown within asynchronous route
handler functions; - Using Pug to create HTML forms;
- Using the
csurfmiddleware to protect against CSRF exploits; - Using the built-in
express.urlencoded()middleware function to parse
incoming request body form data; - Using Sequelize model validations to validate user-provided data;
- Using the
express-validatorvalidation library to validate user-provided
data within an Express route; and - Using Pug includes and mixins to remove unnecessary code duplication.
Planning the routes and views
Before creating any new routes or views, it's a good idea to plan out what pages
need to be added to support the required CRUD (create, read, update, and delete)
operations along with their associated routes, HTTP methods, and views.
Here's a list of the proposed pages to add to the Reading List application:
| Page Name | Route Path | HTTP Methods | View Name |
|---|---|---|---|
| Book List | / |
GET |
book-list.pug |
| Add Book | /book/add |
GET POST |
book-add.pug |
| Edit Book | /book/edit/:id |
GET POST |
book-edit.pug |
| Delete Book | /book/delete/:id |
GET POST |
book-delete.pug |
There are a number of acceptable ways that you could approach implementing the
required CRUD operations for the Book resource or model. The above approach is
a common, tried-and-true way of implementing CRUD operations within a
server-side rendered web application.
The term server-side rendered simply means that all of the work of
generating the HTML for the web application's pages is done on the server.
Later on, you'll learn how to use client-side technologies like React to move
some of that work to the client (i.e. the browser).
Notice that the "Add Book", "Edit Book", and "Delete Book" pages need to support
both the GET and POST HTTP methods. The GET HTTP method will be used to
initially retrieve each page's HTML form while the POST HTTP method will be
used to process each page's HTML form submissions.
Also notice that the route paths for the "Edit Book" and "Delete Book" pages
define an :id route parameter. Without a book ID, those pages wouldn't know
what book record they were supposed to be editing or deleting. The "Add Book"
page doesn't need an :id route parameter because that page is adding a new
book record, so a book ID isn't needed (the ID for the new record will be
created by the database when the record is inserted into the table).
Now that you have a plan, let's start building out the proposed pages—starting
with the "Book List" page!
Creating the Book List page
As a reminder, here's what the default route (/) in the routes module (i.e.
the routes.js file) looks like at this point:
router.get('/', async (req, res, next) => { try { const books = await db.Book.findAll({ order: [['title', 'ASC']] }); res.render('index', { title: 'Home', books }); } catch (err) { next(err); } });
And the ./views/index.pug view:
//- ./views/index.pug extends layout.pug block content p Hello from the Reading List app! h3 Books ul each book in books li= book.title
It's a small change, but start with renaming the ./views/index.pug view to
./views/book-list.pug. Changing the name of the view will make it easier to
identify the purpose of the view at a glance.
After renaming the view, update the call to the res.render() method in the
default route:
router.get('/', async (req, res, next) => { try { const books = await db.Book.findAll({ order: [['title', 'ASC']] }); res.render('book-list', { title: 'Books', books }); } catch (err) { next(err); } });
Notice that the title property—on the object passed as the second argument to
the res.render() method—was changed from "Home" to "Books".
Applying Bootstrap styles to the Book List page
When you added Bootstrap to the project in the first article in this series, it
was mentioned that the look of the application wouldn't change much at that
point. Let's change that!
Update the ./views/book-list.pug view with the following code:
//- ./views/book-list.pug extends layout.pug block content div(class='py-3') a(class='btn btn-success' href='/book/add' role='button') Add Book table(class='table table-striped table-hover') thead(class='thead-dark') tr th(scope='col') Title th(scope='col') Author th(scope='col') Release Date th(scope='col') Page Count th(scope='col') Publisher th(scope='col') tbody each book in books tr td= book.title td= book.author td= book.releaseDate td= book.pageCount td= book.publisher td a(class='btn btn-primary' href=`/book/edit/${book.id}` role='button') Edit a(class='btn btn-danger ml-2' href=`/book/delete/${book.id}` role='button') Delete
Here's an overview of the above Pug template code:
- A hyperlink (
<a>) at the top of the page (a(class='btn btn-success' href='/book/add' role='button') Add Book) gives users a way to navigate to
the "Add Book" page. The hyperlink is styled to look like a button using the
Bootstrap button CSS classes (btn btn-success). - An HTML table is used to render the list of books. The Bootstrap table CSS
classes (table table-striped table-hover) are used to
style the table. - Each row in the books HTML table contains two hyperlinks—one to navigate to
the "Edit Book" page and another to navigate to the "Delete Book" page. Again,
both hyperlinks are styled to look like buttons using the Bootstrap button
CSS classes.
For more information about the Bootstrap front-end component library, see the
official documentation.
Adding an asynchronous route handler wrapper function
In an earlier article, you learned that Express is unable to catch errors thrown
by asynchronous route handlers. Given that, asynchronous route handlers need to
catch their own errors and pass them to the next() method. That's exactly what
the default route handler is currently doing:
router.get('/', async (req, res, next) => { try { const books = await db.Book.findAll({ order: [['title', 'ASC']] }); res.render('book-list', { title: 'Books', books }); } catch (err) { next(err); } });
While you could continue to add try/catch statements to each of your route
handlers, defining a simple asynchronous route handler wrapper function will
keep you from having to write that boilerplate code:
const asyncHandler = (handler) => (req, res, next) => handler(req, res, next).catch(next); router.get('/', asyncHandler(async (req, res) => { const books = await db.Book.findAll({ order: [['title', 'ASC']] }); res.render('book-list', { title: 'Books', books }); }));
For your reference, here's what the ./routes.js file should look like at this
point in the project:
// ./routes.js const express = require('express'); const db = require('./db/models'); const router = express.Router(); const asyncHandler = (handler) => (req, res, next) => handler(req, res, next).catch(next); router.get('/', asyncHandler(async (req, res) => { const books = await db.Book.findAll({ order: [['title', 'ASC']] }); res.render('book-list', { title: 'Books', books }); })); module.exports = router;
Testing the Book List page
Open a terminal and browse to your project folder. Run the command npm start
to start your application and browse to http://localhost:8080/. You should see
the list of books from the database rendered to the page—but instead of using an
unordered list to format the list of books you should see a nicely Bootstrap
formatted HTML table!
Adding the Add Book page
The next page that you'll add to the Reading List application is the "Add Book"
page. As the name clearly suggests, this page will allow you to add a new book
to the reading list.
Adding protection from CSRF attacks
Before adding the route and view for the "Add Book" page, go ahead and prepare
to add protection from CSRF attacks by installing and configuring the necessary
dependencies and middleware.
To review, Cross-Site Request Forgery (CSRF) is an attack that results in an end
user executing unwanted actions within a web application. Imagine that the
Reading List website requires users to login before they can view and make
changes to their reading list (in a future article you'll learn how to implement
user login within an Express application!) If a user was currently logged into
the Reading List website, a CSRF attack would trick the user into clicking a
link that unexpectedly sends a POST request to the Reading List website—a
request that might add or delete a book without the user's consent!
While this particular example is trivial in terms of its impact to the user,
imagine that the affected web application is a banking application. The end user
could end up unintentionally transferring money to the hacker's bank account!
For a detailed walkthrough of a CSRF attack and how to protect against CSRF
attacks, see the "Protecting Forms from CSRF" article in the Express HTML
Forms lesson.
From a terminal, install the following dependencies into your project:
npm install csurf@^1.0.0 npm install cookie-parser@^1.0.0
Within the app module (i.e. the ./app.js file), use the require()
function
to import the cookie-parser middleware and call the app.use() method to add
the middleware just after adding the morgan middleware to the request
pipeline. While you're updating the app module, go ahead and add the built-in
Express urlencoded middleware after adding the cookie-parser middleware
(you'll need the urlencoded middleware to parse the request body form data in
just a bit):
// ./app.js const express = require('express'); const morgan = require('morgan'); const cookieParser = require('cookie-parser'); const routes = require('./routes'); const app = express(); app.set('view engine', 'pug'); app.use(morgan('dev')); app.use(cookieParser()); app.use(express.urlencoded({ extended: false })); app.use(routes); // Code removed for brevity. module.exports = app;
Defining the routes for the Add Book page
Now you're ready to define the routes for the "Add Book" page!
At the top of the routes module (i.e. the ./routes.js file), add a call to
the require() function to import the csurf module:
// ./routes.js const express = require('express'); const csrf = require('csurf'); const db = require('./db/models'); // Code removed for brevity.
Then call the csurf() function to create the csrfProtection middleware that
you'll add to each of the routes that need CSRF protection:
// ./routes.js const express = require('express'); const csrf = require('csurf'); const db = require('./db/models'); const router = express.Router(); const csrfProtection = csrf({ cookie: true }); const asyncHandler = (handler) => (req, res, next) => handler(req, res, next).catch(next); // Code removed for brevity.
Now you're ready to add the routes for the "Add Book" page to the routes
module just after the existing default route (/)—a GET route to initially
retrieve the "Add Book" page's HTML form and a POST route to process the
page's HTML form submissions:
router.get('/book/add', csrfProtection, (req, res) => { const book = db.Book.build(); res.render('book-add', { title: 'Add Book', book, csrfToken: req.csrfToken(), }); }); router.post('/book/add', csrfProtection, asyncHandler(async (req, res) => { const { title, author, releaseDate, pageCount, publisher, } = req.body; const book = db.Book.build({ title, author, releaseDate, pageCount, publisher, }); try { await book.save(); res.redirect('/'); } catch (err) { res.render('book-add', { title: 'Add Book', book, error: err, csrfToken: req.csrfToken(), }); } }));
Here's an overview of the above routes:
- Two routes are defined for the "Add Book" page—a
/book/addGETroute and a
/book/addPOSTroute. As mentioned earlier, theGETroute is used to
initially retrieve the page's HTML form while thePOSTroute is used to
process submissions from the page's HTML form. - Both routes use the
csrfProtectionmiddleware to protect against CSRF
attacks. - Within the
GETroute handler, the Sequelizedb.Book.build()method is used
to create a new instance of theBookmodel which is then passed to the
book-addview. - Within the
POSTroute handler, destructuring is used to declare and
initialize thetitle,author,releaseDate,pageCount, andpublisher
variables from thereq.bodyproperty. Thetitle,author,releaseDate,
pageCount, andpublishervariables are then used to create a new instance
of theBookmodel with a call to thedb.Book.build()method. The
book.save()method is called on the instance to persist the model to the
database and if that operation succeeds the user is redirected to the default
route (/). If an error occurs, thebook-addview is rendered and sent to
the client (so the error can be displayed to the end user).
Creating the view for the Add Book page
Add a view to the views folder named book-add.pug containing the following
code:
//- ./views/book-add.pug extends layout.pug block content if error div(class='alert alert-danger' role='alert') p The following error(s) occurred: pre= JSON.stringify(error, null, 2) form(action='/book/add' method='post') input(type='hidden' name='_csrf' value=csrfToken) div(class='form-group') label(for='title') Title input(type='text' id='title' name='title' value=book.title class='form-control') div(class='form-group') label(for='author') Author input(type='text' id='author' name='author' value=book.author class='form-control') div(class='form-group') label(for='releaseDate') Release Date input(type='text' id='releaseDate' name='releaseDate' value=book.releaseDate class='form-control') div(class='form-group') label(for='pageCount') Page Count input(type='text' id='pageCount' name='pageCount' value=book.pageCount class='form-control') div(class='form-group') label(for='publisher') Publisher input(type='text' id='publisher' name='publisher' value=book.publisher class='form-control') div(class='py-4') button(type='submit' class='btn btn-primary') Add Book a(href='/' class='btn btn-warning ml-2') Cancel
Here's an overview of the above Pug template code:
- A conditional statement checks to see if the
errorvariable is truthy (i.e.
has a reference to an error) and if there's an error, theJSON.stringify()
method is used to render the error to the page as JSON. Later in this article,
you'll refactor this part of the view to improve the display of errors to the
end user. - A hidden
<input>element is used to render the CSRF token value to the page
(i.e.input(type='hidden' name='_csrf' value=csrfToken)). - A series of
<label>and text<input>elements are rendered to create the
form fields for theBookmodeltitle,author,releaseDate,
pageCount, andpublisherproperties. The Bootstrap form CSS
classes (form-group,form-control) are used to style the
form. - At the bottom of the form, a submit
<button>element is rendered along with
a "Cancel" hyperlink that allows the end user to navigate back to the "Book
List" page.
Note: HTML
<input>element types aren't used to their fullest extent in
the above code. Feel free to experiment with using the available<input>
element types to add client-side validation but
remember that client-side validation is intended only to improve the end user
experience. Because client-side validation can easily be thwarted, validating
data on the server is absolutely essential to do. You'll implement server-side
validation in just a bit.
Testing the Add Book page
Run the command npm start to start your application and browse to
http://localhost:8080/. Click the "Add Book" button at the top of the "Book
List" page to browse to the "Add Book" page. Provide a value for each of the
form fields and click the "Add Book" button to submit the form to the server. Be
sure that you provide a valid date value (i.e. "2000-01-31"). You should now see
your new book in the list of books on the "Book List" page!
If you click the "Add Book" button again and submit the "Add Book" page form
without providing any values, an error occurs when attempting to persist an
instance of the Book model to the database. The lengthy error message
displayed just above the form will look like this:
{ "name": "SequelizeDatabaseError", "parent": { "name": "error", "length": 116, "severity": "ERROR", "code": "22007", "file": "datetime.c", "line": "3774", "routine": "DateTimeParseError", "sql": "INSERT INTO \"Books\" (\"id\",\"title\",\"author\",\"releaseDate\",\"pageCount\",\"publisher\",\"createdAt\",\"updatedAt\") VALUES (DEFAULT,$1,$2,$3,$4,$5,$6,$7) RETURNING *;", "parameters": [ "", "", "Invalid date", "", "", "2020-04-02 15:20:33.668 +00:00", "2020-04-02 15:20:33.668 +00:00" ] }, "original": { "name": "error", "length": 116, "severity": "ERROR", "code": "22007", "file": "datetime.c", "line": "3774", "routine": "DateTimeParseError", "sql": "INSERT INTO \"Books\" (\"id\",\"title\",\"author\",\"releaseDate\",\"pageCount\",\"publisher\",\"createdAt\",\"updatedAt\") VALUES (DEFAULT,$1,$2,$3,$4,$5,$6,$7) RETURNING *;", "parameters": [ "", "", "Invalid date", "", "", "2020-04-02 15:20:33.668 +00:00", "2020-04-02 15:20:33.668 +00:00" ] }, "sql": "INSERT INTO \"Books\" (\"id\",\"title\",\"author\",\"releaseDate\",\"pageCount\",\"publisher\",\"createdAt\",\"updatedAt\") VALUES (DEFAULT,$1,$2,$3,$4,$5,$6,$7) RETURNING *;", "parameters": [ "", "", "Invalid date", "", "", "2020-04-02 15:20:33.668 +00:00", "2020-04-02 15:20:33.668 +00:00" ] }
From the error message, you can see that a SequelizeDatabaseError occurred
when attempting to insert into the Books table. The underlying error is a
date/time parse error, which is occurring because you didn't supply a value for
the releaseDate property on the Book model.
It's not just empty strings that result in date/time parse errors. Improperly
formatted date/time string values—or simply bad string values—can also
produce date/time parse errors. For example, all of the following string
date/time values cannot be parsed to date/time values:
- Jan 31st 2002
- 100/31/2002
- Jaanuary 31, 2002
You can use the input element's placeholder attribute to communicate to
users an example of the expected input format. Refactor your input#releaseDate
element to include a placeholder:
input(type='text'
id='releaseDate'
name='releaseDate'
value=book.releaseDate
class='form-control'
placeholder='ex: 2000-01-31')
Time to implement server-side validations! You'll see how to implement
validations using two different approaches—within the Book database model
using Sequelize's built-in model validation and within the "Add Book" page
POST route using the express-validator validation library.
Implementing server-side validation using Sequelize
Before updating the Book model (the ./db/models/book.js file), make a copy
of the existing code by copying the entire file with a file extension of .bak
(i.e. book.js.bak) or simply copying and pasting the code within the existing
file and commenting it out. When implementing validation at the route level
using a validation library, you'll want a convenient way to remove or disable
the validations in the Book model.
Adding validations to the Book model
Now you're ready to update the Book model to the following code:
// ./db/models/book.js 'use strict'; module.exports = (sequelize, DataTypes) => { const Book = sequelize.define('Book', { title: { type: DataTypes.STRING, allowNull: false, validate: { notNull: { msg: 'Please provide a value for Title', }, notEmpty: { msg: 'Please provide a value for Title', }, len: { args: [0, 255], msg: 'Title must not be more than 255 characters long', } } }, author: { type: DataTypes.STRING(100), allowNull: false, validate: { notNull: { msg: 'Please provide a value for Author', }, notEmpty: { msg: 'Please provide a value for Author', }, len: { args: [0, 100], msg: 'Author must not be more than 100 characters long', } } }, releaseDate: { type: DataTypes.DATEONLY, allowNull: false, validate: { notNull: { msg: 'Please provide a value for Release Date', }, isDate: { msg: 'Please provide a valid date for Release Date', } } }, pageCount: { type: DataTypes.INTEGER, allowNull: false, validate: { notNull: { msg: 'Please provide a value for Page Count', }, isInt: { msg: 'Please provide a valid integer for Page Count', } } }, publisher: { type: DataTypes.STRING(100), allowNull: false, validate: { notNull: { msg: 'Please provide a value for Publisher', }, notEmpty: { msg: 'Please provide a value for Publisher', }, len: { args: [0, 100], msg: 'Publisher must not be more than 100 characters long', } } } }, {}); Book.associate = function(models) { // associations can be defined here }; return Book; };
Here's an overview of the above code:
- Sequelize validation rules or validators are applied to model
properties—referred to by Sequelize as "attributes"—using thevalidate
property. Thevalidateproperty is set to an object whose properties
represent each validation rule to apply to the model attribute. - For the
stringbased model attributes (i.e. text based database table
columns) that don't allownullvalues—thetitle,author,publisher
properties—thenotNullandnotEmptyvalidators are applied to disallow
nullvalues and empty string values. - Notice the nuance between the
allowNullmodel attribute property and the
notNullvalidation rule. TheallowNullmodel attribute property is set to
falseto configure the underlying database table column to disallownull
values and thenotNullvalidation rule is applied to validate that a model
instance attribute value is notnull. - The
lenvalidation is also applied to thestringbased model attributes to
give feedback to the end user when a model instance attribute value exceeds
the configured maximum length for the underlying database table column. - The
isDateandisIntvalidators are applied respectively to the
releaseDateandpageCountmodel attributes to validate that the model
instance attribute values can be successfully parsed to the underlying
database table column data types.
Sequelize provides a variety of validators that you can apply to model
attributes. For a list of the available validators, see the official
Sequelize documentation.
For more information about Sequelize model validations see the "Model
Validations With Sequelize" article in the SQL ORM lesson.
Updating the Add Book page POST
route
With the model validations in place, now you need to update the "Add Book" page
POST route in the routes module (the ./routes.js file) to process
Sequelize validation errors.
To start, add the next parameter to the route handler function's parameter
list:
router.post('/book/add', csrfProtection, asyncHandler(async (req, res, next) => { // Code removed for brevity. }));
Then update the try/catch statement to this:
try { await book.save(); res.redirect('/'); } catch (err) { if (err.name === 'SequelizeValidationError') { const errors = err.errors.map((error) => error.message); res.render('book-add', { title: 'Add Book', book, errors, csrfToken: req.csrfToken(), }); } else { next(err); } }
Within the catch block, the err.name property is checked to see if the error
is a SequelizeValidationError error type which is the error type that
Sequelize throws if a validation error has occurred.
If it's a validation error, the Array#map() method is called on the
err.errors array to create an array of error messages. Currently, err is an
object with an errors property.
The err.errors property is an array of error objects that provide detailed
information about each validation error. Each element in err.errors has a
message property. The Array#map() method plucks the message property
from
each error object to create an array of validation messages. This array of
validation messages will be rendered on the form, instead of the array of
error objects.
If the error isn't a SequelizeValidationError error, then the error is passed
as an argument to the next() method call which results in Express handing the
request off to the application's defined error handlers for processing.
For your reference, the updated "Add Book" page POST route should now look
like this:
router.post('/book/add', csrfProtection, asyncHandler(async (req, res, next) => { const { title, author, releaseDate, pageCount, publisher, } = req.body; const book = db.Book.build({ title, author, releaseDate, pageCount, publisher, }); try { await book.save(); res.redirect('/'); } catch (err) { if (err.name === 'SequelizeValidationError') { const errors = err.errors.map((error) => error.message); res.render('book-add', { title: 'Add Book', book, errors, csrfToken: req.csrfToken(), }); } else { next(err); } } }));
Updating the Add Book page view
The final part of implementing validations is to update the "Add Book" page view
(the ./views/book-add.pug file) to render the array of validation messages.
Replace the existing if error conditional statement with the following code:
//- ./views/book-add.pug extends layout.pug block content if errors div(class='alert alert-danger' role='alert') p The following error(s) occurred: ul each error in errors li= error //- Code removed for brevity.
The Bootstrap alert alert-danger CSS classes are used to style the unordered
list of validation messages.
For your reference, the updated "Add Book" page view should now look like this:
//- ./views/book-add.pug extends layout.pug block content if errors div(class='alert alert-danger' role='alert') p The following error(s) occurred: ul each error in errors li= error form(action='/book/add' method='post') input(type='hidden' name='_csrf' value=csrfToken) div(class='form-group') label(for='title') Title input(type='text' id='title' name='title' value=book.title class='form-control') div(class='form-group') label(for='author') Author input(type='text' id='author' name='author' value=book.author class='form-control') div(class='form-group') label(for='releaseDate') Release Date input(type='text' id='releaseDate' name='releaseDate' value=book.releaseDate class='form-control' placeholder='ex: 2000-01-31') div(class='form-group') label(for='pageCount') Page Count input(type='text' id='pageCount' name='pageCount' value=book.pageCount class='form-control') div(class='form-group') label(for='publisher') Publisher input(type='text' id='publisher' name='publisher' value=book.publisher class='form-control') div(class='py-4') button(type='submit' class='btn btn-primary') Add Book a(href='/' class='btn btn-warning ml-2') Cancel
Testing the server-side validations
Run the command npm start to start your application and browse to
http://localhost:8080/. Click the "Add Book" button at the top of the "Book
List" page to browse to the "Add Book" page. Click the "Add Book" button to
submit the "Add Book" page form without providing any values. You should now see
a list of validation messages displayed just above the form.
Provide a value for each of the form fields and click the "Add Book" button to
submit the form to the server. You should now see your new book in the list of
books on the "Book List" page!
Implementing server-side validation using a validation library
Keeping your application's validation logic out of your database models makes
your code more modular. Improved modularity allows you to more easily update one
part of your application without worrying as much about how that change will
impact another part of your application.
In this section, you'll replace the Sequelize model validations with route level
validations using the express-validator validation library.
Removing the Sequelize model validations
Before you updated the Book model (the ./db/models/book.js file), you made a
copy of the existing code by either copying the entire file with a file
extension of .bak (i.e. book.js.bak) or copying and pasting the code within
the existing file and commenting it out. It's time to use your backup copy of
the Book model to remove the Sequelize validations.
For your reference, here's what the Book model (the ./db/models/book.js
file) should look like before proceeding:
// ./db/models/book.js 'use strict'; module.exports = (sequelize, DataTypes) => { const Book = sequelize.define('Book', { title: { type: DataTypes.STRING, allowNull: false }, author: { type: DataTypes.STRING(100), allowNull: false }, releaseDate: { type: DataTypes.DATEONLY, allowNull: false }, pageCount: { type: DataTypes.INTEGER, allowNull: false }, publisher: { type: DataTypes.STRING(100), allowNull: false } }, {}); Book.associate = function(models) { // associations can be defined here }; return Book; };
Updating the Add Book page POST
route
From the terminal, use npm to install the express-validator package:
npm install express-validator@^6.0.0
In the routes module (i.e. the ./routes.js file), use the require()
function to import the express-validator module (just after importing the
csurf module) and destructuring to declare and initialize the check and
validationResult variables:
// ./routes.js const express = require('express'); const csrf = require('csurf'); const { check, validationResult } = require('express-validator'); const db = require('./db/models'); // Code remove for brevity.
The check variable references a function (defined by the express-validator
validation library) that returns a middleware function for validating a request.
When you call the check() method, you pass in the name of the field—in this
case a request body form field name—that you want to validate:
const titleValidator = check('title');
The value returned by the check() method is a validation chain object. The
object is referred to as a validation "chain" because you can add one or more
validators by making a series of method calls.
One of the validators that you can add to the validation chain is the exists()
validator:
const titleValidator = check('title') .exists({ checkFalsy: true });
The exists() validator will fail if the request body is missing a form field
with the name (or key) title or because we set the checkFalsy option to
true the validator will fail if the request body contains a form field with
the name title but the value is set to a falsy value (eg "", 0,
false,
null).
When a validator fails, it'll add a validation error to the current request. You
can chain a call to the withMessage() method to customize the validation error
message for the previous validator in the chain:
const titleValidator = check('title') .exists({ checkFalsy: true }) .withMessage('Please provide a value for Title');
Now if the exists() validator for the field title fails, a validation error
will be added to the request with the message "Please provide a value for
Title".
The express-validator validation library is built on top of the validator.js
library. This means that all of the available
validators within the
validator.js library are available for you to use in
your validation logic.
One of the available validators is the isLength() validator, which can be used
to check the length of a string based field:
const titleValidator = check('title') .exists({ checkFalsy: true }) .withMessage('Please provide a value for Title') .isLength({ max: 255 }) .withMessage('Title must not be more than 255 characters long');
Notice how the isLength() method is called directly on the return value of the
withMessage() method? This is the validation chain in action—each method call
in the validation chain returns the validation chain so you can keep adding
validators. This is also known as "method chaining".
APIs that make use of method chaining are often referred to as fluent
APIs.
Instead of declaring a variable for each field that you want to define a
validation chain for, you can declare a single variable that's initialized to an
array of validation chains:
const bookValidators = [ check('title') .exists({ checkFalsy: true }) .withMessage('Please provide a value for Title') .isLength({ max: 255 }) .withMessage('Title must not be more than 255 characters long'), check('author') .exists({ checkFalsy: true }) .withMessage('Please provide a value for Author') .isLength({ max: 100 }) .withMessage('Author must not be more than 100 characters long'), check('releaseDate') .exists({ checkFalsy: true }) .withMessage('Please provide a value for Release Date') .isISO8601() .withMessage('Please provide a valid date for Release Date'), check('pageCount') .exists({ checkFalsy: true }) .withMessage('Please provide a value for Page Count') .isInt({ min: 0 }) .withMessage('Please provide a valid integer for Page Count'), check('publisher') .exists({ checkFalsy: true }) .withMessage('Please provide a value for Publisher') .isLength({ max: 100 }) .withMessage('Publisher must not be more than 100 characters long'), ];
Each validation chain is an Express middleware function. After initializing an
array containing all of your field validation chains, you can simply add the
array directly to your route definition:
router.post('/book/add', csrfProtection, bookValidators, asyncHandler(async (req, res) => { // Code removed for brevity. }));
Because each field validation chain is a middleware function and the Express
Application post() method accepts an array of middleware functions, each
validation chain will be called when the request matches the route path.
Within the route handler function, validationResult() function is used to
extract any validation errors from the current request:
router.post('/book/add', csrfProtection, bookValidators, asyncHandler(async (req, res) => { const { title, author, releaseDate, pageCount, publisher, } = req.body; const book = db.Book.build({ title, author, releaseDate, pageCount, publisher, }); const validatorErrors = validationResult(req); if (validatorErrors.isEmpty()) { await book.save(); res.redirect('/'); } else { const errors = validatorErrors.array().map((error) => error.msg); res.render('book-add', { title: 'Add Book', book, errors, csrfToken: req.csrfToken(), }); } }));
The validatorErrors object provides an isEmpty() method to check if there
are any validation errors. If there aren't any validation errors, then the
book.save() method is called to persist the book to the database and the user
is redirected to the default route (i.e. the "Book List" page).
If there are validation errors, the array() method is called on the
validatorErrors object to get an array of validation error objects. Each error
object has a msg property containing the validation error message. The
Array#map() method plucks the msg property from each error object into a
new array of validation messages named errors.
For more information about the
express-validatorlibrary, see the official
documentation.
For your reference, here's what the ./routes.js file should look like after
being updated:
// ./routes.js const express = require('express'); const csrf = require('csurf'); const { check, validationResult } = require('express-validator'); const db = require('./db/models'); const router = express.Router(); const csrfProtection = csrf({ cookie: true }); const asyncHandler = (handler) => (req, res, next) => handler(req, res, next).catch(next); router.get('/', asyncHandler(async (req, res) => { const books = await db.Book.findAll({ order: [['title', 'ASC']] }); res.render('book-list', { title: 'Books', books }); })); router.get('/book/add', csrfProtection, (req, res) => { const book = db.Book.build(); res.render('book-add', { title: 'Add Book', book, csrfToken: req.csrfToken(), }); }); const bookValidators = [ check('title') .exists({ checkFalsy: true }) .withMessage('Please provide a value for Title') .isLength({ max: 255 }) .withMessage('Title must not be more than 255 characters long'), check('author') .exists({ checkFalsy: true }) .withMessage('Please provide a value for Author') .isLength({ max: 100 }) .withMessage('Author must not be more than 100 characters long'), check('releaseDate') .exists({ checkFalsy: true }) .withMessage('Please provide a value for Release Date') .isISO8601() .withMessage('Please provide a valid date for Release Date'), check('pageCount') .exists({ checkFalsy: true }) .withMessage('Please provide a value for Page Count') .isInt({ min: 0 }) .withMessage('Please provide a valid integer for Page Count'), check('publisher') .exists({ checkFalsy: true }) .withMessage('Please provide a value for Publisher') .isLength({ max: 100 }) .withMessage('Publisher must not be more than 100 characters long'), ]; router.post('/book/add', csrfProtection, bookValidators, asyncHandler(async (req, res) => { const { title, author, releaseDate, pageCount, publisher, } = req.body; const book = db.Book.build({ title, author, releaseDate, pageCount, publisher, }); const validatorErrors = validationResult(req); if (validatorErrors.isEmpty()) { await book.save(); res.redirect('/'); } else { const errors = validatorErrors.array().map((error) => error.msg); res.render('book-add', { title: 'Add Book', book, errors, csrfToken: req.csrfToken(), }); } })); module.exports = router;
Testing the updated server-side validations
Run the command npm start to start your application and browse to
http://localhost:8080/. Click the "Add Book" button at the top of the "Book
List" page to browse to the "Add Book" page. Click the "Add Book" button to
submit the "Add Book" page form without providing any values. You should now see
a list of validation messages displayed just above the form.
Provide a value for each of the form fields and click the "Add Book" button to
submit the form to the server. You should now see your new book in the list of
books on the "Book List" page!
Adding the Edit Book page
The next page that you'll add to the Reading List application is the "Edit Book"
page. As the name clearly suggests, this page will allow you to edit the details
of a book from the reading list.
Defining the routes for the Edit Book page
Add the routes for the "Edit Book" page to the routes module (i.e. the
./routes.js file) just after the routes for the "Add Book" page—aGETroute to initially retrieve
the "Edit Book" page's HTML form and aPOST` route to
process the page's HTML form submissions:
router.get('/book/edit/:id(\\d+)', csrfProtection, asyncHandler(async (req, res) => { const bookId = parseInt(req.params.id, 10); const book = await db.Book.findByPk(bookId); res.render('book-edit', { title: 'Edit Book', book, csrfToken: req.csrfToken(), }); })); router.post('/book/edit/:id(\\d+)', csrfProtection, bookValidators, asyncHandler(async (req, res) => { const bookId = parseInt(req.params.id, 10); const bookToUpdate = await db.Book.findByPk(bookId); const { title, author, releaseDate, pageCount, publisher, } = req.body; const book = { title, author, releaseDate, pageCount, publisher, }; const validatorErrors = validationResult(req); if (validatorErrors.isEmpty()) { await bookToUpdate.update(book); res.redirect('/'); } else { const errors = validatorErrors.array().map((error) => error.msg); res.render('book-edit', { title: 'Edit Book', book: { ...book, id: bookId }, errors, csrfToken: req.csrfToken(), }); } }));
Here's an overview of the above routes:
- Just like you did for the "Add Book" page, two routes are defined for the
"Edit Book" page—aGETroute and aPOSTroute, both with a path of
/book/edit/:id(\\d+). The:id(\\d+)path segment defines theid
property in yourreq.params, the route parameter to capture the book ID to
edit. The\\d+segment uses regexp to ensure that only numbers
(or digits) will match this segment. - Within both route handlers, the
parseInt()function is used to convert the
req.params.idproperty from a string into an integer. - Within both route handlers, the Sequelize
db.Book.findByPk()method uses the
book ID to retrieve which book to edit from the database. - Just like in the
/book/addroute, destructuring is used to declare and
initialize thetitle,author,releaseDate,pageCount, andpublisher
variables from thereq.bodyproperty. Those variables are then used to
create abookobject literal whose properties align with theBookmodel
properties. If there aren't any validation errors, the object literal is
passed into thebook.update()method to update the book in the database and
the user is redirected to the default route/. If there are validation
errors, thebook-editview is re-rendered with the validation errors.
When passing the book object into the book-edit view, you can use spread
syntax to copy the book object literal properties into a new object. To the
right of spreading the book object, an id property is declared and assigned
to the bookId variable value:
book: { ...book, id: bookId }
The spread syntax above actually creates this book object:
book: { title, author, releaseDate, pageCount, publisher, id: bookId }
Creating the view for the Edit Book page
Add a view to the views folder named book-edit.pug containing the following
code:
//- ./views/book-edit.pug extends layout.pug block content if errors div(class='alert alert-danger' role='alert') p The following error(s) occurred: ul each error in errors li= error form(action=`/book/edit/${book.id}` method='post') input(type='hidden' name='_csrf' value=csrfToken) div(class='form-group') label(for='title') Title input(type='text' id='title' name='title' value=book.title class='form-control') div(class='form-group') label(for='author') Author input(type='text' id='author' name='author' value=book.author class='form-control') div(class='form-group') label(for='releaseDate') Release Date input(type='text' id='releaseDate' name='releaseDate' value=book.releaseDate class='form-control' placeholder='ex: 2000-01-31') div(class='form-group') label(for='pageCount') Page Count input(type='text' id='pageCount' name='pageCount' value=book.pageCount class='form-control') div(class='form-group') label(for='publisher') Publisher input(type='text' id='publisher' name='publisher' value=book.publisher class='form-control') div(class='py-4') button(type='submit' class='btn btn-primary') Update Book a(href='/' class='btn btn-warning ml-2') Cancel
This view is almost the same as the view for the "Add Book" page. On the form
element's action attribute and the submit button content are different.
In just a bit, you'll see how you can leverage features built into Pug to
avoid unnecessary code duplication.
Testing the Edit Book page
Run the command npm start to start your application and browse to
http://localhost:8080/. Click the "Edit" button for one of the books listed in
the table on the "Book List" page to edit that book. Change one or more form
field values and click the "Update Book" button to submit the form to the
server. You should now see the update book in the list of books on the "Book
List" page!
Including view templates for DRYer code
Currently, the "Add Book" and "Edit Book" views contain very similar code. Pug
allows you to include the contents of a template within another template. You
can use this feature to eliminate the code duplication between the
./views/book-add.pug and ./views/book-edit.pug files.
Start by adding a new file named book-form-fields.pug to the views folder
containing the following code:
//- ./views/book-form-fields.pug input(type='hidden' name='_csrf' value=csrfToken) div(class='form-group') label(for='title') Title input(type='text' id='title' name='title' value=book.title class='form-control') div(class='form-group') label(for='author') Author input(type='text' id='author' name='author' value=book.author class='form-control') div(class='form-group') label(for='releaseDate') Release Date input(type='text' id='releaseDate' name='releaseDate' value=book.releaseDate class='form-control' placeholder='ex: 2000-01-31') div(class='form-group') label(for='pageCount') Page Count input(type='text' id='pageCount' name='pageCount' value=book.pageCount class='form-control') div(class='form-group') label(for='publisher') Publisher input(type='text' id='publisher' name='publisher' value=book.publisher class='form-control')
Then update the book-add.pug and book-edit.pug views to the following code:
// ./views/book-add.pug extends layout.pug block content if errors div(class='alert alert-danger' role='alert') p The following error(s) occurred: ul each error in errors li= error form(action='/book/add' method='post') include book-form-fields.pug div(class='py-4') button(type='submit' class='btn btn-primary') Add Book a(href='/' class='btn btn-warning ml-2') Cancel
//- ./views/book-edit.pug extends layout.pug block content if errors div(class='alert alert-danger' role='alert') p The following error(s) occurred: ul each error in errors li= error form(action=`/book/edit/${book.id}` method='post') include book-form-fields.pug div(class='py-4') button(type='submit' class='btn btn-primary') Update Book a(href='/' class='btn btn-warning ml-2') Cancel
Notice the use of the include keyword to include the contents of the
book-form-fields.pug template.
Another Pug feature—mixins—allows you to create reusable blocks of Pug code. You
can use this Pug feature to further eliminate code duplication.
Add a new file named utils.pug to the views folder containing the following
code:
//- ./views/utils.pug mixin validationErrorSummary(errors) if errors div(class='alert alert-danger' role='alert') p The following error(s) occurred: ul each error in errors li= error
Notice that the validationErrorSummary mixin defines an errors parameter. As
you might expect, mixin parameters allow you to pass data into the mixin.
Next, update the book-add.pug and book-edit.pug views to the following code:
// ./views/book-add.pug extends layout.pug include utils.pug block content +validationErrorSummary(errors) form(action='/book/add' method='post') include book-form-fields.pug div(class='py-4') button(type='submit' class='btn btn-primary') Add Book a(href='/' class='btn btn-warning ml-2') Cancel
//- ./views/book-edit.pug extends layout.pug include utils.pug block content +validationErrorSummary(errors) form(action=`/book/edit/${book.id}` method='post') include book-form-fields.pug div(class='py-4') button(type='submit' class='btn btn-primary') Update Book a(href='/' class='btn btn-warning ml-2') Cancel
Notice the use of the include keyword again to include the contents of the
utils.pug template which makes the validationErrorSummary mixin available
within the book-add.pug and book-edit.pug templates. The mixin is called
by prefixing the mixin name with a plus sign (+) and adding a set of
parentheses after the mixin name. Inside of the parentheses, the errors
variable is passed as an argument to the validationErrorSummary mixin.
You can go a bit further to eliminate more code duplication. Update the
./views/utils.pug template to contain the following code:
//- ./views/utils.pug mixin validationErrorSummary(errors) if errors div(class='alert alert-danger' role='alert') p The following error(s) occurred: ul each error in errors li= error mixin textField(labelText, fieldName, fieldValue, placeholder) div(class='form-group') label(for=fieldName)= labelText input(type='text' id=fieldName name=fieldName value=fieldValue class='form-control' placeholder=placeholder)
Then update the ./views/book-form-fields.pug template to contain this code:
//- ./views/book-form-fields.pug include utils.pug input(type='hidden' name='_csrf' value=csrfToken) +textField('Title', 'title', book.title) +textField('Author', 'author', book.author) +textField('Release Date', 'releaseDate', book.releaseDate, 'ex: 2000-01-31') +textField('Page Count', 'pageCount', book.pageCount) +textField('Publisher', 'publisher', book.publisher)
Run the command npm start to start your application and browse to
http://localhost:8080/. Use the "Add Book" page to add a new book and then use
the "Edit Book" page to edit the book. Everything should work as it did before
the refactoring of the view code.
Congratulations on making your code DRYer!
Add the Delete Book page
The next page that you'll add to the Reading List application is the "Delete
Book" page. This page is relatively simple as it only needs to prompt the user
if the selected book is the book that they want to delete.
Defining the routes for the Delete Book page
Add the routes for the "Delete Book" page to the routes module (i.e. the
./routes.js file) just after the routes for the "Edit Book" page—aGETroute to initially
retrieve the "Delete Book" page's HTML form and aPOST` route to
process the page's HTML form submissions:
router.get('/book/delete/:id(\\d+)', csrfProtection, asyncHandler(async (req, res) => { const bookId = parseInt(req.params.id, 10); const book = await db.Book.findByPk(bookId); res.render('book-delete', { title: 'Delete Book', book, csrfToken: req.csrfToken(), }); })); router.post('/book/delete/:id(\\d+)', csrfProtection, asyncHandler(async (req, res) => { const bookId = parseInt(req.params.id, 10); const book = await db.Book.findByPk(bookId); await book.destroy(); res.redirect('/'); }));
Here's an overview of the above routes:
- Just like you did for the "Add Book" and "Edit Book" pages, two routes are
defined for the "Delete Book" page—a/book/delete/:id(\\d+)GETroute and
a/book/delete/:id(\\d+)POSTroute. - Within both route handlers, the
parseInt()function is used to convert the
req.params.idproperty string value into anumber. - Within both route handlers, the Sequelize
db.Book.findByPk()method is used
to retrieve the book to delete from the database. - Within the
POSTroute handler, thebook.destroy()method is called to
delete the book from the database and the user is redirected to the default
route (/).
Creating the view for the Delete Book page
Add a view to the views folder named book-delete.pug containing the
following code:
//- ./views/book-delete.pug extends layout.pug block content h3= book.title div(class='py-4') p Proceed with deleting this book? div form(action=`/book/delete/${book.id}` method='post') input(type='hidden' name='_csrf' value=csrfToken) button(class='btn btn-danger' type='submit') Delete Book a(class='btn btn-warning ml-2' href='/' role='button') Cancel
The purpose of this view is simple: display the title of the book that's about
to be deleted and render a simple form containing a hidden <input> element for
the CSRF token and a <button> element to submit the form.
Testing the Delete Book page
Run the command npm start to start your application and browse to
http://localhost:8080/. Click the "Delete" button for one of the books listed
in the table on the "Book List" page to delete that book. On the "Delete Book"
page, click the "Delete Book" button to delete the book. You should now see that
the book has been removed from the list of books on the "Book List" page!
What you learned
In this article, you learned how to:
- Define a collection of routes and views that use Sequelize to perform CRUD
operations against a single resource; and - Handle Sequelize validation errors when users are attempting to create or
update data and display error messages to the user so that they can resolve
any data quality issues.
You also reviewed the following:
- Using a wrapper function to catch errors thrown within asynchronous route
handler functions; - Using Pug to create HTML forms;
- Using the
csurfmiddleware to protect against CSRF exploits; - Using the built-in
express.urlencoded()middleware function to parse
incoming request body form data; - Using Sequelize model validations to validate user-provided data;
- Using the
express-validatorvalidation library to validate user-provided
data within an Express route; and - Using Pug includes and mixins to remove unnecessary code duplication.